
Subscribe to Our Youtube Channel
Related Manuals for Trojan iSMART 600


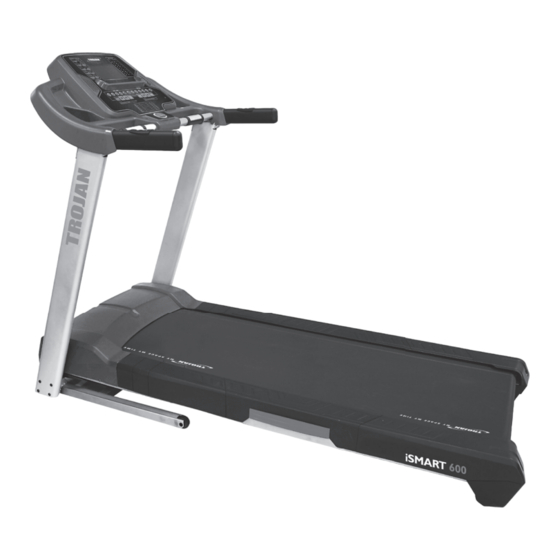
Summary of Contents for Trojan iSMART 600
- Page 1 CAUTION READ ALL PRECAUTIONS AND INSTRUCTIONS IN THIS MANUAL bEfORE USING THIS EQUIPMENT. KEEP THIS MANUAL fOR fUTURE REfERENCE. iSMART 600 TREADMILL USER MANUAL Visit facebook.com/trojanhealth www.trojanhealth.co.za...
-
Page 2: Table Of Contents
index • Important Safety Instructions ______________________________________ 3 • Grounding Instructions ___________________________________________ 5 • Pre Assembly Check List __________________________________________ 6 • Hardware & Tools List ____________________________________________ 7 • Assembly Steps _________________________________________________ 8 • Operation Instructions ___________________________________________ 11 • Pre-Set Programs _______________________________________________ 15 • App Installation ________________________________________________ 23 • Maintenance _ __________________________________________________ 29 • Fitness Tips & Techniques _ _________________________________________ 31 • Conditioning Guidelines __________________________________________ 32 • Warm Up & Cool Down _________________________________________ 33... -
Page 3: Important Safety Instructions
IMPORTANT SAFETY INSTRUCTIONS It is the sole responsibility of the purchaser of Trojan products to read the owner’s manual, warning labels and instruct all individuals, on proper usage of the equipment. Understanding each and every warning to the fullest is important. If any of these instructions or warnings are unclear please contact Trojan Customer Services on 0861 TROJAN (0861 876526), within the Republic of South Africa. - Page 4 INSPECTION • Do not use or permit use of any equipment that is damaged or has worn or broken parts. For all Trojan equipment use only replacement parts supplied by Trojan. • Always make sure that all nuts and bolts are tightened prior to each use.
-
Page 5: Grounding Instructions
GROUNDING INSTRUCTIONS WARNING • Never use a ground fault circuit interrupt (GFCI) wall outlet with this treadmill. Route the power cord away from any moving parts of the treadmill including the elevation mechanism and transport wheels. • Never remove any cover without first disconnecting AC power. •... -
Page 6: Pre Assembly Check List
PRE ASSEMbLY CHECk LIST Thank you for choosing the Trojan iSMART 600 Treadmill. We take great pride in producing this product and hope it will provide many hours of quality exercise to make you feel better, look better and enjoy life to its fullest. Yes, it’s a proven fact that a regular exercise program can improve your physical and mental health. -
Page 7: Hardware & Tools List
HARDWARE & TOOLS LIST INSTRUCTIONS fOR ASSEMbLy • Before you start to assemble, please check the hardware packaging to make sure all parts are included. • Basic tools, such as spanners will be required for assembly. Part No. Description Computer Console Frame Left Upright Tube Right Upright Tube Part No. Description Truss Hex Screw M8 x P1.25 mm x 40 mm... -
Page 8: Assembly Steps
ASSEMbLY STEPS INSTRUCTIONS fOR ASSEMbLy • Unpack the carton and use the parts check list to check that all parts are accounted for. • Do not dispose of the packaging material until assembly is completed. • Tools are provided for use in assembly. • Majority of the parts here have been preassembled at the factory. - Page 9 ASSEMbLY STEPS STEP 2: • Note: This step requires two people to continue the assembly. • Connect the control wire from the Computer Console (A) to the control wire of the Right Upright Tube (D). • Place the Computer Console on the Left and Right Upright Tubes (C/D) and tighten with one Truss Hex Screw (a) and one Nylon Nut (d) on the Left and Right Upright Tubes (C/D).
- Page 10 ASSEMbLY STEPS STEP 3: • Place the Suction Cups (m) in an area they will be able to secure your device on the treadmill. CAUTION: Ensure that cables are not damaged during assembly or when tightening screws. Re-check All bolts and nuts are tightened securely before using the machine 10332...
-
Page 11: Operation Instructions
OPERATION INSTRUCTIONS Quick incline keys Quick speed keys Incline - Incline + Speed - Speed + bUTTONS START • Once the treadmill is turned on, it will go into a standby state. • Pressing the “START” button while in standby will begin a quick workout session. •... - Page 12 OPERATION INSTRUCTIONS ENTER • Press the “ENTER” button to confirm a desired pre-set program or confirming the next step in the program selecting process. MODE • During standby, pressing the “MODE” button will cycle through the different programs/settings available. INSTANT SPEED KEy •...
- Page 13 OPERATION INSTRUCTIONS PROGRAM OPERATION INSTRUCTION START/STANDby START/STANDby • Once the power is switched on, the console will beep and ask for a weight setting to be inserted. WEIGHT SETTING • Press “SPEED +/-” to set your desired weight. The default weight is 70 kg and ranges between 23 kg –...
-
Page 14: Manual Program
OPERATION INSTRUCTIONS STOP OR fINISH TRAINING • During your workout, press the “STOP” button to pause the workout. Should the workout be paused, the running deck will slowly reduce the speed to 0 km/h and the incline will return to its starting position. -
Page 15: Pre-Set Programs
PRE-SET PROGRAMS P1 – 9 Holes • Scroll to P1 and press “ENTER” to select P1. Enter the training intensity level setting by pressing “SPEED +” or “SPEED –” to select your desired intensity. The default value is 1 and ranges from 1 – 10 (levels). •... - Page 16 PRE-SET PROGRAMS RANDOM PROGRAM You will be prompted to enter your end goal on either a Time, Distance or Calorie workout. TIME • Press “ENTER” to confirm the Random Program and enter the Time setting. • Press “SPEED +” or “SPEED –” to adjust the target Time. The default value is 0:00 and ranges from 01:00 –...
- Page 17 PRE-SET PROGRAMS H.R.C 1-3 PROGRAM There are 3 settings within this program, 60 %, 75 % or THR (Target Heart Rate). • The program will adjust the Speed and Incline so you are able to maintain your goal Heart Rate for your preset time.
- Page 18 PRE-SET PROGRAMS bODy fAT MODE • Press “ENTER” to select Body Fat. You will be asked for the following information: • Age: The default value is 30 and ranges from 13 – 80 years. Press “SPEED +” or “SPEED –” to adjust the target Age by 1.
- Page 19 PRE-SET PROGRAMS PROGRAM VISUAL ILLUSTRATIONS MANUAL P1 (9 Hole) Hidden zone P2 (Hill Climb) Hidden zone P3 (Hill Run) Hidden zone P4 (Interval) Hidden zone P5 (Rolling) Hidden zone P6 (Weight Loss) Hidden zone Note: The display will only show 20 of the User Profile Zones Hidden zone 10332...
- Page 20 PRE-SET PROGRAMS 10332...
- Page 21 PRE-SET PROGRAMS P1~P6 PROGRAM TABLE P1 (9 Hole) SPEED AND ELEVATION CHANGES Level 1 ELEVATION (km/h) Level 2 ELEVATION (km/h) Level 3 ELEVATION (km/h) Level 4 ELEVATION (km/h) Level 5 ELEVATION (km/h) Level 6 ELEVATION (km/h) Level 7 ELEVATION (km/h) Level 8 ELEVATION (km/h) Level 9...
- Page 22 PRE-SET PROGRAMS P4 (Interval) SPEED CHANGES ONLY INTERVAL (P4) Level 1 (km/h) Level 2 (km/h) Level 3 (km/h) Level 4 (km/h) Level 5 (km/h) Level 6 (km/h) Level 7 (km/h) 4.8 10.4 8.0 10.4 8.0 10.4 8.0 10.4 8.0 10.4 8.0 10.4 8.0 10.4 8.0 10.4 8.0 10.4 8.0 10.4 8.0 10.4 8.0 10.4 8.0 Level 8 (km/h) 5.6 11.2 8.8 11.2 8.8 11.2 8.8 11.2 8.8 11.2 8.8 11.2 8.8 11.2 8.8 11.2 8.8 11.2 8.8 11.2 8.8 11.2 8.8 11.2 8.8...
-
Page 23: App Installation
Step 1: Please place your device on the console in front of the LCD display. • Step 2: Go in to the device Settings. • Step 3: Open Bluetooth App and look for devices. • Step 4: The device should pick up the iSmart 600 treadmill. 10332... - Page 24 APP INSTALLATION • Step 5: Select the treadmill to sync the device. • Step 6: Please wait for a few seconds until the status of the device changes to “Connected”. Check the top right of your device screen to see if the Bluetooth symbol changes to white. This will confi rm the connection.
- Page 25 APP INSTALLATION APP INSTALLATION INSTRUCTION for Android Device APP software download: • Connect your Android device to the Play Store and search for Pafers. • Follow the App download instructions and download the “Run On Earth” App. This is the only compatible App for the treadmill.
- Page 26 APP INSTALLATION • Step 4: The device should pick up the iSmart 600 treadmill. • Step 5: Select the treadmill to sync the device. • Step 6: Please wait for a few seconds until the status of the device changes to “Connected”. Check the top right of your device screen to see if the Bluetooth symbol changes to white.
- Page 27 APP INSTALLATION APP TROUbLE SHOOTING • After successfully syncing your device and treadmill, start the App within 2 minutes. The connection may be lost and you will need to repeat the syncing of the devices. • The operation and function of every App is different, please visit Pafers website www.pafers.com for the App function introduction.
- Page 28 APP INSTALLATION Step 2: Enter your device Settings program and press “Cancel Matching”. Step 3: Close the Bluetooth function and turn off treadmill. Step 4: Turn on treadmill back on after 10 seconds. Step 5: Sync your treadmill and device again. Step 6: Re-launch the Pafers App.
-
Page 29: Maintenance
Inspect and tighten all parts of the treadmill regular. Replace any worn parts immediately. CLEANING The Trojan iSMART 600 Treadmill can be cleaned with a soft cloth and mild detergent. Do not use abrasives or solvents on plastic parts. Please wipe your perspiration off the Trojan iSMART 600 Treadmill after each use. - Page 30 MAINTENANCE HOW TO APPLy LUbRICANT • Lift one side of the treadbelt. • Pour one half of the lubricant bottle under the centre of the treadbelt on the top surface of the treadboard. • Walk on the treadmill at a slow speed for 3 to 5 minutes to evenly distribute lubricant. • NOTE: DO NOT over lubricate treadboard. Any excess lubricant that comes out should be wiped off. • NOTE: ONLY USE HALF THE BOTTLE OF LUBRICANT PER APPLICATION. • NOTE: If your lubricant is finished, the treadbelt can be lubricated with Dubbin. LUbRICATION SCHEDULE. • Check the treadboard lubrication during installation. If it’s necessary, lubricate the treadboard using one half of the lubricant provided, before using the treadmill for the first time.
-
Page 31: Fitness Tips & Techniques
MUSCLE CHART TROJAN ISMART 600 TREADMILL The exercise routine that is performed on the Trojan iSMART 600 Treadmill will develop the lower body muscle group as well as condition the circulatory system and provide a good aerobic workout. These muscle groups are highlighted on the muscle chart below. -
Page 32: Conditioning Guidelines
CONDITIONING GUIDELINES How you begin your exercise program depends on your physical condition. If you have been inactive for several years, or are severely overweight, you must start slowly and increase your time on the equipment, a few minutes per workout. Initially, you may be able to exercise only for a few minutes in your target zone, however, your aerobic fitness will improve over the next six to eight weeks. -
Page 33: Warm Up & Cool Down
WARM UP & COOL DOWN WORKOUT GUIDELINES Each workout should include the following three parts: A warm-up: 5 to 10 minutes of stretching and light exercise. A proper warm-up increases your body temperature, heart rate, and circulation in preparation for exercise. Training zone exercise: 20 to 30 minutes of exercising with your heart rate in your training zone. (Note: During the first few weeks of your exercise program, do not keep your heart rate in your training zone for longer than 20 minutes). -
Page 34: Trouble Shooting
TROUbLE SHOOTING NOTE: Do not touch any internal electric wires without consulting the manufacturer. TREADMILL WILL NOT START: • Make sure the power cord is plugged into a surge protector, the surge protector is plugged into a properly grounded outlet and the surge protector is turned on (refer to the Power Requirements section in this manual). •... -
Page 35: Year Limited Warranty
The Consumer does not need to return the product to the store. The Consumer should call the Trojan Call Centre on 0861 TROjAN (0861 876526) and the Manufacturer’s authorised agent will at its discretion either repair the item at the Consumer’s residence or collect and repair the item at their premises. -
Page 36: Repairs Procedure
Do not return the product to the store.* • Call the Trojan Call Centre on 0861 TROjAN (0861 876526) to log the faulty product (under warranty or out of warranty). • The operator or technical advisor will try identify the fault, and will book a service team call out. -
Page 37: Parts List
PARTS LIST Full parts list for spares related queries Part No. Description Part No. Description Computer Console belt 230J8 Running belt 495 mm x 2944 mm x T1.4 Computer Upper Cover Nut M8 x P1.25 mm Front Roller Device Holder CkS Hex Screw M8 x 1.25 mm x 55 mm Round Head Screw M5 x P0.8 mm x L15 mm Washer Ø8 mm x Ø16 mm x T1.5 mm Iron board Rear Roller bT Module Music board PCb of Console MP3 Source Wire Safety key Truss Hex Screw k-299 key board (20 keys) CkS Hex Screw M8 x P1.25 mm x 120 mm Computer Console Panel Sticker CkS Hex Screw M10 x P1.5 mm x 20 mm Suction Cups Truss Cross Screw M5 x P0.8 mm x 15 mm Round Head Cross Self-Tapping Screw Upright Assembly (Left) Ø3 mm x 8 mm Round Head Cross Self-Tapping Screw Upright Assembly (Right) Ø3 mm x 8 mm Truss Cross Self-Tapping Screw... - Page 38 PARTS LIST Part No.. Description Part No. Description Round Head Screw M5 x P0.8 mm x 10 Foot Pad Washer Cross Self-Tapping Screw Washer Ø8 mm x Ø19 mm x T3.0 mm M4 x P0.7 mm x 16 mm Spring Washer M10 Wheel Ø50 mm Motor Truss Hex Screw k-288 Truss Cross Screw M4 x P0.7 mm x 10 mm Nylon Nut M10 x P1.5 mm Round Head Screw M4 x P0.7 x 10 mm Expansion Pipe Assembly Truss Cross Self-Tapping Screw Pedal Ø4 mm x 64 mm Truss Cross Self-Tapping Screw Inner Tube Cap Ø4 mm x 10 mm Truss Cross Self-Tapping Screw Truss Cross Screw M5 x P0.8 mm x 30 mm Ø4 mm x 12 mm Truss Hex Screw M8 x P1.25 mm x 35 mm Fixing Screw M4 x P0.7 mm x 10 mm Washer Ø6 mm x Ø19 mm x T2.0 mm Expansion Pipe Setting Spindle Flat Washer Expansion Cover Ø10 mm x Ø20 mm x T3.0 mm Motor Fixing Plate Nylon Nut M5 x P0.8 mm CkS Hex Screw Frame Assembly M8 x P1.25 mm x 10 mm Spring Washer M8 Power Cord Socket Hex Screw M8 x P1.25 mm Power Switch...
- Page 39 PARTS LIST Part No. Description Part No. Description Middle Pedal Truss Hex Screw M8 x P1.25 mm x 15 mm Rear Pedal (Left) Washer Ø8 mm x Ø19 mm x T2.0 mm Rear Pedal (Right) Truss Hex Screw M8 x P1.25 mm x 40 mm Pipe Plug Wrench 13 mm Compression Spring L Shaped Hex Wrench Running board Hand Pulse Plastic base Running board Lengthen Plate Hand Pulse Sensor Foam Sticker 1210 mm x 40 mm x T1.5 mm Two Side Tape 25 mm x 75 mm x T0.3 mm Socket Hex Screw M8 x P1.25 mm x 30 mm Hand Pulse Wire Round Head Screw Socket Hex Screw M8 x P1.25 mm x 35 mm M3 mm x P0.5 mm x 30 mm Washer Cross Self-Tapping Screw Hex Nut M3 x P0.5 mm 4 mm x 12 mm Circuit breaker Flat Cap Wire Clip knob Uc-0.5 Oval Cap Extension Wire (White) HDR Faom Grip 14 awg x 90 mm x T2 mm Extension Wire (black) Handle Switch Plastic 14 awg x 90 mm x T2 mm Extension Wire (White) Handle Switch + Wire 14 awg x 170 mm x T2 mm Extension Wire (black)
-
Page 40: Exploded Drawing
ExPLODED DRAWING 10332... - Page 41 ExPLODED DRAWING 10332...
-
Page 42: Notes
NOTES 10332... - Page 43 NOTES 10332...
Need help?
Do you have a question about the iSMART 600 and is the answer not in the manual?
Questions and answers
Can the iSmart 600 work with Training Peaks app?