Table of Contents
Advertisement
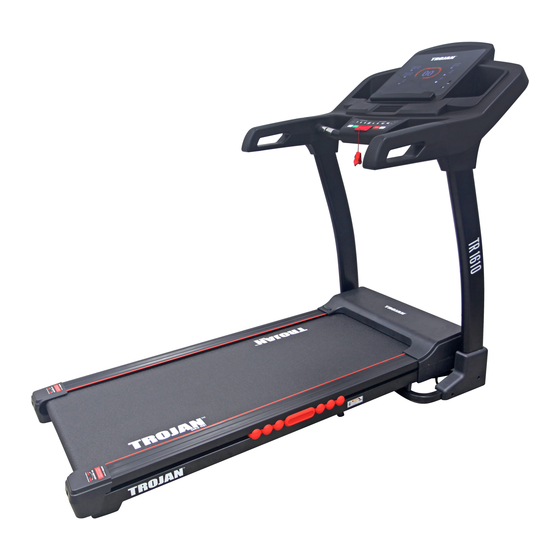
TR1610 TREADMILL
AUTO
FITSHOW AND
CARDIO
INCLINE
BLUETOOTH ENABLED
USER MANUAL
AUDIO ENABLED
FitSHOW APP ENABLED
CAUTION
Visit facebook.com/trojanhealth
READ ALL PRECAUTIONS AND
INSTRUCTIONS IN THIS MANUAL
www.trojanhealth.co.za
BEFORE USING THIS EQUIPMENT.
KEEP THIS MANUAL FOR
www.instagram.com/trojanhealth
FUTURE REFERENCE.
Advertisement
Table of Contents

Related Manuals for Trojan TR1610


Summary of Contents for Trojan TR1610
- Page 1 TR1610 TREADMILL AUTO FITSHOW AND CARDIO INCLINE BLUETOOTH ENABLED USER MANUAL AUDIO ENABLED FitSHOW APP ENABLED CAUTION Visit facebook.com/trojanhealth READ ALL PRECAUTIONS AND INSTRUCTIONS IN THIS MANUAL www.trojanhealth.co.za BEFORE USING THIS EQUIPMENT. KEEP THIS MANUAL FOR www.instagram.com/trojanhealth FUTURE REFERENCE.
-
Page 2: Table Of Contents
INDEX Important Safety Instructions ________________________________ 3 Pre Assembly Check List _____________________________________ 5 Hardware & Tools List ________________________________________ 6 Parts List ___________________________________________________ 7 Exploded Drawing ___________________________________________ 9 Assembly Steps _____________________________________________ 10 Operation Instructions _______________________________________ 16 Fitshow App ________________________________________________ 18 Fitness Tips & Techniques ____________________________________ 26 Maintenance ______________________________________ 27 Conditioning Guidlines _______________________________________ 29 Warm up &... -
Page 3: Important Safety Instructions
IMPORTANT SAFETY INSTRUCTIONS It is the sole responsibility of the purchaser of Trojan products to read the owner’s manual, warning labels and instruct all individuals, on proper usage of the equipment. Understanding each and every warning to the fullest is important. If any of these instructions or warnings are unclear please contact Trojan Customer Services on 0861 TROJAN (0861 876526), within the Republic of South Africa. - Page 4 INSPECTION • Do not use or permit use of any equipment that is damaged, or has worn or broken parts. For all Trojan equipment use only replacement parts supplied by Trojan. • Always make sure that all nuts and bolts are tightened prior to each use.
-
Page 5: Pre Assembly Check List
PRE ASSEMBLY CHECK LIST Thank you for choosing the Trojan TR1610 Treadmill. We take great pride in producing this product and hope it will provide many hours of quality exercise to make you feel better, look better and enjoy life to its fullest. -
Page 6: Hardware & Tools List
HARDWARE & TOOLS LIST INSTRUCTIONS FOR ASSEMBLY • Before you start to assemble, please check the hardware packaging to make sure all parts are included. • Basic tools, such as spanners will be provided for assembly. 1. Main Frame (1 PC) 14. -
Page 7: Parts List
PARTS LIST Wheel Cover Main frame Elastic Cushion Base frame Right riser assembly right column cover Console Top Cover Left riser assembly Console Bottom Cover Incline bracket Electronic table rack assembly Console Top Cover Front roller Keyboard Fixing Plate Left Handlebar Rear roller Right Handlebar Cylinder... - Page 8 PARTS LIST Bolt (ST4.2 x 20mm) Bolt (M8 x 40mm) Wind scooper DC Motor Incline Motor electric fan The oil guide pipe Bolt (M10 x 45mm) Nut (M10) Washer (10) Turn the block before the edge bar Flat Washer (8) Turn the block after the edge bar Spring Washer (8) Limit buffer pad...
-
Page 9: Exploded Drawing
EXPLODED DRAWING... -
Page 10: Assembly Steps
ASSEMBLY STEPS 1. PREPARATION • Before assembling make sure that you will have enough space around the item. • Use the supplied parts and hardware for the assembly. • Before assembling please check whether all the required parts have been supplied as per the exploded drawing on the opposite page. - Page 11 ASSEMBLY STEPS STEP 3: STEP 3 Use the #6 Allen Key to fix the Left upright post (4) and Right upright post (3) to the Main Fame (1) using 2 x Bolts (70) 2 x Bolts (56) and 4 x Washers (67) STEP 4: STEP 4 Use the #5 Allen key (10) to secure the Left upright...
- Page 12 ASSEMBLY STEPS STEP 5: STEP 5 Use the Multi Tool (12) to fix the Left base cover (42) to the Left upright post (4) using 2 x Bolts (77). Use the Multi Tool (12) to fix the Right base cover (43) to the Right upright post (3) using 2 x Bolts (77).
- Page 13 ASSEMBLY STEPS STEP 7: STEP 7 Insert the Power Cable (17) into the inlet as illustrated. ATTENTION: PLEASE ENSURE THE ASSEMBLY HAS BEEN COMPLETED, PER THE ABOVE INSTRUCTIONS AND THAT ALL BOLTS ARE SECURELY TIGHTENED. ONCE THIS HAS BEEN CHECKED, YOU MAY PROCEED WITH THE INSTRUCTIONS THAT FOLLOW.
- Page 14 FOLDING INSTRUCTIONS FOLDING THE TREADMILL: Place one hand on (A), as illustrated below, and lift the machine in the direction of the arrow until you hear a click sound from the cylinder (B). Note: Please unplug the power cord to shut down the machine completley before folding or unfolding the machine.
- Page 15 CONSOLE FUNCTIONS FUNCTIONS TIME: Displays time; during startup, display 3 seconds countdown: 3, 2, 1. SPEED: Displays speed. DISTANCE: Displays distance. CALORIE: Displays calories. INCLINE: Displays incline. HEART RATE: When the heart rate is blinking the corresponding window shows the heartbeat. FUNCTIONS AND OPERATIONS: PROGRAM: PROGRAM:...
-
Page 16: Operation Instructions
OPERATION INSTRUCTIONS QUICK START (MANUAL MODE): Attach the safety key.Press the start key, after the 3 seconds countdown, the treadmill will start from the lowest speed, press the SPEED / or speed shortcut to adjust the speed, and press the INCLINE , or incline shortcut to adjust the number of incline. - Page 17 ERROR OPERATION INSTRUCTIONS CODE REASON SOLUTION Message wire is broken or not 1. Check if the computer and bottom connected well control board wire connect well. 2. Check if IC on bottom control board is loosen, reset the IC 1. Check if the power voltage is 50% 1.
-
Page 18: Fitshow App
FITSHOW APP FITSHOW APP equipment such as treadmills, exercise bikes or spinners, steppers and ellipticals, and records all exercise sessions. While tracking your distance, pace and calories burnt, the FitShow App also allows you to compete against friends or like-minded individuals, helping you to push harder and achieve your goals quicker! Choose to exercise indoors or outdoors on a map route using GPS signal or even choose to compete in pre- 1. - Page 19 FITSHOW APP Sync the APP and your Trojan Fitness Equipment For the App to work with your equipment, you need to sync them. Open the FitShow App. On the Main Page, press “Device”, the APP will search for your Equipment.
- Page 20 FITSHOW APP FITSHOW APP FITNESS MODE SELECTION • Once your Device and Equipment are connected, select the Mode of training. • EQUIPMENT CONTROL AND TRAINING INFORMATION...
- Page 21 FITSHOW APP • Select the “Sport” option for a live overview of your training progress. • Incline) . • Once your training session is complete, a full overview of your session is provided. This information can be saved for future reference. CUSTOMIZED TRAINING PLAN •...
- Page 22 FITSHOW APP DISCOVER Discover Sports Articles, Diet Tips and Course recommendations.
- Page 23 FITSHOW APP SPORTS CENTRE The Sports Centre is your Personal Fitness Data Record. View all your previous Training Sessions as well as Fitness data such as: Total workout time Total calories Total km...
- Page 24 KINOMAP APP THIRD-PARTY APPLICATIONS KINOMAP Search, download, and install Kinomap through the App Store or Google Play. Create your account . Login to the APP. Select “Equipment Management”. Select the “Device Type”. Select the “FitShow” Icon. The APP will now search for your Equipment, once found, select the Equipment you wish to pair. Select your Training Mode.
- Page 25 Press PLAY/PAUSE to listen to the music or pause at any moment. The volume can be controlled and adjusted on your Device and your Trojan equipment by either pressing the Volume Up / Down Buttons on your Console, or by pressing the Volume Up / Down...
-
Page 26: Fitness Tips & Techniques
Always consult your physician before beginning any exercise program. MUSCLE CHART The exercise routine that is performed on the Trojan TR1610 Treadmill will develop the lower body muscle group as well as condition the circulatory system and provide a good aerobic workout. These muscle groups are highlighted on the muscle chart below. -
Page 27: Maintenance
MAINTENANCE Reasonable cleaning/lubricating should be made to extend the life time of this unit. Performance is maximised when the belt and mat are kept as clean as possible. WARNING The mat/deck friction may play a major role in the function and life of your treadmill and that is why we recommend you constantly lubricate this friction point to prolong the serviceable life of your treadmill. - Page 28 MAINTENANCE CLEANING The Trojan TR1610 Treadmill can be cleaned with a soft cloth and mild detergent. Do not use abrasives or solvents on plastic parts. Wipe any perspiration off the Trojan TR1610 Treadmill after each use. STORAGE Store the Trojan TR1610 Treadmill in a clean and dry environment away from children.
-
Page 29: Conditioning Guidlines
CONDITIONING GUIDELINES CONDITIONING GUIDLINES How you begin your exercise program depends on your physical condition. If you have been inactive for several years, or are severely overweight, you must start slowly and increase your time on the equipment, a few minutes per workout. Initially, you may be able to exercise only for a few minutes in your target zone, however, your aerobic to work at your own pace. -
Page 30: Warm Up & Cool Down
WARM UP & COOL DOWN WORKOUT GUIDELINES Each workout should include the following 3 parts: 1. A WARM-UP: 5 to 10 minutes of stretching and light exercise. A proper warm-up increases your body temperature, heart rate, and circulation in preparation for exercise. 2. - Page 31 CENTRE THE RUNNING BELT ILLUSTRATION A Place treadmill on a level surface. Run Treadmill at approximately 6-8 km/h to check the running condition. If the belt has drifted to the right, turn the right adjusting bolt 1/4 turn clockwise, then start running until centering the belt.
-
Page 32: Year Limited Warranty
Consumer upon collection or delivery of the repaired product. The Consumer does not need to return the product to the store. The Consumer should call the Trojan Call Centre on 0861 Trojan (0861 876526). Customers residing outside South Africa can contact us on +27 10 206 4405 and the call centre will advise of the procedure. -
Page 33: Repairs Procedure
Do not return the product to the store. Call the Trojan Call Centre on 0861 Trojan (0861 876526) to log the faulty product (under warranty or out of warranty). Customers residing outside South Africa can contact us on +27 10 206 4405.
Need help?
Do you have a question about the TR1610 and is the answer not in the manual?
Questions and answers