
Related Manuals for Falcon Elite 110 Dual Fuel


Summary of Contents for Falcon Elite 110 Dual Fuel
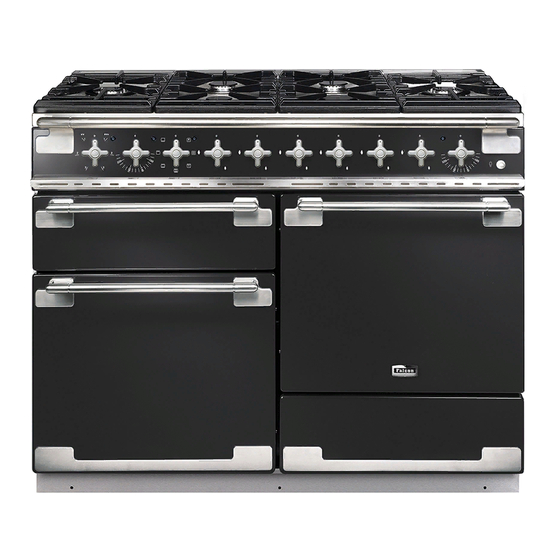
- Page 1 Elite 110 Dual Fuel Users Guide Installation & Service Instructions Australia U105220 01...
-
Page 2: Peculiar Smells
Australia Be safe Warning Accessible parts will become hot in use. To avoid burns and scalds children should be kept away. You need clean fresh air - so does your cooker. Burner fl ames produce exhaust gases, heat and moisture. Make sure that the kitchen is well ventilated: keep natural ventilation holes open or install a powered cooker hood that vents outside. -
Page 3: Table Of Contents
Australia Contents Hotplate Burners Page 4 The Griddle Page 5 The Wok cradle Page 6 The Ovens Page 6 The Left Hand Oven Page 6 The Right Hand Oven Page 6 The Clock Page 7 Multi-function oven Page 10 The Handygrill Page 11 Using your Handygrill Page 12... -
Page 4: Hotplate Burners
Australia Hotplate Burners The drawing by each knob indicates which burner that knob controls. There is a spark ignition system that works when the knob is pressed in. Each burn er also has a spe cial safe ty de vice that stops the fl ow of gas if the fl... -
Page 5: The Griddle
Australia The Griddle Preheat the griddle for a maximum of 5 minutes The griddle fi ts the centre left pan support, front before adding food. Leaving it longer may cause to back. It is designed for cooking food on directly. damage. -
Page 6: The Wok Cradle
Australia The Wok cradle Make sure the cradle is stable and that the Wok is The Rangemaster Wok cradle is designed to fi t a sitting level in the ring. Typhoon Professional 14” Wok. This is available from CookCraft (www.cookcraft.com) and also from other retailers. -
Page 7: The Ovens
Australia The Ovens During use the appliance becomes hot. Care should be taken to avoid the touching heating elements inside the oven. The clock must be set to the time of day before the ovens will work. See ‘The Clock’ section for instructions on setting the time of day. -
Page 8: The Clock
Australia The Clock To time something that’s cooking (minute minder) You can use the timer to turn the ov ens on and Turn the Timer knob off. The clock must be set to the time of day to the right to the ( ) before the ovens will work. -
Page 9: Manual Cooking
Australia The ‘stop time’, which is the time of day you want Clock Special Features - Key Lock the oven to stop cooking. When the key lock is activated, the clock can be operated as usual but the ovens are locked and You cannot set a start time directly - this is set will not come on. -
Page 10: Cooking Using The Timer
Australia For even browning, the maximum recommended Cooking using the timer size of a baking tray is 330mm by 290mm. The timer can be used to turn just one oven, or both ovens, on and off automatically. The start Cooking high moisture content foods can and stop time must be the same for both ovens create a ‘steam burst’, when the oven door is but different cooking temperatures can be set. -
Page 11: Multi-Function Oven
Australia Multi-function oven Fan oven This function operates the fan and the The left hand oven of your cooker is Multi- heating element around it. An even heat is function. It has many varied uses. We sug gest you produced throughout the oven, allowing you to keep a careful eye on your cooking until you are cook large amounts quickly. -
Page 12: The Handygrill
Australia Conventional oven The Handygrill (top and base heat) The maximum weight than can be held by the This function combines the heat from the top Handygrill is 5.5kg (12lb). It should only be used and base elements. It is particularly suitable for with the supplied tin, which is designed to fi... - Page 13 Australia Grilling Cooking Chart To fit the Handygrill The position of the Handygrill on the oven door Line up the ends of the Handygrill rack with a pair brackets will depend upon the size of the food of holes in the mounting brackets on the oven being grilled.
-
Page 14: Oven Shelves
Australia Oven shelves Steam When cooking foods with high water content (e.g. oven chips) there may be some steam visible at the grille at the rear of the hotplate. This is perfectly normal. Oven light the shelf guard should be at the back pointing upwards The oven light comes on as soon as the The oven shelves can be easily re moved and thermostat is turned on. -
Page 15: Storage
Australia Storage The bottom drawer has a moulded plastic tray in the base to hold the Wok ring and Griddle plate. Never place anything hot on the tray; it will be damaged. Make sure that ring or plate is cool before storage. -
Page 16: Multi-Function Oven Cooking Guide
Australia Multi-function Oven cooking guide Remember - not all functions will be suitable for all food types. The oven control settings and cooking times given are intended to be used only as a guide. Individual tastes may require the temperature to be altered to provide a preferred result. Food is cooked at lower temperature in a fan oven than in a conventional oven. -
Page 17: Cooking Chart
Australia Cooking chart - Conventional and full Fan oven functions Convection Oven Fan Oven Shelf Position Food Temperature Temperature Approximate Cooking Time FISH 190°C 180°C Fillets 15-20mins. 190°C 180°C Whole 10mins.per 500g + 10mins. 190°C 180°C Steaks according to thickness. ROAST MEATS Beef with bone 160°C... -
Page 18: Cleaning Your Cooker
Australia Cleaning your cooker Essential information Before thorough cleaning isolate the electricity supply. Remember to switch on the electricity supply and reset the clock before using the cooker. Never use paint solvents, washing soda, caustic cleaners, biological powders, bleach, chlorine based bleach cleaners, coarse abrasives or salt. -
Page 19: Control Panel And Doors
Australia and replaced and the oven heated at 200°C for about one hour. This will ensure the Cook & Clean panels are working effectively. Don’t use steel wool (Brillo) or any other materials that will scratch the surface. Don’t use oven cleaning pads. -
Page 20: Cleaning Table
Australia Cleaning Table Hotplate Part Finish Recommended Cleaning Method Hotplate Top Enamel or Hot soapy water, soft cloth. Any stubborn stains remove Stainless Steel gently with a nylon scourer. Pan Supports, Wok Cradle (some Enamel coated Jif Cream Cleaner- Faberge Lever and a nylon scourer. models only) Cast Iron or Dishwasher. -
Page 21: Troubleshooting
Australia Troubleshooting If you are cooking a large item, be prepared to turn it round during cooking. If two shelves are used, check that space has been Steam is coming from the oven left for the heat to cir cu late. When a baking tray is When cooking foods with a high water content put into the oven, make sure it is placed centrally (e.g. -
Page 22: General Safety Instructions
Australia Edison screw fi tting 15w 240v lamp, FOR OVENS. General Safety Instructions It must be a special bulb, heat resistant to 300 °C. See the HELP leafl et for spares by mail order. If you smell gas Open the oven door and remove the Handyrack (if Don’t turn electric switches on or off. - Page 23 Australia Use dry oven gloves when applicable - using Never leave a chip pan unattended. Always damp gloves might result in steam burns heat fat slowly, and watch as it heats. Deep when you touch a hot surface. Never operate fry pans should be only one third full of the cooker with wet hands.
-
Page 24: Service And Spares
Andi Appliances Pty Ltd. 1 Stamford Road, Oakleigh, VIC 3166. Tel No : (03) 9569 1255 Fax No : (03) 9569 1450 Email : Service@andico.com.au Elite 110 Dual Fuel Name of Appliance: Appliance Serial Number * Fuel Type* Date of Purchase Installers Name &... -
Page 25: Installation
INSTALLATION Check the ap pli ance is electrically safe and gas sound when you have fi nished. Installation Ventilation Requirements Ventilation must be as specifi ed by Dear Installer ‘AS 5601/AG 601 - Gas Installations’. Before you start your installation, please The room containing the appliance should have complete the details BELOW. - Page 26 INSTALLATION Check the ap pli ance is electrically safe and gas sound when you have fi nished. FLEXIBLE GAS HOSE Checking the parts 4 pan supports Griddle plate A suitable hose and restraining chain are supplied with the cooker. If a different hose is used it must be in accordance with the relevant standards.
-
Page 27: Positioning The Cooker
INSTALLATION Check the ap pli ance is electrically safe and gas sound when you have fi nished. Positioning the Cooker Clearances (see AS 5601/AG 601) 3 Side clearances - Measurement E 1 Overhead - Measurement A Where D, the distance from the periphery of the The minimum height of any surface above the cooker nearest burner to a horizontal combustible surface is is 650mm above the hotplate... -
Page 28: Moving The Cooker
INSTALLATION Check the ap pli ance is electrically safe and gas sound when you have fi nished. some where safe - do not refi t it until the installation is complete. Lower the Rollers. Fit the Allen key tool to the centre roller lowering mechanism (C in the fi... - Page 29 INSTALLATION Check the ap pli ance is electrically safe and gas sound when you have fi nished. Measure the height from fl oor level to engagement Levelling edge in back of cooker. Add 3mm to this dimension You are recommended to use a spirit level on a shelf in and assemble the stability bracket to this height.
-
Page 30: Pressure Testing
INSTALLATION Check the ap pli ance is electrically safe and gas sound when you have fi nished. A fl exible connection is supplied with the cooker. If Natural Gas it is necessary to use another hose it must be to A.S. The adjustable spring loaded governor is pre-set to 1869 class B and suitable for your gas type. - Page 31 INSTALLATION Check the ap pli ance is electrically safe and gas sound when you have fi nished. note the maximum cable sizes are 6mm for the screw Current Operated Earth Leakage Breakers terminals and 10mm for the 3 pronged links. Where the installation is protected by a 30 milliamp Access to the mains terminal is gained by removing sensitivity residual current device (RCD), the combined...
-
Page 32: Refit The Drawer
INSTALLATION Check the ap pli ance is electrically safe and gas sound when you have fi nished. Fitting the plinths Fitting the front plinth The cooker is supplied with two stainless steel side panel extensions, a black front plinth with stainless steel end feet and a stainless front plinth trim plate. -
Page 33: Conversion To Lp Gas
SERVICING - WARNING Disconnect from electricity and gas before servicing. Check ap pli ance is safe when you have finished. Conversion to LP gas Remove the shield covering the control taps (2screws). Check in the Technical Data section at the back of the book that the cooker is convertible to the gas you want to use. - Page 34 SERVICING - WARNING Disconnect from electricity and gas before servicing. Check ap pli ance is safe when you have finished. Refi t the control tap shield. Reconnect the wiring to the control panel and refi t the panel. Check the appliance is gas sound. Check operation of all the burners.
-
Page 35: Servicing
SERVICING - WARNING Disconnect from electricity and gas before servicing. Check ap pli ance is safe when you have finished. Servicing To Remove an Outer Side Panel Disconnect the appliance from the electricity supply. Remove the control panel – see 1. Remove the BEFORE SERVICING ANY GAS CARRYING retaining screw on the upper front edge and the two COMPONENTS. - Page 36 SERVICING - WARNING Disconnect from electricity and gas before servicing. Check ap pli ance is safe when you have finished. To Remove an Oven element Thermal 13 To Remove the Oven Outer Door Panel Open the oven door. Remove the socket headed Cut-Out.
- Page 37 SERVICING - WARNING Disconnect from electricity and gas before servicing. Check ap pli ance is safe when you have finished. 17 To Remove the Hotplate Spark 21 To Remove an Oven fan Element Disconnect the appliance from the electricity supply. Generator Pull the unit forward to access the cover boxes at Disconnect the appliance from the electricity supply.
-
Page 38: Circuit Diagram
Australia Circuit Diagram... -
Page 39: Technical Data
Australia Technical Data This cooker is designed for use on Natural Gas:- A conversion for LP (LPG X Propane (2.54kPa)) gas is available. INSTALLER: Please leave these instructions with the User. DATA BADGE LOCATION: LOWER RIGHT HAND COOKER UPRIGHT (Remove storage drawer) Country of Destination: Australia Electric Natural gas... - Page 40 Falcon is a business name of AGA Consumer Products...
Need help?
Do you have a question about the Elite 110 Dual Fuel and is the answer not in the manual?
Questions and answers