Table of Contents
Advertisement
Quick Links
Advertisement
Table of Contents

Related Manuals for Jolimark BP-1000K (Model B)


Summary of Contents for Jolimark BP-1000K (Model B)
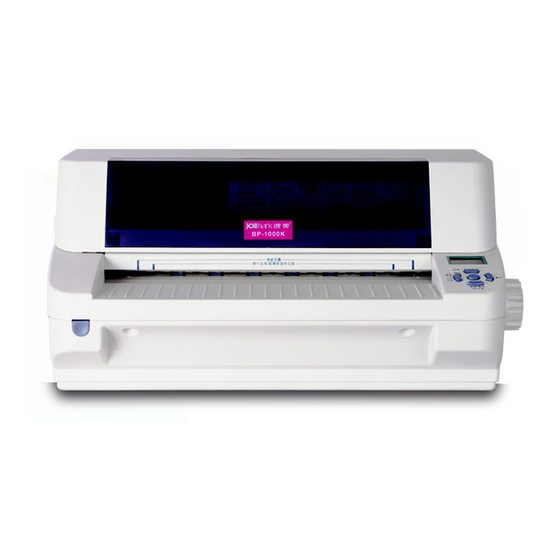
- Page 1 User's Manual BP-1000K (Model B)
- Page 2 BP-1000K User’s Manual Declare About Trademark Corporation names and product names are the registered trademarks or commodity names of the corporation. * EPSON is a registered trademark of Seiko Epson Corporation. * ESC/PK2 is a registered trademark of Seiko Epson Corporation. *...
-
Page 3: Important Safety Instructions
BP-1000K User’s Manual Important Safety Instructions Read all of these instructions carefully and thoroughly and save them for later reference. The unauthorized operation would lead to malfunction or accident. Manufacturers have no responsibilities for the problems which are led by misoperations. Follow all warnings and instructions in the manual as well as marked on the product. -
Page 4: Table Of Contents
BP-1000K User’s Manual Table of Contents Declare................................i Important Safety Instructions ........................ii Chapter 1 Product Features........................1 Chapter 2 Checking and Installing ......................3 2.1 Unpacking and Checking ........................3 2.2 Unpacking the Protective Materials.....................3 2.3 Main Parts of the Printer........................4 2.4 Installing the Printer ..........................4 2.4.1 Choose Proper Installing Place ....................4 2.4.2 Installing the Paper Feed Knob ....................4 2.4.3 Installing the Ribbon Cartridge .....................5... - Page 5 BP-1000K User’s Manual 4.7 The Self Test Functions........................35 4.7.1 ASCII Self-Test ........................... 35 4.7.2 Chinese Self Test Mode......................35 4.7.3 H Pattern Test..........................36 4.7.4 Hex Mode ........................... 36 4.7.5 Dot Alignment Mode ........................36 Chapter 5 Maintenance and Troubleshooting ..................38 5.1 Cleaning the Printer ..........................
-
Page 6: Chapter 1 Product Features
BP-1000K User’s Manual Chapter 1 Product Features Thank you for choosing Jolimark passbook printer. The printer is a product of 24 pin high quality 110 column multifunction passbook/certificate/report printer, it can fulfill your printing requirement. The printer has the specialties as follows:... - Page 7 BP-1000K User’s Manual Safety design of humanization The printer installing a sensor of cover open which make the printer stop printing whenever the upper cover does not be covered and make the print head move to the middle position. If you close the cover it will continue printing again.
-
Page 8: Chapter 2 Checking And Installing
BP-1000K User’s Manual Chapter 2 Checking and Installing 2.1 Unpacking and Checking Check the following items in the package, if any of these items is missing, please contact your dealer. (1) Printer; (2) Ribbon cartridge (JMR115); (3) Paper feed knob; (4) Driver CD; (5) Power cord; (6) Facility user's guide (as Figure 2-1 show). -
Page 9: Main Parts Of The Printer
BP-1000K User’s Manual 2.3 Main Parts of the Printer Figure 2-3and Figure 2-4 mark the names of main parts. Upper cover Ribbon cartridge Upper frame lever Carriage shaft Print head Ribbon guide board LCD display Paper feed knob Power switch Control panel Figure 2-3 Main parts of the printer (Front view) Serial interface or... -
Page 10: Installing The Ribbon Cartridge
BP-1000K User’s Manual Paper feed knob Figure 2-5 Installing the Paper feed knob Note:The D shape placket of the knob should match the D shape shaft inside the printer cover. 2. Press the paper feed knob till it very close up the cover of the printer. 2.4.3 Installing the Ribbon Cartridge 1. - Page 11 BP-1000K User’s Manual Figure 2-8 Turn over the guide of the carriage 4. Buckle the bottom and upper button of the ribbon frame in turn into the slot of the printer frame. Figure 2-9 Installing the ribbon cartridge 5. Fix the ribbon core into the ribbon path. Figure 2-10 Installing the ribbon core 6.
-
Page 12: Connecting To Your Computer
3. Never move the print head when the printer is ON condition or else the printer may be damaged. Don’t touch the print head as it will be hot during printing. 4. Use genuine Jolimark JMR115 consumables or else warranty will be void. 2.5 Connecting to Your Computer The printer can configured with a parallel interface, USB interface, serial interface and Ethernet interface. -
Page 13: Connecting The Usb Interface
BP-1000K User’s Manual Wire clips Parallel interface Parallel cable Figure 2-13 Connecting the parallel interface 2.5.2 Connecting the USB Interface 1. Plug the USB cable A end (flat shape) into the computer's USB interface. 2. Plug the USB cable B end (square shape) into the printer's USB interface. Caution: Don’t impact the plug after connecting to the USB interface. -
Page 14: Connecting The Ethernet Interface Cable
BP-1000K User’s Manual 2.5.4 Connecting the Ethernet Interface Cable Plug the crystal end of the Ethernet interface cable (RJ-45) into the printer's Ethernet interface, and then plug the other end into the LAN’s entrance as shown in Figure 2-16. Ethernet interface Ethernet cable Figure 2-16 Connecting the Ethernet interface cable Note: Please refer to the user’s manual for the detailed instructions of internet settings. - Page 15 BP-1000K User’s Manual Hand operated installing way Note: The hand-operated installing ways of serial interface and parallel interface are the same. 1) The installing steps of parallel interface for Windows 2000/XP/Vista are as follows: 1 Click “Start” → “Settings” → “Select Printers”. 2.
- Page 16 BP-1000K User’s Manual 2. Click “Add Printer”, then a window of “Add Printer Wizard” pops up, click “Next”, then please read the select guide carefully, such as, select “Local printer” in the “Local or Network Printer” window, then click “Next”. 3.
-
Page 17: Network Settings
BP-1000K User’s Manual 2.8 Network Settings Please use Jolimark network setting software NetFinder to set the IP address for Jolimark printers, which can be found in the CD or downloaded from www.jolimark.com. Note: The network printing function needs the operation system of Windows2000 or above. - Page 18 BP-1000K User’s Manual If the printer still can not be found out when the network connection is correct and in the same network, please check whether the network fire wall on the PC open or not. If there is fire wall, please close it temporarily, open again after finishing searching and setting a printer completely.
-
Page 19: Installing Printer Network Driver
BP-1000K User’s Manual It is suggested that printer’s IP set to static in actual usage, which can cut down the time when initializing the Ethernet interface as the printer is turned on and prevent IP conflicts (The dynamic address used in printer may conflict with another one). The network segment part of the IP address and Subnet Mask must be the same as those of PC connecting with a printer. - Page 20 BP-1000K User’s Manual according to whether the PC installs the printer driver or not. If the printer driver hasn’t been installed on the PC, adopt newly-install way whose steps are shown in “Newly-install printer network driver”. If the printer driver has been installed on the PC, adopt Upgrade-install way whose steps are shown in “Upgrade-install printer network driver”.
- Page 21 BP-1000K User’s Manual 6) A window of “Additional Port Information Required” pops up, select “Custom” in the “Device Type”, then click “Settings”. 7) A window of “Port Settings” pops up. Affirm that “Port name” and “Printer name or IP address” are correct, “Protocol”...
- Page 22 BP-1000K User’s Manual 8) Return to “Additional Port Information Required”, click “Next”. 9) A window of “Completing the Add Standard TCP/IP Printer Port Wizard” pops up, click “Finish”. 10) In the selection of “Manufacturers/Printers”, click “Have Disk”, and then click “Next”. 11) A window of “Install From Disk”...
- Page 23 BP-1000K User’s Manual 4) A window of “Printer port” pops up, select “Standard TCP/IP Port”, click “New port”. 5) A window of “Add Standard TCP/IP Printer Port Wizard” pops up, click “Next”. 6) A window of “Add a port” pops up, import the IP address reported by the “Setting printer’s IP address”...
- Page 24 BP-1000K User’s Manual 7) A window of “Additional Port Information Required” pops up, select “Custom” in the “Device Type”, then click “settings”. 8) A window of “Port Settings” pops up. Affirm that “Port name” and “Printer name or IP address” are correct, “Protocol”...
- Page 25 BP-1000K User’s Manual 9) Return to “Additional Port Information Required”, click “Next”. 10) A window of “Completing the Add Standard TCP/IP Printer Port Wizard” pops up, click “Finish”. 11) Return to “Printer Ports”, click “Close”. 12) Return to “Properties”, make sure the network port is selected, click “Apply”, and then click “Close”.
- Page 26 BP-1000K User’s Manual - 21 -...
-
Page 27: Chapter 3 Paper Process
BP-1000K User’s Manual Chapter 3 Paper Process 3.1 Paper Switch When this printer leaves factory it configures with four paper process modes, that are cut sheet mode, passbook mode, thick paper mode and continuous paper mode. 1) Cut sheet mode (Front feed): It is fit for the medium of A4 and thin paper. 2) Passbook mode (Front feed): It is fit for the medium of passbook and vertical certificate which thickness is less than 2mm. -
Page 28: Loading The Passbook
BP-1000K User’s Manual 3. 1+3 copy mode fits for the 1+2~4 ply paper, passbook, registered permanent residence book, driving license, various license, etc.. 4. 1+6 copy mode fits for 1+5 ply or 1+6 ply papers. 3.3 Loading the Passbook Follow the steps as below to load passbook: 1. -
Page 29: Loading The Thick Paper
BP-1000K User’s Manual Figure 3-3 Loading the vertical certificate 3.5 Loading the Thick Paper Follow the steps as below to feed the paper which the thickness is over 2MM: 1. Turn on the printer and setting the paper process to thick paper mode. 2. -
Page 30: Tearing The Tractor Paper
BP-1000K User’s Manual 2. Connect the printer and turn on the power, and switch the paper process mode to continuous paper mode. (Please see the operation way in Chapter 4 Control Panel). 3. Loosen the sprocket lock levers of the tractor (optional), and then move the left sprocket to the fitting position, and press down the lock lever to lock the left sprocket. - Page 31 BP-1000K User’s Manual Figure 3-8 Tearing the tractor paper - 26 -...
-
Page 32: Chapter 4 Control Panel
BP-1000K User’s Manual Chapter 4 Control Panel 4.1 Key, Indicator Light and LCD Display on Control Panel There are five keys, two LED indicator lights and a LCD display on control panel. (Show as figure 4-1) The LCD display is a dot matrix display module (106×56dots), and the display dimension is 32.6mm×17.6mm. -
Page 33: The Information On The Lcd Display When At Stand By State
BP-1000K User’s Manual High Speed In the offline mode, press High Speed key can switch the speed mode of “Normal ◄ Speed”, “High Speed” or “Super High Speed”. At the same time, the LCD display will show you the current printing speed. In the online mode, press the key about 2 seconds, the printer switch among four paper modes of “cut sheet”, “passbook”, “thick paper”... -
Page 34: Use Of The Menu Setup System
BP-1000K User’s Manual 4) Continuous paper, show as follow: Paper: Continuous paper _ _ _ 4.4 Use of the Menu Setup System 4.4.1 Change the Current Setting of the Printer The menu of BP-1000K is containing main menu and sub menu, and displays it on the LCD display. Users can easy setting all the basic functions of the printer. -
Page 35: Printing The Current Setting Report
BP-1000K User’s Manual Menu setting PRT-SPEED ► 1. PRT-SPEED ► 1. NORMAL ► 2. Copy ► 2. High Speed √ As the right picture shows, the option which marks with a “√” is the current default setting. 4) Press “▲”,“▼” keys for up and down selection. For example, if you need to change the speed to “super high speed”, you can press “▲”... - Page 36 BP-1000K User’s Manual Jolimark BP-1000K Current Setting Report Version: 1000K vx.x xxx/xx/xx PRINT SETUP PRT-SPEED NORMAL COPY NORMAL EMULATION EPSON CHAR MODE ASCII FONT ROMAN COMPRESS 100% AUTO_COMP PITCH 10 CPI CHIN. PITCH 6.7 CP LINE SPACE 6 LPI FORM...
-
Page 37: Menu Item Description
BP-1000K User’s Manual Note: If the printer doesn’t install Ethernet interface, the Ethernet interface information of MAC or IP would not be printed out in self-test mode and current setting report. 4.4.3 Menu Item Description Table 4-2: Menu item descriptions are as follow: Item Description PRT-SPEED... -
Page 38: Online Aptitude Parameter Setting
1. Ensure the printer and the computer are connecting with USB interface cable. Turn on both the printer and the computer, and the printer is in online mode. 2. Click “Start” → “Settings” → “Printers”. 3. Right click “Jolimark BP1000K” in the “Printers”, select “Properties”. 4. Click “Device Property” in the property page. - 33 -... -
Page 39: Restoring Factory Printer Settings
BP-1000K User’s Manual 5. The setting way is corresponding with that of printer menu system. In the “Printer Settings” layout, select the first class menu in the combobox of “Select Printer Setting Class”, select the second menu in the “Configuration” and set the item in the current parameters list. 6. -
Page 40: Tof Adjustment
BP-1000K User’s Manual 4.5 TOF Adjustment TOF is mean top of form position. When paper is loaded, the printer detects the Form end of the paper and determines the printing start position based on the detected paper end. That position is the top of the form. When the printer online, adjusting…... -
Page 41: H Pattern Test
BP-1000K User’s Manual CHINESE TEST MODE ersion: 1000K v XXX 20XX/XX/XX 、 。 · ˉ ˇ ¨ 〃 々 ~ ‖ … ‘ ’ — 」 『 』 〖 〗 【 】 ± × ÷ : ∧ ∨ ∑ ∏ ⊙... - Page 42 BP-1000K User’s Manual printer is online. When the printer enters dot Alignment Mode, online LED blinks. In Dot Alignment mode, press the Load/Eject or LF/FF keys for adjusting dot alignment. Load/Eject: Press to move the odd line to the right (original parameter values increase). LF/FF: Press to move the odd line to the left (original parameter values decrease).
-
Page 43: Chapter 5 Maintenance And Troubleshooting
BP-1000K User’s Manual Chapter 5 Maintenance and Troubleshooting 5.1 Cleaning the Printer Upper cover Carriage shaft Paper sensor shield Paper feed platform Figure 5-1 Clean the printer Cleaning periodically and the cleaning tool Periodical cleaning: every six months or every 300 working hours once Cleaning tool: dry cloth (please use soft cloth to clean metal parts.) Clean the paper feed platform Wipe off the wasted paper and clean the dirt and dust. - Page 44 BP-1000K User’s Manual The flat and straight paper path is specially design for your large quantities of document no trouble printing. When paper jam, please do as following steps: 1. Shut down the power and open the upper cover of the printer. 2.
-
Page 45: Error Indication On The Display Of Control Panel
BP-1000K User’s Manual 5. Press down the upper frame and pull the upper frame lever ahead till it locks in the correct position. Then pull backwards the upper frame lever and lock the upper frame. Figure 5-5 Press down the upper frame 6. - Page 46 BP-1000K User’s Manual Please eject the paper switch Paper switch Eject the paper first, loaded paper, mode error mode error and then switch to the for fear affect correct paper mode. paper switch Upper cover Power light and Upper cover The upper cover Please check if the sensor...
-
Page 47: Chapter 6 Paper Specification
BP-1000K User’s Manual Chapter 6 Paper Specification The printing paper should be up to the following demands: Use the paper that request in our manual It should be finer of the paper around edge, and the printing area should finer too, it can not has any perforation or cranny. -
Page 48: Tractor Paper Printable Area
BP-1000K User’s Manual paper length 66 mm printable area width 279.4 mm left, right margin 2 mm top margin 4 mm bottom margin 6 mm weight 55 g/m 180 g/m 6.2 Tractor Paper Printable Area Printable area Printable area Figure 6-2 tractor paper printable area Dimension Min. -
Page 49: Passbook Printable Area
BP-1000K User’s Manual 1+6 paper weight 280 g/m 6.3 Passbook Printable Area 6.3.1 Size Specifications of Horizontal Passbook The cover and the inner paper of the passbook should not have any crease, twist and breakage. The cover should be same thickness. Before printing, open the passbook, and turn down by the bind line which makes it more flat to load into the printer. -
Page 50: Size Specifications Of Vertical Certificate
BP-1000K User’s Manual passbook cover 0.18 mm 0.46 mm 6.3.2 Size Specifications of Vertical Certificate Printable area Printable area Figure 6-4 Vertical certificate printable area Dimension certificate width 65 mm 280 mm certificate length 85 mm 536 mm left, right margin 2 mm top margin bottom margin 4 mm... -
Page 51: Appendix A Technical Specification
BP-1000K User’s Manual Appendix A Technical Specification A.1 Technical Specification Item Description Printing method 24-Pin Flatbed Dot Matrix Impact Printer Printing direction Bi-directional logic seeking Printing width 110 column (10cpi)/279.4mm ASCII Chinese speed 10 CPI 12 CPI speed 6.7 CPI 7.5 CPI Normal speed 100 CPS... - Page 52 BP-1000K User’s Manual Input Buffer 132 KB Model: JMR115 Ribbon Life: 10 million characters (draft mode) Noise <55 dB (A) (ISO7779 standard) Control panel 5 keys and 2 indicator lights and a LCD display Cut sheet: Load/eject from the front / Load from front and eject from rear Paper feed type Tractor paper (Tractor is optional) : Load front the rear , eject from the front Thickness adjust...
-
Page 53: Parallel Interface
BP-1000K User’s Manual Rated frequency range: 50 ~ 60 Hz ①Operation: 80 W; ②Maximum: 180 W; ③Standby: 6 W Power Caution: Only when the product is unconnected with outer power supply, it can achieve zero energy consumption state. Reliability MTBF≥20,000 hours (IEC 605.7standard) Wireless disturbance Grade B A.2 Parallel Interface... -
Page 54: Usb Interface
BP-1000K User’s Manual Printer ← Host — PRIME Printer → Host — ERROR Printer ↔ Host — SIGNAL GND Printer → Host — Printer → Host — PULLED UP 5V Printer ← Host — SELECTIN Figure A-2 Parallel interface connector pin number A.3 USB Interface USB interface is 2.0 (Full Speed), the interface connector A and B signal assignments are shown below:... - Page 55 BP-1000K User’s Manual Data bit Stop bit Original bit Parity check bit Figure A-4 Serial data format Character length: 7~8 bits Connector Pin Assignments RS-232C default settings ABBREVIATION NAME DIRECTION RDY/BSY X-ON/X-OFF Frame Ground —— Transmitted Data Received Data Request to Send Signal Ground ——...
-
Page 56: Ethernet Interface
BP-1000K User’s Manual PIN 1 FG (Frame Ground---connect to the printer rack) Connect to the circuit frame ground. PIN 2 SD (Transmitted Data) Send serial data to the printer through this pin. This pin is low level when it receives no data. - Page 57 BP-1000K User’s Manual Single sheet copy paper Single sheet tractor paper Figure A-8 - 52 -...
Need help?
Do you have a question about the BP-1000K (Model B) and is the answer not in the manual?
Questions and answers