Table of Contents

Subscribe to Our Youtube Channel
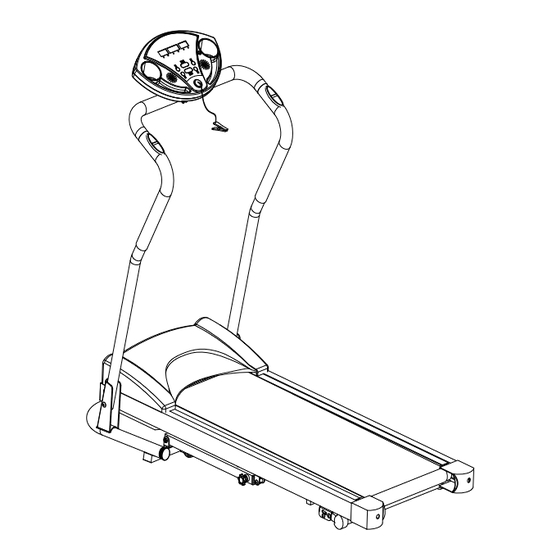
Related Manuals for LifeSpan BOOMER PLUS


Summary of Contents for LifeSpan BOOMER PLUS
- Page 1 BOOMER PLUS USER’S MANUAL This is HIGH-POWER item; please DO NOT USE THE SAME OUTLET WITH OTHER HIGH-POWER HOUSEHOLD APPLIANCE like air-conditioning etc. Please choose an outlet exclusively for the machine and make sure the fuse is 10A.
-
Page 2: Important Safety Precautions
Product may vary slightly from the item pictured due to model upgrades IMPORTANT SAFETY PRECAUTIONS CAUTION: Before starting any exercise program, consult with your physician or health professional. IMPORTANT: Read all instructions carefully before using this product. Retain this owner’s manual for the future reference. -
Page 3: Important Operation Instructions
STOP IMMEDIATELY! Consult your physician before continuing. 13. If you observe any damage or wear on the mains plug or on any section of the mains lead then please have these replaced immediately by a qualified electrician – do not attempt to change or repair these yourself. -
Page 4: Folding Instructions
A safety key is provided with this machine. Remove the safety key will stop the walking belt immediately; the treadmill will shut off automatically. Insert the safety key will reset the display. Do not use excessive pressure on console control keys. They are precision set to function ... -
Page 6: Parts List
PARTS LIST Name. Specification Name. Specification Cross pan-headed See the program Computer ST4.2×15 bolt Alloy cover See the program Bowl cover Flat washer Semicircle knot Ф38 Cross pan-headed M4×12 Tube combine bolt M8 knob See the program Square magnet Foam grips Ф36×3×375 Motor 1.5HP... -
Page 7: Assembly Parts List
Name. Specification Name. Specification Degree adjustable Running belt 2300×400×1.6 Inner hexagonal Blue connection M6×30 S4 sunk-headed bolt wire Red connection 1085×486×15 Running board wire Stop washer Rear roller Cashion running 30×40×5 Nylon tube Length 200mm board Bowl cover Wax tube Length 200mm Assembly parts list: Ⅰ... - Page 8 TOOLS AND NUTS LIST: Part No. Name Specification Numbers Inner hexagonal wrench Inner hexagonal wrench Inner hexagonal wrench Cross-head wrench S13,S14,S15...
-
Page 9: Assembly Instructions
4. Children should not be allowed to play on the treadmill or move the treadmill deck up and down. We recommend you have someone to assist you in lifting and assembling your Lifespan treadmill. Following these instructions carefully which will make it’s easier to assemble your Lifespan treadmill. -
Page 10: Operation Guide
OPERATION GUIDE CONSOLE DISPLAYS, FEATURES AND FUNCTIONS: Your treadmill comes with an innovative console designed to make your intense workout fun and entertaining. Below are the features and benefits of the console: Shown windows 4 LED windows: SPEED, TIMR/DIST,PULSE, CALORIES and 3 Arc indicator light. 1.Window SPEED: Displays the current speed. -
Page 11: Program Mode
7. Arc calories indicator light: The light”50” is on when the amount is ≤75 cal; The light “150” is on when the amount is >75 cal and ≤150 cal; All the lights is on when the amount is >900 cal. Button operations START/ STOP Press the button to start or stop the treadmill. -
Page 12: User Defined Program
value is from 0.5 to 99:9. 4. When the distance is in the mode of counting down, press “DISPLAY MODE” and the calories will begin to count down. The CAL window will display the flashing number “50”. Press the “SPEED+”, “SPEED-“ to set the desired distance. Setting value is from 10 to 999. -
Page 13: Maintenance
十.SAFETY KEY FEATURE: The safety Key is designed to function as an emergency stop mechanism. For this reason it is extremely important for you that the safety key CORD should be attached to your clothing at all times while using the treadmill. As soon as the key is pulled out from the sensor, the treadmill will stop immediately. -
Page 14: Maintenance And Servicing
• Inspect the power cord. If the power cord is damaged, contact Lifespan Fitness. • Make sure the power cord is not underneath the treadmill or in any other area where it can become pinched or cut. -
Page 15: General Cleaning
SERVICING: IF YOU FAIL TO COMPLY WITH LIFESPAN’S MAINTENANCE AND SERVICING STEPS ABOVE, YOU MAY VOID YOUR WARRANTY. IF YOU REQUIRE A SKILLED LIFESPAN REPRESENTATIVE TO UNDERTAKE ONE OF THE STEPS ABOVE, PLEASE EMAIL US AT lifespanfitness@hotmail.com. 2 General Cleaning Use a soft, damp cloth to wipe the edge of the belt and the area between the belt edge and frame. -
Page 16: How To Check The Running Mat For Proper Lubrication
If the surface is slick when touched, then no further lubrication is needed. If the surface is dry when touched, apply a suitable silicone lubricant. We recommend you use a silicone based spray to lubricate your Lifespan Treadmill. This can be purchased from your local sports Retailer or a local hardware store. - Page 17 ▲ first set speed at lowest position. ▲ second check the belt shifts to which side. If the belt shifts to right, tighten the right bolt and loosen the left bolt by using 6mm Hexagonal Wrench, until the belt is centered itself; If belt shifts to left, tighten the left bolt and loosen the right bolt by using 6mm Hexagonal Wrench, until the belt is centered.
-
Page 18: Warranty Registration
WARRANTY REGISTRATION Please visit the following link to complete the product warranty form online. Please visit http://warrantyform.lifespanfitness.com.au/ PLEASE NOTE: YOUR WARRANTY IS ONLY VALID IF YOU CAN PROVE YOU ARE THE ORIGINAL PURCHASER ON THIS ITEM (i.e. a copy of the receipt, invoice, delivery date or internet confirmation).
Need help?
Do you have a question about the BOOMER PLUS and is the answer not in the manual?
Questions and answers