Table of Contents
Advertisement
Quick Links
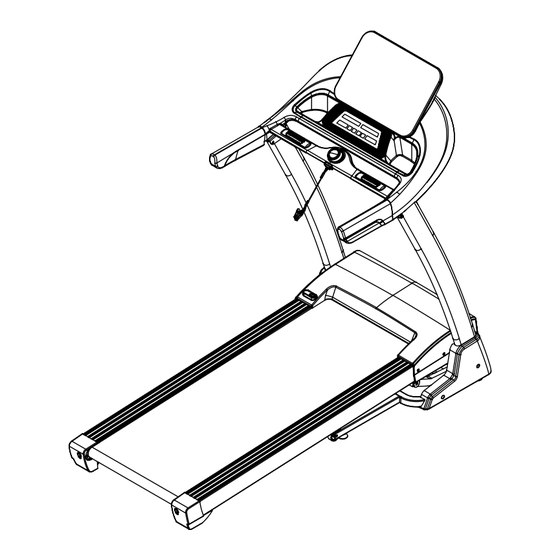
Boost 2 Treadmill
Product may vary slightly from the item pictured due to model upgrades.
Read all instructions carefully before using this product.
Retain this owner's manual for future reference.
NOTE:
This manual may be subject to updates or changes. Up to date manuals are available through our
website at www.lifespanfitness.com.au
USER MANUAL
Find the
Digital Manual
Online
Advertisement
Table of Contents

Related Manuals for LifeSpan Boost 2


Summary of Contents for LifeSpan Boost 2
- Page 1 Boost 2 Treadmill USER MANUAL Find the Digital Manual Online Product may vary slightly from the item pictured due to model upgrades. Read all instructions carefully before using this product. Retain this owner’s manual for future reference. NOTE: This manual may be subject to updates or changes. Up to date manuals are available through our...
-
Page 2: Table Of Contents
TABLE OF CONTENTS Important Safety Instructions ....... 03 II. Important Electrical Information ......05 III. -
Page 3: Important Safety Instructions
I. IMPORTANT SAFETY INSTRUCTIONS WARNING: Read all instructions before using this treadmill. It is important your treadmill receives regular maintenance to prolong its useful life. Failing to regularly maintain your treadmill may void your warranty. DANGER To reduce the risk of electric shock disconnect your treadmill from the electrical outlet prior to cleaning and/or service work. - Page 4 • The treadmill is intended for in-home use only and is not suitable for commercial environments. • To disconnect, turn all controls to the off position, remove the safety key, and then remove the plug from the outlet. • The pulse sensors are not medical devices. Various factors, including the user’s movement, may affect the accuracy of heart rate readings.
-
Page 5: Important Electrical Information
II. IMPORTANT ELECTRICAL INFORMATION Grounding Information This product must be grounded. If it should malfunction or breakdown, grounding provided a path of least resistance for electric current to reduce the risk of electric shock. This product is equipped with a cord having an equipment-grounding conductor and a Grounding plug. The plug must be plugged into an approved outlet that is properly installed and grounded in accordance with all local codes and ordinances. -
Page 6: Important Operating Instructions
III. IMPORTANT OPERATING INSTRUCTIONS • Understand that changes in speed and incline do not occur immediately. Set your desired speed on the computer console and release the adjustment key. The computer will obey the command gradually. • Use caution while participating in other activities while walking on your treadmill, such as watching television, reading, etc. -
Page 7: Assembly Instructions
IV. ASSEMBLY INSTRUCTIONS PARTS LIST Description Specs Description Specs Safety Lock Main Frame Set Left Bottom Shield 6 # Allen Wrench Hex Socket Flat Right Bottom Shield M8*42 Round Head Screw With Cross Wrench S = 13, 14, 15 Hex Socket Flat M8*16 Round Head Screw Power Cord... - Page 8 STEP 1 STEP 2 1. Open the packing box and remove the 1. Hold the electronic watch frame with your contents from the box. Lay the main frame hand and using a 5 # Allen wrench (10), group flat on the ground. secure the Allen flat round head screw (62) and an internal serrated locking washer (88), to the electronic watch frame on the left and...
- Page 9 STEP 4 1. Use a 5 # Allen wrench (10) to secure Allen flat round head screw (70) and an internal serrated locking washer (88) to pass through the base and the right column, and lightly lock it on the base. 2.
-
Page 10: Folding Instructions
V. FOLDING INSTRUCTIONS FOLDING Hold position A with both hands, lift the machine up, and push it up with a little force until you hear a click for hydraulic folding rod (B). UNFOLDING Hold position A with both hands, lift the machine slightly up, then apply pressure with your foot to the mid-section of the hydraulic folding rod (B) (it is usually in orange for the unlock release point). -
Page 11: Moving The Treadmill
VI. MOVING THE TREADMILL Before moving the treadmill, unplug the power cord and ensure the area is cleared for where you wish to place it in. CAUTION: Seek assistance if you are unable to lift heavy equipment. 1. With your left hand on onto point A and with your right-hand hold onto point B. 2. -
Page 12: Operation Guide
VII. OPERATION GUIDE WINDOW DESCRIPTIONS 1. Time Window: Displays the duration of the exercise. 2. Speed Window: Shows the current speed of movement. 3. Calorie Window: Indicates the calories burned during the exercise. 4. Slope/Heart Rate Window: Displays either the slope or heart rate, depending on which icon is active. 5. -
Page 13: Main Functions
1. "PROG." Button: Program selection key. The sequence is as follows: manual mode, P01-15, FAT mode, and back to manual mode in a continuous cycle. 2. "MODE" Key: Mode selection key. The sequence is: manual mode, time countdown, distance countdown, calorie countdown, and back to manual mode. •... - Page 14 4. PROGRAM Mode: • Press the "PROGRAM" button to select one of the built-in programs (P01-P15). • The "TIME" window will display the default value and blink. Adjust the exercise time using the SPEED ▲/▼ or INCLINE ▲/▼ keys. • The built-in program is divided into 20 segments, with each segment’s running time calculated as total time divided by 20.
-
Page 15: Exercise Guide
L2 (Brisk Walk) Default Value Adjustment Range Display Range Remark Adjustable only after Speed 4.0 (km/h) 1.0-6.0 (km/h) 1.0-6.0 (km/h) start-up Adjustable only after Incline 0-15% start-up 5:00-99:00 Time 30:00 (min) 5:00--99:00 (min) (min) Each time = set time/20 speed unit km/h Number of Segments Speed... - Page 16 L4 (800M Fitness Test/800M Fitness Test) Default Value Adjustment Range Display Range Remark 1.0-maximum Adjustable only after Speed 3.0 (km/h) 1.0-maximum (km/h) (km/h) start-up Adjustable only after Incline 0-15% start-up Distance 0.8 (km) Not adjustable 800-Meter Countdown: In this mode, the treadmill will countdown an 800-meter distance. Once the countdown is complete, the time taken to finish the distance will be displayed in the speed window as the result.
- Page 17 L6 (Cross-country Run) Default Value Adjustment Range Display Range Remark Adjustable only after Speed 4.0 (km/h) 4.0-10.0 (km/h) 4.0-10.0 (km/h) start-up Incline 0-15% 5:00-99:00 Time 30:00 (min) 5:00--99:00 (min) (min) Each time = set time/20 speed unit km/h Number of Segments Speed 10.0...
- Page 18 L8 (1000M Fitness Test/1000M Fitness Test) Default Value Adjustment Range Display Range Remark 1.0-maximum Adjustable only after Speed 3.0 (km/h) 1.0-maximum (km/h) (km/h) start-up Incline 0-15% Distance 1.0 (km) Time 7 minutes Not adjustable 0-7′00" 1000-meters Countdown: Once the countdown is complete, the speed window will appear based on the time assessment results.
- Page 19 Input Parameter Display and Setting Range: Parameter Category Default Value Setting Range Remark Surname (-1-) 0 (M) 0—1 0 = Male, 1 = Female Age (-2-) Aged 25 10-99 years old Height (-3-) 170CM 100-240CM Weight (-4-) 70KG 20-160KG Body Mass Index Chart: Body Mass Index (BMI) <19 Under Weight...
- Page 20 15 Built-in Program Data Sheets with 20 Segments Setting Time/20 = interval running time PROGRAM TIME 9 10 11 12 13 14 15 16 17 18 19 20 SPEED INCLINE SPEED INCLINE SPEED INCLINE SPEED INCLINE SPEED INCLINE SPEED INCLINE SPEED INCLINE SPEED...
-
Page 21: Trouble Shooting Guide
VIII. TROUBLE SHOOTING GUIDE Error Code Reason Suggestion Solution Overload: The current may be too high 1. The system may have protected itself due to due to exceeding the rated load. high current. Restart the system. 2. A part of the treadmill may be stuck, causing the motor to stop rotating. - Page 22 Error Code Reason Suggestion Solution Motor parameter error: Incorrect 1. Provide the correct motor parameters from motor parameters. the original factory. Other Errors Contact support for further assistance Poor communication: 1. Check the communication line. Communication line issues. 2. Replace the electronic watch if necessary. 3.
-
Page 23: Exercise Guide
IX. EXERCISE GUIDE PLEASE NOTE: Before beginning any exercise program, consult your physician. This is important especially if you are over the age of 45 or individuals with pre-existing health problems. The pulse sensors are not medical devices. Various factors, including the user’s movement, may affect the accuracy of heart rate readings. -
Page 24: Workout Guidelines
COOL DOWN Finish each workout with a light jog or walk for at least 1 minute. Then complete 5 to 10 minutes of stretching to cool down. This will increase the flexibility of your muscles and will help prevent post- exercise problems. -
Page 25: Maintenance Instructions
• Your treadmill comes pre-lubricated between the running board and the running belt. Since friction between these parts affects the machine’s performance and lifespan, regular lubrication is essential. • Inspect the board surface regularly for any damage. If damage is found, contact customer service. - Page 26 1. To prolong the life of your treadmill, turn off the power after 1.5 hours of continuous use. Let the machine rest for 10 minutes before resuming use. 2. Ensure the running belt is properly tensioned. If the belt is too loose, it may slip during use; if it’s too tight, it could strain the motor and increase wear on the belt and drum.
-
Page 27: Adjusting The Running Belt
ADJUSTING THE RUNNING BELT 1. PREPARATION • Place the treadmill on a level surface. • Set the treadmill speed to approximately 6-8 km/h and observe the alignment of the running belt. 2. ADJUSTING BELT DEVIATION • If the running belt is biased to the right: 1. -
Page 28: Exploded Diagram
XI. EXPLODED DIAGRAM 28| EXPLODED DIAGRAM... -
Page 29: Parts List
XII. PARTS LIST Description Specs Description Specs Main Frame Assembly Foot Pad Base Assembly Safety Lock Column Assembly Nylon Isolation Pad Lifting Frame Assembly Cushion Electronic Watch Reinforcing Rod Cushion Frame Assembly Running Board Annular Wire Guard Plug Reinforcement Plate Oil Guide Plate Assembly Annular Wire Guard Plug Front Drum... - Page 30 Description Specs Description Specs Cross Groove Type 1 Non-metallic Insert Countersunk Head Hex Lock Nut 4.2*19 Self-tapping and Self- Hex Socket Countersunk drilling Screw M8*25 Head Screw Cross Grooves Pan Hex Socket Countersunk Head Self-tapping and 4.2*9.5 M6*40 Head Screw Self-drilling Screw Hex Socket Cylindrical Luminous Ring...
-
Page 31: Warranty
Any claim against this warranty must be made through your original place of purchase. Proof of purchase is required before a warranty claim may be processed. If you have purchased this product from the Official Lifespan Fitness website, please visit https://lifespanfitness.com.au/warranty-form For support outside of warranty, if you wish to purchase replacement parts or request a repair or service, please visit https://lifespanfitness.com.au/warranty-form and fill in our Repair/Service... -
Page 32: Hand Pulse Technology
XIV. HAND PULSE TECHNOLOGY This product comes equipped with hand pulse sensors which are used to pick up tiny EKG/ECG signals that run through the body when your heart beats. These electrical EKG/ECG signals are very small and must be amplified 1000 times to make the signal viable for the computer to display your pulse. To ensure proper operation: •... - Page 36 WWW.LIFESPA NF ITN ES S.COM.AU...
Need help?
Do you have a question about the Boost 2 and is the answer not in the manual?
Questions and answers