Table of Contents
Advertisement
Quick Links
Advertisement
Table of Contents

Subscribe to Our Youtube Channel
Related Manuals for Kontron CG2100


Summary of Contents for Kontron CG2100
- Page 1 Kontron CG2100 Carrier Grade Server Document Revision 1.2...
-
Page 2: Table Of Contents
Product Accessories ............7 Additional Information and Software .......... 8 Features ......... 9 Server Components ............10 CG2100 Server Front Panel ........... 12 CG2100 Server Back Panel ............ 14 Front Panel Board ............15 LED/Switch Board ............15 Hard Disk Drives ............15 SD Flash Module ............. -
Page 3: Optional Component Installation Procedures
Installing a Solid-State Drive on the Server Board ....... 56 4.13 Installing the Server into a Rack ........... 57 Connecting the Power Cord ..........57 Equipment Rack Precautions ..........57 Server Component Replacements ....59 Before You Begin ............59 www.kontron.com www.kontron.com... - Page 4 If You Cannot Access Setup ..........78 Setup Menus .............. 78 Upgrading the BIOS ............80 Preparing for the Upgrade ..........80 Updating the BIOS ............80 Restoring BIOS Default Settings ..........80 Clearing the Password ............81 www.kontron.com www.kontron.com...
- Page 5 If DC power supplies are installed: ........94 Temperature and Ventilation ..........95 Safety Cautions ............. 95 Wichtige Sicherheitshinweise ..........96 Consignes de sécurité ............ 98 Instrucciones de seguridad importantes ........100 10 Appendix B: Regulatory and Certification Information ........105 www.kontron.com www.kontron.com...
- Page 6 Europe (CE Declaration of Conformity) ........106 VCCI (Japan) ............107 BSMI (Taiwan) ............107 Regulated Specified Components .......... 107 11 Appendix C: Getting Help ....... 108 11.1 World Wide Web ............. 108 11.2 Telephone ..............108 11.3 Email ..............108 www.kontron.com www.kontron.com...
-
Page 7: Introduction
1.2 Manual Organization Chapter 2 Features provides a brief overview of the CG2100 server. In this chapter, you will find a list of the server board features, chassis features, illustrations of the product, and product diagrams to help you identify components and their locations... -
Page 8: What Your Server Includes
The following list shows the separately orderable components and optional accessories available for inclusion in the initial order or to have as spares. Refer to the CG2100 Carrier Grade Server Configuration Guide for a complete list of orderable spares and options. -
Page 9: Additional Information And Software
If you need more technical information or information about the accessories that can be used with this CG2100 server, refer to the Technical Product Specifications (TPSs) for the system and the server board. The TPS documents are located on the Kontron support website at http://us.kontron.com/support. The system TPS provides in-depth technical information about the server. -
Page 10: Features
Features This chapter briefly describes the main features of the Kontron CG2100 Carrier Grade Server. It provides a diagram of the product, a list of the server features, and a diagram showing the location of important components and connections on the server system. -
Page 11: Server Components
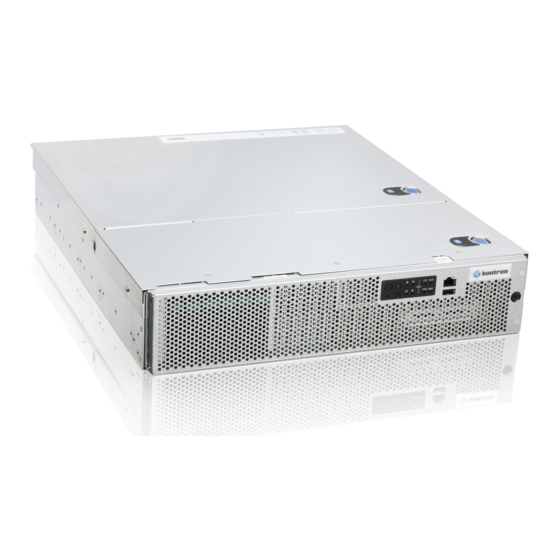
On-board ServerEngines* LLC Pilot II Controller Integrated Baseboard Management Controller (Integrated System Management BMC), IPMI 2.0-compliant Integrated Super I/O on LPC interface 2.1 Server Components Figure 2 shows the CG2100 server with top covers and front bezel removed to show the internal components. - Page 12 Figure 2. CG2100 Carrier Grade Server Components...
-
Page 13: Cg2100 Server Front Panel
LEDs Riser card assembly (containing both full- height and low-profile riser cards 2.2 CG2100 Server Front Panel Figure 3 shows the front panel of the CG2100 server with the bezel installed. Figure 3. CG2100 Server Front View (Bezel Installed) - Page 14 USB port buttons and status indicator and telco alarm LEDs RJ45 COM2 port Bezel captive screw Figure 4shows the front panel of the CG2100 server with the bezel removed. Figure 4. CG2100 Server Front View (Bezel Removed) Item Description Item Description...
-
Page 15: Cg2100 Server Back Panel
SDR TAM setting. Yellow is the default color. 2.3 CG2100 Server Back Panel Figure 6 shows the back panel of the CG2100 server. Figure 6. CG2100 Server Rear View Description... -
Page 16: Front Panel Board
• On board LEDs to indicate power, critical, major, and minor alarms 2.6 Hard Disk Drives The CG2100 server supports up to six hot-swappable hard drive carriers accessible from the front of the chassis with the front bezel removed. Both SAS and SATA drives are... -
Page 17: Sd Flash Module
NOTE: The CG2100 server does not support all SAS or SATA drive models. For a list of validated hard drive manufacturers and hard drive types, refer to the Tested Hardware and Operating System List (THOL) on the Kontron website at http://us.kontron.com/support/... -
Page 18: Riser Card Assembly
Fan header 2.9 Riser Card Assembly The CG2100 server has a PCI riser assembly that supports the installation of both PCI- X and PCI Express* add-in cards. There are three riser card options that can each use the super slot on the T5520UR server board (the baseboard). -
Page 19: Ethernet Nic Ports
2.10 Ethernet NIC Ports The CG2100 server has two GbE NIC ports mounted on the baseboard that are accessible from the rear of the chassis. Additional rear-accessible GbE NIC ports can be added to the system by using • Full-height PCI-X/PCIe add-in cards or low-profile PCIe add-in cards •... -
Page 20: System Cooling
2.13 System Cooling There are three main cooling areas in the CG2100 server as illustrated in Figure 9. • CPU2 and memory (blue in Figure 9) with two redundant , hot-swappable 80mm fans These fans facilitate the air flow through the front bezel, over the server board, CPU2, and out through the rear of the chassis. -
Page 21: Processors
Processors The T5520UR server board accommodates two six-core processors from the Intel® Xeon® processor 5600 series. These processors can be ordered from Kontron using the Kontron part numbers listed in the CG2100 Carrier Grade Server Configuration Guide. Memory The Intel® QuickPath Memory Controller integrated in the Xeon 5600 processor supports DDR3 800, DDR3 1066 and DDR3 1333 memory technologies. -
Page 22: Standard Component Installations And Upgrades
Removing the Chassis Covers The CG2100 server must be operated with the top covers in place to ensure proper cooling. You will need to remove one or both top covers to add or replace components inside the chassis that are not hot-swappable from the front or rear panels. -
Page 23: Re-Installing The Chassis Covers
2. While holding the blue button at the top right of the front cover (Figure 10, “B”), slide the cover forward until it stops. 3. Lift the cover straight up to remove it from the chassis. Removing the Back Cover 1. -
Page 24: Removing The Front Bezel
2. Slide the front cover toward the back cover until the tabs fit together and the front cover is firmly in place. 3. Install the shipping screw if tooled entry is required or if the unit will be shipped. 4. Reconnect all peripheral devices and the power cord(s). CAUTION: This unit must have both covers installed when it is running to ensure proper cooling. -
Page 25: Re-Installing The Riser Card Assembly
To remove the riser card assembly: 1. Power down the server and remove all peripheral devices and the power cord(s) 2. Remove the back chassis cover. For instructions, see “Removing the Chassis Covers” in Section 3.2. 3. Loosen the blue captive thumb screw (Figure 12, “B”) at the rear of the chassis. Notice the guide pins that will be used to re-install the riser assembly into the chassis. -
Page 26: Removing The Processor Air Duct
Removing the Processor Air Duct The processor air duct is black plastic with rubber grommets that reduce vibration. It must be removed to access the processors and the memory DIMMs. The air duct is required to ensure proper air flow within the chassis, so be sure that it is in place again before re-installing the back cover. -
Page 27: Re-Installing The Processor Air Duct
The memory DIMM slots are located in two separate banks on the T5520UR server board. Detailed information about the memory subsystem in the CG2100 server can be found in the Intel® Server Board S5520UR Technical Product Specification located on the Kontron support website http://us.kontron.com/support... -
Page 28: Supported Memory
Intel® QuickPath Memory Controller The Intel® Xeon® Processor 5600 Series has an integrated memory controller in its package. The Intel® QuickPath Memory Controller supports DDR3 800, DDR3 1066 and DDR3 1333 memory technologies. The memory controller requires the following configuration rules: •... -
Page 29: Memory Ras
• The silk screened DIMM slot identifiers on the board provide information about the channel and the processor to which they belong. For example, DIMM_A1 is the first slot on Channel A on processor 1; DIMM_D1 is the first DIMM socket on Channel D on processor 2. •... - Page 30 The integrated memory controller in the Intel Xeon Processor 5600 Series alternates ® ® between both channels for read transactions. Write transactions are issued to both channels under normal circumstances. When the system is in the Channel Mirroring mode, channel C and channel F of socket 1 and socket 2 respectively are not used.
-
Page 31: Memory Upgrade Rules
Mirroring Possible? Memory Upgrade Rules Upgrading the system memory requires careful positioning of the DDR3 DIMMs based on the following factors: • Current RAS mode of operation • Existing DDR3 DIMM population • DDR3 DIMM characteristics • Optimization techniques used by the Intel® Xeon® Processor 5600 Series to maximize memory bandwidth In the Channel Independent mode, all DDR3 channels operate independently. -
Page 32: Installing Memory Dimms
• If only one processor socket is populated, the next upgrade from the Single Channel mode is installing DIMM B1 to allow channel interleaving. The system operates in the Independent Channel mode. • The DIMM parameter-matching requirements for memory RAS is local to a socket. For example, while Channels A/B/C can have one match of timing, technology, and size, channels D/E/F can have a different set of parameters and RAS still functions. -
Page 33: Replacing Or Removing Memory Dimms
Adding or Replacing a Processor CAUTION: The processor must be appropriate: You could damage the server board if you install a processor that is inappropriate for your server. Refer to the Configuration Guide located on the support web page http://us.kontron.com/support/... - Page 34 (search for CG2100, click on Product Downloads, and then Ordering Guide) for a list of compatible processors for the CG2100 server. Use the instructions provided below to add or replace a processor instead of using the instructions that came with the processor. Before you begin, remove the riser card assembly and processor air duct from the chassis.
- Page 35 4. Open the socket by pushing the lever handle down and away from the socket to release it. (“A” and “B” in 5. Figure 18) Figure 18. Using the Socket Lever Pull the lever and open the load plate all the way. (Figure 19, “A”) Figure 19.Opening the Load Plate 6.
-
Page 36: Inserting The Heat Sink
CAUTION: The underside of the processor has components that may damage the socket pins if installed improperly. The processor must align correctly with the socket opening before installation. Gently place the processor onto the socket surface. Do not drop the processor into the socket! 2. -
Page 37: Configuring Jumpers On The Server Board
of the chassis for correct airflow (front to back). Use caution and make sure that cables are not pinched beneath the heat sink. (See Figure 17.) Loosely screw in the captive screws on the heat sink corners by tightening one, then the one diagonally opposite, and so on. - Page 38 Table 4. Server Board Jumpers (J1E7, J1E8, J1D4, J1H2) Jumper Name Pins System Results J1E7: BIOS These pins should have a jumper in place for normal Default system operation (Default) If these pins are jumpered with AC power plugged, the BIOS settings are cleared within five seconds.
-
Page 39: Optional Component Installation Procedures
This chapter covers separately-orderable components that you may want to add or replace in your Kontron CG2100 Carrier Grade Server. Most of these components can be ordered as accessories from Kontron and some are from third party vendors. For more information about what is available from Kontron, see the CG2100 Carrier Grade Server Configuration Guide. - Page 40 Figure 25. Cable Routing Table 5. System Cables Cable Number and Name End 1 Connection End 2 Connection End 3 Connection Power Front panel SAS/SATA Power distribution distribution board backplane board...
-
Page 41: Installing Or Replacing Hard Disk Drives
Panel 4.2 Installing or Replacing Hard Disk Drives Up to six hot-swappable SAS or SATA hard disk drives can be installed in your CG2100 server. The drives go into carriers that connect to the SAS/SATA backplane board once the carriers with drives attached are inserted back into the drive bays. The CG2100 server ships with six drive carriers. -
Page 42: Installing A Hard Drive In A Carrier
Installing a Hard Drive in a Carrier 1. If a drive is already installed (that is, if you are replacing the drive), remove it by unfastening the four screws that attach the drive to the drive carrier. (Figure 27, “A”) Set the screws aside for use with the new drive. -
Page 43: Installing A Sas/Sata Control Module
Figure 29. Inserting a New Hard Drive into the Chassis 4.3 Installing a SAS/SATA Control Module Hard disk drives are not supported on the CG2100 server by default. One of two separately-orderable controller options is required. The SAS/SATA control module is the solution for basic SAS/SATA drive support. - Page 44 Figure 31. Installing the SAS/SATA Control Module in the Bracket 5. Line the SAS/SATA control module and bracket up close to the SAS/SATA backplane board and insert the SAS/SATA control module card edge into the edge connector on the backplane board. (Figure 32, “A” and “B”) Figure 32 Installing the SAS/SATA Control Module 6.
- Page 45 Figure 33. Attaching the Flex Circuit Cable 8. Place the plastic protective cover (Figure 34, “A”) over the flex cable and snap it into the grooves on the side wall (“B” and “C”) Figure 34. Installing the Flex Circuit Cable Cover 9.
-
Page 46: Installing A Hardware Raid Module
4.4 Installing a Hardware RAID Module Hard disk drives are not supported on the CG2100 server by default. One of two separately-orderable controller options is required. Hardware RAID support requires a SAS/SATA hardware RAID module, which is described in this section. -
Page 47: Installing A Raid Intelligent Battery Backup Unit (Ibbu)
2. Slide the power supply module(s) out a few inches for access to the SAS/SATA hardware RAID module bracket. 3. Unscrew the SAS/SATA RAID module sheet metal bracket. (See Figure 31, “A”) 4. If you are using an IBBU on the SAS/SATA hardware RAID module, install it now. For instructions see Section 4.5 “Installing a RAID Intelligent Battery Backup Unit (IBBU)”... -
Page 48: Adding A Second Power Supply Module
3. Secure the IBBU module to the bottom of the RAID module with the three screws in the kit packet. (Figure 39 “A”) Figure 39. Securing the IBBU to the RAID Module 4.6 Adding a Second Power Supply Module Depending on which model you order, your server has one AC or one DC power supply module. -
Page 49: Installing A Pci Riser Card
4.7 Installing a PCI Riser Card The CG2100 server does not ship with a PCI riser card, just the sheet metal bracket where the riser card and PCI add-in cards are housed. There are three different PCI riser card options that all use the same header connection on the T5520 UR server board: •... -
Page 50: Installing Pci Add-In Cards
3. Holding the riser card upside-down with the edge connector on top, line the keyhole features up with the standoffs on the bracket. (Figure 41, “A”) 4. Fasten the riser card to the bracket with the two 6/32 screws. (“B” and “C”) Torque screws to 8 lbf*in. -
Page 51: Installing A Personality Module
4.9 Installing a Personality Module The CG2100 server support three different GbE I/O modules and a SAS I/O module as separately orderable, optional accessories. For information about these options and how to order them, see the Kontron CG2100 Carrier Grade Server Configuration Guide. -
Page 52: Installing A Remote Management Module
Figure 44. Installing the Personality Module 4.10 Installing a Remote Management Module The Remote Management Module (RMM) solution for the CG2100 server has RMM3 in the iBMC on the T5520UR server board. To use the RMM3 functionality a separately orderable GCM4 NIC must be installed at the rear of the chassis. -
Page 53: Installing An Sd Flash Module
4.11 Installing an SD Flash Module The CG2100 server SD flash module supports the use of two SD flash memory card. SD flash module package includes the board, a bracket, and a USB cable. The server chassis comes with a filler panel on the front panel where the optional SD flash module bracket is installed. - Page 54 To install the SD flash module, you must first power-down the system and remove the chassis front cover and front bezel. 1. Remove the front chassis cover. For instructions, see “Removing the Front Cover” in Section 3.2. 2. Remove the front panel bezel from the chassis to access the optical device slot. 3.
- Page 55 6. Connect the USB cable to the 2x3 USB connector on the front panel board (Figure 49, “A”) Figure 49. Connecting the USB Cable 7. Insert the SD flash module bracket from the front of the chassis. (Figure 50, “A”) 8.
-
Page 56: Installing A Usb Solid-State Drive
There are two places where a solid state drive can be installed on the CG2100 server; on the front panel board and on the server board. Installing a Solid-State Drive on the Front Panel Board 1. -
Page 57: Installing A Solid-State Drive On The Server Board
Installing a Solid-State Drive on the Server Board 1. Remove the back chassis cover. For instructions, see “Removing the Back Cover” in Section 3.2. 2. Remove the riser card assembly. For instructions, see “Removing the Riser Card Assembly” in Section 3.2. 3. -
Page 58: Installing The Server Into A Rack
Configuration Guide. The latest version of the Configuration Guide is located on the Kontron support website at http://us.kontron.com/support/ (search for CG2100, click on Product Downloads, then Ordering Guide). Installation instructions are included in each of the rack mounting kits. Connecting the Power Cord NOTE: When using a rack, wait to install the power cord(s) until after the server is in the rack. - Page 59 AC overcurrent protection — When AC power is used, the server is designed for a line voltage source with up to 20 amperes of overcurrent protection per cord feed. If the power system for the equipment rack is installed on a branch circuit with more than 20 amperes of protection, you must provide supplemental protection for the server.
-
Page 60: Server Component Replacements
Server Technical Product Specification. 5.2 Replacing Fans The fan replacement spare kit for the CG2100 server contains two 60mm fans and four 80mm fans. Each fan module is exactly like the fans in the server, i.e., the bracket and plastic finger guard are attached. For ordering information, see the CG2100 Carrier Grade Server Configuration Guide. -
Page 61: Replacing 80Mm Cpu Fans
Replacing 80mm CPU Fans The four 80mm fan assemblies are located behind the front panel board. (See Figure 2, “Q”)These fans are in front of the T5520UR server board and provide cooling for the CPUs and memory DIMMs 1. Remove the front chassis cover. For instructions see “Removing the Front Cover” in Section 3.2. -
Page 62: Replacing The Bridge Board
• The flex circuit cable connection on the SAS/SATA module • The serial port connection on the bridge board CAUTION: Before replacing any of the boards on the CG2100 server, you must first take the server out of service, turn off all peripheral devices connected to the server, turn off the server by pressing the power button, and unplug the power cord(s) from the system and wall outlet. - Page 63 2. Unfasten the plastic protective cover from the flex circuit cable. (Figure 55, “A”, “B”, and “C” Figure 55. Removing the Flex Circuit Cable Cover 3. Disconnect the flex cable from the SAS/SATA module. (Figure 56, “A” and “B”) Figure 56. Disconnecting the Flex Circuit Cable Removing the Guide Bracket and Releasing the Bridge Board 1.
-
Page 64: Re-Installing The Bridge Board
3. Remove the bridge board from the chassis by opening the connector latch clips at both ends of the board to free the board. (Figure 58, “A”) The FP board connector latch clip is under the top edge of the chassis front panel. You cannot see it, but you can feel the latch and unhook it from the board. -
Page 65: Replacing The Front Panel Board
3. Re-attach the black guide bracket by fastening the two screws to the chassis base. (See Figure 57.) 4. Re-connect the serial port cable. 5. Re-connect the SAS/SATA flex cable to the SAS/SATA control module (or RAID module) and re-install the plastic protective cover and retention clip. (See Figure 33 through Figure 35 in Section 4.3 for instructions.) 6. -
Page 66: Removing The Old Front Panel Board
Front panel input power cable connector CAUTION: Before replacing any of the boards on the CG2100 server, you must first take the server out of service, turn off all peripheral devices connected to the server, turn off the server by pressing the power button, and unplug the power cord(s) from the system and wall outlet. -
Page 67: Installing The New Front Panel Board
7. Remove the USB flash memory from the FP board (if present) so it can be used on the replacement board. For more information, see Section 4.12 “Installing a Solid-State Drive on the Front Panel Board”. Installing the New Front Panel Board 1. -
Page 68: Replacing The Led/Switch Board
Section 3.2, “General Installation Procedures”. 5.5 Replacing the LED/Switch Board The LED/switch board is mounted against the front panel of the CG2100 server chassis because it supports the LEDs and switches that are on the control panel on the front of the chassis. -
Page 69: Replacing The Telco Alarms Module (Tam)
5.6 Replacing the Telco Alarms Module (TAM) The TAM board is on the right side of the CG2100 server chassis floor, just behind the front panel. Before you can replace the TAM board, you must remove the front chassis cover and black protective cover over the front panel board. -
Page 70: Installing The New Telco Alarms Module
Figure 63. Disconnecting the TAM Cables 6. Remove the TAM board from the chassis by lifting it off of the two standoffs on the left side of the board. (Figure 62 “B” and “C”) Installing the New Telco Alarms Module 1. -
Page 71: Removing The Old Power Distribution Board
-- SAS/SATA control module or SAS/SATA hardware RAID module flex circuit cable CAUTION: Before replacing any of the boards on the CG2100 server, you must first take the server out of service, turn off all peripheral devices connected to the server, turn off the server by pressing the power button, and unplug the power cord(s) from the system and wall outlet. -
Page 72: Installing The New Power Distribution Board
5.8 Replacing the T5520UR Server Board The CG2100 Carrier Grade Server uses the Intel® server board T5520UR. To replace the server board, the following components must be removed first:... -
Page 73: Removing The Old Server Board From The Chassis
• All DIMMs • Flash memory drive, if installed CAUTION: Before replacing any of the boards on the CG2100 server, you must first take the server out of service, turn off all peripheral devices connected to the server, turn off the server by pressing the power button, and unplug the power cord(s) from the system and wall outlet. -
Page 74: Installing The New Server Board
Figure 65. Removing the Server Board Installing the New Server Board 1. Set the replacement server board into place. Insert the rear edge of the board first and line up the I/O ports with the slots in the rear panel of the chassis. 2. -
Page 75: Replacing The Sas/Sata Backplane Board
• The power cable connected to the front of the backplane board CAUTION: Before replacing any of the boards on the CG2100 server, you must first take the server out of service, turn off all peripheral devices connected to the server, turn off the server by pressing the power button, and unplug the power cord(s) from the system and wall outlet. - Page 76 5. Disconnect all cables attached to the backplane board. 6. Remove the HDD bay assembly cover plate by loosening the screw that fastens it to the drive bay assembly. (Figure 67 “A”) Slide the cover plate towards the side chassis wall (“B”) to release the four tabs. (“C”) Lift the cover plate off of the HDD bay assembly.
-
Page 77: Installing The New Sas/Sata Backplane Board
Figure 68. Removing the Backplane Board Installing the New SAS/SATA Backplane Board NOTE: Make sure the six-slot HDD backplane has top and bottom insulators on the rear side of the board. 1. Slide the backplane board part way into place behind the HDD bay assembly, making sure the board fits securely between the edge of the HDD bay assembly and the guide “A”... - Page 78 Figure 70. Fastening the Backplane Board 4. Secure the six-slot HDD backplane in place by placing the cover plate over the HDD bay assembly. The cover plate goes over the HDD bay notches and then slides to the right. Re-fasten the screw that holds the cover plate in place. (See Figure 68, “A” for the location.) 5.
-
Page 79: Server Utilities
6.1 Using the BIOS Setup Utility This section describes the BIOS Setup Utility, which is used to change configuration values for the Kontron CG2100 Carrier Grade Server. You can run BIOS Setup with or without an operating system present Using BIOS Setup You may want to use BIOS Setup for the following purposes: •... - Page 80 Description ↑ Select Item up - The up arrow is used to select the previous value in a menu item’s option list, or a value field pick list. Pressing the Enter key activates the selected item. ↓ Select Item down - The down arrow is used to select the next value in a menu item’s option list, or a value field pick list.
-
Page 81: Upgrading The Bios
Description If Yes is selected and the Enter key is pressed, all changes are saved and Setup is exited. If No is selected and the Enter key is pressed, or the ESC key is pressed, you are returned to where you were before F10 was pressed without affecting any existing values. -
Page 82: Clearing The Password
3. Locate the “Restore Defaults” jumper (J1E7) as shown in Figure 24. 4. Move jumper (J1E7) from the normal position (pins 1-2) to the restore position (2- 3) and wait five seconds. 5. Move the jumper (J1E7) back to the normal position (pins 1-2). 6. -
Page 83: Bmc Force Update Procedure
3. Move the jumper (J1E8) from the normal operation position, “Password Clear Protect”, at pins 1 and 2 to the “Password Clear Erase” position, covering pins 2 and 3. 4. Reconnect the power cord(s) and power up the system. 5. Power down the system and disconnect the power cord(s). 6. -
Page 84: Troubleshooting
Troubleshooting This chapter helps you identify and solve problems that might occur while you are using the Kontron CG2100 Carrier Grade Server. For any issue, first ensure you are using the latest firmware and files. Firmware upgrades include updates for BIOS and the baseboard management controller (BMC). Go to http://us.kontron.com/products/systems+and+platforms/communication+rackmount+servers/c... -
Page 85: Hardware Diagnostic Testing
(power on light should be lit)? Are all integrated components from the tested components lists? Check the tested memory list and the supported hardware and operating system list. Go to http://us.kontron.com/products/systems+and+platforms/communication+rackmount+se rvers/carrier+grade+servers/cg2100+carrier+grade+server.html for links to the tested component lists. 7.3 Hardware Diagnostic Testing This section provides a more detailed approach to identifying a hardware problem and locating its source. -
Page 86: Specific Problems And Corrective Actions
7.4 Specific Problems and Corrective Actions This section provides possible solutions for specific problems: Try the solutions below in the order given. If you cannot correct the problem, contact your service representative or authorized dealer for help. See “Appendix C: Getting Help”... -
Page 87: System Cooling Fans Do Not Rotate Properly
Try a different network cable. Make sure you are using the correct and the current drivers. Go to http://us.kontron.com/products/systems+and+platforms/communication+rackmount+se rvers/carrier+grade+servers/cg2100+carrier+grade+server.html for a link to the drivers. Make sure the driver is loaded and the protocols are bound. -
Page 88: System Boots When Installing A Pci Card
Devices are not Recognized under Device Manager (Windows*OS) The Windows* operating systems do not include all of the drivers for the Intel ® chipsets, onboard NICs, and other components. Check the Kontron Deployment CD that came with your server or go to http://us.kontron.com/products/systems+and+platforms/communication+rackmount+servers/c arrier+grade+servers/cg2100+carrier+grade+server.html... -
Page 89: Hard Drive(S) Are Not Recognized
Make sure the drive is not disabled in BIOS Setup. Make sure the drive is compatible. Go to http://us.kontron.com/products/systems+and+platforms/communication+rackmount+se rvers/carrier+grade+servers/cg2100+carrier+grade+server.html for a link to the list tested drives. Make sure you have not exceeded the power budget for the server. Go to http://us.kontron.com/products/systems+and+platforms/communication+rackmount+se... - Page 90 Green or Green blinking = drive amber activity, no action activity* required Amber = drive fault Off = no access/no HDD fault *See CG2100 Technical Product Specification for more information about hard drive LED operation Memory fault Identify DIMM end, Amber On = fault (1 –...
-
Page 91: Bios Post Beep Codes
LED Name Function Location Color Notes on state Power LED Identify Control panel Off = power off system power (on button) (ACPI S4 or S5) state On = power on (ACPI Slow blinking = low power state (ACPI NIC1 and NIC2 Identify NIC Left and Left LED... - Page 92 Table 9. Error Beep Codes Provided by an Intel® Remote Management Module Beep Code Reason for the beeps and action to take Control panel CMOS clear has been initiated. 1-5-1-1 Processor failure. Reseat or replace the failed processor. No processor is installed or the CPU 1 socket is 1-5-2-1 empty.
-
Page 93: Warranty
Warranty This Kontron product is warranted against defects in material and workmanship for the warranty period from the date of shipment. During the warranty period, Kontron will at its discretion decide to repair or replace defective products. Within the warranty period, the repair of products is free of charge as long as warranty conditions are observed. -
Page 94: Appendix A: Safety Information
EMC compliance testing. For more information, please contact your local Kontron Representative. See Appendix B, “Regulatory and Certification Information” product Safety and EMC regulatory compliance information. This is an FCC (Federal Communications Commission) Class A device. -
Page 95: If Dc Power Supplies Are Installed
provides proper grounding only for the server. You must provide additional, proper grounding for the rack and other devices installed in it. Overcurrent protection: The server is designed for an AC line voltage source with up to 20 amperes of overcurrent protection per cord feed. If the power system for the equipment rack is installed on a branch circuit with more than 20 amperes of protection, you must provide supplemental protection for the server. -
Page 96: Temperature And Ventilation
Temperature and Ventilation CAUTION: Temperature -- The temperature, in which the server operates when installed in an equipment rack, must not go below 5°C (41°F) or rise above 35°C (95°F). Extreme fluctuations in temperature can cause a variety of problems in your server. -
Page 97: Wichtige Sicherheitshinweise
padlock has been installed. 2. Remove and save all screws from the covers. 3. Remove the covers. 4. Do not operate the system with the chassis covers removed. For proper cooling and airflow, always reinstall the chassis covers before turning on the system. Operating the system without the covers in place can damage system parts. - Page 98 Benutzer können am Netzgerät dieses Produkts keine Reparaturen Produkt enthält möglicherweise mehrere Netzgeräte. Wartungsarbeiten müssen von vornehmen. Das qualifizierten Technikern ausgeführt werden. Versuchen Sie nicht, das mitgelieferte Netzkabel zu ändern oder zu verwenden, wenn es sich nicht genau um den erforderlichen Typ handelt. Ein Produkt mit mehreren Netzgeräten hat für jedes Netzgerät ein eigenes Netzkabel.
-
Page 99: Consignes De Sécurité
ordnungsgemäßen Sitz und Installation. 3. Bringen Sie die Abdeckungen wieder am Gehäuse an, indem Sie die zuvor gelösten Schrauben wieder anbringen. Ziehen Sie diese gut an. 4. Bringen Sie die Verschlußeinrichtung (Padlock) wieder an und schließen Sie diese, um ein unerlaubtes Öffnen des Systems zu verhindern. - Page 100 de problème. Ne pas essayer d’utiliser ni modifier le câble d’alimentation CA fourni, s’il ne correspond pas exactement au type requis. Le nombre de câbles d’alimentation CA fournis correspond au nombre de blocs d’alimentation du produit. Notez que le commutateur CC de mise sous tension /hors tension du panneau avant n’éteint pas l’alimentation CA du système.
-
Page 101: Instrucciones De Seguridad Importantes
plus tôt. 4. Remettez le cadenas en place et verrouillez-le afin de prévenir tout accès non autorisé à l’intérieur du système. 5. Rebranchez tous les cordons d’alimentation c. a. et câbles externes ausystème. Le microprocesseur et le dissipateur de chaleur peuvent être chauds si le système a été... - Page 102 No intente modificar ni usar el cable de alimentación de corriente alterna, si no corresponde exactamente con el tipo requerido. El número de cables suministrados se corresponden con el número de fuentes de alimentación de corriente alterna que tenga el producto. Nótese que el interruptor activado/desactivado en el panel frontal no desconecta la corriente alterna del sistema.
- Page 103 5. Conecte todos los cables externos y los cables de alimentación CA al sistema. Si el sistema ha estado en funcionamiento, el microprocesador y el disipador de calor pueden estar aún calientes. También conviene tener en cuenta que en el chasis o en el tablero puede haber piezas cortantes o punzantes.
- Page 104 L’interruttore attivato/disattivato nel pannello anteriore non interrompe l’alimentazione in c.a. del sistema. Per interromperla, è necessario scollegare tutti I cavi di alimentazione in c.a. dalle prese a muro o dall’alimentazione di corrente. PASSI DI SICUREZZA: Qualora si rimuovano le coperture del telaio per accedere all’interno del sistema, seguire i seguenti passi: 1.
- Page 105 Se il sistema è stato a lungo in funzione, il microprocessore e il dissipatore di calore potrebbero essere surriscaldati. Fare attenzione alla presenza di piedini appuntiti e parti taglienti sulle schede e sul telaio. È consigliabile l’uso di guanti di protezione. Esiste il pericolo di un esplosione se la pila non viene sostituita in modo corretto.
-
Page 106: Appendix B: Regulatory And Certification Information
10 Appendix B: Regulatory and Certification Information 10.1 Product Regulatory Compliance Product Safety Compliance The Carrier Grade server complies with the following safety requirements: • UL60950-1 /CSA 60950-1 (USA / Canada) • EN60950-1 (Europe) • IEC60950-1 (International), CB Certificate & Report including all international deviations •... -
Page 107: Electromagnetic Compatibility Notices
(1) this device may not cause harmful interference, and (2) this device must accept any interference received, including interference that may cause undesired operation. For questions related to the EMC performance of this product, contact: Kontron America, Inc. 14118 Stowe Drive Poway, CA 92064-7147 (888) 294-4558 This equipment has been tested and found to comply with the limits for a Class A digital device, pursuant to Part 15 of the FCC Rules. -
Page 108: Vcci (Japan)
VCCI (Japan) English translation of the notice above: This is a Class A product based on the standard of the Voluntary Control Council for Interference (VCCI) from Information Technology Equipment. If this is used near a radio or television receiver in a domestic environment, it may cause radio interference. -
Page 109: Appendix C: Getting Help
11 Appendix C: Getting Help 11.1 World Wide Web Technicians and engineers from Kontron and/or its subsidiaries are available for technical support. We are committed to making our product easy to use and will help you use our products in your systems. -
Page 110: Corporate Offices
188 Southern West 4th 85386 Eching/Munich Ring Germany Tel.: +1 888 294 4558 Road Tel.: +49 (0)8165/ 77 Fax: +1 858 677 0898 Beijing 100070, P.R.China info@us.kontron.com Fax: +49 (0)8165/ 77 Tel.: + 86 10 63751188 Fax: + 86 10 83682438 info@kontron.com info@kontron.cn...
Need help?
Do you have a question about the CG2100 and is the answer not in the manual?
Questions and answers