
Related Manuals for Kontron ME1310


Summary of Contents for Kontron ME1310
- Page 1 User Documentation - ME1310 User Documentation - ME1310 Version 1.0 (March 2023) www.kontron.com // 1...
- Page 2 Table of contents Table of contents User Documentation - ME1310 Product description Revision history Warranty and support Safety and regulatory information Overview Specifications Platform components Product architecture Description of system access methods Recommended technical expertise Planning Environmental considerations Power consumption and power budget...
- Page 3 Sending a BREAK signal over a serial connection Disabling sleep states in Linux Application notes Generating custom secure boot keys Provisioning custom secure boot keys Reference guides Supported Redfish commands Supported IPMI commands Document symbols and acronyms Version 1.0 (March 2023) www.kontron.com // 3...
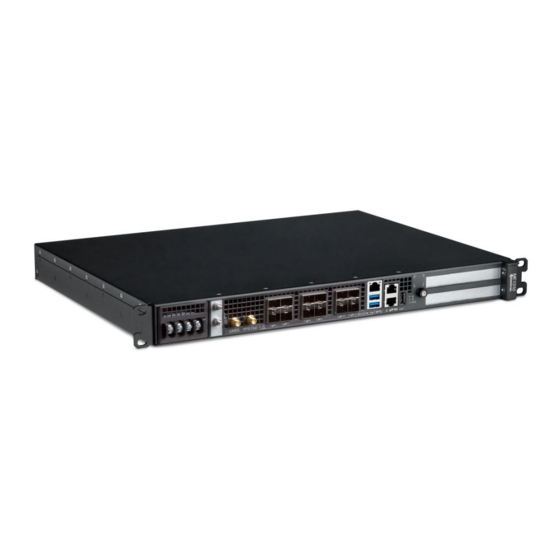
- Page 4 ME1310 flexible edge server for rapid deployment of telecom and 5G services The Kontron ME1310 high performance 1U edge server is a d istributed unit for wide temperature ranges . The ME1310 is used for RAN or multi-access edge computing (MEC). This platform has more cores, more memory and an increased density.
- Page 5 Revision history Revision history Revision Revision Brief description of changes Brief description of changes Date of issue Date of issue First client release March 2023 Version 1.0 (March 2023) www.kontron.com // 5...
- Page 6 Disclaimer Kontron would like to point out that the information contained in this manual may be subject to alteration, particularly as a result of the constant upgrading of Kontron products. This document does not entail any guarantee on the part of Kontron with respect to technical processes described in the manual or any product characteristics set out in the manual.
- Page 7 The presence of this logo on the product means it should not be disposed of as unsorted waste and must be collected separately. Dispose of this product according to the appropriate local rules, regulations and laws. WEEE directive logo WEEE directive logo General power safety warnings and cautions General power safety warnings and cautions Version 1.0 (March 2023) www.kontron.com // 7...
- Page 8 Always maintain reliable grounding of rack-mounted equipment. Earth ground lug location Earth ground lug location Regulatory specifications Regulatory specifications The platform meets the requirements of the following regulatory tests and standards: Safety compliance Safety compliance Version 1.0 (March 2023) www.kontron.com // 8...
- Page 9 Equipment Directive 2014/53/EU, EN 301 489-1 and EN 303 413. International International This product complies with CISPR 32 Class A and CISPR 35. Japan Japan This product complies with VCCI Class A. Note for Japan AC input rating is 90-130 VAC. Version 1.0 (March 2023) www.kontron.com // 9...
- Page 10 Overview Overview Version 1.0 (March 2023) www.kontron.com // 10...
- Page 11 Specifications Specifications Table of contents ME1310 key hardware features ME1310 key software features ME1310 physical dimensions ME1310 packaging physical dimensions ME1310 shipping weights ME1310 environmental specifications ME1310 key hardware features ME1310 key hardware features Feature Feature Description Description Hardware platform High-performance server for radio access network (RAN) and multi-access edge computing (MEC) Rackmount, 1U height, 13.5 inches deep, 19 inches wide...
- Page 12 Body Side clearance None Front clearance 100 [4] Recommended Rear clearance 70 [2.8] ME1310 packaging physical dimensions ME1310 packaging physical dimensions Depth (mm [in]) Depth (mm [in]) Width (mm [in]) Width (mm [in]) Height (mm [in]) Height (mm [in]) 489 [19.25] 571.5 [22.5]...
- Page 13 Certain limitations may apply. These limitations could be the result of the operating temperature range of installed configurable components (e.g., SFP+ module, SSD and PCIe add-in card). Kontron only supports using SFP+ and SSD modules rated for an industrial operating temperature range (-40 º C to +85 º C).
- Page 14 Platform front panel Platform front panel The ME1310 platform is available with a DC or AC power supply. To simplify documentation, only the DC version is shown here. For information on component pinouts, refer to Connector pinouts and electrical characteristics...
- Page 15 (right – green) State State No link On (no activity) 10Base-T link established Blinking (activity) Yellow On On (no activity) 100Base-TX link established Blinking (activity) Green On On (no activity) 1000Base-T link established Blinking (activity) Version 1.0 (March 2023) www.kontron.com // 15...
- Page 16 Blinking (green or amber based on port speed) Activity No link Pass-through module Pass-through module This option is planned for development. Please contact Kontron sales Power supply LEDs Power supply LEDs DC power supply DC power supply Output status/operation (amber/green)
- Page 17 The part number A description of the product including configurable options The manufacturing batch number Here is an example of the information that could be displayed: Kontron part # = 1069-1291 Kontron product name = ME1210BX-BCDDBXX ZZXX1234HH (XX) = 01A0001100 Relevant section:...
- Page 18 IO module option This option is planned for development. Please contact Kontron sales Network planes Network planes The ME1310 platform provides: 3 network planes 3 network planes (management plane, control plane, data plane) Version 1.0 (March 2023) www.kontron.com // 18...
- Page 19 Ethernet switch IO module option Internal connections with the p ass-through IO module option Internal connections with the p ass-through IO module option This option is planned for development. Please contact Kontron sales Version 1.0 (March 2023) www.kontron.com // 19...
- Page 20 Paths to the UEFI/BIOS options Paths to the switch network operating system (NOS) To configure, monitor and troubleshoot the ME1310 platform and its components, several interfaces can be used: Management interface (BMC) Management interface (BMC) – through the management plane and the data plane of the platform Operating system Operating system –...
- Page 21 Accessible from the data plane. SSH from the integrated server SSH from the integrated server Local access to the s witch NOS for control and Accessible locally from the server operating system. monitoring Version 1.0 (March 2023) www.kontron.com // 21...
- Page 22 It is recommended that you identify the appropriate upstream topology with the help of the IT/network personnel managing the upstream network hardware and configuration. This will facilitate the process down the road. IP addresses will also need to be assigned based on known MAC addresses, so appropriate IT expertise is required. Version 1.0 (March 2023) www.kontron.com // 22...
- Page 23 Planning Planning Version 1.0 (March 2023) www.kontron.com // 23...
- Page 24 Environmental considerations The ME1310 platform has been designed to work over the extended temperature range of -40⁰C to +65⁰C (-40⁰F to +149⁰F) when using a DC power supply or - 5⁰C to +50⁰C (23⁰F to +122⁰F) when using an AC power supply and to withstand non-condensing humidity levels up to 95%. This equipment should not be exposed directly to the elements (sun, rain, wind, dust).
- Page 25 System power consumption System power consumption The following ME1310 configuration was used to obtain the typical power consumption values shown in the table below: Xeon® D-2796NT processor Ethernet switch IO module with standard OCXO Eight 64 GB LRDIMM One 128 GB M.2 SATA module...
- Page 26 Connection is link up with partner device 10GBASE-SR SFP+ Connection is link up with partner device If all the optional components are used and operate at maximum power, the system co uld exceed its maximum power consumption. Version 1.0 (March 2023) www.kontron.com // 26...
- Page 27 Reserved MAC for switch network operating system. SW_MAC_BASE + Pass-through IO module option Pass-through IO module option This option is planned for development. Please contact Kontron sales Discovering the platform MAC addresses Discovering the platform MAC addresses The platform MAC addresses can be discovered: Using the...
- Page 28 NOTE: When the platform is powered up after being shut off, the UEFI/BIOS may load before the BMC has received its IP address. In this case, the UEFI/BIOS menu information will need to be refreshed by restarting the server and re-entering the UEFI/BIOS . Version 1.0 (March 2023) www.kontron.com // 28...
- Page 29 8086 18df SMBus Intel Corporation Device 00:1f.5 8086 18e0 Serial bus controller Intel Corporation Device 00:1f.7 8086 18e1 Non-Essential Intel Corporation Device Instrumentation 01:00.0 1d79 2263 Non-Volatile memory Transcend Information, Inc. Device controller Version 1.0 (March 2023) www.kontron.com // 29...
- Page 30 Intel Corporation Device fe:0b.2 8086 344b System peripheral Intel Corporation Device fe:0c.0 8086 344a Performance Intel Corporation Device counters fe:0d.0 8086 344a Performance Intel Corporation Device counters fe:1a.0 8086 2880 Performance Intel Corporation Device counters Version 1.0 (March 2023) www.kontron.com // 30...
- Page 31 Intel Corporation Device ff:1e.4 8086 345c System peripheral Intel Corporation Device ff:1e.5 8086 345d System peripheral Intel Corporation Device ff:1e.6 8086 345e System peripheral Intel Corporation Device ff:1e.7 8086 345f System peripheral Intel Corporation Device Version 1.0 (March 2023) www.kontron.com // 31...
- Page 32 Pass-through IO module option Pass-through IO module option This option is planned for development. Please contact Kontron sales Description, pinout and electrical characteristics of external connectors Description, pinout and electrical characteristics of external connectors This section describes the following connectors and lists their pinouts and electrical characteristics: SMA GNSS RF input –...
- Page 33 Suitable for use with 50 ohms to ground terminated loads: > 1.2 V < 0.3 V PPS rising edge (at SMA) aligned within ± 5 ns from internal time of day (ToD) counter RJ45 alarm port RJ45 alarm port Description: Description: Version 1.0 (March 2023) www.kontron.com // 33...
- Page 34 Mating connector: Pass-through IO module option Pass-through IO module option This option is planned for development. Please contact Kontron sales Description: Description: The SFP+ and SFP28 interfaces are standardized and are compliant to the following (non exhaustive): SFF-8431, SFF-8432 (SFP+) SFF-8402 (SFP28) Version 1.0 (March 2023)
- Page 35 -40.0 V to -56.7 V continuous operating voltage Internal fuses (30 A on RTN_A and RTN_B; 25 A on -48V_A, -48V_B) Inrush and over-current protection with active hot-swap controller Includes surge protection (IEC 61000-4-5 class 2, 1kV) Version 1.0 (March 2023) www.kontron.com // 35...
- Page 36 The AC power input has the following basic characteristics (refer to Murata documentation for component D1U54P-W-650-12-HB4C for more details): 90 to 264 VAC, 47 to 63 Hz Inrush limited (25 Apk) 80 plus platinum efficiency Includes surge protection (IEC 61000-4-5 class 3, 2kV) Version 1.0 (March 2023) www.kontron.com // 36...
- Page 37 For a list of compatible components, refer to the Hardware compatibility list Optional adapter Optional adapter Item_1 RJ45 to DB9 serial adapter (Kontron P/N: 1015-9404) Component installation and assembly Component installation and assembly PCIe add-in card PCIe add-in card Refer to...
- Page 38 Panduit Hand Crimp Tool (638130400) Item_5 One 8 AWG ground cable based on the length required Item_6 One ground lug right angle, 8 AWG (Kontron P/N 1064-4226) Item_7 One hand crimp tool, Panduit CT-1700 Item_8 7 mm wrench or equivalent tool...
- Page 39 Platform, modules and accessories Platform, modules and accessories Relevant section: Relevant section: Components installation and assembly This section provides the complete list of compatible parts and components that can be ordered from Kontron. Description Description Kontron Kontron Illustration Illustration RJ45 to DB9 serial adapter 1015-9404 C13 to CEE 7/7 European AC power cord, 10A/250 VAC, 1.8 m...
- Page 40 Smart Modular Technology STI8197RD440425-SA Active 1068-6291 *ME1310 platforms support DDR4 speeds of up to 2933 SFP, SFP+ and SFP28 industrial modules (-40°C to 85°C) SFP, SFP+ and SFP28 industrial modules (-40°C to 85°C) Modules shall be tested: With the Ethernet switch IO module in ports configured to support the module speed grade...
- Page 41 Status Status CentOS 7.8 PLANNED PLANNED RHEL 7.8 PLANNED PLANNED RHEL 8.2 PLANNED PLANNED SUSE EL 15 SP2 PLANNED PLANNED Ubuntu 18.04 PLANNED PLANNED Ubuntu 20.04 PLANNED PLANNED VMWare ESXi 6.7 PLANNED PLANNED Version 1.0 (March 2023) www.kontron.com // 41...
- Page 42 The platform features a Trusted Platform Module (TPM). Determine your requirement with regards to hardware-based, security-related functions. Refer to Configuring the TPM in section Configuring UEFI/BIOS options For more information on security features, contact Kontron. Version 1.0 (March 2023) www.kontron.com // 42...
- Page 43 Getting started Getting started Version 1.0 (March 2023) www.kontron.com // 43...
- Page 44 Introduction Introduction This getting started section describes the network integration, platform access and operating system installation steps required to start operating an ME1310 platf orm equipped with one or two PCIe add-in cards provided b y the customer and o ne 128GB M.2 SATA drive,...
- Page 45 Unboxing the platform Unboxing the platform What's in the box What's in the box The box includes one ME1310 multi-access edge computing 1U platform one ME1310 multi-access edge computing 1U platform . Step_1 Carefully remove the platform from its packaging.
- Page 46 > You now have the material and software required. Proceed with the installation of the PCIe add-in card(s). Installing one or two PCIe add-in cards and thermal probes in an ME1310 Installing one or two PCIe add-in cards and thermal probes in an ME1310 Version 1.0 (March 2023)
- Page 47 Installing one or two thermal probes for the PCIe add-in cards Installing one or two thermal probes for the PCIe add-in cards Locating the thermal probe connections Locating the thermal probe connections There are three thermal probe connectors on an ME1310. Location Location Reference designator...
- Page 48 Connecting one or two PCIe Connecting one or two PCIe add-in cards add-in cards The maximum form factor of the optional PCIe add-in cards is full-height, three-quarter length (FH3/4L). Version 1.0 (March 2023) www.kontron.com // 48...
- Page 49 Step_4 Carefully insert the PCIe assembly into the unit and fasten the two thumbscrews (6 lbf·in torque). Connect the intrusion detection switch wire near the front of the chassis. Closing the chassis Closing the chassis Version 1.0 (March 2023) www.kontron.com // 49...
- Page 50 (e.g. Panduit CT-1700 crimp tool set at: Color Code = Red; Die Index No. = P21). Step_7 Install the ground lug on the studs, fastening with the 2 nuts and washers. NOTE: NOTE: The thread of the two chassis ground lugs is M4x0.7. Version 1.0 (March 2023) www.kontron.com // 50...
- Page 51 (green power LED). > You are now ready to discover IP addresses. > You are now ready to discover IP addresses. Discovering the BMC IP address Discovering the BMC IP address Version 1.0 (March 2023) www.kontron.com // 51...
- Page 52 NOTE: PuTTY is recommended. NOTE: Relevant sections: Relevant sections: Accessing the UEFI or BIOS Sending a BREAK signal over a serial connection Port location Port location Accessing the UEFI/BIOS setup menu Accessing the UEFI/BIOS setup menu Version 1.0 (March 2023) www.kontron.com // 52...
- Page 53 Step_5 The UEFI/BIOS setup menu is displayed. Accessing the BMC network configuration menu Accessing the BMC network configuration menu NOTE: In an ME1310 platform, LAN channel 1 corresponds to port Srv 5, the RJ45 connector. NOTE: Version 1.0 (March 2023) www.kontron.com...
- Page 54 Relevant sections: Relevant sections: Default user names and passwords Accessing the switch NOS Procedure Procedure NOTE: When using Serial over SSH, to quit the session press Enter NOTE: Enter followed by ~ ~ . Version 1.0 (March 2023) www.kontron.com // 54...
- Page 55 NOTE: The procedure may vary depending on the browser used. Examples provided use Firefox. NOTE: Connecting to the Web UI of the BMC Connecting to the Web UI of the BMC Version 1.0 (March 2023) www.kontron.com // 55...
- Page 56 It is recommended to change the administrator password immediately after accessing the Web UI. Launching the KVM Launching the KVM The Web UI allows remote control of the server through a KVM (Keyboard, Video, Mouse) interface. Version 1.0 (March 2023) www.kontron.com // 56...
- Page 57 Click on Start Start to access virtual media from the OS. Accessing the UEFI/BIOS setup menu Accessing the UEFI/BIOS setup menu Step_1 From the BMC Web UI, click on the Power Power button. Version 1.0 (March 2023) www.kontron.com // 57...
- Page 58 “Entering Setup…”. Step_5 The UEFI/BIOS sign on screen displays “Entering Setup…”. NOTE: NOTE: It may take several seconds to display and enter the UEFI/BIOS setup menu. Step_6 The UEFI/BIOS setup menu will be displayed. Version 1.0 (March 2023) www.kontron.com // 58...
- Page 59 LocalServer_OSPrompt:~# lsblk lsblk Step_6 Confirm the control plane network interface controller is loaded by the igb driver. LocalServer_OSPrompt:~# lspci -s 04:00 -v lspci -s 04:00 -v NOTE: NOTE: You should discover one 1GbE NIC. Version 1.0 (March 2023) www.kontron.com // 59...
- Page 60 The key sensors to look at are the following: Temperature sensors Power sensors Relevant sections: Relevant sections: Accessing a BMC Monitoring sensors Monitoring platform sensors using the Web UI Monitoring platform sensors using the Web UI Version 1.0 (March 2023) www.kontron.com // 60...
- Page 61 Step_2 From the left-side menu, click on Hardware status Hardware status and then Sensors Sensors . Step_3 The sensor list will be displayed. Scroll down to see the list of sensors or use the dedicated search bar to filter the sensors. Version 1.0 (March 2023) www.kontron.com // 61...
- Page 62 Mechanical installation and precautions Mechanical installation and precautions Version 1.0 (March 2023) www.kontron.com // 62...
- Page 63 Keep a part of your body (e.g. a hand) in contact with the metal chassis to dissipate the static charge while handling the electronic component. Avoid moving around unnecessarily. Use a ground strap attached to the front panel (with the bezel removed). Read and follow the safety precautions provided for a specific component by the manufacturer. Version 1.0 (March 2023) www.kontron.com // 63...
- Page 64 Unboxing Unboxing What's in the box What's in the box The box includes one ME1310 multi-access edge computing 1U platform one ME1310 multi-access edge computing 1U platform . Step_1 Carefully remove the platform from its packaging. Step_2 Remove the plastic film from the platform. Failure to do so may affect platform airflow efficiency, thus resulting in poor cooling Failure to do so may affect platform airflow efficiency, thus resulting in poor cooling capabilities.
- Page 65 ESD protections Disconnect the power supply cord before servicing the product to avoid electric shock. If the product has more than one power supply cord, disconnect them all. Opening the enclosure Opening the enclosure Version 1.0 (March 2023) www.kontron.com // 65...
- Page 66 For the thermal probe part number, refer to Platform, modules and accessories ( ( Optional) Optional) Locating the thermal probe connection Locating the thermal probe connection There are three thermal probe connectors on an ME1310. Location Location Reference designator Reference designator...
- Page 67 NOTE: Configuration will be performed once the platform is operational (thresholds, specific software configurations, etc.). Step_3 Repeat steps 1 and 2 if two thermal probes must be installed. Installing a PCIe add-in card Installing a PCIe add-in card Version 1.0 (March 2023) www.kontron.com // 67...
- Page 68 PCIe add-in card software installation instructions. Installing an M.2 storage Installing an M.2 storage Up to four M.2 storage drives can be installed in an ME1310. For the list of tested M.2 storages, refer to Hardware compatibility list Locating the M.2 storage...
- Page 69 Put the screw and washer back in place and tighten (2 lbf·in torque) Installing DIMMs Installing DIMMs Up to eight DIMMs can be installed in an ME1310. For the list of tested DIMMs, refer to Hardware compatibility list Locating the DIMMs Locating the DIMMs Version 1.0 (March 2023)
- Page 70 Step_5 Visually inspect each lever to ensure they are fully closed and correctly engaged with the notches on the DIMM edge. (E) Replacing fans Replacing fans There are eight fans in this platform. Locating the fans Locating the fans Replacing a fan Replacing a fan Version 1.0 (March 2023) www.kontron.com // 70...
- Page 71 Place the cover onto the chassis. Step_2 Loosely fit all M3 flat head screws: 5 on top 8 per side (16 total) 7 in the back Using a T10 Torx screwdriver, tighten all the screws (6 lbs-in torque). Version 1.0 (March 2023) www.kontron.com // 71...
- Page 72 Airflow Airflow The ME1310 platform features a front to back air flow system. To optimize heat transfer, refer to the Specifications section for the ideal clearances. Version 1.0 (March 2023) www.kontron.com // 72...
- Page 73 Rack installation Rack installation Installing an ME1310 pla tform in a 19-in rack Installing an ME1310 pla tform in a 19-in rack Ensure there is no physical obstruction that would hinder proper airflow when choosing a location for the platform in the rack.
- Page 74 Material required Material required Kontron suggests using crimp lugs (ring or spade crimp lug, straight, isolated, UL94V-0) on the power cables. Connect the appropriate cable to the appropriate polarity. Use appropriate wire gauge for -48V DC and RTN based on cable specifications and local electrical code.
- Page 75 LNA is used. Step_2 Follow the RF splitter documentation to connect the antenna. Connecting to an external antenna Connecting to an external antenna Version 1.0 (March 2023) www.kontron.com // 75...
- Page 76 Step_5 Use a high quality, 50-ohm coaxial cable, such as LMR-400, from the grounding bloc and surge protector to the platform. This cable needs an SMA connection on the platform side. Version 1.0 (March 2023) www.kontron.com // 76...
- Page 77 Accessing platform components Accessing platform components Version 1.0 (March 2023) www.kontron.com // 77...
- Page 78 NOTE: The procedure may vary depending on the browser used. Examples provided use Firefox. NOTE: Access procedure Access procedure To obtain the list of default user names and passwords, refer to Default user names and passwords Version 1.0 (March 2023) www.kontron.com // 78...
- Page 79 A JSON parsor command-line tool such as jq jq is installed. Relevant sections: Relevant sections: Discovering platform IP addresses Configuring and managing users (if a password needs to be changed) Creating the Redfish ROOT_URL Creating the Redfish ROOT_URL Version 1.0 (March 2023) www.kontron.com // 79...
- Page 80 Accessing a BMC via the internal Redfish host interface BMC Redfish resources can be accessed locally by the integrated server using the internal, private, Redfish Host Interface. In the ME1310, this is implemented using a USB-LAN interface. Most modern Linux operating systems should have built-in support for this USB-LAN device.
- Page 81 Access procedure Step_1 From a remote computer that has access to the server OS through SSH, RDP or the platform serial port, enter the desired command. LocalServer_OSPrompt:~# ipmitool [IPMI command] ipmitool [IPMI command] Version 1.0 (March 2023) www.kontron.com // 81...
- Page 82 Cookies must be enabled in order to access the website. For further information about enabling cookies, please refer to your Web browser's documentation. NOTE: The procedure may vary depending on the browser used. Examples provided use Firefox. NOTE: Access procedure Access procedure Version 1.0 (March 2023) www.kontron.com // 82...
- Page 83 Step_5 You now have access to the management Web UI of the BMC. You can use the interface. Launching the KVM Launching the KVM NOTE: The KVM sometimes loses connection. Simply refresh the Web browser page to establish the connection. NOTE: Version 1.0 (March 2023) www.kontron.com // 83...
- Page 84 The remote computer has access to the management network subnet. Redirection to the serial port is configured in the OS. NOTE: NOTE: If the OS was installed by Kontron, console redirection is enabled by default. Relevant sections: Relevant sections: Accessing a BMC...
- Page 85 Step_4 Log in to the BMC Web UI using the appropriate credentials. Step_5 You now have access to the management Web UI of the BMC. You can use the interface. Launching the Web UI SOL console Launching the Web UI SOL console Version 1.0 (March 2023) www.kontron.com // 85...
- Page 86 NOTE: PuTTY is recommended for Windows environments and SSH is recommended for Linux environments. NOTE: Redirection to the serial port is configured in the OS. NOTE: If the OS was installed by Kontron, console redirection is enabled by default. NOTE: Relevant sections:...
- Page 87 Recommended emulation mode: VT100+ NOTE: NOTE: PuTTY is recommended. Redirection to the serial port is configured in the OS. NOTE: NOTE: If the OS was installed by Kontron, console redirection is enabled by default. Version 1.0 (March 2023) www.kontron.com // 87...
- Page 88 Using a serial console tool, establish communication using the parameters provided. Press Enter Enter . Step_3 The OS start screen will be displayed. NOTE: If the OS is not displayed, perform a server reset. Refer to NOTE: Platform power management Version 1.0 (March 2023) www.kontron.com // 88...
- Page 89 Cookies must be enabled in order to access the website. For further information about enabling cookies, please refer to your Web browser's documentation. NOTE: The procedure may vary depending on the browser used. Examples provided use Firefox. NOTE: Access procedure Access procedure Version 1.0 (March 2023) www.kontron.com // 89...
- Page 90 Step_5 You now have access to the management Web UI of the BMC. You can use the interface. Accessing the UEFI/BIOS setup menu using SOL using the Web UI Accessing the UEFI/BIOS setup menu using SOL using the Web UI Version 1.0 (March 2023) www.kontron.com // 90...
- Page 91 NOTE: It may take several seconds to display and enter the UEFI/BIOS setup menu. Step_6 The UEFI/BIOS setup menu will be displayed. Accessing the UEFI or BIOS using the KVM Accessing the UEFI or BIOS using the KVM Version 1.0 (March 2023) www.kontron.com // 91...
- Page 92 Web UI of this interface. Step_4 Log in to the BMC Web UI using the appropriate credentials. Step_5 You now have access to the management Web UI of the BMC. You can use the Version 1.0 (March 2023) www.kontron.com // 92...
- Page 93 NOTE: It may take a few seconds for the UEFI/BIOS sign on screen to display the confirmation message “Entering Setup…”. Step_5 The UEFI/BIOS sign on screen displays “Entering Setup…”. NOTE: NOTE: It may take several seconds to display and enter the UEFI/BIOS setup menu. Version 1.0 (March 2023) www.kontron.com // 93...
- Page 94 NOTE: PuTTY is recommended for Windows environments and SSH is recommended for Linux environments. Relevant sections: Relevant sections: Discovering platform IP addresses Common software installation Accessing a BMC Default user names and passwords Version 1.0 (March 2023) www.kontron.com // 94...
- Page 95 4 A community version of ipmitool is installed on a remote computer to enable remote monitoring—it is recommended to use ipmitool version 1.8.18. Relevant sections: Relevant sections: Discovering platform IP addresses Common software installation Access procedure Access procedure To obtain the list of default user names and passwords, refer to Default user names and passwords Version 1.0 (March 2023) www.kontron.com // 95...
- Page 96 Parity: None Flow Control: None Recommended emulation mode: VT100+ NOTE: PuTTY is recommended. NOTE: Relevant sections: Relevant sections: Common software installation Sending a BREAK signal over a serial connection Port location Port location Version 1.0 (March 2023) www.kontron.com // 96...
- Page 97 "Entering Setup…". Step_4 The UEFI/BIOS sign on screen displays "Entering Setup…". NOTE: NOTE: It will take several seconds to display and enter the UEFI/BIOS setup menu. Step_5 The UEFI/BIOS setup menu is displayed. Version 1.0 (March 2023) www.kontron.com // 97...
- Page 98 NOTE: The procedure may vary depending on the browser used. Examples provided use Firefox. NOTE: Access procedure Access procedure To obtain the list of default user names and passwords, refer to Default user names and passwords Version 1.0 (March 2023) www.kontron.com // 98...
- Page 99 Accessing the BMC of the server for which you want to access the NOS Accessing the BMC of the server for which you want to access the NOS To obtain the list of default user names and passwords, refer to Default user names and passwords Version 1.0 (March 2023) www.kontron.com // 99...
- Page 100 Step_4 Log in to the BMC Web UI using the appropriate credentials. Step_5 You now have access to the management Web UI of the BMC. You can use the interface. Launching the Web UI SOL console Launching the Web UI SOL console Version 1.0 (March 2023) www.kontron.com // 100...
- Page 101 Use the appropriate credentials to complete login to the NOS. Accessing the switch NOS CLI using SSH from a remote computer Accessing the switch NOS CLI using SSH from a remote computer Prerequisites Prerequisites Version 1.0 (March 2023) www.kontron.com // 101...
- Page 102 Access the integrated server operating system using the preferred method. Step_2 Using an SSH client tool, open an SSH session with the following parameter: Switch NOS IP address Log in the switch NOS CLI using the appropriate credentials. Version 1.0 (March 2023) www.kontron.com // 102...
- Page 103 Discovering the platform BMC IP address using the UEFI or BIOS Accessing the UEFI/BIOS using a s erial console (physical connection) Accessing the UEFI/BIOS using a s erial console (physical connection) Prerequisites Prerequisites Version 1.0 (March 2023) www.kontron.com // 103...
- Page 104 Recommended emulation mode: VT100+ NOTE: PuTTY is recommended. NOTE: Relevant section: Relevant section: Sending a BREAK signal over a serial connection Port location Port location Accessing the UEFI/BIOS setup menu Accessing the UEFI/BIOS setup menu Version 1.0 (March 2023) www.kontron.com // 104...
- Page 105 Front panel Srv 5 Internal server port 4 → switch port 16 * LAN channel 2 eth1 * The BMC can then communicate through SFP ports Sw 1 to 12, depending on switch configuration. Version 1.0 (March 2023) www.kontron.com // 105...
- Page 106 The MAC address is known for the BMC interface connected to the network for which the IP address is required. Relevant section: Relevant section: MAC addresses (to find the first assigned BMC MAC address) Procedure Procedure Version 1.0 (March 2023) www.kontron.com // 106...
- Page 107 An SSH client tool is installed on the remote computer. NOTE: NOTE: PuTTY is recommended for Windows environments and SSH is recommended for Linux environments. Relevant sections: Relevant sections: Default user names and passwords Accessing the switch NOS Version 1.0 (March 2023) www.kontron.com // 107...
- Page 108 Linux DHCP server network interface name 172.16.211.126 172.16.211.126 IP address assigned to the device by the DHCP server IP address assigned to the device by the DHCP server 172.16.0.10 Linux DHCP server IP address Version 1.0 (March 2023) www.kontron.com // 108...
- Page 109 User name Password Password admin ready2go Operating system Operating system The user name and password are application-specific. However, if Kontron provided an operating system, the credentials will be the following: User name User name Password Password root kontron UEFI/BIOS UEFI/BIOS No default password is set.
- Page 110 Software installation and deployment Software installation and deployment Version 1.0 (March 2023) www.kontron.com // 110...
- Page 111 Step_3 If applicable, download the ISO file of the OS to be installed. For a list of known compatible operating systems, refer to Validated operating systems For information on components, refer to the PCI mapping Version 1.0 (March 2023) www.kontron.com // 111...
- Page 112 Operations and then on KVM KVM . Step_2 A new browser window opens and displays the virtual server screen. Mounting the operating system image via virtual media Mounting the operating system image via virtual media Version 1.0 (March 2023) www.kontron.com // 112...
- Page 113 NOTE: When a reset server command is launched, it may take a few seconds for the UEFI/BIOS sign on screen to display. NOTE: NOTE: It may take a few seconds for the UEFI/BIOS sign on screen to display Version 1.0 (March 2023) www.kontron.com // 113...
- Page 114 Enter . The server will reboot and the media installation process will start. Completing operating system installation Completing operating system installation Step_1 Complete the installation by following the on-screen prompts of the specific OS installed. Version 1.0 (March 2023) www.kontron.com // 114...
- Page 115 Installing an OS on a server using a USB storage device Installing an OS on a server using a USB storage device Relevant sections: Relevant sections: Accessing the UEFI or BIOS Platform power management Version 1.0 (March 2023) www.kontron.com // 115...
- Page 116 Power on the platform and access the UEFI/BIOS setup menu. Step_4 Navigate to the Save & Exit Save & Exit menu and then to the Boot Override Boot Override section. Step_5 Choose the USB option desired. Version 1.0 (March 2023) www.kontron.com // 116...
- Page 117 -e "$ETH_NAME: $(ethtool -i $ETH_NAME| grep -E 'driver|bus- info')\n"; \ info')\n"; \ done done NOTE: NOTE: You should discover one 1GbE NIC and up to four 25GbE NIC. Step_9 Configure network interface controllers based on your requirements and network topology. Version 1.0 (March 2023) www.kontron.com // 117...
- Page 118 LocalServer_OSPrompt:~# ipmitool mc info ipmitool mc info Operating system power management states Operating system power management states The ME1310 platform does not support power management states. Please refer to Disabling sleep states in Linux for more information. Version 1.0 (March 2023) www.kontron.com...
- Page 119 Default platform sensor thresholds should not be changed. They have been set to ensure proper operation. Should you decide to change them, use caution as inappropriate settings could cause a property damage. Prerequisites Prerequisites An OS is installed. Access to the OS is required. Version 1.0 (March 2023) www.kontron.com // 119...
- Page 120 "Temp PCIe 2 mbox=60" > $sensor_daemon_pipe sleep 2 sleep 2 done done NOTE: The scripts were tested with Ubuntu 20.04. They should work on any Linux system that supports Bash version 4.x+. NOTE: Version 1.0 (March 2023) www.kontron.com // 120...
- Page 121 -k -s --request PATCH --url [ROOT_URL]/redfish/v1/Managers/bmc --header "'Content-Type: application/json'" --data application/json'" --data '{"Oem": {"Kontron": {"VirtualPcieFru": {"[PCIE_SLOT]": " '{"Oem": {"Kontron": {"VirtualPcieFru": {"[PCIE_SLOT]": " [FRU] [FRU] "} "} } } } } } } ' ' | jq | jq Step_2 Reboot the BMC to apply the changes.
- Page 122 -k -s --request PATCH --url [ROOT_URL]/redfish/v1/Managers/bmc --header "'Content-Type: application/json'" --data application/json'" --data '{"Oem": {"Kontron": {"VirtualPcieFru": {"[PCIE_SLOT]": ""} '{"Oem": {"Kontron": {"VirtualPcieFru": {"[PCIE_SLOT]": ""} } } } } } } ' ' | jq | jq Step_2 Reboot the BMC to apply the changes.
- Page 123 HTTP/FTP client tool used to navigate the Web API using a command-line tool. JSON viewer JSON viewer browser add- If the Redfish API is used through an Internet browser, a JSON viewer is recommended to make the output human- readable. Version 1.0 (March 2023) www.kontron.com // 123...
- Page 124 Configuring Configuring Version 1.0 (March 2023) www.kontron.com // 124...
- Page 125 Configuring and managing users Configuring and managing users Version 1.0 (March 2023) www.kontron.com // 125...
- Page 126 ASCII table as they are not managed by the IPMI tool. Using the Web UI Using the Web UI Refer to Accessing a BMC using the Web UI for access instructions. Version 1.0 (March 2023) www.kontron.com // 126...
- Page 127 "}"' | jq Using IPMI Using IPMI The following procedures will be executed using the Accessing a BMC using IPMI via KCS method, but some configurations can also be performed using IOL. To Version 1.0 (March 2023) www.kontron.com // 127...
- Page 128 ASCII table as they are not managed by the IPMI tool. Using the Web UI Using the Web UI Refer to Accessing a BMC using the Web UI for access instructions. Version 1.0 (March 2023) www.kontron.com // 128...
- Page 129 The following procedures will be executed using the Redfish ROOT URL required for an external network connection. They can also be executed using the Redfish ROOT URL required for the internal Redfish host interface if the commands are initiated locally from the server operating system. Refer to Accessing a BMC using Redfish for access instructions. Version 1.0 (March 2023) www.kontron.com // 129...
- Page 130 LocalServer_OSPrompt:~# ipmitool user enable ipmitool user enable [USER_ID] [USER_ID] Deleting a user Deleting a user Using the Web UI Using the Web UI Refer to Accessing a BMC using the Web UI for access instructions. Version 1.0 (March 2023) www.kontron.com // 130...
- Page 131 Step_2 Disable the user selected. LocalServer_OSPrompt:~# ipmitool user disable ipmitool user disable [USER_ID] [USER_ID] NOTE: NOTE: The first and second user names of the user list are reserved fields and therefore can't be disabled. Version 1.0 (March 2023) www.kontron.com // 131...
- Page 132 The following procedures will be executed using the Redfish ROOT URL required for an external network connection. They can also be executed using the Redfish ROOT URL required for the internal Redfish host interface if the commands are initiated locally from the server operating system. Refer to Accessing a BMC using Redfish for access instructions. Version 1.0 (March 2023) www.kontron.com // 132...
- Page 133 LocalServer_OSPrompt:~# ipmitool channel setaccess [LAN_CHANNEL] [USER_ID] privilege=[PRIVILEGE_LEVEL] ipmitool channel setaccess [LAN_CHANNEL] [USER_ID] privilege=[PRIVILEGE_LEVEL] NOTE: NOTE: The first and second user names of the user list are reserved fields and therefore can't be modified. Version 1.0 (March 2023) www.kontron.com // 133...
- Page 134 (Optional) To make the change persistent, save running-config to startup-config. Adding a user Adding a user To preserve configurations, the current configuration needs to be saved to startup-config. Refer to Saving the current configuration using the Web UI Version 1.0 (March 2023) www.kontron.com // 134...
- Page 135 (Optional) To make the change persistent, save running-config to startup-config. Configuring privilege level Configuring privilege level To preserve configurations, the current configuration needs to be saved to startup-config. Refer to Saving the current configuration using the Web UI Version 1.0 (March 2023) www.kontron.com // 135...
- Page 136 Configuring privilege level Refer to Accessing the switch NOS for access instructions. To preserve configurations, the current configuration needs to be saved to startup-config. Refer to Saving the current configuration using the CLI Version 1.0 (March 2023) www.kontron.com // 136...
- Page 137 Step_2 To change the privilege level of a user, reconfigure the user and change its privilege level. LocalSwitchNOS_OSPrompt:~(config)# username [USERNAME] username [USERNAME] privilege [NEW_PRIVILEGE_LEVEL] password unencrypted [PASSWORD] privilege [NEW_PRIVILEGE_LEVEL] password unencrypted [PASSWORD] Step_3 (Optional) To make the change persistent, save running-config to startup-config. Version 1.0 (March 2023) www.kontron.com // 137...
- Page 138 Configuring date and time Configuring date and time Version 1.0 (March 2023) www.kontron.com // 138...
- Page 139 Click on the Save settings Save settings button. Configuring the BMC date and time based on the NTP using the Web UI Configuring the BMC date and time based on the NTP using the Web UI Version 1.0 (March 2023) www.kontron.com // 139...
- Page 140 [ROOT_URL]/redfish/v1/ Managers/bmc Managers/bmc | jq .DateTime | jq .DateTime Configuring the BMC date and time based on the NTP using Redfish Configuring the BMC date and time based on the NTP using Redfish Version 1.0 (March 2023) www.kontron.com // 140...
- Page 141 This flag sets the command timeout to prevent multiple duplicated entry errors to be logged. LocalServer_OSPrompt:~# ipmitool sel time set ipmitool sel time set "[MM/DD/YYYY HH:MM:SS]" "[MM/DD/YYYY HH:MM:SS]" -N 5 -N 5 Version 1.0 (March 2023) www.kontron.com // 141...
- Page 142 Access the switch NOS CLI using one of the SSH methods described in section Accessing the switch NOS To preserve configurations, the current configuration needs to be saved to startup-config. Refer to Saving the current configuration using the CLI Version 1.0 (March 2023) www.kontron.com // 142...
- Page 143 Accessing the switch NOS using the switch NOS Web UI for access instructions. To preserve configurations, the current configuration needs to be saved to startup-config. Refer to Saving the current configuration using the Web UI Version 1.0 (March 2023) www.kontron.com // 143...
- Page 144 Access the switch NOS CLI using one of the SSH methods described in section Accessing the switch NOS To preserve configurations, the current configuration needs to be saved to startup-config. Refer to Saving the current configuration using the CLI Version 1.0 (March 2023) www.kontron.com // 144...
- Page 145 NOTE: This command sets the parameters for every year. No reprogramming needed. Step_4 Verify the time zone configuration. LocalSwitchNOS_OSPrompt:~(config)# exit exit LocalSwitchNOS_OSPrompt:~# show clock detail show clock detail Step_5 (Optional) To make the change persistent, save running-config to startup-config. Version 1.0 (March 2023) www.kontron.com // 145...
- Page 146 Configuring networking Configuring networking Version 1.0 (March 2023) www.kontron.com // 146...
- Page 147 Use the UEFI/ BIOS setup menu. Refer to Accessing the UEFI or BIOS for access instructions. BMC network architecture BMC network architecture Ethernet switch IO module option Ethernet switch IO module option Version 1.0 (March 2023) www.kontron.com // 147...
- Page 148 * The BMC can then communicate through SFP ports Sw 1 to 12, depending on switch configuration. Pass-through IO module option Pass-through IO module option This option is planned for development. Please contact Kontron sales Enabling or disabling a BMC network interface Enabling or disabling a BMC network interface This can be achieved:...
- Page 149 '{"IPv4StaticAddresses": [{"Address": "[IP_ADDRESS]","SubnetMask": "[MASK]","Gateway": "[GATEWAY]"}]}' | jq Configuring a static IP address using the BMC Web UI Configuring a static IP address using the BMC Web UI Refer to Accessing a BMC using the Web UI for access instructions. Version 1.0 (March 2023) www.kontron.com // 149...
- Page 150 Configuring a static IP address using the UEFI/BIOS setup menu Configuring a static IP address using the UEFI/BIOS setup menu Refer to Accessing the UEFI or BIOS for access instructions. Accessing the BMC network configuration menu Accessing the BMC network configuration menu Version 1.0 (March 2023) www.kontron.com // 150...
- Page 151 UEFI/BIOS menu information will need to be refreshed by restarting the server and re-entering the UEFI/BIOS . Configuring a static IP address using the UEFI/BIOS setup menu Configuring a static IP address using the UEFI/BIOS setup menu Version 1.0 (March 2023) www.kontron.com // 151...
- Page 152 IOL, add the IOL parameters to the command: -I lanplus -H [BMC MNGMT_IP] -U [IPMI user name] -P [IPMI password] -C 17 -I lanplus -H [BMC MNGMT_IP] -U [IPMI user name] -P [IPMI password] -C 17 . Configuring a static IP address Configuring a static IP address Version 1.0 (March 2023) www.kontron.com // 152...
- Page 153 Configuring a dynamic IP address using the BMC Web UI Configuring a dynamic IP address using the BMC Web UI Refer to Accessing a BMC using the Web UI for access instructions. Configuring a dynamic IP address Configuring a dynamic IP address Version 1.0 (March 2023) www.kontron.com // 153...
- Page 154 Configuring a dynamic IP address using the UEFI/BIOS setup menu Configuring a dynamic IP address using the UEFI/BIOS setup menu Refer to Accessing the UEFI or BIOS for access instructions. Accessing the BMC network configuration menu Accessing the BMC network configuration menu Version 1.0 (March 2023) www.kontron.com // 154...
- Page 155 UEFI/BIOS menu information will need to be refreshed by restarting the server and re-entering the UEFI/BIOS . Configuring a dynamic IP address using DHCP Configuring a dynamic IP address using DHCP Version 1.0 (March 2023) www.kontron.com // 155...
- Page 156 Configuring a VLAN for a BMC network interface Configuring a VLAN for a BMC network interface Given the ME1310 architecture, if a VLAN is assigned to the eth1 eth1 BMC network interface, the 1/16 switch port should reflect the configuration.
- Page 157 Configure an IP address for the VLAN interface created using one of the Redfish methods described in this section. Assigning a VLAN u sing Assigning a VLAN u sing the BMC Web UI the BMC Web UI Refer to Accessing a BMC using the Web UI for access instructions. Version 1.0 (March 2023) www.kontron.com // 157...
- Page 158 Configure an IP address for the VLAN interface created using one of the IPMI methods described in this section. Removing a VLAN Removing a VLAN This can be achieved: Using Redfish Using the BMC Web UI Version 1.0 (March 2023) www.kontron.com // 158...
- Page 159 [VLAN_ID] }' | jq }' | jq Removing a VLAN using the BMC Web UI Removing a VLAN using the BMC Web UI Refer to Accessing a BMC using the Web UI for access instructions. Version 1.0 (March 2023) www.kontron.com // 159...
- Page 160 BMC Redfish resources can be accessed locally by the integrated server using the internal, private, Redfish host interface. In this platform, the functionality is implemented using a USB-LAN interface. Most modern Linux operating systems should have built-in support for this USB-LAN device. The procedure below configures the IP address used for the host interface. Version 1.0 (March 2023) www.kontron.com // 160...
- Page 161 Step_3 You can now access the BMC Redfish interface using the internal Redfish Host Interface IP address. The BMC IP address is always 169.254.0.17 169.254.0.17 . LocalServer_OSPrompt:~# curl -k https://[USER_NAME]: curl -k https://[USER_NAME]: [PASSWORD]@169.254.0.17/redfish/v1/[URL] [PASSWORD]@169.254.0.17/redfish/v1/[URL] Version 1.0 (March 2023) www.kontron.com // 161...
- Page 162 Not applicable 05:00.0 Enabling UEFI support for installed network controllers Enabling UEFI support for installed network controllers Refer to the Identifying the network interfaces table. The help text should match the Bus:Device.Function Bus:Device.Function column. Version 1.0 (March 2023) www.kontron.com // 162...
- Page 163 Save & Exit menu, go to Save Changes and Reset Save Changes and Reset and press Enter Enter . Configuring PXE network boot using the UEFI/BIOS menu Configuring PXE network boot using the UEFI/BIOS menu Enabling PXE support Enabling PXE support Version 1.0 (March 2023) www.kontron.com // 163...
- Page 164 Boot URI can be set explicitly, but it is very often transmitted by the DHCP server during the IP address selection process. Please consult your network administrator for information pertaining to your installation. Enabling HTTP boot support Enabling HTTP boot support Version 1.0 (March 2023) www.kontron.com // 164...
- Page 165 UEFI network services are active. Configuring VLANs for UEFI network boot using the UEFI/BIOS menu Configuring VLANs for UEFI network boot using the UEFI/BIOS menu Relevant sections: Relevant sections: Accessing the UEFI or BIOS MAC addresses Version 1.0 (March 2023) www.kontron.com // 165...
- Page 166 VLANs. Step_5 Repeat steps 1 to 4 to assign VLANs for another E823 10GbE interface, as needed. Step_6 Press F4 F4 to save changes and exit. Removing VLANs Removing VLANs Version 1.0 (March 2023) www.kontron.com // 166...
- Page 167 In the example, VLAN ID 2002 will be removed and VLAN ID 1001 will be kept. Step_3 Repeat steps 1 and 2 to remove VLANs in another E823 10GbE interface, as needed. Step_4 Press F4 F4 to save changes and exit. Version 1.0 (March 2023) www.kontron.com // 167...
- Page 168 Configuring switch VLANs for procedures to add VLANs with the network operating system. Adding a NOS VLAN interface IP address Adding a NOS VLAN interface IP address This can be done using: Web UI Version 1.0 (March 2023) www.kontron.com // 168...
- Page 169 Configuring a dynamic IP address using DHCP Configuring a dynamic IP address using DHCP To preserve configurations, the current configuration needs to be saved to startup-config. Refer to Saving the current configuration using the Web UI Version 1.0 (March 2023) www.kontron.com // 169...
- Page 170 Accessing the switch NOS using the switch NOS Web UI for access instructions. To preserve configurations, the current configuration needs to be saved to startup-config. Refer to Saving the current configuration using the Web UI Version 1.0 (March 2023) www.kontron.com // 170...
- Page 171 For the secure HTTPS protocol to work, a certificate needs to be installed. As a temporary measure, the switch can create a self-signed certificate, which is secure but cannot be trusted as a long term solution. Users will need to provide their own certificate, delivered from a valid certificate authority. Version 1.0 (March 2023) www.kontron.com // 171...
- Page 172 Web Browser Web Browser : Upload a certificate via a Web browser. Upload Upload certificate PEM file URL : Upload a certificate via an URL. (Available into the switch. when the The file should Version 1.0 (March 2023) www.kontron.com // 172...
- Page 173 NOTE : : The self-signed certificate will be valid for a fixed time period (e.g. November 30th 2021 at 00:00:01 up to November 30th 2031 at 23:59:59). NOTE If a self-signed certificate is used, the Web browser will display a warning message before you can access the page. If this is the case, click on Advanced. Advanced. Version 1.0 (March 2023) www.kontron.com // 173...
- Page 174 Then click on the Proceed to [IP_ADDRESS] (unsafe) Proceed to [IP_ADDRESS] (unsafe) link. From the switch Web UI, perform the following steps. Version 1.0 (March 2023) www.kontron.com // 174...
- Page 175 Certificate Status field will indicate that the certificate is present. Step_6 (Optional) To make the change persistent, save running-config to startup-config. Uploading a certificate from a URL Uploading a certificate from a URL Version 1.0 (March 2023) www.kontron.com // 175...
- Page 176 Step_7 The Certificate Status Certificate Status field will indicate that the certificate is in present. Step_8 (Optional) To make the change persistent, save running-config to startup-config. Deleting an installed certificate Deleting an installed certificate Version 1.0 (March 2023) www.kontron.com // 176...
- Page 177 Mode field to Disabled Disabled . Step_3 Press Save Save to confirm. Step_4 (Optional) To make the change persistent, save running-config to startup-config. Configuring the interface for HTTPS only Configuring the interface for HTTPS only Version 1.0 (March 2023) www.kontron.com // 177...
- Page 178 Mode field to Enabled Enabled . Step_4 Set the Automatic Redirect Automatic Redirect field to Disabled Disabled . Step_5 Press Save Save to confirm. Step_6 (Optional) To make the change persistent, save running-config to startup-config. Version 1.0 (March 2023) www.kontron.com // 178...
- Page 179 NOTE : : The self-signed certificate will be valid for a fixed time period (e.g. November 30th 2021 at 00:00:01 up to November 30th 2031 at 23:59:59). NOTE If a self-signed certificate is used, the Web browser will display a warning message before you can access the page. If this is the case, click on Advanced. Advanced. Version 1.0 (March 2023) www.kontron.com // 179...
- Page 180 Step_4 (Optional) To make the change persistent, save running-config to startup-config. Configuring the interface protocol Configuring the interface protocol Refer to Accessing the switch network operating system for access instructions. There are three options to configure the interface protocol: Version 1.0 (March 2023) www.kontron.com // 180...
- Page 181 LocalSwitchNOS_OSPrompt:~# no ip domain name no ip domain name Step_3 Verify that configuration was successful. LocalSwitchNOS_OSPrompt:~# do do show ip domain show ip domain Step_4 (Optional) To make the change persistent, save running-config to startup-config. Version 1.0 (March 2023) www.kontron.com // 181...
- Page 182 LocalSwitchNOS_OSPrompt:~# do do show ip name-server show ip name-server Step_4 (Optional) To make the change persistent, save running-config to startup-config. Configuring a DNS server using the Web UI Configuring a DNS server using the Web UI Version 1.0 (March 2023) www.kontron.com // 182...
- Page 183 IP Configuration , enable or disable proxy DNS by clicking on the DNS Proxy Proxy checkbox. Step_3 Click on the Save Save button. Step_4 (Optional) To make the change persistent, save running-config to startup-config. Version 1.0 (March 2023) www.kontron.com // 183...
- Page 184 Configuring BMC services Configuring BMC services Version 1.0 (March 2023) www.kontron.com // 184...
- Page 185 [STRING] is a unique community name. RemoteComputer_OSPrompt:~$ curl -k -s --request PATCH --url curl -k -s --request PATCH --url [ROOT_URL]/redfish/v1/Managers/bmc/NetworkProtocol [ROOT_URL]/redfish/v1/Managers/bmc/NetworkProtocol --header --header 'Content-Type: application/json' --data '{"CommunityString":"[STRING]"}' | jq 'Content-Type: application/json' --data '{"CommunityString":"[STRING]"}' | jq Version 1.0 (March 2023) www.kontron.com // 185...
- Page 186 Version 1.0 (March 2023) www.kontron.com // 186...
- Page 187 The following procedures will be executed using the Redfish ROOT URL required for an external network connection. They can also be executed using the Redfish ROOT URL required for the internal Redfish host interface if the commands are initiated locally from the server operating system. Refer to Accessing a BMC using Redfish for access instructions. Version 1.0 (March 2023) www.kontron.com // 187...
- Page 188 RemoteComputer_OSPrompt:~$ curl -k -s --request POST --url curl -k -s --request POST --url [ROOT_URL]/redfish/v1/EventService/Subscriptions [ROOT_URL]/redfish/v1/EventService/Subscriptions --header --header 'Content-Type: application/json' --data '{"Destination": "snmp://[SERVER]:[PORT]", "SubscriptionType": "SNMPTrap", "Protocol": 'Content-Type: application/json' --data '{"Destination": "snmp://[SERVER]:[PORT]", "SubscriptionType": "SNMPTrap", "Protocol": "SNMPv2c"}' | jq "SNMPv2c"}' | jq Version 1.0 (March 2023) www.kontron.com // 188...
- Page 189 Almost all configuration commands have a corresponding 'no' form. The 'no' form is syntactically similar (but not necessarily identical) to the configuration command; however, it either resets the parameters to default values for the configurable item or disables the item altogether. Version 1.0 (March 2023) www.kontron.com // 189...
- Page 190 Switch NOS port mapping The following table lists the physical ports of the Ethernet switch of a ME1310 with the appropriate IO module. Note that, in the switch NOS, physical ports are a category of interfaces. The port designation is used in CLI commands, denoted by [INTERFACE_ID] [INTERFACE_ID] below, to monitor or configure the corresponding port.
- Page 191 Verifying link status using the CLI Access the switch NOS CLI. Refer to Accessing the switch NOS for access instructions. Step_1 Verify every link status. LocalSwitchNOS_OSPrompt:~# show interface * status show interface * status Version 1.0 (March 2023) www.kontron.com // 191...
- Page 192 Access the switch NOS CLI. Refer to Accessing the switch NOS for access instructions. To preserve configurations, the current configuration needs to be saved to startup-config. Refer to Saving the current configuration using the CLI Version 1.0 (March 2023) www.kontron.com // 192...
- Page 193 Ports Ports . Step_2 Select a value from the Speed Speed dropdown menu. Step_3 Press on the Save Save button to confirm. Step_4 (Optional) To make the change persistent, save running-config to startup-config. Version 1.0 (March 2023) www.kontron.com // 193...
- Page 194 Access the switch NOS Web UI. Refer to Accessing the switch NOS for access instructions. To preserve configurations, the current configuration needs to be saved to startup-config. Refer to Saving the current configuration using the Web UI Version 1.0 (March 2023) www.kontron.com // 194...
- Page 195 Access the switch NOS Web UI. Refer to Accessing the switch NOS for access instructions. To preserve configurations, the current configuration needs to be saved to startup-config. Refer to Saving the current configuration using the Web UI Version 1.0 (March 2023) www.kontron.com // 195...
- Page 196 Access the switch NOS Web UI. Refer to Accessing the switch NOS for access instructions. To preserve configurations, the current configuration needs to be saved to startup-config. Refer to Saving the current configuration using the Web UI Version 1.0 (March 2023) www.kontron.com // 196...
- Page 197 Access the switch NOS Web UI. Refer to Accessing the switch NOS for access instructions. To preserve configurations, the current configuration needs to be saved to startup-config. Refer to Saving the current configuration using the Web UI Version 1.0 (March 2023) www.kontron.com // 197...
- Page 198 Saving the current configuration using the Web UI Saving the current configuration using the Web UI Changes to the switch configuration are not persistent after rebooting the switch. To preserve custom configurations, use the following command. Version 1.0 (March 2023) www.kontron.com // 198...
- Page 199 Restoring the default configuration using the Web UI Step_1 From the left-side menu, select Maintenance Maintenance and then Factory Defaults Factory Defaults . Step_2 Press on the Yes Yes button to confirm the choice. Version 1.0 (March 2023) www.kontron.com // 199...
- Page 200 Value in this platform Value in this platform CFG-NAVSPG-DYNMODEL Dynamic platform model 0 (Portable) 2 (Stationary) CFG-UART1-BAUDRATE Baud rate for UART1 38400 115200 Configuring the antenna cable delay Configuring the antenna cable delay Version 1.0 (March 2023) www.kontron.com // 200...
- Page 201 USB HS (IO Board USB2) and ensure its status is set to Enable Enable . Configuring the antenna delay Configuring the antenna delay Log in to the server. Refer to Accessing the operating system of a server for access instructions. Version 1.0 (March 2023) www.kontron.com // 201...
- Page 202 The switch can be configured as a telecom grandmaster (T-GM) (primary reference clock) using the switch NOS CLI or Web UI. The following examples show minimum configurations using default values for most parameters. Only critical values are included in the exam ple. However, additional configurations are likely to be required. Prerequisite Prerequisite Version 1.0 (March 2023) www.kontron.com // 202...
- Page 203 Configuring the switch as a telecom grandmaster using the Web UI Log in to the switch NOS CLI. Refer to Accessing the switch NOS for access instructions. Step_1 From the left-side menu, select Configuration Configuration and then Version 1.0 (March 2023) www.kontron.com // 203...
- Page 204 Step_10 (Optional) To make the change persistent, save running-config to startup-config. Configuring the switch as a telecom boundary clock as per ITU-T G.8275.1 Configuring the switch as a telecom boundary clock as per ITU-T G.8275.1 Version 1.0 (March 2023) www.kontron.com // 204...
- Page 205 Log in to the switch NOS Web UI. Refer to Accessing the switch NOS for access instructions. Step_1 From the left-side menu, select Configuration Configuration and then . Click, on the Add New PTP Clock Add New PTP Clock button. Version 1.0 (March 2023) www.kontron.com // 205...
- Page 206 Step_10 (Optional) To make the change persistent, save running-config to startup-config. Configuring the internal server as a telecom time slave clock as per ITU-T G.8275.1 Configuring the internal server as a telecom time slave clock as per ITU-T G.8275.1 Version 1.0 (March 2023) www.kontron.com // 206...
- Page 207 Channel (ESMC) as defined in ITU-T G.8264. To enable distribution of frequency to some or all ports, two ports should be chosen as SyncE sources. In this example, ports 1/1 and 1/2 will be used. Prerequisite Prerequisite Version 1.0 (March 2023) www.kontron.com // 207...
- Page 208 Step_5 (Optional) To make the change persistent, save running-config to startup-config. Configuring synchronous Ethernet using the Web UI Configuring synchronous Ethernet using the Web UI Log in to the switch NOS Web UI. Refer to Accessing the switch NOS for access instructions. Version 1.0 (March 2023) www.kontron.com // 208...
- Page 209 Interfaces 1/3-1/12 can be used by link partners requiring a SyncE source and expecting SSM status information. Step_4 Click on the Save Save button. Step_5 (Optional) To make the change persistent, save running-config to startup-config. Version 1.0 (March 2023) www.kontron.com // 209...
- Page 210 Save & Exit menu and then to the Boot Override Boot Override section. Enabling Secure Boot Enabling Secure Boot The following application notes are required to generate secure boot keys and configure them: Generating custom secure boot keys Provisioning custom Version 1.0 (March 2023) www.kontron.com // 210...
- Page 211 Step_2 Navigate to the Save & Exit Save & Exit menu, go to Save Changes and Exit Save Changes and Exit and press Enter Enter to confirm. Configuring the TPM Configuring the TPM Version 1.0 (March 2023) www.kontron.com // 211...
- Page 212 This option changes the behavior of the green power LED. Refer to Platform components for behavior information. Refer to Platform resources for customer application for information on how to control this behavior from your application. Version 1.0 (March 2023) www.kontron.com // 212...
- Page 213 Disabled . This will effectively disconnect the I210 Ethernet controller from the server. Disabling USB ports Disabling USB ports NOTE: Enabling or disabling platform USB ports may cause the system to malfunction. Proceed with caution. NOTE: Version 1.0 (March 2023) www.kontron.com // 213...
- Page 214 --data '{ "Boot": { "BootSourceOverrideTarget": "[BOOT_DEVICE]", "BootSourceOverrideEnabled": " application/json' --data '{ "Boot": { "BootSourceOverrideTarget": "[BOOT_DEVICE]", "BootSourceOverrideEnabled": " [ [ OVERRIDE_TYPE OVERRIDE_TYPE ] ] " } }' " } }' | jq | jq Version 1.0 (March 2023) www.kontron.com // 214...
- Page 215 Supported values for parameter [THRESHOLD] [THRESHOLD] are: LowerThresholdCritical LowerThresholdNonCritical UpperThresholdCritical UpperThresholdNonCritical To modify customer-specific PCIe add-in card related sensors, the value for parameter [RESOURCE] [RESOURCE] is: Temperatures Configuring minimum fan speed Configuring minimum fan speed Version 1.0 (March 2023) www.kontron.com // 215...
- Page 216 IOL, add the IOL parameters to the command: -I lanplus -H [BMC MNGMT_IP] -U [IPMI user name] -P [IPMI password] -C 17 -I lanplus -H [BMC MNGMT_IP] -U [IPMI user name] -P [IPMI password] -C 17 . Configuring thresholds Configuring thresholds Version 1.0 (March 2023) www.kontron.com // 216...
- Page 217 " " [SENSOR_ID]" [SENSOR_ID]" [THRESH_TYPE] [VALUE] [THRESH_TYPE] [VALUE] Supported THRESHOLDS are: unr = upper non-recoverable ucr = upper critical unc = upper non-critical lnc = lower non-critical lcr = lower critical lnr = lower non-recoverable Version 1.0 (March 2023) www.kontron.com // 217...
- Page 218 Operating Operating Version 1.0 (March 2023) www.kontron.com // 218...
- Page 219 The following procedures will be executed using the Redfish ROOT URL required for an external network connection. They can also be executed using the Redfish ROOT URL required for the internal Redfish host interface if the commands are initiated locally from the server operating system. Refer to Accessing a BMC using Redfish for access instructions. Version 1.0 (March 2023) www.kontron.com // 219...
- Page 220 A BMC reboot can be executed using: BMC Web UI Redfish Rebooting the BMC using the Web UI Rebooting the BMC using the Web UI Refer to Accessing a BMC using the Web UI for access instructions. Version 1.0 (March 2023) www.kontron.com // 220...
- Page 221 NOTE: Make sure all changes to the configuration are saved prior to rebooting the switch NOS. Refer to NOTE: Configuring the switch Refer to Accessing the switch NOS using the switch NOS Web UI for access instructions. Version 1.0 (March 2023) www.kontron.com // 221...
- Page 222 Restart Device Step_2 Click on the Yes Yes button to begin the restart procedure. Step_3 Wait for the switch to be available again. NOTE: NOTE: Rebooting the switch NOS may take several seconds. Version 1.0 (March 2023) www.kontron.com // 222...
- Page 223 The following procedures will be executed using the Redfish ROOT URL required for an external network connection. They can also be executed using the Redfish ROOT URL required for the internal Redfish host interface if the commands are initiated locally from the server operating system. Refer to Accessing a BMC using Redfish for access instructions. Version 1.0 (March 2023) www.kontron.com // 223...
- Page 224 The following procedures will be executed using the Redfish ROOT URL required for an external network connection. They can also be executed using the Redfish ROOT URL required for the internal Redfish host interface if the commands are initiated locally from the server operating system. Refer to Accessing a BMC using Redfish for access instructions. Version 1.0 (March 2023) www.kontron.com // 224...
- Page 225 The BMC IP address is known. An HTTP client tool is installed on the remote computer. Creating a session token Creating a session token Relevant section: Relevant section: Default user names and passwords Version 1.0 (March 2023) www.kontron.com // 225...
- Page 226 -k -s --request GET --url https:// https:// [ [ BMC MNGMT_IP BMC MNGMT_IP ] ] /redfish/v1/UpdateService /redfish/v1/UpdateService --header 'X- --header 'X- Auth-Token: Auth-Token: [ [ TOKEN TOKEN ] ] ' ' | jq | jq Version 1.0 (March 2023) www.kontron.com // 226...
- Page 227 The following procedures will be executed using the Redfish ROOT URL required for an external network connection. They can also be executed using the Redfish ROOT URL required for the internal Redfish host interface if the commands are initiated locally from the server operating system. Version 1.0 (March 2023) www.kontron.com // 227...
- Page 228 Collecting the BMC, UEFI and FPGA firmware versions using the BMC Web UI Collecting the BMC, UEFI and FPGA firmware versions using the BMC Web UI Access the BMC Web UI. Refer to Accessing a BMC using the Web UI for access instructions. Version 1.0 (March 2023) www.kontron.com // 228...
- Page 229 [URL_FROM_STEP_2 ] | jq ] | jq Collecting hardware configuration information Collecting hardware configuration information Hardware configuration information might be required to make the proper board health diagnostics. The following list contains basic examples of information Version 1.0 (March 2023) www.kontron.com // 229...
- Page 230 Kontron support team. Power supply type (AC or DC) Product IO board configuration Processor device information Memory device configuration Collecting power supply type (AC or DC) Collecting power supply type (AC or DC) The power supply type can be collected:...
- Page 231 LocalServer_OSPrompt:~# ipmitool fru print ipmitool fru print Power supply types: Power supply types: AC PSU: M1877 DC PSU: ME1310-PSU-DC Collecting product IO module information Collecting product IO module information The product IO module information can be collected: Using the BMC Web UI...
- Page 232 Use the following command to collect the FRU information. LocalServer_OSPrompt:~# ipmitool fru print ipmitool fru print IO module type: IO module type: Switchboard = ME1310-SW-X IOBoard = ME1310-IOS Collecting processor device information Collecting processor device information The processor device information can be collected:...
- Page 233 Collecting memory device configuration using the BMC Web UI Collecting memory device configuration using the BMC Web UI Access the BMC Web UI. Refer to Accessing a BMC using the Web UI for access instructions. Version 1.0 (March 2023) www.kontron.com // 233...
- Page 234 /redfish/v1/Systems/system/Memory | jq Step_2 Collect m emory device information using the following command. RemoteComputer_OSPrompt:~$ curl -k -s --request GET --url curl -k -s --request GET --url [ROOT_URL] [ROOT_URL] /redfish/v1/Systems/system/Memory/[DEVICE_URL] | jq /redfish/v1/Systems/system/Memory/[DEVICE_URL] | jq Version 1.0 (March 2023) www.kontron.com // 234...
- Page 235 Download Configuration , then select where to save the configuration file. Collecting the Ethernet switch firmware version Collecting the Ethernet switch firmware version The Ethernet switch firmware version can be collected: Using the switch NOS CLI Version 1.0 (March 2023) www.kontron.com // 235...
- Page 236 Collecting the Ethernet switch firmware version using the switch NOS Web UI Refer to Accessing the switch NOS using the switch NOS Web UI for access instructions. Step_1 From the left-side menu, select Monitor Monitor , System System and then Information Information Version 1.0 (March 2023) www.kontron.com // 236...
- Page 237 Monitoring Monitoring Version 1.0 (March 2023) www.kontron.com // 237...
- Page 238 For instructions on how to access the BMC, refer to Accessing a BMC Monitoring using the BMC Web UI Monitoring using the BMC Web UI Refer to Accessing a BMC using the Web UI for access instructions. Version 1.0 (March 2023) www.kontron.com // 238...
- Page 239 Chassis/ Chassis/ ME1310_Baseboard ME1310_Baseboard /Sensors /Sensors | jq | jq Discrete sensors Managers/bmc Managers/bmc | jq ".Oem.Kontron.Discrete" | jq ".Oem.Kontron.Discrete" Pass-through IO module sens ors Chassis Chassis /IOBoard/Thermal /IOBoard/Thermal | jq ".Temperatures" | jq ".Temperatures" Ethernet switch IO module sensors...
- Page 240 Relevant sections: Relevant sections: Sensor list System event log Possible values (IPMI only) Possible values (IPMI only) The cause of the last board reset can only be found in the system event log entries. Version 1.0 (March 2023) www.kontron.com // 240...
- Page 241 -k -s --request GET --url [ROOT_URL]/redfish/v1/ Systems/system | jq .LastResetTime Systems/system | jq .LastResetTime Heaters Heaters The BMC will register events indicating a heater status change. There are three heater sensors present in the platform: Heater CPU Version 1.0 (March 2023) www.kontron.com // 241...
- Page 242 Heater PCIe1 (optional) Heater PCIe2 (optional) For information about the PCIe heaters, contact the Kontron support team. Refer to Support information Relevant sections: Relevant sections: Platform cooling and thermal management - Behavior upon startup at temperatures below 0 degrees Celsius...
- Page 243 Step_1 Display the Jumpers Status sensor values using the following command. RemoteComputer_OSPrompt:~$ curl -k -s --request GET --url [ROOT_URL]/redfish/v1/ curl -k -s --request GET --url [ROOT_URL]/redfish/v1/ Managers/bmc | jq .Oem.Kontron.Discrete Managers/bmc | jq .Oem.Kontron.Discrete Monitoring Jumpers Status sensor using IPMI...
- Page 244 Step_1 Display the TelcoAlarm statuses using the following command. RemoteComputer_OSPrompt:~$ curl -k -s --request GET --url [ROOT_URL]/redfish/v1/ curl -k -s --request GET --url [ROOT_URL]/redfish/v1/ Managers/bmc | jq .Oem.Kontron.Discrete Managers/bmc | jq .Oem.Kontron.Discrete Possible values are: 0 0 for a closed contact...
- Page 245 Sensor type code Event/Reading type code Event/Reading type code , refer to Interpreting sensor data ME1310 sensors ME1310 sensors ME1310 sensors are always present regardless of the platform hardware configuration. Unit-based sensors Unit-based sensors Fan sensors Fan sensors Sensor name Sensor name...
- Page 246 Event/Reading type code Event/Reading type code [SENSOR_ID] [SENSOR_ID] P_12V_SLOT1 V_12V_SLOT1 power consumption Power Supply (0x08) 0x01 (Threshold Based) P_12V_SLOT2 V_12V_SLOT2 power consumption Power Supply (0x08) 0x01 (Threshold Based) Other unit-based sensors Other unit-based sensors Version 1.0 (March 2023) www.kontron.com // 246...
- Page 247 (0xD3) Power supply sensors Power supply sensors The power supply sensors will differ according to the power supply unit configuration of the platform. The ME1310 comes equipped with either a DC or an AC power supply unit. DC PSU sensors DC PSU sensors NOTE: The DC PSU sensors are only present when a DC PSU is connected.
- Page 248 Pass-through IO module sens NOTE: The pass-through IO module sensors are only present if the platform is equipped with a p ass-through IO module module. NOTE: This option is planned for development. Please contact Kontron sales Application-specific sensors Application-specific sensors Silicom P3iMB sensors...
- Page 249 Maintenance Maintenance Version 1.0 (March 2023) www.kontron.com // 249...
- Page 250 The TelcoAlarms generated will set the BMC health status in a critical state. Currently, the only supported way of restoring the BMC health status is by clearing the system event log. Kontron recommends exporting the SEL before clearing it. Relevant section:...
- Page 251 Accessing the BMC system event log Accessing the BMC system event log NOTE: Depending on the event, there may not be an associated sensor attribute. However, if this attribute is present, refer to NOTE: Interpreting sensor data Version 1.0 (March 2023) www.kontron.com // 251...
- Page 252 Redfish supported event types Redfish supported event types The event format is composed of the OpenBMC event schema version followed by the event type [SCHEMA VERSION].[EVENT TYPE]. The current schema version is OpenBMC.0.1 OpenBMC.0.1 . Version 1.0 (March 2023) www.kontron.com // 252...
- Page 253 NOTE: This method will only clear the IPMI event log. The Web UI and Redfish event logs must be cleared separately. NOTE: Step_1 Use the following command to clear the system event log. LocalServer_OSPrompt:~# ipmitool sel clear ipmitool sel clear Exporting the BMC system event log Exporting the BMC system event log Version 1.0 (March 2023) www.kontron.com // 253...
- Page 254 Accessing the NOS SEL using the NOS CLI Accessing the NOS SEL using the NOS CLI Refer to Accessing the switch NOS for access instructions. Accessing the NOS system event log Accessing the NOS system event log Version 1.0 (March 2023) www.kontron.com // 254...
- Page 255 Clearing the NOS system event log Clearing the NOS system event log Step_1 Display the switch NOS event log. LocalSwitchNOS_OSPrompt:~# clear clear logging logging Step_2 The NOS system event log should be empty. LocalSwitchNOS_OSPrompt:~# show show logging logging Version 1.0 (March 2023) www.kontron.com // 255...
- Page 256 The following procedures will be executed using the Redfish ROOT URL required for an external network connection. They can also be executed using the Redfish ROOT URL required for the internal Redfish host interface if the commands are initiated locally from the server operating system. Refer to Accessing a BMC using Redfish for access instructions. Version 1.0 (March 2023) www.kontron.com // 256...
-
Page 257: Remotecomputer_Osprompt:~# Curl -K -S --Request Get --Url
Step_1 Access the POST code logs using the following command. RemoteComputer_OSPrompt:~# curl -k -s --request GET --url curl -k -s --request GET --url [ROOT_URL]/redfish/v1/Systems/system/LogServices/PostCodes/Entries [ROOT_URL]/redfish/v1/Systems/system/LogServices/PostCodes/Entries | jq | jq Version 1.0 (March 2023) www.kontron.com // 257... - Page 258 Sensor type Sensor type The sensor type attribute defines what the sensor is monitoring. The following table lists all the IPMI sensor types present on the platform. Sensor type Sensor type Description Description Version 1.0 (March 2023) www.kontron.com // 258...
- Page 259 0Bh (Other Unit-based sensor) Report a sensor-specific unit. 18h (Chassis) Report the presence of an item in the chassis. C4h (Board Reset - Kontron OEM) Report the last restart/reboot source. D3h (Jumpers status - Kontron OEM) Reserved. 23h (Watchdog 2) General information about the IPMI watchdog.
- Page 260 Component replacement Component replacement Refer to Components installation and assembly for component replacement procedures. Version 1.0 (March 2023) www.kontron.com // 260...
- Page 261 Backing up and restoring the switch NOS configuration using SCP Backing up and restoring the switch NOS configuration using the switch NOS Web UI On an ME1310 platform, UEFI/BIOS and switch NOS configurations can be backed up and restored. UEFI/BIOS UEFI/BIOS This section describes how to create a UEFI/BIOS backup that includes the current UEFI/BIOS user settings and perform a restore from the backup created.
- Page 262 : configuration currently active (may differ from startup-config if changes were made since the last boot, but not saved). running-config startup-config : saved configuration applied at switch boot. startup-config LocalSwitchNOS_OSPrompt:~# copy <running-config|startup-config> scp://<SERVER_USERNAME>: copy <running-config|startup-config> scp://<SERVER_USERNAME>: <SERVER_PASSWORD>@<SERVER_IP>/<FILE_PATH> save-host-key <SERVER_PASSWORD>@<SERVER_IP>/<FILE_PATH> save-host-key Restoring the switch NOS configuration Restoring the switch NOS configuration Version 1.0 (March 2023) www.kontron.com // 262...
- Page 263 : Saved configuration applied at switch boot. startup-config Step_2 Click Download Configuration Download Configuration , then select where to save the configuration file. Restoring the switch NOS configuration Restoring the switch NOS configuration Version 1.0 (March 2023) www.kontron.com // 263...
- Page 264 This can be achieved by selecting Maintenance Maintenance , then Restart Restart Device Device from the left-side menu. Then, confirm that a restart is to be performed by clicking Yes . Version 1.0 (March 2023) www.kontron.com // 264...
-
Page 265: Curl -K -S --Request Get --Url
Redfish is the preferred interface for upgrading BMC firmware. Prerequisites Prerequisites The .tar .tar file provided by Kontron was downloaded on the remote computer. Access to the BMC Redfish interface is required. Relevant section: Relevant section: Accessing a BMC using Redfish... - Page 266 Upgrading the firmware of the BMC using the Web UI Prerequisites Prerequisites The .tar .tar file provided by Kontron was downloaded on the remote computer. Access to the BMC Web UI is required. Relevant section: Relevant section: Accessing a BMC using the Web UI Version 1.0 (March 2023)
- Page 267 FPGA firmware can be upgraded: Using Redfish Using the Web UI Upgrading the firmware of the FPGA using Redfish Upgrading the firmware of the FPGA using Redfish Redfish is the preferred interface for upgrading the FPGA firmware. Version 1.0 (March 2023) www.kontron.com // 267...
- Page 268 Prerequisites Prerequisites The .tar .tar file provided by Kontron was downloaded on the remote computer. Access to the BMC Redfish interface is required. Relevant section: Relevant section: Accessing a BMC using Redfish Procedure Procedure Step_1 From the BMC Redfish interface, verify the current FPGA firmware version.
- Page 269 Upgrading UEFI/BIOS firmware using a virtual media and the built-in UEFI shell Prerequisites Prerequisites A virtual media .bin .bin file has been provided by Kontron. Access to the BMC Web UI is required. Secure Boot must be disabled. Relevant sections:...
- Page 270 Operations and then Virtual media Virtual media . Step_2 Click on Add file Add file to browse for the .bin .bin file provided by Kontron. Step_3 Click on Start Start . Upgrading the UEFI/BIOS Upgrading the UEFI/BIOS Version 1.0 (March 2023) www.kontron.com...
- Page 271 Prerequisites Prerequisites A server configured for the desired protocol is available and accessible from the switch NOS. The . itb itb upgrade file provided by Kontron was downloaded on the server. Relevant section: Relevant section: Accessing the switch NOS Procedure Procedure The URL following the server IP address is a path relative to the user home folder provided ("~/").
- Page 272 Prerequisites Prerequisites Access to the switch NOS Web UI is required. The . itb itb upgrade file provided by Kontron was downloaded on the remote computer. Relevant section: Relevant section: Accessing the switch NOS using the switch NOS Web UI...
- Page 273 Environmental considerations Sensor list Configuring sensors and thermal parameters The ME1310 platform can operate within an ambient temperature range of: -40°C to +65°C when using a DC PSU -5°C to +50°C when using an AC PSU Fans may not be running when the ambient temperature is below 10°C.
- Page 274 To access the SEL using Redfish to see the events, refer to System event log Default temperature thresholds Default temperature thresholds To see temperature thresholds, refer to the instruc tions provide d in Monitoring sensors Configuring sensors and thermal parameters Version 1.0 (March 2023) www.kontron.com // 274...
- Page 275 Troubleshooting Troubleshooting Version 1.0 (March 2023) www.kontron.com // 275...
- Page 276 00A0A5E1B934 00A0A5E1B934 = First MAC address attributed to the integrated Ethernet switch. Value to be used to replace SW_MAC_BASE. This is only present for a platform configured with the IO Ethernet switch module. Version 1.0 (March 2023) www.kontron.com // 276...
- Page 277 Activate Activate . Step_2 Click on the default-config default-config radio button. Step_3 Press on the Activate Configuration Activate Configuration button to confirm. Step_4 (Optional) To make the change persistent, save running-config to startup-config. Version 1.0 (March 2023) www.kontron.com // 277...
- Page 278 Identify the ID ID of the user with the password to restore. LocalServer_OSPrompt:~# ipmitool user list [CHANNEL] ipmitool user list [CHANNEL] Step_2 Reset the password. LocalServer_OSPrompt:~# ipmitool user set ipmitool user set password [USER_ID] [NEW_PASSWORD] password [USER_ID] [NEW_PASSWORD] Version 1.0 (March 2023) www.kontron.com // 278...
- Page 279 By phone: 1-888-835-6676 By email: support-na@kontron.com Via the website: www.kontron.com For sales information, including current and future product options, please contact Kontron Sales Support in Canada through the following means: By phone: 1-800-387-4222 By email: gss-com@kontron.com Version 1.0 (March 2023) www.kontron.com...
- Page 280 Knowledge base Knowledge base Version 1.0 (March 2023) www.kontron.com // 280...
- Page 281 Sending a BREAK signal over a serial connection Sending a BREAK signal over a serial connection The documentation refers to the possibility of resetting a Kontron server using a special signal called BREAK BREAK . Wikipedia describes a break condition as something that "occurs when the receiver input is at the 'space' (logic low, i.e., '0') level for longer than some duration of time."...
- Page 282 LocalServer_OSPrompt:~# cat /sys/power/state cat /sys/power/state Disabling sleep states Disabling sleep states Step_1 Disable sleep states using systemd. LocalServer_OSPrompt:~# sudo systemctl mask sudo systemctl mask sleep.target suspend.target hibernate.target hybrid- sleep.target suspend.target hibernate.target hybrid- sleep.target sleep.target Version 1.0 (March 2023) www.kontron.com // 282...
- Page 283 Application notes Application notes Version 1.0 (March 2023) www.kontron.com // 283...
- Page 284 +x mkkeys.sh yum install sbsigntools-v0.9.2-1.x86_64.rpm efitools-v1.9.2-1.x86_64.rpm ./mkkeys.sh Step_2 The commands will generate a lot of files. You need the *.cer file to use in the provisioning procedure. Version 1.0 (March 2023) www.kontron.com // 284...
- Page 285 Step_1 Access the UEFI Setup Utility by pressing F2 or DEL when the sign-on screen is displayed during boot. Step_2 Access the Secure Boot Secure Boot submenu from the Security Security tab. Version 1.0 (March 2023) www.kontron.com // 285...
- Page 286 A list of available file systems will be displayed, using their corresponding UEFI device path. Select the USB device where the Public Key certificates are located. Note that if Virtual Media redirection is used, the device will be identified as a CDROM. Version 1.0 (March 2023) www.kontron.com // 286...
- Page 287 Selecting Update Update from the pop-up window will erase the pre-provisioned KEK entries and add a new KEK as a single entry; Selecting Append Append will add the new KEK to the database. Version 1.0 (March 2023) www.kontron.com // 287...
- Page 288 Step_15 Select Save Changes and Exit Save Changes and Exit from the Setup Utility. To take advantage of the Secure Boot feature, make sure it is enabled in the Security → Secure Boot submenu. Version 1.0 (March 2023) www.kontron.com // 288...
- Page 289 Reference guides Reference guides Version 1.0 (March 2023) www.kontron.com // 289...
- Page 290 Information about the telemetry service | /redfish/v1/TelemetryService | TelemetryService.v1_2_1 Collection of metric definitions | /redfish/v1/TelemetryService/MetricReportDefinitions | MetricReportDefinitionCollection Information about a specified metric definition | /redfish/v1/TelemetryService/MetricReportDefinitions/[METRIC_REPORT_DEF] | MetricReportDefinition.v1_3_0 Collection of metric reports | /redfish/v1/TelemetryService/MetricReports | MetricReportCollection Version 1.0 (March 2023) www.kontron.com // 290...
- Page 291 Event service | /redfish/v1/EventService | EventService.v1_5_0 Collection of current event subscriptions | /redfish/v1/EventService/Subscriptions | EventDestinationCollection Miscellaneous URLs Miscellaneous URLs List of OEM JSON schemas and extensions | /redfish/v1/JsonSchemas Information about a specified JSON schema | /redfish/v1/JsonSchemas/[JSON_SCHEMA_NAME] Version 1.0 (March 2023) www.kontron.com // 291...
- Page 292 Sensor event commands Storage commands FRU information commands SDR repository commands SEL device commands Transport commands LAN device commands Serial over LAN commands Kontron OEM commands Application commands Application commands IPM device commands IPM device commands Net function Net function Command...
- Page 293 Get Channel OEM Payload Info Unsupported 0x06 0x54 Get Channel Cipher Suites Supported 0x06 0x55 Suspend/Resume Payload Encryption Unsupported 0x06 0x56 Set Channel Security Keys Unsupported 0x06 0x57 Get System Interface Capabilities Unsupported Version 1.0 (March 2023) www.kontron.com // 293...
- Page 294 Bridging commands Net function Net function Command Command Command name Command name Supported / Unsupported Supported / Unsupported 0x02 0x20 Bridge Request Unsupported 0x02 0x21 Bridge Message Unsupported Bridge event commands Bridge event commands Version 1.0 (March 2023) www.kontron.com // 294...
- Page 295 Command name Supported / Unsupported Supported / Unsupported 0x0a 0x10 Get FRU Inventory Area Info Supported 0x0a 0x11 Read FRU Data Supported 0x0a 0x12 Write FRU Data Supported SDR repository commands SDR repository commands Version 1.0 (March 2023) www.kontron.com // 295...
- Page 296 Supported / Unsupported Supported / Unsupported 0x0c 0x22 Get SOL Configuration Parameters Supported 0x0c 0x21 Set SOL Configuration Parameters Supported Kontron OEM commands Kontron OEM commands Net function Net function Command Command Command name Command name Supported / Unsupported Supported / Unsupported...
- Page 297 Symbols Symbols The following symbols are used in Kontron documentation. DANGER indicates a hazardous situation which, if not avoided, will result in death or serious injury. WARNING indicates a hazardous situation which, if not avoided, could result in death or serious injury.
- Page 298 IPMI Intelligent Platform Management Interface Interrupt Request Line KB, Kbyte Kilobyte – 1024 bytes Keyboard Controller Style KEAPI Kontron Embedded Application Programming Interface Keyboard, Video, Mouse Local Area Network Light-Emitting Diode Low Profile Low Pin Count LVDS Low Voltage Differential SCSI...
- Page 299 Secure Shell THOL Tested Hardware and Operating System List Trusted Platform Module Technischer Uberwachungs-Verein (A safety testing laboratory with headquarters in Germany) UART Universal Asynchronous Receiver Transmitter UEFI Unified Extensible Firmware Interface Underwriter's Laboratory Version 1.0 (March 2023) www.kontron.com // 299...
- Page 300 Volt-Ampere (volts multiplied by amps) Volts Alternating Current Volts Direct Current Verband Deutscher Electrotechniker (German Institute of Electrical Engineers) Video Graphics Array vRAN Virtualized Radio Access Network Voltage Standby Watt WEEE Waste Electrical and Electronic Equipment Ω Version 1.0 (March 2023) www.kontron.com // 300...
Need help?
Do you have a question about the ME1310 and is the answer not in the manual?
Questions and answers