Table of Contents
Advertisement
Quick Links
Download this manual
See also:
Configuration Manual
Advertisement
Table of Contents

Subscribe to Our Youtube Channel
Related Manuals for Kontron CG1200


Summary of Contents for Kontron CG1200
- Page 1 Kontron CG1200 Carrier Grade Server Document Revision 1.1...
-
Page 2: Table Of Contents
Kontron CG1200 Carrier Grade Server Installation and Maintenance Guide » Table of Contents « Introduction ..................1 About this Manual........................1 Manual Organization ........................ 1 What Your Server Includes ....................... 2 Product Accessories ......................... 2 Additional Information and Software ..................3 Features .................. - Page 3 Kontron CG1200 Carrier Grade Server Installation and Maintenance Guide 3.2.2 Re-installing the Chassis Cover ................17 3.2.3 Removing the Front Bezel ..................17 3.2.4 Re-Installing the Front Bezel ..................18 3.2.5 Removing the Riser Card Assembly................. 18 3.2.6 Re-Installing the Riser Card Assembly ..............19 Internal System Components Configuration and Installation Procedures .........
- Page 4 Kontron CG1200 Carrier Grade Server Installation and Maintenance Guide 4.10.2 Tools and Supplies Needed ................59 4.10.3 Equipment Rack Precautions ................60 Server Component Replacements ..........61 Before You Begin ........................61 5.1.1 System References ....................61 5.1.2 Cable Routing Reference..................61 Replacing Fans ........................
- Page 5 Kontron CG1200 Carrier Grade Server Installation and Maintenance Guide Restoring BIOS Default Settings ..................... 85 Clearing the Password ......................86 BMC Force Update Procedure ....................86 ME Force Update Procedure ....................87 Troubleshooting ................88 Resetting the System ......................88 Problems Following Initial System Installation .................
- Page 6 Kontron CG1200 Carrier Grade Server Installation and Maintenance Guide 9.2.2 If DC power supplies are installed: ................99 9.2.3 DC Power Supply 48V Input Power Mating Connector ..........99 9.2.4 DC Power Supply Earth Grounding Studs on Chassis ..........100 9.2.5 Overcurrent protection ...................
-
Page 7: Introduction
Manual Organization Chapter 2 Features provides a brief overview of the CG1200 server. In this chapter, you will find a list of the server board features, chassis features, illustrations of the product, and product diagrams to help you identify components and their locations... -
Page 8: What Your Server Includes
The following list shows the separately orderable components and optional accessories available for inclusion in the initial order or to have as spares. Refer to the CG1200 Carrier Grade Server Configuration Guide for a complete list of orderable spares and options. The Configuration Guide can be found on the Kontron Support Website at http://us.kontron.com/support/... -
Page 9: Additional Information And Software
If you need more technical information or information about the accessories that can be used with this CG1200 server, refer to the Technical Product Specifications (TPS) for the system and the server board. The TPS documents are located on the Kontron support website at http://us.kontron.com/support. The system TPS provides in-depth technical information about the server. -
Page 10: Features
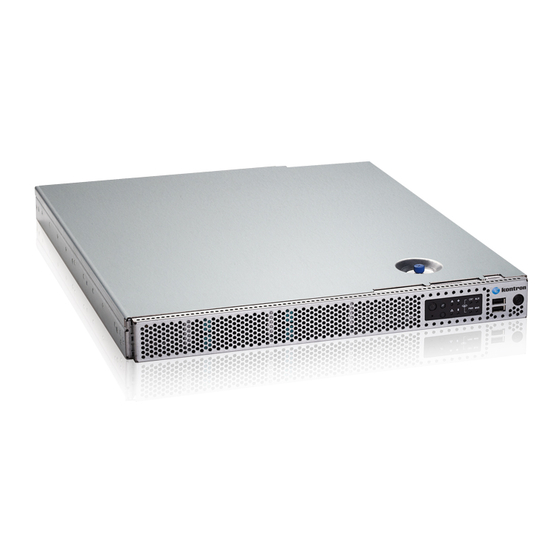
Kontron CG1200 Carrier Grade Server Installation and Maintenance Guide Features This chapter briefly describes the main features of the Kontron CG1200 Carrier Grade Server. It provides a diagram of the product, a list of the server features, and a diagram showing the location of important components and connections on the server system. - Page 11 Kontron CG1200 Carrier Grade Server Installation and Maintenance Guide Table 1: CG1200 Server Features Feature Description External connections: One DE-15 video VGA connector (rear) One DB-15 TAM dry relay connector (rear) Four RJ45 10/100/1000 Mbps network connections (rear) Two USB 2.0 connectors (rear) Two USB 2.0 connectors (front)
-
Page 12: Server Components
Kontron CG1200 Carrier Grade Server Installation and Maintenance Guide Server Components Figure 2 shows the CG1200 server with the top cover removed to show the internal components. Figure 2: CG1200 Server Components... -
Page 13: Cg1200 Server Front Panel
Redundant, hot-swappable AC or DC power PCIe slot supply modules Power distribution board (PDB) CG1200 Server Front Panel Figure 3 shows the front panel of the CG1200 server with the bezel installed. Figure 3: CG1200 Server Front View (Bezel Installed) Item Description Item... - Page 14 Kontron CG1200 Carrier Grade Server Installation and Maintenance Guide Figure 4: CG1200 Server Front View (Bezel Removed) Item Description Item Description Hard disk drive slot 3 ESD ground strap attachment Hard disk drive slot 2 SD flash card LED Mini-bezel control buttons, status...
-
Page 15: Cg1200 Server Back Panel
† Critical and Major alarm indicators are bi-color LEDs that can be configured to be yellow or red by means of an SDR TAM setting. Yellow is the default color. CG1200 Server Back Panel Figure 6 shows the back panel of the CG1200 server. Figure 6: CG1200 Server Rear View... -
Page 16: Front Panel Board
Kontron CG1200 Carrier Grade Server Installation and Maintenance Guide Item Description Item Description Optional power supply slot 2 (filler panel shown) I/O module (filler panel shown) Power supply slot 1 (shown with DC power supply USB ports installed) DC power grounding studs... -
Page 17: Telco Alarm Module (Tam) Board
HDDs. 2) The CG1200 server does not support all SAS or SATA drive models. For a list of validated hard drive manufacturers and hard drive types, refer to the Tested Hardware and Operating System List (THOL) on the Kontron website at http://us.kontron.com/support/... -
Page 18: Server Board (Baseboard)
Kontron CG1200 Carrier Grade Server Installation and Maintenance Guide 2.10 Server Board (Baseboard) The CG1200 server uses the Intel® S2400EP4 server board for the baseboard. The processors and memory DIMMs are on the server board and support for several optional accessories, such a PCI riser slot, the platform management subsystem, and RMM4or I/O module connectors. -
Page 19: Riser Card Assembly
Kontron CG1200 Carrier Grade Server Installation and Maintenance Guide Item Description Item Description PCIe x16 riser slot SAS module CPU 2 DIMM slots Fan 1 power connector Rear panel I/O connectors RKSAS4 storage key (pre-installed) PMBus connector HSBP I C connector... -
Page 20: I/O Module
2.16 System Cooling There are two cooling areas in the CG1200 server as illustrated in Figure 8. All system components except the PCI riser card assembly and components under it are cooled by a set of four CPU/DIMM dual rotor fans mounted near the front of the chassis behind the SAS HDD bay. -
Page 21: Processors And Memory Dimms
2.17 Processors and Memory DIMMs NOTE: To avoid integration difficulties and possible board damage, your server must meet the requirements outlined below. For a list of qualified processors refer to the CG1200 Carrier Grade Server Configuration Guide located on the support website at (search for CG1200, http://us.kontron.com/support/... -
Page 22: Standard Component Installations And Upgrades
3.2.1 Removing the Chassis Cover The CG1200 server must be operated with the top cover in place to ensure proper cooling. You will need to remove the top cover to add or replace components inside the chassis that are not hot-swappable. -
Page 23: Re-Installing The Chassis Cover
Kontron CG1200 Carrier Grade Server Installation and Maintenance Guide 3. Lift the cover straight up to remove it from the chassis (“C”). Figure 9: Removing the Cover 3.2.2 Re-installing the Chassis Cover When you are finished working inside the chassis, you must put the cover back on before turning the server back on. -
Page 24: Re-Installing The Front Bezel
Kontron CG1200 Carrier Grade Server Installation and Maintenance Guide NOTE: The server does not have to be powered down just to remove the front bezel. 1. Loosen the captive bezel retention screw on the right side of the bezel (Figure 10, “A”). -
Page 25: Re-Installing The Riser Card Assembly
Kontron CG1200 Carrier Grade Server Installation and Maintenance Guide 2. Remove the chassis cover. For instructions, see Section 3.2.1 “Removing the Chassis Cover”. 3. Loosen the blue captive retention screw ( 4. Figure 11, “A”) at the front of the riser assembly and the blue captive screw at the back panel of the chassis. -
Page 26: Internal System Components Configuration And Installation Procedures
The memory DIMM slots are located in two separate banks on the S2400EP4 server board. Detailed information about the memory subsystem in the CG1200 server can be found in the Intel® Server Board S2400EP4 Family Technical Product Specification located on the Kontron support website (search for CG1200, click on Product Downloads, then Technical Info). -
Page 27: Installing Memory Dimms
For more information about population considerations, see Section 3.2.2.2 “Memory Slot Identification and Population Rules” in the Intel® Server Board S2400EP4 Family TPS. For information about what memory has been tested on the CG1200 server, see CG1200 Tested Memory List on the Kontron website at http://us.kontron.com/support/... -
Page 28: Replacing Or Removing Memory Dimms
Kontron CG1200 Carrier Grade Server Installation and Maintenance Guide Using both hands, push down firmly and evenly on both sides of the DIMM until it snaps into place and the levers close.(“C”) IMPORTANT: Visually check that each latch is fully closed and correctly engaged with the notch on the DIMM edge. -
Page 29: Adding Or Replacing A Processor
(search for CG1200, click on Product Downloads, and then http://us.kontron.com/support/ Ordering Guide) for a list of compatible processors for the CG1200 server. Use the instructions provided below to add or replace a processor instead of using the instructions that came with the processor. - Page 30 Kontron CG1200 Carrier Grade Server Installation and Maintenance Guide Figure 14: Removing the Heat Sink 4. Open the socket by pushing the lever handle down and away from the socket to release it. (Figure...
- Page 31 Kontron CG1200 Carrier Grade Server Installation and Maintenance Guide Figure 15: Using the Socket Lever 5. Lift the load plate up off the processor. (Figure 16)
- Page 32 Kontron CG1200 Carrier Grade Server Installation and Maintenance Guide Figure 16.Opening the Load Plate 6. Remove the protective cover in the socket (Figure 17 ) or the processor if you are replacing an existing one.
- Page 33 Kontron CG1200 Carrier Grade Server Installation and Maintenance Guide Figure 17 Removing the Socket Protective Cover Installing a New Processor NOTE: Follow the ESD precautions covered in “ESD and Processor Handling Precautions”. To install a processor, follow these instructions: 1. Take the processor out of its packaging and remove the protective shipping cover by grasping the cover tab and pulling it away from the load plate.
- Page 34 Kontron CG1200 Carrier Grade Server Installation and Maintenance Guide CAUTION: The underside of the processor has components that may damage the socket pins if installed improperly. The processor must align correctly with the socket opening before installation. Gently place the processor onto the socket surface. Do not drop the processor into the socket! 3.
- Page 35 Kontron CG1200 Carrier Grade Server Installation and Maintenance Guide Figure 20: Closing the Processor Load Plate 6. When the load plate comes down and the lever is latched, the socket cover pops off. Save it for future use if the processor is removed from the socket (...
-
Page 36: Installing The Heat Sink
Kontron CG1200 Carrier Grade Server Installation and Maintenance Guide Figure 21: Closing the Socket Lever 3.3.6 Installing the Heat Sink 1. If this is a new heat sink (not the one you removed above), remove the protective film, if present, on the Thermal Interface Material (TIM) located on the bottom of the heat sink (Figure 22, “A”). -
Page 37: Configuring Jumpers On The Server Board
Kontron CG1200 Carrier Grade Server Installation and Maintenance Guide Figure 22: Installing a Heat Sink 3.3.7 Configuring Jumpers on the Server Board The jumpers are located on the S2400EP4 server board. The system comes with the baseboard jumpers configured in the default position for normal system operation. Only change the jumper position for performing the desired recovery procedures outlined in this section. - Page 38 Kontron CG1200 Carrier Grade Server Installation and Maintenance Guide Figure 23: Jumper Blocks (J1L4, J1L6, J1L7, J2L4, J2L5)
- Page 39 10 seconds after power on. Pins 2 – 3 should not be connected for normal system operation. See Chapter 9, “Jumper Blocks” in the Intel® Server Board S400EP4 Family TPS on the Kontron Support website for more information about the recovery features.
-
Page 40: Optional Component Installation Procedures
Kontron and some are from third party vendors. For more information about what is available from Kontron, see the CG1200 Carrier Grade Server Configuration Guide. For a list of qualified third party vendors, see the Tested Hardware and Operating System List (THOL). The latest version of the Configuration Guide is located on the Kontron support website at http://us.kontron.com/support/... - Page 41 Kontron CG1200 Carrier Grade Server Installation and Maintenance Guide Figure 24: Cable Routing...
- Page 42 Kontron CG1200 Carrier Grade Server Installation and Maintenance Guide Table 5: System Cables End #1 Connection End #3 Connection Interconnect #: Name: End #2 Connection End #4 Connection End #1: Power Distribution End #3: NA 1. Baseboard SSI Main Board...
-
Page 43: Installing Or Replacing Hard Disk Drives
The CG1200 server does not support all SAS HDD or SATA SDD disk drives. To see a list of validated manufacturers and drive models, refer to the THOL. The latest version of the THOL is located on the Kontron support website at . -
Page 44: Installing A Hard Drive In A Carrier
Kontron CG1200 Carrier Grade Server Installation and Maintenance Guide Figure 25: Removing the Drive Carrier 4.2.2 Installing a Hard Drive in a Carrier 1. If the drive carrier is empty (that is, if you are installing a drive in it for the first time), remove the black plastic filler panel by unfastening the four screws that attach it to the carrier (Figure 26, “A”). - Page 45 Kontron CG1200 Carrier Grade Server Installation and Maintenance Guide Figure 26: Removing a Hard Drive 4. Install the new drive in the drive carrier (Figure 27, “A”) and secure the drive with the four screws that come with the carrier (“B”).
-
Page 46: Installing A Hardware Raid Controller
Figure 28: Inserting a New Hard Drive into the Chassis Installing a Hardware RAID Controller The CG1200 server supports the use of a RAID-on-chip (ROC) hardware RAID controller. This option is separately orderable. The ROC module can be used with or without a SuperCap maintenance-free backup module. - Page 47 Kontron CG1200 Carrier Grade Server Installation and Maintenance Guide b. Unfasten the screw at the back of the duct assembly (“B”) and slide the assembly up and away from the chassis retention bracket (“C”). Figure 29: Removing the PCIe Fan Duct 6.
- Page 48 Kontron CG1200 Carrier Grade Server Installation and Maintenance Guide Figure 30: Removing the Mini-SAS Cable 7. Install the ROC module: a. Firmly fasten the connector on the new SAS cable provided in the cable kit to the ROC module. (Figure 31)
- Page 49 Kontron CG1200 Carrier Grade Server Installation and Maintenance Guide b. Snap the four plastic standoffs from the RAID kit into the holes on the server board (Figure 32, “B”). c. Align the ROC module with the four standoffs and press down on the module to secure it in place (“A”).
-
Page 50: Installing The Supercap Module
Kontron CG1200 Carrier Grade Server Installation and Maintenance Guide Figure 33: Connecting the Mini-SAS Cable to the Backplane If you are not installing a SuperCap module, then re-install the fan duct assembly, re-connect the fan power cable to the server board, replace the riser card assembly, the front bezel, and the chassis cover, and re-connect the power cord(s) and any external devices. - Page 51 Kontron CG1200 Carrier Grade Server Installation and Maintenance Guide 1. Connect the SuperCap cable to the SuperCap module (Figure 34). The module connector is keyed and the contacts face upwards. Figure 34: Connecting the SuperCap Cable to the SuperCap Module 2.
- Page 52 Kontron CG1200 Carrier Grade Server Installation and Maintenance Guide 3. Align the tabs on the bottom of the SuperCap module with the mating connectors on the bracket and slide the module to the right to secure the SuperCap module to the bracket (Figure 36, “A”).
- Page 53 Kontron CG1200 Carrier Grade Server Installation and Maintenance Guide 6. Route the SuperCap cable from the SuperCap module between the main fan assembly and the HDD backplane, and then past the small U-shaped air baffle to the ROC module on the server board (Figure 37).
-
Page 54: Adding Or Replacing A Power Supply Module
Depending on which model you order, your server comes with one AC or one DC power supply module. A second power supply provides redundancy. NOTE: The CG1200 power supply units are hot-swappable, but you must unplug the power cord(s) from the power source before adding them or removing them from the chassis. -
Page 55: Replacing A Power Supply
Kontron CG1200 Carrier Grade Server Installation and Maintenance Guide 1. If you are installing a DC power supply, there are two threaded studs for chassis enclosure grounding. A 90°standard barrel, two-hole, compression terminal lug with 5/8-inch pitch suitable for a #14-10 AWG conductor must be used for proper safety grounding. -
Page 56: Removing The Old Riser Card
Kontron CG1200 Carrier Grade Server Installation and Maintenance Guide Figure 40: Adding a Riser Card CAUTION: When handling the riser card, observe normal safety and ESD precautions. (See Appendix A: Safety Information” for more information. 4.5.1 Removing the Old Riser Card To replace the riser card: 1. - Page 57 Kontron CG1200 Carrier Grade Server Installation and Maintenance Guide 1. Power down the server and remove all peripheral devices and the power cord(s) 2. Remove the chassis cover. For instructions, see Section 3.2.1“Removing the Chassis Cover”. 3. Remove the riser card assembly from the chassis. For instructions, see Section 3.2.5, “Removing the Riser Card Assembly”.
-
Page 58: Installing A Remote Management Module 4
Figure 42: Installing and Securing the Riser Card Assembly Installing a Remote Management Module 4 The Remote Management Module (RMM) solution for the CG1200 server uses RMM4 in the iBMC on the S2400EP4 server board. There are two options: the Intel® Remote Management Module 4 kit and the Intel®... - Page 59 Kontron CG1200 Carrier Grade Server Installation and Maintenance Guide 1. Power down the server and remove all external devices and the power cord(s). 2. Remove the chassis cover. For instructions, see Section 3.2.1, “Removing the Chassis Cover”. 3. Remove the front bezel if you will be using the ESD ground attachment for your anti-static wrist strap.
- Page 60 Kontron CG1200 Carrier Grade Server Installation and Maintenance Guide Figure 44: Re-installing the RMM4 Bracket 8. Install the RMM4 module into the slot in the bracket just installed (Figure 45, “A”). Make sure the module fits within bracket clip (“B”).
- Page 61 Kontron CG1200 Carrier Grade Server Installation and Maintenance Guide Figure 45: Installing the RMM4 Board 11. To install full RMM4, install the small key card to the connector on the server board (Figure 46) Figure 46: Installing the Full RMM4 Activation Key...
-
Page 62: Installing An I/O Module
Reconnect all the external devices and plug in the power cord(s). Installing an I/O Module The CG1200 server supports the use of a separately purchased, optional I/O module, such as the Quad GbE Ethernet Adapter listed in the THOL and Configuration Guide. - Page 63 Kontron CG1200 Carrier Grade Server Installation and Maintenance Guide Figure 47: Adjusting the I/O Module Standoffs 7. Install the I/O module into the rear of the chassis by lining up the three holes on the board with the three standoffs and the module connector with the connector at the edge of the server board (Figure 48, “A”...
-
Page 64: Installing An Eusb Flash Drive
Kontron CG1200 Carrier Grade Server Installation and Maintenance Guide Figure 48: Installing the I/O Module Installing an eUSB Flash Drive A separately purchased, optional Embedded USB flash drive (eUSB) provides local USB flash memory storage for various uses, such as system information, diagnostic partitions, and configuration data. The eUSB is installed on the front panel board. -
Page 65: Installing The Server Into A Rack
For detailed information about the rack mounting kits and how to order them, see the CG1200 Carrier Grade Server Configuration Guide. The latest version of the Configuration Guide is located on the Kontron support website at (search for CG1200, click on http://us.kontron.com/support/... -
Page 66: Equipment Rack Precautions
Kontron CG1200 Carrier Grade Server Installation and Maintenance Guide • Personal grounding device such as an anti-static wrist strap and a grounded conductive pad 4.10.3 Equipment Rack Precautions CAUTION: ANCHOR THE EQUIPMENT RACK — The equipment rack must be anchored to an unmovable support to prevent it from falling over when one or more servers are extended in front of it on slide assemblies. -
Page 67: Server Component Replacements
Server Technical Product Specification. Replacing Fans The fan replacement spare kit for the CG1200 server contains five 40mm dual-rotor fans with their power cables attached. For ordering information, see the CG1200 Carrier Grade Server Configuration Guide. The latest version of the Configuration Guide is located on the Kontron support website at http://us.kontron.com/support/... - Page 68 Kontron CG1200 Carrier Grade Server Installation and Maintenance Guide 5. Unplug the fan power cable from the server board connector (Figure 50 or Figure 51, “A”). 6. Remove each fan by grasping both sides of the fan assembly and pulling the fan out of the black plastic enclosure (“B”).
-
Page 69: Replacing The Front Panel Board
Kontron CG1200 Carrier Grade Server Installation and Maintenance Guide Figure 51: Removing a Processor Fan (System Fan 5) 7. Replace the fan by connecting the power cable on the server board and then inserting the new fan into the empty slot. . - Page 70 SSI front panel board power CAUTION: Before replacing any of the boards on the CG1200 server, you must first take the server out of service, turn off all peripheral devices connected to the server, turn off the server by pressing the power button, and unplug the power cord(s) from the system and wall outlet.
-
Page 71: Removing The Old Front Panel Board
Kontron CG1200 Carrier Grade Server Installation and Maintenance Guide 5.3.1 Removing the Old Front Panel Board 1. Power down the server and remove all peripheral devices and the power cord(s) 2. Remove the chassis cover. For instructions, see Section 3.2.1, “Removing the Chassis Cover”. -
Page 72: Installing The New Front Panel Board
Kontron CG1200 Carrier Grade Server Installation and Maintenance Guide Figure 53: Removing the Front Panel Board from the Chassis 5.3.2 Installing the New Front Panel Board 1. Tilt the new FP board and slide it toward the front of the chassis so the USB connectors fit through the slot on the front panel of the chassis and the two keyhole slots fit over the standoffs on the chassis floor. -
Page 73: Replacing The Led/Switch Board
Replacing the LED/Switch Board The LED/switch board is mounted against the front panel of the CG1200 server chassis because it supports the LEDs and switches that are on the control panel on the front of the chassis. Before you can replace the LED/switch board, you must remove the chassis cover and the front bezel. -
Page 74: Installing The New Led/Switch Board
Kontron CG1200 Carrier Grade Server Installation and Maintenance Guide Figure 54: Removing the LED/Switch Board 5.4.2 Installing the New LED/Switch Board 1. Connect the LED/switch board power and signal ribbon cable to the new LED/switch board. See Figure 54, “A”. -
Page 75: Removing The Old Telco Alarms Module
TAM board, but you may want to move some of the FP cables that cross over the TAM board out of the way.) CAUTION: Before replacing any of the boards on the CG1200 server, you must first take the server out of service, turn off all peripheral devices connected to the server, turn off the server by pressing the power button, and unplug the power cord(s) from the system and wall outlet. -
Page 76: Installing The New Telco Alarms Module
Kontron CG1200 Carrier Grade Server Installation and Maintenance Guide Figure 56: Removing the TAM Board 5.5.2 Installing the New Telco Alarms Module 1. Slide the new TAM board toward the alignment pins. 2. Fasten the retaining screw to secure the module to the chassis floor (Figure 56, “A”). -
Page 77: Removing The Old Sas Backplane Board
The HDD backplane power cable that connects to the power distribution board CAUTION: Before replacing any of the boards on the CG1200 server, you must first take the server out of service, turn off all peripheral devices connected to the server, turn off the server by pressing the power button, and unplug the power cord(s) from the system and wall outlet. - Page 78 Kontron CG1200 Carrier Grade Server Installation and Maintenance Guide Figure 57: Removing the SAS Backplane Board 6. Disengage the backplane board from the retention tabs (Figure 58, “A”) and lift the backplane board and bracket up and out of the chassis (“B”).
-
Page 79: Installing The New Sas Backplane Board
Kontron CG1200 Carrier Grade Server Installation and Maintenance Guide Figure 58: Removing the Bracket from the Backplane Board 5.6.2 Installing the New SAS Backplane Board 1. Fasten the sheet metal bracket to the new backplane board using the three screws saved from the old board. -
Page 80: Replacing The Power Distribution Board
CAUTION: Before replacing any of the boards on the CG1200 server, you must first take the server out of service, turn off all peripheral devices connected to the server, turn off the server by pressing the power button, and unplug the power cord(s) from the system and wall outlet. - Page 81 Kontron CG1200 Carrier Grade Server Installation and Maintenance Guide 5.1.3. Disconnect the PMBus connector. For the location see Figure 7. 5.2. Disconnect the 2x4 CPU 1 power connector. For the location, see Figure 7, “M”. 5.3. Disconnect the HDD backplane power connector. For the location, see Figure 58.
- Page 82 Kontron CG1200 Carrier Grade Server Installation and Maintenance Guide Figure 59: Removing the PDB from the Chassis 8. Remove the bracket from the PDB and save it and the two screws for use with the new PDB (Figure 60).
-
Page 83: Installing The New Power Distribution Board
Kontron CG1200 Carrier Grade Server Installation and Maintenance Guide Figure 60: Removing the PDB Mounting Bracket 5.7.2 Installing the New Power Distribution Board 1. Fasten the PDB bracket to the new PDB with the two screws reserved from removing the old PDB. - Page 84 Kontron CG1200 Carrier Grade Server Installation and Maintenance Guide Figure 62: Installing the New PDB in the Chassis 3. Connect all of the new cables on the new PDB to their connectors on the SAS backplane, server board, and front panel board, being careful to route them as low as possible so as not to interfere with other components or air flow.
-
Page 85: Replacing The S2400Ep4 Server Board
• All DIMMs CAUTION: Before replacing any of the boards on the CG1200 server, you must first take the server out of service, turn off all peripheral devices connected to the server, turn off the server by pressing the power button, and unplug the power cord(s) from the system and wall outlet. - Page 86 Kontron CG1200 Carrier Grade Server Installation and Maintenance Guide For the locations of these cable connectors on the server board and information about how the cables are routed, see Figure 24: Cable Routing” and Figure 7: Baseboard Components and Connectors”.
-
Page 87: Installing The New Server Board
Kontron CG1200 Carrier Grade Server Installation and Maintenance Guide Figure 63: Removing the Server Board 5.8.2 Installing the New Server Board 1. Set the replacement server board in place. Insert the rear edge of the board first and line up the I/O ports with the slots in the rear panel of the chassis. - Page 88 Kontron CG1200 Carrier Grade Server Installation and Maintenance Guide 3. Fasten the server board to the chassis base with the seven screws that were removed and saved. 4. If the new server board does not have components pre-installed and you are re-using components from the old server board, install components as follows: To install memory DIMMs, see Section 3.3.3, “...
-
Page 89: Server Utilities
Using the BIOS Setup Utility This section describes the BIOS Setup Utility, which is used to change configuration values for the Kontron CG1200 Carrier Grade Server. You can run BIOS Setup with or without an operating system present 6.1.1 Using BIOS Setup You may want to use BIOS Setup for the following purposes: •... - Page 90 Kontron CG1200 Carrier Grade Server Installation and Maintenance Guide Description Select Item up - The up arrow is used to select the previous value in a menu item’s option list, ↑ or a value field pick list. Pressing the Enter key activates the selected item.
-
Page 91: Upgrading The Bios
See Section 1.4, “Additional Information and Software” for additional information. 6.2.2 Updating the System Firmware To update the firmware, go to the Kontron Support Website at http://us.kontron.com/support/ search for CG1200, and then click on BIOS. -
Page 92: Clearing The Password
Kontron CG1200 Carrier Grade Server Installation and Maintenance Guide NOTE: Removing power before performing the CMOS clear operation causes the system to automatically power up and immediately power down after the procedure is followed and power is re-applied. If this happens, remove the power cord again, wait 30 seconds, and reconnect the power cord. -
Page 93: Me Force Update Procedure
Kontron CG1200 Carrier Grade Server Installation and Maintenance Guide NOTE: Normal Integrated BMC functionality is disabled when the Force BMC Update jumper is set to the “enabled” position. The server should never be run with the Integrated BMC Force Update jumper set in this position. -
Page 94: Troubleshooting
NOTE: This chapter has not been edited or reviewed for this draft. The information here is subject to change. This chapter helps you identify and solve problems that might occur while you are using the Kontron CG1200 Carrier Grade Server. -
Page 95: Hardware Diagnostic Testing
Kontron CG1200 Carrier Grade Server Installation and Maintenance Guide • Are the configuration settings made in Setup correct? • Is the operating system properly loaded? Refer to the operating system documentation. • Did you press the system power on/off switch on the front panel to turn the server on (power on light... -
Page 96: No Characters Appear On Screen
Kontron CG1200 Carrier Grade Server Installation and Maintenance Guide • Is the system operating normally? If so, the power LED might be defective or the cable from the front panel to the server board might be loose. • Have you securely plugged the server power cord into the power supply? •... -
Page 97: Cannot Connect To A Server
Kontron CG1200 Carrier Grade Server Installation and Maintenance Guide • Is the power-on light lit? If not, see Section 7.4.1, “Power Light does not Light”. • Are any other front panel LEDs lit? • Have any of the fan motors stopped? Use the server management subsystem to check the fan status. -
Page 98: System Boots When Installing A Pci Card
The Windows* operating systems do not include all of the drivers for the Intel chipsets, onboard NICs, ® and other components. Check the Kontron Deployment CD that came with your server or go to http://us.kontron.com/products/systems+and+platforms/communication+rackmount+servers/carrier+grade +servers/cg1200+carrier+grade+server.html for a link to the current drivers and chipset files. -
Page 99: Light-Guided Diagnostics
The server board includes several on-board LED indicators to aid with troubleshooting various board-level faults. This section describes the function of each LED on the server board. For more information and the location of each LED on the board, see the Intel® Server Board S2400EP4 Family TPS on the Kontron website at http://us.kontron.com/support/... - Page 100 Kontron CG1200 Carrier Grade Server Installation and Maintenance Guide Table 7. System Status LED Definitions Color State Criticality Description Green Solid on System OK System booted and ready System degraded: • Non-critical temperature threshold asserted • Non-critical voltage threshold asserted •...
-
Page 101: Post Error Beep Codes
Kontron CG1200 Carrier Grade Server Installation and Maintenance Guide Color State Criticality Description redundant systems. (NOTE: This state also occurs when power is first applied to the system. This indicates the BMC is booting) Power off, if no degraded, non-critical, critical, or non- Not ready recoverable conditions exist. - Page 102 Kontron CG1200 Carrier Grade Server Installation and Maintenance Guide Table 8. POST Error Beep Codes Beeps Error Message Post Progress Code Description USB device Short beep sounded whenever a USB device is discovered action in POST or inserted or removed during runtime Intel®...
-
Page 103: Warranty
Warranty This Kontron product is warranted against defects in material and workmanship for the warranty period from the date of shipment. During the warranty period, Kontron will at its discretion decide to repair or replace defective products. Within the warranty period, the repair of products is free of charge as long as warranty conditions are observed. -
Page 104: Appendix A: Safety Information
Kontron CG1200 Carrier Grade Server Installation and Maintenance Guide Appendix A: Safety Information Warning: Although you may be using this guide or another resource as a reference, before working with your server product pay close attention to these safety instructions. You must adhere to the assembly instructions in this guide to ensure and maintain compliance with existing product certifications and approvals. -
Page 105: If Dc Power Supplies Are Installed
AC source by double or reinforced insulation. The DC source must be capable of providing up to 300 watts of continuous power per feed pair. Mains DC power connect: Kontron recommends using all 4 pins on the DC input connector for redundancy purposes. -
Page 106: Dc Power Supply Earth Grounding Studs On Chassis
Kontron CG1200 Carrier Grade Server Installation and Maintenance Guide Figure 65: DC Power Supply Mating Connector 9.2.4 DC Power Supply Earth Grounding Studs on Chassis For instructions about how the safety earth grounding wire is attached to the chassis for use with DC power supplies, see Figure 39, ”DC Power Supply Grounding”... - Page 107 Kontron CG1200 Carrier Grade Server Installation and Maintenance Guide The power supply in this product contains no user-serviceable parts. There may be more than one supply in this product. Refer servicing only to qualified personnel. Do not attempt to modify or use the supplied AC power cord if it is not the exact type required.
-
Page 108: Wichtige Sicherheitshinweise
Kontron CG1200 Carrier Grade Server Installation and Maintenance Guide 4. Insert and lock the padlock to the system to prevent unauthorized access inside the system. 5. Connect all external cables and the AC power cord(s) to the system. A microprocessor and heat sink may be hot if the system has been running. Also, there may be sharp pins and edges on some board and chassis parts. - Page 109 Kontron CG1200 Carrier Grade Server Installation and Maintenance Guide 3. Ziehen Sie den Stromanschlußstecker Ihres Systems aus der Steckdose. 4. Auf der Rückseite des Systems beschriften und ziehen Sie alle Anschlußkabel von den I/O Anschlüssen oder Ports ab. 5. Tragen Sie ein geerdetes Antistatik Gelenkband, um elektrostatische Ladungen (ESD) über blanke Metallstellen bei der Handhabung der Komponenten zu vermeiden.
-
Page 110: Consignes De Sécurité
Kontron CG1200 Carrier Grade Server Installation and Maintenance Guide • keinen Erschütterungen ausgesetzt sein; • keine starken, von elektrischen Geräten erzeugten elektromagnetischen Felder aufweisen; • in Regionen, in denen elektrische Stürme auftreten, mit einem Überspannungsschutzgerät verbunden sein; während eines elektrischen Sturms sollte keine Verbindung der Telekommunikationsleitungen mit dem Modem bestehen;... -
Page 111: Instrucciones De Seguridad Importantes
Kontron CG1200 Carrier Grade Server Installation and Maintenance Guide 2. Retirez toutes les vis des panneaux et mettez-les dans un endroit sûr. 3. Retirez les panneaux. Afin de permettre le refroidissement et l’aération du système, réinstallez toujours les panneaux du boîtier avant de mettre le système sous tension. Le fonctionnement du système en l’absence des panneaux risque d’endommager ses pièces. - Page 112 Kontron CG1200 Carrier Grade Server Installation and Maintenance Guide El usuario debe abstenerse de manipular los componentes de la fuente de alimentación de este producto, cuya reparación debe dejarse exclusivamente en manos de personal técnico especializado. Puede que este producto disponga de más de una fuente de alimentación.
- Page 113 Kontron CG1200 Carrier Grade Server Installation and Maintenance Guide accederse al mismo sin autorización. 5. Conecte todos los cables externos y los cables de alimentación CA al sistema. Si el sistema ha estado en funcionamiento, el microprocesador y el disipador de calor pueden estar aún calientes.
- Page 114 Kontron CG1200 Carrier Grade Server Installation and Maintenance Guide PASSI DI SICUREZZA: Qualora si rimuovano le coperture del telaio per accedere all’interno del sistema, seguire i seguenti passi: 1. Spegnere tutti i dispositivi periferici collegati al sistema. 2. Spegnere il sistema, usando il pulsante spento/acceso dell’interruttore del sistema.
- Page 115 Kontron CG1200 Carrier Grade Server Installation and Maintenance Guide • Al riparo da urti e lontana da fonti di vibrazione. • Isolata dai forti campi magnetici prodotti da dispositivi elettrici. • In aree soggette a temporali, è consigliabile collegare il sistema ad un limitatore di corrente.
-
Page 116: Appendix B: Regulatory And Certification Information
Kontron CG1200 Carrier Grade Server Installation and Maintenance Guide 10 Appendix B: Regulatory and Certification Information NOTE: This chapter has not been edited or reviewed yet for this CG1200 manual. The information here is subject to change. 10.1 Product Regulatory Compliance 10.1.1 Product Safety Compliance... -
Page 117: Electromagnetic Compatibility Notices
Kontron CG1200 Carrier Grade Server Installation and Maintenance Guide 10.2 Electromagnetic Compatibility Notices 10.2.1 FCC (USA) This device complies with Part 15 of the FCC Rules. Operation is subject to the following two conditions: (1) this device may not cause harmful interference, and (2) this device must accept any interference received, including interference that may cause undesired operation. -
Page 118: Vcci (Japan)
Kontron CG1200 Carrier Grade Server Installation and Maintenance Guide VCCI (Japan) 10.2.4 English translation of the notice above: This is a Class A product based on the standard of the Voluntary Control Council for Interference (VCCI) from Information Technology Equipment. If this is used near a radio or television receiver in a domestic environment, it may cause radio interference. -
Page 119: Appendix C: Nebs Considerations
The intra-building ports of the CG1200 MUST NOT be metallically connected to interfaces that connect to the OSP or its wiring. These interfaces are designed for use as intra-building interfaces only (Type 2 or Type 4 ports as described in GR-1089) and require isolation from the exposed OSP cabling. -
Page 120: Appendix D: Getting Help
12 Appendix D: Getting Help 12.1 World Wide Web Technicians and engineers from Kontron and/or its subsidiaries are available for technical support. We are committed to making our product easy to use and will help you use our products in your systems. - Page 121 Kontron CG1200 Carrier Grade Server Installation and Maintenance Guide Corporate Offices Europe, Middle East & Africa North America Asia Pacific 14118 Stowe Drive 17 Building, Block #1, ABP. Oskar-von-Miller-Str. 1 Poway, CA 92064-7147 188 Southern West 4th 85386 Eching/Munich Ring Road Germany Beijing 100070, P.R.China...
Need help?
Do you have a question about the CG1200 and is the answer not in the manual?
Questions and answers