Table of Contents
Advertisement
Quick Links
Download this manual
See also:
User Manual
Quick Start Guide
Thank you for purchasing GV-Compact DVR. This guide is designed to assist the new user in getting
immediate results from the GV-Compact DVR. For advanced information on how to use the GV-Compact
DVR, please refer to GV-Compact DVR User's Manual on Software DVD.
© 2011 GeoVision, Inc. All rights reserved.
All GeoVision Products are manufactured in Taiwan.
GV-Compact DVR V3
1
Introduction
Welcome to the GV-Compact DVR V3 Quick Start Guide. In the following sections,
you will learn about the basic installations and configurations of the GV-Compact
DVR V3. For a detailed user's manual, see GV-Compact DVR V3 User's Manual on
the GV-Compact DVR V3 software DVD.
Models
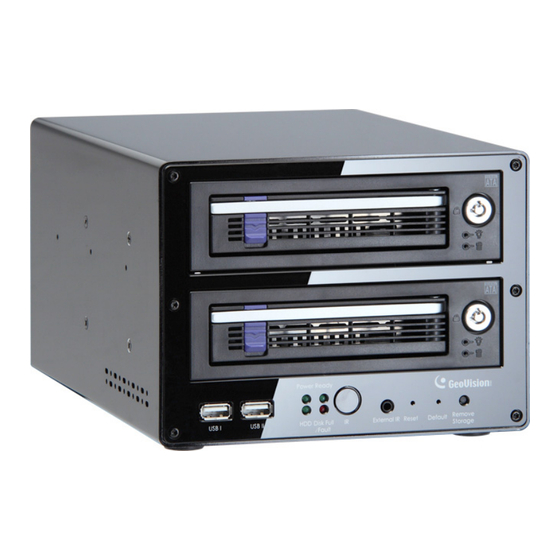
The 4-Channel Unit
Model No.
GV-LX4C3D1
GV- LX4C3D2
GV- LX4C3D2W
GV-LX4C3V
The 8-Channel Unit
Model No.
GV-LX8CD1
GV-LX8CD2
GV-LX8CD2W
GV-LX8CV1
GV-LX8CV2
Note: For the Anti-vibration ACC models (GV-LX4C3V, GV-LX8CV1 and
2011/10
English
GV-LX8CV2), it is necessary to use the hard drive for notebook, vehicle or
CDVRV3-QG-B
surveillance applications to prevent vibration and shock hazard.
Model
Description
Standard
Equipped with 2 USB ports and 1 hard drive
bay.
Standard
Equipped with 2 USB ports and 2 hard drive
bays.
Standard
Equipped with 2 USB ports, 1 hard drive
bay and 1 DVD-RW drive.
Anti-Vibration
Equipped with vibration absorbers, 2 USB
ACC
ports and 1 hard drive bay.
Model
Description
Standard
Equipped with 4 USB ports and 1 hard drive
bay.
Standard
Equipped with 4 USB ports and 2 hard drive
bays.
Standard
Equipped with 4 USB ports, 1 hard drive
bay and 1 DVD-RW drive.
Anti-Vibration
Equipped with vibration absorbers, 4 USB
ACC
ports and 1 hard drive bay.
Anti-Vibration
Equipped with vibration absorbers, 4 USB
ACC
ports and 2 hard drive bays.
Advertisement
Table of Contents

Subscribe to Our Youtube Channel
Related Manuals for GeoVision GV-LX4C3D1


Summary of Contents for GeoVision GV-LX4C3D1
- Page 1 Note: For the Anti-vibration ACC models (GV-LX4C3V, GV-LX8CV1 and 2011/10 English GV-LX8CV2), it is necessary to use the hard drive for notebook, vehicle or © 2011 GeoVision, Inc. All rights reserved. All GeoVision Products are manufactured in Taiwan. CDVRV3-QG-B surveillance applications to prevent vibration and shock hazard.
-
Page 2: Packing List
Packing List The 4-Channel Unit The 8-Channel Unit ● Power Adaptor 12V, 5.0A x 1 ● Power Cable x 1 ● Power Adaptor 12V, 5.0A x 1 ● Power Cable x 1 (Standard Model) (Standard Model) (Anti-Vibration Model) (Anti-Vibration Model) ●... - Page 3 15 16 17 GV-GPS 232 GV-GPS 232 Receiver is a Global Position System Receiver with PS/2 receiver. It can be applied to vehicle tracking and location GV-LX4C3D1 Connector verification. The device is designed for Anti-Vibration ACC models only. 2.5” to 3.5” HDD The HDD converter allows you to install a 2.5’’...
- Page 4 Anti-Vibration ACC Model 75 Ω When using the Loop function, turn the switches to OFF positions. The switch number is corresponding to the channel number. The default setting is ON. Video In/Out • Inputs (4 Blue Connectors/CH1-4): Connects to cameras. •...
- Page 5 The 8-Channel Unit Standard Model Anti-Vibration ACC Model 13 14 15 16 17 13 14 15 16 17 GV-LX8CD1 GV-LX8CV1 13 14 15 16 17 13 14 15 16 17 18 GV-LX8CV2 GV-LX8CD2 Name Description USB Port Connects the USB storage device, Wireless LAN adaptor and/or mobile Internet device.
- Page 6 IR Receiver Receives data from the infrared remote control. VGA Monitor Port Connects to a PC monitor. Default Button Sets all configurations to factory settings. I/O Terminal Block Connects to input and output devices, PTZ cameras, and etc. Reset Button Restarts the unit, and keeps all current configurations.
-
Page 7: Basic Connection For Standard Models
Connecting the GV-Compact DVR V3 Basic Connection for Standard Models 1. Connect to power by using the supplied power adaptor. The 4-Channel Unit 2. Connect to cameras. ● 4-Ch: Using the blue connectors of the supplied D-Type Video Cable, connect to cameras. - Page 8 Power Cable ● Supplied Shorting Cable Camera ● Additional power adaptor (DC 12V, 5A), which can be purchased from GeoVision. Power Cable 1. Connect the Shorting Cable to Pins 14 and 16 (4-Ch) or Pins 22 and 24 (8-Ch) on the terminal block.
- Page 9 Connecting Anti-Vibration ACC Models to a Vehicle Connecting the Power Wire Using the fuse specification diagram, locate the power cables from the fuse box. You You need to connect the ACC model to ACC wire and power wire on the vehicle. may need to use a voltmeter to determine positive-voltage and negative-voltage Connect to Pin 16 (4-Ch) or cables.
-
Page 10: Formatting The Hard Drive
2. The connected USB mass storage device must also be formatted according 3. To enable the updating of images in Microsoft Internet Explorer, you must set your to above instructions before use. browser to allow ActiveX Controls and perform a one-time installation of GeoVision’s ActiveX component onto your computer. -
Page 11: Main Screen Overview
Main Screen Overview Important: 1. If Dynamic IP Address and PPPoE are enabled, you must check the current IP address from the OSD screen of Network Status every time before logging in the unit. Otherwise, you may enable the DDNS function that links a domain name to the unit’s changing IP address first. -
Page 12: Upgrading System Firmware
Upgrading System Firmware You can perform the following basic operations using the remote control. GeoVision will periodically release the updated firmware on the website. To load the new firmware into the GV-Compact DVR V3, read the important notes below and then follow the instructions.
Need help?
Do you have a question about the GV-LX4C3D1 and is the answer not in the manual?
Questions and answers