Table of Contents
Advertisement
Quick Links
Quick Start Guide
Quick Start Guide
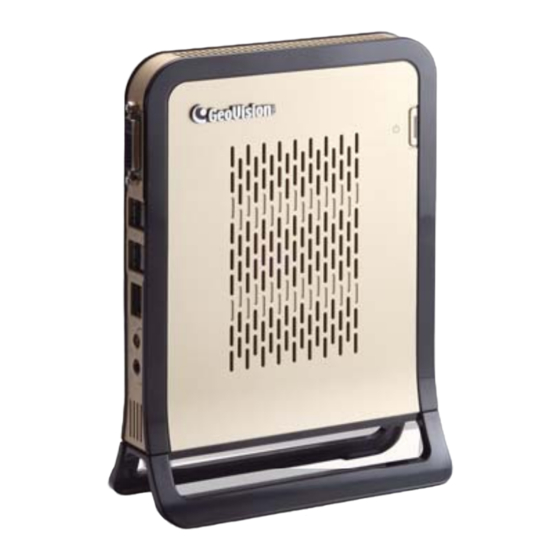
GV-NVR System Lite
Firmware V1.7
Thank you for purchasing GV-NVR System Lite. This guide is designed to assist the new user in getting immediate
results from the GV-NVR System Lite. For advanced information on how to use the GV-NVR System Lite, please
refer to GV-NVR System Lite User's Manual (GV-Desktop < Program button < User Manual).
© 2012 GeoVision, Inc. All rights reserved.
All GeoVision Products are manufactured in Taiwan.
The Vision of Security
RoHS
2012/08
English
NVRLV17-QG-A
1
1
Basic Installation
LAN
1. Connect the speakers to the unit.
2. Connect the microphone to the unit.
3. Using the USB cables, connect a keyboard and a mouse to the unit.
4. Using the DVI cable, connect the computer monitor to the unit.
4
5
7
Left Side
Advertisement
Table of Contents

Summary of Contents for GeoVision GV-NVR System Lite
- Page 1 3. Using the USB cables, connect a keyboard and a mouse to the unit. Thank you for purchasing GV-NVR System Lite. This guide is designed to assist the new user in getting immediate 4. Using the DVI cable, connect the computer monitor to the unit.
- Page 2 Subnet Mask:255.255.255.0 Subnet Mask:255.255.255.0 After the power is turned on, the GV-NVR System Lite will search for GV IP cameras with the default settings. You can then choose to set up the channels automatically or manually. With automatic setup, the GV IP cameras will be randomly assigned an IP address and displayed on the main screen without any further configuration.
-
Page 3: Packing List
IP cameras (of 640x 480 resolution). 3. For details on bundled software preinstalled in the GV-NVR System Lite, see ● Connect up to a total of 4 cameras from GV IP camera and third-party IP cameras (of 1280 x 720 resolution). -
Page 4: Mounting Method
GV-NVR System Lite. Setting Up GV IP Cameras Automatically 1. Power on the GV-NVR System Lite. The GV IP cameras with the default IP address (192.168.0.10), ID (admin) and password (admin) are detected, this message appears. - Page 5 2. Click the Scan Camera button. This dialog box appears. Changing the IP address of the GV IP cameras 1. From the desktop of GV-NVR System Lite, click the Program button and select VS Utility. This dialog box appears. The GV IP device utility will automatically detect the GV IP cameras on the LAN.
- Page 6 Exiting to Windows (TCP/IP) and click Properties. The GV-NVR System Lite is protected by GV-Desktop that is limited to run the 5. Select Use the following IP address, type the new IP information, and click OK selected programs. If you need to exit to Windows desktop, follow these steps.
-
Page 7: Main Screen
Click to call up I/O Control Panel Click to call up PTZ Control Panel The GV-NVR System Lite records audio and video to the internal hard drive. You can Status indicators for remote applications also use an external hard drive to expand recording space. You must format the hard Date / Time / Storage Space drive before you can use it. - Page 8 Chapter 1, DVR User's Manual (GV-Desktop < Program button < User Manual). For details, see 3.6 Adding the External Hard Drive to the Recording Path in GV-NVR System Lite User's Manual (GV-Desktop < Program button < User Manual). Renaming the Camera You can give a new name for each camera.
-
Page 9: Recording Schedule Setup
Recording Schedule Setup Video Playback You can program recording to turn on and off at a specific time each day. You can play back video recorded during a particular date and time. 1. Click on the main screen, and select Schedule Edit. 1. - Page 10 . Zoom in: Click the Zoom-in button, and then click on the area you want to Note: You have to connect a USB DVD RW device to the GV-NVR System Lite magnify. Each click will increase the zoom level. for video files backup.
- Page 11 Playing Backup Files Open the backup folder, run EZViewLog500.exe, and then follow the instructions in the Video Playback section above.
-
Page 12: System Restoration
C. 4. Wait until the “Recover your partition now. Are you sure?” message appears. 1. Restart the GV-NVR System Lite. This image appears. Click OK to start the recovery. 2. Once the above image appears, keep on clicking the F8 button on the keyboard When the recovery process is complete, the confirmation message “The recovery...


Need help?
Do you have a question about the GV-NVR System Lite and is the answer not in the manual?
Questions and answers