Table of Contents
Advertisement
Advertisement
Table of Contents

Related Manuals for York Fitness G-570


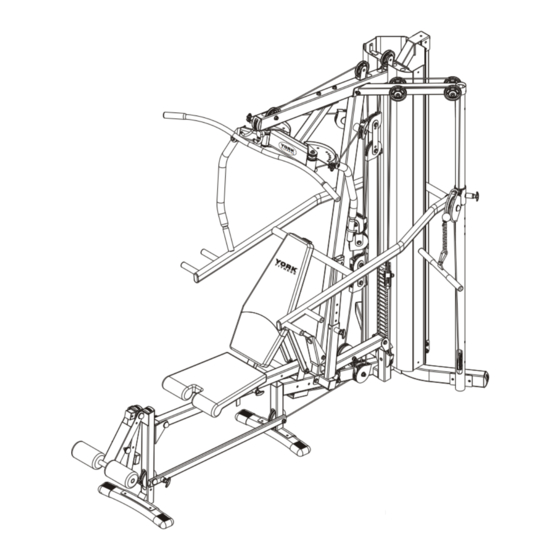
Summary of Contents for York Fitness G-570
-
Page 3: Instruction
SHOULD YOU REQUIRE ANY ASSISTANCE REGARDING THIS PRODUCT PLEASE CONTACT YORK DIRECTLY. Distributed by: Distributed by: Distributed by: YORK FITNESS (TAIWAN) LTD. YORK BARBELL (U.K.) LTD. YORK BARBELL (AUST.) PTY. LTD. YORK WAY, DAVENTRY, 4F-A2. No.51... - Page 4 INSTRUCTION Bolt OVAL STABILIZER (4) onto FRONT CROSS SUPPORT (2) using washers and bolts as illustrated. NOTE: Ensure the feet of the OVAL STABILIZER (4) are pointing forwards. WEIGHT PLATE Slot WEIGHT PLATE GUIDE POSTS (5) down GUIDE POSTS into REAR BASE STABILIZER (1) and bolt together with REAR MAIN TUBE LOWER MOUNT (3) and FRONT CROSS SUPPORT (2) using the washers, bolts and nuts as illustrated.
- Page 5 INSTRUCTION Slot RUBBER BUMPERS (99) onto WEIGHT PLATE GUIDE POSTS (5) M10 x 75mm HEX HEAD BOLT X and slide down to bottom. Fix FLY ARM RETAINING BRACKET (7) onto rear of FRONT MAIN POST (6) using Allen head bolts as illustrated. Attach FRONT MAIN POST (6) onto FRONT CROSS SUPPORT (2) using washers, bolts and nuts as illustrated.
- Page 6 INSTRUCTION Carefully slot the 5KG WEIGHT PLATES (104) WEIGHT PLATE GUIDE POSTS 1 by 1 onto the WEIGHT PLATE GUIDE POSTS (5) ensuring the entry point for the SELECTOR PIN (106) is facing forwards and the flat face of the plate is facing upwards as illustrated.
- Page 7 INSTRUCTION Slot FRONT TOP CROSS SUPPORT (10) into top of WEIGHT PLATE GUIDE POSTS (5) REAR MAIN TUBE and secure to bracket of FRONT MAIN POST (6) UPPER MOUNT using bolts, washers and nuts as illustrated. Attach REAR MAIN TUBE UPPER MOUNT (9) to rear of FRONT TOP CROSS SUPPORT (10) using bolts, washers and nuts as illustrated.
- Page 8 INSTRUCTION Attach FLY ARM MOUNT ASSEMBLY (11) to underside of FRONT TOP CROSS SUPPORT (10) using bolts, washers and nuts as illustrated. NOTE: Bolts must be inserted from top. FLY ARM MOUNT ASSEMBLY M10 NYLON 10.5mm X 23mm X 2mm LOCKNUT X FLAT WASHER X M10 X 100mm HEX HEAD BOLT X...
- Page 9 INSTRUCTION Fit UPPER RIGHT FLY ARM (13) and 1 x CAM ASSEMBLY (14) into right side bracket of FLY ARM MOUNT ASSEMBLY (11) and secure using bolt, washers, nuts and plastic cap as illustrated. M12 NYLON Fit UPPER LEFT FLY ARM (12) and 13mm X 25mm X 2mm LOCKNUT X FLAT WASHER X...
- Page 10 INSTRUCTION Attach LOWER FLY ARM (15) to both LEFT and RIGHT UPPER FLY ARMS using bolts, washers, nuts and plastic caps as illustrated. NOTE: Ensure bottom handles on LOWER FLY ARMS (15) are pointing inwards. M12 NYLON 13mm X 25mm X 2mm 19mm X 19mm X 44mm LOCKNUT X FLAT WASHER X...
- Page 11 INSTRUCTION Align BENCH SUPPORT TUBE (19) (with the slot towards the front) inside top front bracket of FRONT CROSS SUPPORT (2) and attach the RIGHT REAR SEAT SUPPORT (21) and LEFT REAR SEAT SUPPORT (20) using bolt, washers and nut as illustrated. Slot the SEAT GLIDE ASSEMBLY (18) onto the BENCH SUPPORT TUBE (19) and screw the SPRING LOADED PULL/TWIST PIN into...
- Page 12 INSTRUCTION Attach OVAL STABILIZER (4) with the feet pointing forwards to FRONT LEG (16) using bolts, washers and plastic caps as illustrated. 10.5mm X 23mm X 2mm FLAT WASHER X 17mm X 17mm PLASTIC END CAP X M10 X 50mm HEX HEAD BOLT X FRONT LEG OVAL STABILIZER SHOULD YOU REQUIRE ANY ASSISTANCE REGARDING THIS PRODUCT PLEASE CONTACT YORK DIRECTLY...
- Page 13 INSTRUCTION Attach FRONT LEG (16) to the front end of the BENCH SUPPORT TUBE (19) using the bolt, washers, nut and plastic cap as illustrated. NOTE: Align FRONT LEG (16) with the OVAL STABILIZER (4) facing forwards. M10 X 75mm HEX HEAD BOLT X M10 NYLON LOCKNUT X 10.5mm X 23mm X 2mm...
- Page 14 INSTRUCTION Fix LEVEL BRACKET (23) to front of FRONT MAIN POST (6) using nut, bolt and washers as illustrated. Attach PRESS PULLEY BRACKET (22) to side bracket of the FRONT CROSS SUPPORT (2) using nut, washers and bolt as illustrated. NOTE: Ensure the RUBBER STOP of the PRESS PULLEY BRACKET (22) is facing downwards.
- Page 15 INSTRUCTION Secure LOWER HEIGHT ADJUSTER (24) to the threaded pin of the PRESS PULLEY BRACKET (22) using the nut, bolt and washer illustrated. NOTE: Ensure the pivot bush of LOWER HEIGHT ADJUSTER (24) is facing towards the front. Screw the SPRING LOADED PULL/TWIST PIN (77) into the assembly as illustrated.
- Page 16 INSTRUCTION Attach end of BACK REST SUPPORT (26) to SEAT GLIDE ASSEMBLY (18) at rear hole of top bracket using bolt, washers and nut as illustrated. Fix the top end of LEFT & RIGHT REAR SEAT SUPPORT (20 & 21) to the BACK REST SUPPORT (26) using the bolt, washers and nut as illustrated.
- Page 17 INSTRUCTION Mount the SEAT ADJUSTING BRACKET (28) to the centre hole of the SEAT SUPPORT (27) using the nut, bolt and washers as illustrated. Attach the rear hole of SEAT SUPPORT (27) to the front hole of SEAT GLIDE ASSEMBLY (18) top bracket using 2 x SPACER (111), nut, bolt and washers as illustrated.
- Page 18 INSTRUCTION Pass bolt end of TOP PULL CABLE (119) from underside up through slot at front of FRONT TOP CROSS SUPPORT (10) M10 X 65mm HEX HEAD BOLT X and fix PULLEY WHEEL (84) behind cable using nut, washers, bolt and spacers as illustrated. Pass bolt end of TOP PULL CABLE (119) from top through middle slot in FRONT TOP CROSS SUPPORT (10) and fix PULLEY WHEEL (84) under cable to 1 pulley bracket...
- Page 19 INSTRUCTION PULLEY GLIDE BRACKET Screw the SPRING LOADED PULL/TWIST PIN (77) into PULLEY GLIDE BRACKET (34) as illustrated. Pull out SPRING LOADED PULL/TWIST PIN (77) and Slot PULLEY GLIDE BRACKET (34) onto SPRING HIGH/LOW SUPPORT TUBE (33) releasing LOADED the pin to secure in the centre adjustment hole. PULL/TWIST NOTE: The PULLEY GLIDE BRACKET (34) has a flat edge inside, ensure you align this with the flat side...
- Page 20 INSTRUCTION Slot HIGH/LOW CROSS SUPPORT (35) on top of HIGH/LOW SUPPORT TUBE (33) M10 X 78mm HEX HEAD BOLT X and secure to both FRONT TOP CROSS SUPPORT (10) and HIGH/LOW SUPPORT TUBE (33) using bolts and washers as illustrated. Attach ROTATING PULLEY BRACKET (36) to front of PULLEY GLIDE BRACKET (34) using bolt, M10 X 65mm HEX HEAD BOLT X...
- Page 21 INSTRUCTION Attach one end of PEC CABLE (120) inside the small bracket on the side of the right CAM ASSEMBLY (14) using the bolt, washers and nuts as illustrated. Pass PEC CABLE (120) around the back of the FRONT MAIN POST (6) 10.5mm X 23mm X 2mm before attaching the other end inside the small bracket on the side of FLAT WASHER X...
- Page 22 INSTRUCTION Insert ball end of HIGH/LOW PULLEY CABLE (118) end pointing upwards) into ROTATING PULLEY BRACKET (36) and mount PULLEY WHEEL (113) in front using the bolt, washers, nut and plastic caps as illustrated. Feed other end of HIGH/LOW PULLEY CABLE (118) through front of slot in bottom of HIGH/LOW SUPPORT TUBE (33) and fix PULLEY WHEEL (84) with PULLEY COVERS (85) above cable using nut, washers, bolt and spacers as illustrated.
- Page 23 INSTRUCTION START HERE SINGLE PULLEY BRACKET HIGH / LOW PULLEY CABLE SHOULD YOU REQUIRE ANY ASSISTANCE REGARDING THIS PRODUCT PLEASE CONTACT YORK DIRECTLY YORK G570 / 21...
- Page 24 INSTRUCTION You will need assistance to locate the single hole end of LEG EXTENSION ASSEMBLY (31) inside front bracket of FRONT LEG (16) and align the top hole of the LEG CURL ASSEMBLY (32) to the outside of the FRONT LEG (16) bracket, securing both parts in place using the nut, bolt, washers and plastic caps as illustrated.
- Page 25 INSTRUCTION Attach NON ball end of LEG EXTENSION CABLE (117) inside small bracket at bottom of LEG EXTENSION ASSEMBLY (80) using nut and bolt as illustrated. Pass other end of LEG EXTENSION CABLE (117) from front through slot in bottom of FRONT LEG (16) and out to the rear through slot in leg of FRONT CROSS SUPPORT (2).
- Page 26 INSTRUCTION SHOULD YOU REQUIRE ANY ASSISTANCE REGARDING THIS PRODUCT PLEASE CONTACT YORK DIRECTLY YORK G570 / 24...
- Page 27 INSTRUCTION SHOULD YOU REQUIRE ANY ASSISTANCE REGARDING THIS PRODUCT PLEASE CONTACT YORK DIRECTLY YORK G570 / 25...
- Page 28 INSTRUCTION Screw bolt end of CONNECT CABLE (124) into bottom of SINGLE PULLEY BRACKET (39) and feed other end from outside through slot in side of FRONT CROSS SUPPORT (2) fixing PULLEY WHEEL (84) and PULLEY COVERS (85) above CONNECT CABLE (124) using nut, bolt and washers as illustrated.
- Page 29 INSTRUCTION PULLEY BRACKET PLATE DOUBLE PULLEY BRACKET NOTE: Over time the cables may stretch, move pulley wheels to START inner adjustment HERE holes as required to correct the cable length. CONNECT CABLE VIEW FROM RIGHT SIDE SHOULD YOU REQUIRE ANY ASSISTANCE REGARDING THIS PRODUCT PLEASE CONTACT YORK DIRECTLY YORK G570 / 27...
- Page 30 INSTRUCTION Fit the REAR UPHOLSTERY (115) to BACK REST SUPPORT (26) and SEAT (114) to SEAT SUPPORT (27) using the washers and bolts as illustrated. M8 X 37mm HEX HEAD BOLT X REAR 8.5mm X 20mm X 2mm UPHOLSTERY WASHER X SEAT SHOULD YOU REQUIRE ANY ASSISTANCE REGARDING THIS PRODUCT PLEASE CONTACT YORK DIRECTLY YORK G570 / 28...
- Page 31 INSTRUCTION Insert the REAR MAIN UPRIGHT (30) top first into REAR MAIN TUBE M10 X 80mm HEX HEAD BOLT X UPPER MOUNT (9) then swing bottom into REAR MAIN TUBE LOWER MOUNT (3) and secure using bolts, washers and nuts as illustrated. REAR MAIN UPRIGHT 10.5mm X 23mm X 2mm...
- Page 32 INSTRUCTION Attach 1 x SIDE WEIGHT COVER (108) to the right side using the bolts and washers as illustrated. NOTE: Ensure the YORK BADGE on the side is 8.5mm X 20mm X 2mm the correct way up and the holes along the long FLAT WASHER X edge are towards the rear.
- Page 33 INSTRUCTION You will need assistance to pass the narrow end of the BENCH PRESS ARM (40) either side of the SIDE WEIGHT COVERS (108) from the front and align with pivot tube mounted on the REAR MAIN UPRIGHT (30). NOTE: Ensure bracket in centre is on the left side as illustrated.
- Page 34 INSTRUCTION Fit the LAT BAR (41) to the ball end of TOP PULL CABLE (119) using 1 x SNAP LOCK HOOK (76). Attach the SHORT PULLEY BAR (42) to the ball end of HIGH/LOW PULLEY CABLE (118) using the CHAIN (78) and 2 x SNAP LOCK HOOKS (76). SHOULD YOU REQUIRE ANY ASSISTANCE REGARDING THIS PRODUCT PLEASE CONTACT YORK DIRECTLY YORK G570 / 32...
- Page 35 SHOULD YOU REQUIRE ANY ASSISTANCE REGARDING THIS PRODUCT PLEASE CONTACT YORK DIRECTLY YORK G570 / 33...
- Page 36 SHOULD YOU REQUIRE ANY ASSISTANCE REGARDING THIS PRODUCT PLEASE CONTACT YORK DIRECTLY YORK G570 / 34...
- Page 37 DESCRIPTION SHOULD YOU REQUIRE ANY ASSISTANCE REGARDING THIS PRODUCT PLEASE CONTACT YORK DIRECTLY YORK G570 / 35...
- Page 38 DESCRIPTION SHOULD YOU REQUIRE ANY ASSISTANCE REGARDING THIS PRODUCT PLEASE CONTACT YORK DIRECTLY YORK G570 / 36...
- Page 39 DESCRIPTION SHOULD YOU REQUIRE ANY ASSISTANCE REGARDING THIS PRODUCT PLEASE CONTACT YORK DIRECTLY YORK G570 / 37...
- Page 40 DESCRIPTION SHOULD YOU REQUIRE ANY ASSISTANCE REGARDING THIS PRODUCT PLEASE CONTACT YORK DIRECTLY YORK G570 / 38...
- Page 41 PARTS LIST KEY NO. PART NO. Q'TY(PCS) DESCRIPTION 5643-01 REAR BASE STABILIZER 5643-02 FRONT CROSS SUPPORT 5643-03 REAR BOTTOM CROSS POST 5643-04 FRONT STABILIZER 5643-05 WEIGHT PLATE GUIDE POST 5643-06 FRONT MAIN POST 5643-07 ARM REST BRACKET 5643-08 SELECTOR STEM 5643-09 TOP REAR CROSS BRACKET 5643-10...
- Page 42 PARTS LIST KEY NO. PART NO. Q'TY(PCS) DESCRIPTION 5643-43 M12 X 125mm HEX HEAD BOLT 5643-44 M12 X 80mm HEX HEAD BOLT 5643-45 M12 X 70mm HEX HEAD BOLT 5643-46 M10 X 165mm HEX HEAD BOLT 5643-47 M10 X 125mm HEX HEAD BOLT 5643-48 M10 X 100mm HEX HEAD BOLT 5643-49...
- Page 43 PARTS LIST KEY NO. PART NO. Q'TY(PCS) DESCRIPTION 5643-86 50mm X 70mm X 2mm INTERNAL END CAP 5643-87 50mm X 50mm X 2mm SQ. INTERNAL END CAP 5643-88 25.4mm O.D. INTERNAL END CAP 5643-89 30mm X 60mm X 2mm INTERNAL END CAP 5643-90 25mm X 50mm X 2mm REDUCER CAP 5643-91...
-
Page 44: Warranty Registration
F I T N E S S HELP LINE (8:30am- 4:30pm) HELP LINE (9:00am- 6:00pm) YORK BARBELL CO. LTD. YORK FITNESS (TAIWAN) LTD. 1450 S. SERVICE ROAD WEST, ROOM A2 4F, NO.51, GONG-YI ROAD, OAKVILLE (TORONTO), ONTARIO, SEC. 2, TAICHUNG CITY, TAIWAN... - Page 45 WARRANTY REGISTRATION IMPORTANT: Please complete and return this page, with a copy of your receipt, to your local York dealer within 14 days. Alternatively, you can register your warranty on-line - please visit www.yorkfitness.com Which product did you buy? _________________________________________________________________________ Where from (name of retailer)? _______________________________________________________________________ Date Purchased _____________________________ Serial / Batch No _______________________________...
- Page 46 PLACE STAMP HERE PLACE STAMP F I T N E S S HERE PLACE STAMP HERE...
- Page 47 PARTS ORDER FORM Enclose a check or money order with this form for replacement parts. Date of purchase Name of location where purchased Model number Last name, First name Telephone number Address City State Zip/Postcode Part Description Part No. Q'ty Unit Price Total Total value of order...
- Page 48 PLACE STAMP HERE PLACE STAMP F I T N E S S HERE PLACE STAMP HERE...
Need help?
Do you have a question about the G-570 and is the answer not in the manual?
Questions and answers