Advertisement
Advertisement
Table of Contents

Related Manuals for York Fitness 540


Summary of Contents for York Fitness 540
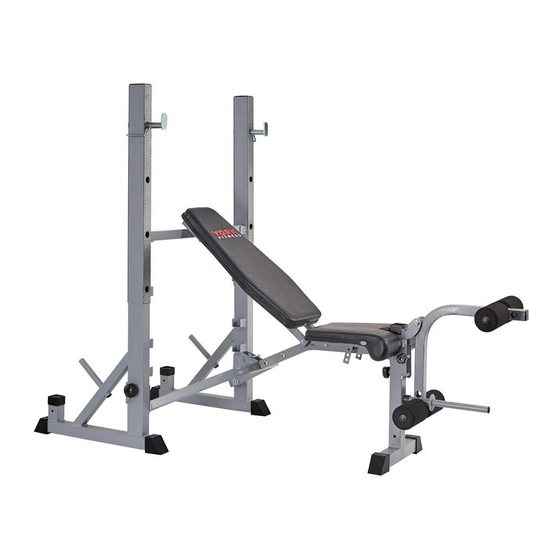
- Page 1 Owner’s Manual York 540 Bench Item #45070 June 27 ,2013 www.yorkfitness.com...
- Page 2 Table of contents Congratulations on CONTENTS purchasing your exercise equipment from Safety information Customer support Assembly instructions Folding bench for storage 18 You have chosen a high quality, safe and innovative piece of equipment as your Exploded drawing training partner and we are certain it will keep you motivated on the way to achieving your personal fitness goals.
-
Page 3: Safety Information
• Use only the adjustment settings as described in • Due to our continuous policy of product the instructions. Always use the correct adjustment development, York Fitness reserves the right to pin and/or locking devices. • secure before use and / or after adjustment. -
Page 4: Customer Support
This product label is an example only, it is not the realserial number of the item you have bought. IMPORTANT!! - Please retain your sales receipt, York Fitness Customer Care may request proof of purchase to validate eligibility for warranty service. Warranty cover starts from the date shown on the proof of purchase. -
Page 5: Assembly Instructions
Assembly instructions Care & Maintenance • This equipment should not be placed outdoors, in a garage or an outbuilding. Keep the equipment in a dry place with as little temperature variation as possible. • We recommend placing a mat beneath the equipment to protect both the equipment and your flooring. •... - Page 6 Assembly instructions Blister Pack: 45070 M8x40L 8 pcs M10x50L 2 pcs M10x40L 2 pcs M10 2 PCS M10 2 PCS D20xD11 5pcs D25xD8.5x2T 2PCS M10x70L 2 pcs M10 1 PCS D24xD13.5 2pcs M12x80L 1pcs M12 1pcs D38xD8.5x3T 2pcs (MM) www.yorkfitness.com...
- Page 7 Step 1 1. Locate the LEFT/RIGHT SIDE SUPPORTS (3&4) and position them in the upright position. Ensure that the post brackets are facing inwards. Ensure that these parts are being supported by somebody else as they could fall if stood up on there own. 2.
- Page 8 Assembly instructions Step 2 1. Find the U-SHAPED LOCKING PIN (17) and insert into the bracket at the rear of the REAR CONNECTING SUPPORT (5). Incline adjustable post in position U-Shaped Locking Pin www.yorkfitness.com...
- Page 9 Step 3 1. Find the MAIN FRAME SUPPORT(2) and connect to the FRONT UPRIGHT shown. Ensure that the bracket points to the front. You may tighten Bracket towards front 30 x 1 28 x 1 25 x 2 Step 4 1.
- Page 10 Assembly instructions Step 5 www.yorkfitness.com...
- Page 11 Step 6 1. Find the 2 x BACK UPHOLSTERY POSTS (8), L/R SEAT UPHOLSTER POSTS (8) & PIVOT ROD (15) 2. Assemble the parts so that the PIVOT ROD locates through the bust on the main frame support, the SEAT UPHOLSTERY POSTS are either side with the 2 x BACK UPHOLSTERY POSTS are on the outside.
- Page 12 Assembly instructions Step 7 1. Find the BACK UPHOLSTER (8) and attach to the BACK UPHOLSTERY POSTS using the fixings shown. 2. When all bolts are in place, tighten all bolts up to this stage. Back Upholstery Posts 24 x 4 34 x 4 www.yorkfitness.com...
- Page 13 Step 8 1. Find the SEAT UPHOLSTERY (19) and attach to the SEAT UPHOLSTERY POSTS using the fixings shown. 24 x 4 34 x 4 Seat Upholstery Post Left/Right www.yorkfitness.com...
- Page 14 Assembly instructions Step 9 www.yorkfitness.com...
- Page 15 Step 10 1. Find the LEG EXTENSION SUPPORT (12), 4 x FOAM ROLLERS (49), 2 x FOAM ROLLER POSTS (16) & a SPRING COLLAR (37) 2. Slot the 2 x FOAM ROLLER POSTS through the LEG EXTENSION SUPPORT and then add the 4 x FOAM ROLLERS.
- Page 16 Assembly instructions Step 11 1. Find the LEG EXTENSION SUPPORT (12), 4 x FOAM ROLLERS (49), 2 x FOAM ROLLER POSTS (16) & a SPRING COLLAR (37) 2. Slot the 2 x FOAM ROLLER POSTS through the LEG EXTENSION SUPPORT and then add the 4 x FOAM ROLLERS.
- Page 17 Step 12 www.yorkfitness.com...
- Page 18 Folding Bench for storage To fold up the bench: 1. Remove the incline adjustable post. 2. The back upholstery will then rest freely on the main frame. 3. Loosen and remove the 2 x male hand-wheels 4. Remove the female hand-wheel and the bolt at the front of the bench. (WARNING: Ensure unsecured front leg is held in position.) 5.
- Page 19 Bench In Squat Position Bench I n Squat Posi t i o n: 1. Remove the incline adjustable post. 2. Place the adjustable post into position. (see diagrams / stages below. ) 3. Place the left & right adjustable bar racks So that they are to the rear of the bench.
- Page 20 Exploded Drawing / Part List REF. DESCRIPTION QTY. REF. DESCRIPTION QTY. FRONT UPRIGHT SUPPORT FLAT WASHER (D24*D13.5*2.5T) MAIN FRAME SUPPORT SELF TAPPING SCREW (ST4*1.41*10L) LEFT SIDE SUPPORT NYLON NUT (M10*1.5*10T) RIGHT SIDE SUPPORT NYLON NUT (M12*1.75*12T) REAR CONNECTING SUPPORT FLAT WASHER (D20*D11*2T) LEFT SEAT UPHOLSTERY POST FLAT WASHER (D24*D13.5*2.5T) RIGHT SEAT UPHOLSTERY POST...
- Page 21 www.yorkfitness.com...
Need help?
Do you have a question about the 540 and is the answer not in the manual?
Questions and answers