Table of Contents
Advertisement
Advertisement
Table of Contents

Related Manuals for WaterLogic WL Cube Firewall


Summary of Contents for WaterLogic WL Cube Firewall
- Page 1 WL Cube Firewall Technical Manual VERSION 1...
- Page 2 UV-C radiation. UV-C radiation may, even in little doses, cause harm to the eyes and skin. 14. Appliances that are obviously damaged must not be used. Electrical Wiring Diagram 120V 15. The replacement of the UV lamp must be carried out by personnel trained by Waterlogic International Electrical Wiring Diagram 230V or their approved distributors.
-
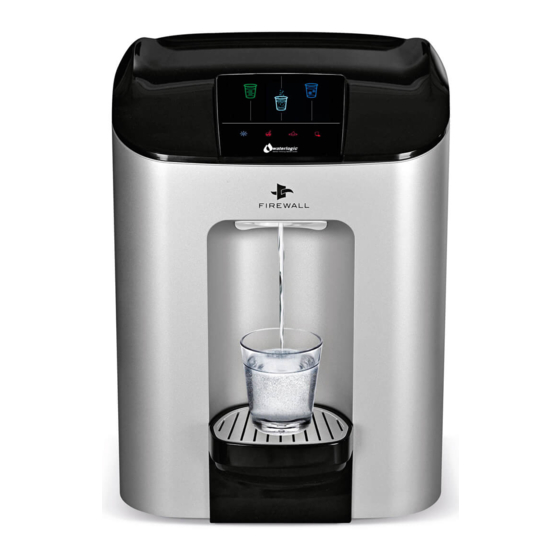
Page 3: Machine Overview
There are many kinds of different filter combinations available from Waterlogic to suit local water conditions. FIREWALL CHAMBER The Firewall chamber incorporates the in-Faucet UV and is made of aluminium and is highly reflective. -
Page 4: Water Valves
UV LAMP PLASTIC PANELS The UV light is a 13 Watt germicidal lamp at a wavelength of 253.7 NM, which is The molded panels are made from recyclable ABS plastic. All the ABS plastic panels very efficient at destroying bacteria in water. The UV lamp is situated in the Firewall are UV resistant and meet the standards of CE and UL. -
Page 5: Pre Delivery Inspection Procedures (Pdi)
CAUTION: Only competent trained technicians should work on Waterlogic products. Waterlogic units may weigh over 25KG. We recommend caution when lifting. Packing materials could present a trip hazard. Keep them off the floor. Take care not to allow the power lead to get wet. If the lead gets wet it must not be used. -
Page 6: Installation Procedures
16. Turn unit around and drain from rear drain valves if fitted. filter. 17. Clean and repack ready for dispatch. 18. Waterlogic recommend that all units are fully electrically (PAT) tested on site by the commissioning engineer as damage may have occurred during transit to the unit’s final destination. -
Page 7: Installation Kit
• The cold tank should also be flushed and sanitised every 12 months. • Waterlogic International strongly recommends the use of an anti-flood device. 12. The water temperatures are pre-set at the factory to 5°c for the cold water and •... -
Page 8: Energy Saving Feature
Operating Instructions Operating Instructions ENERGY SAVING FEATURE COLD WATER The Cube has an energy saving feature that minimizes power consumption when Select cold water and press dispensing button. the machine has not been operated for 3 hours. If the sleep mode on the Cube has been deactivated, the machine will automatically enter sleep mode after 72 hours of no use. -
Page 9: Maintenance And Servicing
Maintenance and Servicing • The Cube must be serviced every 12 months, but we strongly recommend 11. Check the faucet nipple for any calcium build up or any visible damage and clean the UV lamp and filters be changed every six months. or replace it if necessary. - Page 10 4. Remove the top cover from the Cube by undoing the two screws located at the DE-SCALING back of the machine, then slide the panel backwards and lift up. You will need the following items: 5. Take out the filter by un-clicking the loop at the top of the housing and pulling it •...
-
Page 11: Advisory Icons
ADVISORY ICONS selecting the cold option until the water stops being dispensed. Isolate the power to HOT WATER DISPENSING the machine by switching the red switch at the rear of the machine off and removing Press and hold the hot water icon BUTTON the power lead. -
Page 12: Fault Finding
8. Water leaks: Most leaks will be detected by either the internal Cube leak detection system that will trigger an alarm, or it will trip the Waterlogic block located on the All fault finding procedures must be carried out by a technician trained by Waterlogic installation kit. -
Page 13: Technical Specifications And Warranties
Minimum Water Pressure 3.77 (0.377) 2.6 (0.26) Bar (Megapascal) Waterlogic has a policy of constant and continual improvement and therefore Maximum Water Pressure 6.0 (0.6) 4.14 (0.414) reserves the right to change specifications without prior notice, other than in the Bar (Megapascal) case of significant changes. -
Page 14: End Of Life
ROHS All Waterlogic machines comply with EC Directive (2002/95/EC) on the Restriction of the Use of Certain Hazardous Substances in Electrical and Electrical Equipment (RoHS). BIOCOTE® (ANTI-MICROBIAL SOLUTION) For your added protection this product incorporates BioCote®... -
Page 15: Electrical Wiring Diagram 230V
Electrical Wiring Diagram 230V Dip Switch Setup THE CUBE MAIN PCB DIP SWITCHES 1 & 2 WITH INSTRUCTIONS Dip switch 2 DANGER HIGH VOLTAGES PRESENT ON THIS PCB CARE MUST BE TAKEN WHEN LIVE TESTING Dip switch 1 The Cube Technical Manual - Version 1, May 2014... - Page 16 Dip Switch Setup When reading this document please note the white coloring on the diagrams indicate the required position of the switch to determine the setting. DIP SWITCH 1 SETUP DIP SWITCH 2 SETUP FILTER 2 C-TEMP 1 H-TEMP 3 H-SLP 5˚c 80 ˚c...
-
Page 17: Wetted Parts List
Wetted Parts List Hot, Cold and Ambient N° Part Description JG Bulkhead Connector Union 1/4" * 1/4" JG LLD PE Tube - Blue O.D.1/4" JG LLD PE Tube - Blue O.D.1/4" 48 47 46 45 44 43 41 40 39 36 35 34 33 32 31 30 29 28 27 JG Stem Elbow Connector 1/4"... - Page 18 Wetted Parts List Hot, Cold and Sparkling N° Part Description Silicon Tube 5/16" for hot water JG End Stop 1/4" JG LLD PE Tube - Blue O.D.1/4" JG Equal Tee Connector 1/4" JG 1/4" STOPPER JG UK JG Equal Tee Connector 1/4" JG LLD PE Tube - Blue O.D.1/4"...
-
Page 19: Main Parts List
Main Parts List WL Cube Mains Parts Illustration N° Part Description WL Cube Side panel left -Silver Mark IV Al (Mirror/no gauze/Spout 18mm) for CUBE WL Cube FW fixing bracket WL Cube Front frame panel-Black WL Cube Front cover -Silver WL Cube Spout assembly bracket-Silver WL Cube Drip tray body -Black WL Cube Drip tray grill -Silver... - Page 20 N° Part Description Drain valve cap only (for 5/16" & 1/4" size) Electronic fixing Bracket WL Cube WL Cube Top Cover- Black 5/16-1/4 Reducing Straight Connector Filter Bracket CBC 1 Micron 10" Filter Ass’y-PD use-WL Label Hot & Cold Solenoid Valve 24V- 300mm CUBE 1/4"...
- Page 21 Speak to a Water Expert USA, Canada and Mexico exportsales@waterlogic.com info@waterlogicusa.com + 353 1 293 1960 + 1 402 884 7212 WLI Trading Ltd. Waterlogic USA, 11710 Stonegate Circle, Suite 4, 2nd Floor Beacon Court, Omaha, NE 68164 Sandyford, Dublin 18, Ireland www.waterlogic.com...
Need help?
Do you have a question about the WL Cube Firewall and is the answer not in the manual?
Questions and answers