Table of Contents
Advertisement
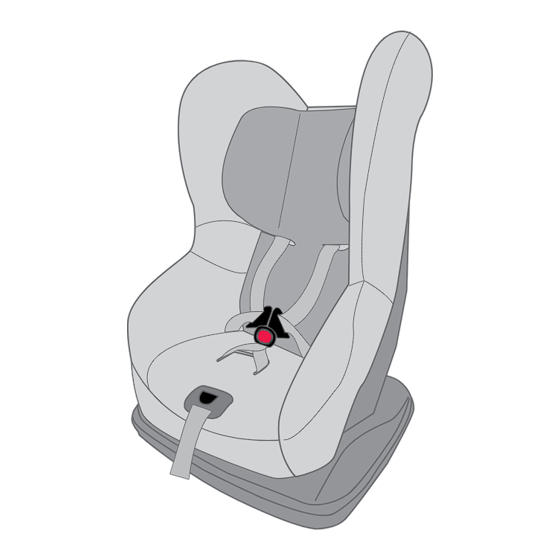
Convertible Child Restraint
Rearward Facing
For use with children
up to approximately 12 months.
IMPORTANT: KEEP THIS BOOKLET IN THE PLACE PROVIDED ON THE CHILD RESTRAINT
Series No.7300/A/2010, 7300/D/2010
Forward Facing.
For use with children from approximately
12 months to approximately 4 years of age.
Advertisement
Table of Contents

Related Manuals for Britax 7300 A 2010


Summary of Contents for Britax 7300 A 2010
- Page 1 Convertible Child Restraint Series No.7300/A/2010, 7300/D/2010 Rearward Facing Forward Facing. For use with children For use with children from approximately up to approximately 12 months. 12 months to approximately 4 years of age. IMPORTANT: KEEP THIS BOOKLET IN THE PLACE PROVIDED ON THE CHILD RESTRAINT...
- Page 2 CAREFULLY READ ALL THE INSTRUCTIONS FOR INSTALLATION. IN THE EVENT OF DOUBT ABOUT SPECIAL FEATURES - FORWARD-FACING THE METHOD OF INSTALLATION, CONSULT BRITAX CHILDCARE OR AGENT OR A CHILD RESTRAINT FITTING STATION AUTHORISED BY A RELEVANT TRANSPORT AUTHORITY OR, IN NEW ZEALAND, SUITABLE FOR USE - FORWARD-FACING THE AGENT FOR THE VEHICLE.
- Page 3 • Use the restraint exactly as shown in the instructions. • The restraint is not intended to be a substitute baby cot or bed. It is only designed to enable safe transportation of children in motor vehicles. Do not leave a baby in the restraint for long periods •...
-
Page 4: Shoulder Height Markersa Growing Child
SHOULDER HEIGHT MARKERS SHOULDER HEIGHT MARKERS A GROWING CHILD Newborn (Rearward facing) Shoulder height markers are provided on this restraint for a visual indication that the child is safe to Shoulder height ride in this restraint. Do not turn to forward-facing until the child's shoulder's reach the lower marker. Rearward Facing label (hidden) Do not continue to use the restraint if the child's shoulders are above the top marker. - Page 5 SHOULDER HEIGHT MARKERS & SUITABLE FOR USE - REARWARD-FACING THE NEXT STEP For the next child restraint choose TO BE USED WITH A LAP SASH OR LAP ONLY SEAT BELT IN Convertible Booster THE BACK OF MOST CARS WITH FORWARD-FACING SEATS. from: 600mm seat used with...
-
Page 6: Special Features
SPECIAL FEATURES - SPECIAL FEATURES - REARWARD-FACING REARWARD-FACING To be used only in a rearward-facing position until the infant's shoulders reach the lower shoulder height marker (approximately 12 months of age). Shoulder Height Markers may be hidden under headrest in lowest position. 1. -
Page 7: How To Set Up
HOW TO SETUP HOW TO SETUP ADJUSTING HASSLE FREE HARNESS™ STRAP HEIGHT & HEADREST: CONVERT TO BABY USE MODE FOR BABY USE REARWARD-FACING A. To fully recline the restraint into Child use mode, place one hand Correct fitment of the harness is very important as it restrains the baby in the restraint. The Headrest on the front corner of the base firmly, lift recline latch up to unlock, must be in the correct position &... -
Page 8: How To Install
HOW TO SETUP HOW TO INSTALL HOW TO ADJUST HEADREST & HASSLE FREE HARNESS™ INSTALLING INTO VEHICLE (REARWARD FACING) A. Loosen the harness straps before adjusting the Headrest. The restraint is normally packaged in the fully upright child use Fully press Adjuster Button (A) mode so if you need to use it for baby use you must first fully B. - Page 9 HOW TO INSTALL HOW TO INSTALL INSTALLING INTO VEHICLE (REARWARD FACING) Continued D. Remove Insert Pad (if fitted), and gently lift Headrest trim end, then pull backwards the centre panel flap, with the Padded Insert comfort pad from the inner seat of trim. A.
- Page 10 HOW TO INSTALL HOW TO INSTALL F. Engage seat belt buckle & tongue and H. Align restraint centrally to the chosen seating position as shown right. Pull tighten the seat belt allowing the sash to sash portion of seat belt until all fully retract.
- Page 11 HOW TO INSTALL HOW TO INSTALL I. Fit the attachment clip to the anchor fitting as shown Fitting Summary Attachment Clip Hook Attachment Clip to right. Make sure to remove as many twists as the car's anchor fitting. possible from the upper anchorage strap. Ensure Upper Anchorage Strap is tightened, attached to the J.
- Page 12 HOW TO INSTALL HOW TO INSTALL IMPORTANT: ANGULAR ADJUSTMENT OF RESTRAINT If using an Extension Strap, positioning the Attachment Clip above the baby may lead to injury in an Some vehicle seats have more rearward slope than others. If the angle of the seat causes the baby to accident therefore make sure that the Attachment Clip is not positioned in front of the vehicle seat.
-
Page 13: How To Use
HOW TO USE HOW TO USE PLACING BABY INTO RESTRAINT D. Fit either harness tongue into the harness buckle followed by the A. Ensure the Headrest and shoulder straps are adjusted to the correct height for your child (see page other tongue until a click is heard. - Page 14 Strap to remove C. Disengage Attachment Clip from the Anchor Fitting. The slack Do not use restraint if straps do not tighten and contact Britax child restraint is now disconnected. Childcare Customer Service. Refer to back cover for details. See page 34 for storage of the stabilising bar and the return to the upright position if required.
- Page 15 SPECIAL FEATURES SPECIAL FEATURES - FORWARD-FACING - FORWARD-FACING 18 19 To be used only in a forward- facing position by children whose shoulder's have reached the lower 12. Car's Anchor Fitting shoulder height marker (approximately 12 months of age) until the shoulders reach the upper shoulder 13.
-
Page 16: Suitable For Use
SUITABLE FOR USE - HOW TO SETUP FORWARD-FACING CONVERT THE RESTRAINT TO CHILD USE MODE TO BE USED WITH A LAP SASH OR LAP ONLY SEAT BELT IN THE BACK OF MOST CARS WITH FORWARD-FACING SEATS. A. Convert the restraint to child use mode by placing one hand on Lift forward Once the child's shoulders reach the lower shoulder height marker then the seat can be changed to the the top of the restraint and using the other hand pulling the recline... - Page 17 HOW TO SETUP HOW TO SETUP ADJUSTING HASSLE FREE HARNESS™ STRAP HEIGHT & HEADREST: HOW TO ADJUST THE HEADREST & HASSLE FREE HARNESS™ FOR CHILD USE FORWARD-FACING A. Loosen the harness straps before adjusting the Headrest. Correct fitment of the harness is very important as it restrains the child in the restraint. The harness B.
- Page 18 HOW TO INSTALL HOW TO INSTALL INSTALLING INTO VEHICLE FORWARD-FACING F. Position the restraint in forward-facing mode and align restraint centrally within the (UPRIGHT OR RECLINED) Hook and Loop chosen seating position. attachment Some vehicle seat fabrics (particularly Pull sash portion velours) may be damaged by a child of seat belt to Stabilising...
- Page 19 HOW TO INSTALL HOW TO INSTALL K. Fit the attachment clip on the upper anchorage strap to the Attachment Clip FITTING SUMMARY anchor fitting as shown. Make sure to remove as many twists as possible from the upper anchorage strap. Upper Anchorage Upper Anchorage Adjustment Strap...
- Page 20 HOW TO USE HOW TO USE C. Fit either harness tongue into PLACING CHILD IN THE RESTRAINT Pull to the harness buckle followed by lengthen the other tongue until a click is A. Lengthen the harness by pushing and holding heard.
-
Page 21: Care And Maintenance
HOW TO USE CARE & MAINTENANCE REGULAR CARE OF THIS RESTRAINT: TO RECLINE RESTRAINT Push recline latch up while moving restraint into desired Please check the following items regularly to ensure the safety of your child: The child restraint may be reclined or positioned upright without recline position. - Page 22 D. Remove any accessories, pillow, Insert Pad, shoulder pads If the Harness Buckle cannot be returned to its original working condition then contact Britax Childcare Customer Service. (if fitted). E. Refit the harness buckle to the restraint with the red button facing out and feeding each 3-bar slide through appropriate slot.
- Page 23 CARE & MAINTENANCE CARE & MAINTENANCE F. Unhook the elastic loops at the top of the TO REPLACE COVER: Hook elastic loop at the back of the restraint cover located at the back of the restraint and A. Feed the Harness Tongues and shoulder straps unhook elastic the elastic loops at the bottom of the restraint through the side slots in the cover.
- Page 24 ACCESSORIES ACCESSORIES IMPORTANT: INSERT PAD - STYLE MAY VARY ONLY USE SAFE-N-SOUND SEAT COVERS AND ACCESSORIES THAT ARE DESIGNED AND TESTED The Insert Pad is designed to snugly support baby for extra support FOR USE WITH THIS PRODUCT. and comfort and should be used for small babies when rearward- facing.
-
Page 25: Travelling Tips
ACCESSORIES TRAVELLING TIPS MESSY MAT™ (IF SUPPLIED) Long Messy Mat SAFETY (If fitted) The Messy Mat's has been specifically designed to protect your Never hold a baby in arms when riding in a motor vehicle. In this position the baby could be thrown vehicle seat from damage by the child restraint and children’s against the dashboard, windscreen or other occupant and suffer serious injury or death. -
Page 26: Installation Of Car Anchor Fitting
TRAVELLING TIPS INSTALLATION OF CAR ANCHOR FITTING CLOTHING/BATHING Consult the vehicle owner’s handbook for location of anchorage fittings or anchorage points and the possible use of spacers. Some vehicles may have an anchor fitting fitted by the vehicle manufacturer. Take several changes of clothing and bibs for possible car sickness. Disposable nappies and liners are If anchorage points cannot be found refer to car manufacturer or local child restraint fitting station or very handy while travelling. - Page 27 INSTALLATION OF CAR ANCHOR FITTING INSTALLATION OF CAR ANCHOR FITTING UPPER ANCHORAGE FITTING IF THE CAR IS FITTED WITH CHILD RESTRAINT Extension Strap distance to be measured. Fig.1. ANCHORAGE POINT Attachment Bolt Length 300mm (Use Safe-n-Sound part 0035). Locate the anchorage point behind the rear seating position. Lock washer Length 600mm (Use Safe-n-Sound part 0036).
-
Page 28: In Case Of Accident
CAR INSTALLATION ACCESSORIES Please assist the owner of this restraint in their claim. (From retailers of Safe-n-Sound products) Britax Childcare Pty. Ltd. EXTRA ANCHOR KITS: Available for using the restraint in additional cars. (Incorporated in Victoria) New Zealand Office Re-order no: 0038 A.B.N 55 006 773 600... - Page 29 Since its inception in 2006, the Crash Exchange program has helped 100’s of families ensure that their children have new restraints and that the restraints are not sold second hand placing others at risk. Our Crash Exchange Terms and Application form are accessible on our website. Please visit www.britax.com.au for further information.
- Page 30 NOTES NOTES...
- Page 31 The Britax trademark is the property of Britax Excelsior Limited (UK). We reserve the right to alter this product without notice. © 1995-2011 Britax Childcare Pty. Ltd. This product is covered by Australian and overseas Patent applications. Patents pending. Part No.2200834/A...
Need help?
Do you have a question about the 7300 A 2010 and is the answer not in the manual?
Questions and answers