Table of Contents
Advertisement
Available languages
Available languages
Advertisement
Chapters
Table of Contents

Related Manuals for Britax EMBLEM


Summary of Contents for Britax EMBLEM
- Page 1 EMBLEM ® ALLEGIANCE ® Canadian User Guide Guide d'utilisation canadien...
-
Page 3: Table Of Contents
, EMBLEM , BRITAX , and EZ-Buckle are trademarks ® ® ® owned by Britax Child Safety, Inc. All rights reserved. ©2021 Britax Child Safety, Inc. This product and its components are subject to change without notice. Printed in USA. P14165200_A:04.21... -
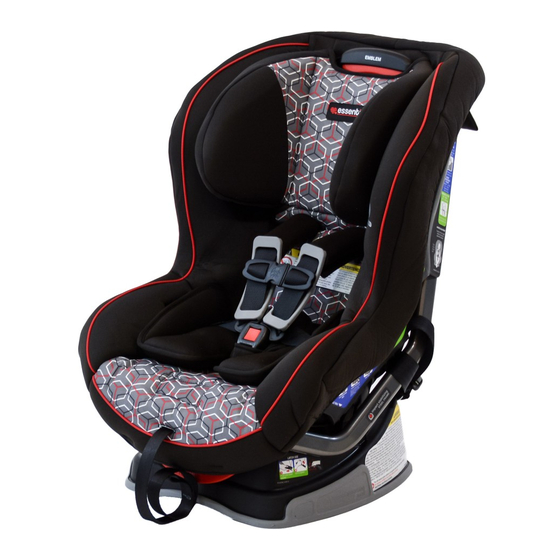
Page 4: Child Seat Features
BRITAX Child Safety, Inc. Child Seat Features Front Rear... - Page 5 EMBLEM/ALLEGIANCE Canadian User Guide Description 1. Cover 2. Harness Height Adjuster 3. Head Restraint (EMBLEM) Head Pad (ALLEGIANCE) 4. Comfort Pads 5. Infant Positioning Pillow 6. Harness Holder 7. Rear-Facing Lock-Offs (Blue – under cover) 8. Lower Connector Bar 9. Lower Connector Strap (LUAS component) 10.
-
Page 6: Safety Information
GENERAL USAGE • Follow all instructions on this child restraint and in the written instructions. • Britax strongly recommends that children should remain in a child seat with a 5-point harness until reaching the maximum weight or height allowed • Register your child restraint with the manufacturer. -
Page 7: Important Notes
• The use of non-Britax covers, inserts, toys, accessories, or tightening devices is not approved by Britax. Their use could cause this child seat not to perform as intended in a crash. • The primary protection for occupants of a vehicle in a collision is the body of the vehicle itself;... -
Page 8: Certification
Send your name, address, e-mail address if available and the restraint’s model number and manufacturing date to Britax Child Safety, Ltd., P.O. Box 7289, RPO Brunswick Square, Saint John NB E2L 4S6, or call 1-888-427-4829, or register online at us.britax.com/registration. -
Page 9: Child Fit Information
EMBLEM/ALLEGIANCE Canadian User Guide Child Fit Information Rear Facing: 2�3 – 18 kg (5 – 40 lbs) Britax strongly recommends that children ride rear facing to the highest weight or height specified. Use rear facing: • with harness straps in the closest position at or below the child’s... -
Page 10: Rear-Facing Installation
BRITAX Child Safety, Inc. Rear-Facing Installation IMPORTANT: The provided infant positioning pillow must be used for children weighing 10 kg (22 lbs) or less in a rear-facing position. Do not use over 10 kg (22 lbs) or in a forward-facing position. - Page 11 EMBLEM/ALLEGIANCE Canadian User Guide Rear-Facing Installation with LUAS 9 All connections are secure and straps are not twisted. 9 No more than 7.5 cm (3 in.) of the base hangs over the edge of the vehicle seat. 9 The anti-rebound bar is properly installed (see page 26).
-
Page 12: Lap-Shoulder Belt Installation
BRITAX Child Safety, Inc. Lap-Shoulder Belt Installation 1. Loosen the harness. a. Lift harness adjuster lever and pull both harness straps forward. b. Remove the infant positioning pillow and unbuckle the harness. 2. The anti-rebound bar is required for rear facing installations. - Page 13 EMBLEM/ALLEGIANCE Canadian User Guide 8. Push down into the middle of the child seating area with moderate force while removing all slack from the bottom (lap) part of the vehicle belt and close the lock-off (see page 24). IMPORTANT: Both the...
-
Page 14: Lap Belt Installation
BRITAX Child Safety, Inc. Lap Belt Installation 1. Loosen the harness. a. Lift harness adjuster lever and pull both harness straps forward. b. Remove the infant positioning pillow and unbuckle the harness. 2. The anti-rebound bar is required for rear facing installations. - Page 15 EMBLEM/ALLEGIANCE Canadian User Guide 7. Push down on the middle of the child seat while pulling the vehicle belt to remove all slack. NOTE: Ensure that the vehicle belt is locked as directed by your vehicle owner’s manual. 8. Replace the seat cover...
-
Page 16: Forward-Facing Installation
BRITAX Child Safety, Inc. Forward-Facing Installation IMPORTANT: Do NOT use the infant positioning pillow in a forward-facing position. IMPORTANT: Do NOT use the anti-rebound bar in a forward-facing position. LUAS Installation IMPORTANT: Do not install forward-facing with LUAS for a child weighing more than 22.7 kg (50 lbs). - Page 17 EMBLEM/ALLEGIANCE Canadian User Guide 6. Attach the tether to a designated anchor (see vehicle owner’s manual) and remove slack (see page 29). 7. Wrap excess webbing in the elastic strap and store in tether storage pouch. Forward-Facing Installation with LUAS 9 All connections are secure and straps are not twisted.
-
Page 18: Lap-Shoulder Belt Installation
BRITAX Child Safety, Inc. Lap-Shoulder Belt Installation 1. Remove the tether from the pouch and place it up and over the child seat back. 2. Adjust this child seat to position 1 or 2 and place forward-facing on the vehicle seat (see page 24). - Page 19 EMBLEM/ALLEGIANCE Canadian User Guide 8. Push down into the middle of the child seating area with moderate force while pulling the top (shoulder) part of the belt between the belt slots to remove any remaining slack through the lock-off. 9. Attach the tether to a designated anchor (see vehicle owner’s manual)
-
Page 20: Lap Belt Installation
BRITAX Child Safety, Inc. Lap Belt Installation 1. Remove the tether from the pouch and place it up and over the child seat back. 2. Adjust this child seat to position 1 or 2 and place forward-facing on the vehicle seat (see page 24). - Page 21 EMBLEM/ALLEGIANCE Canadian User Guide 7. Attach the tether to a designated anchor (see vehicle owner’s manual) and remove slack (see page 29). Wrap excess webbing in the elastic strap and store in tether storage pouch. 8. Replace the seat cover.
-
Page 22: Securing Your Child
BRITAX Child Safety, Inc. Securing Your Child IMPORTANT: Impact absorbing chest pads are highly recommended for forward-facing mode. Removal of chest pads is optional for rear-facing mode to ensure a snug fit for small infants. 1. Follow the instructions on page 22 to make the proper adjustments to the harness and buckle. - Page 23 EMBLEM/ALLEGIANCE Canadian User Guide 7. Fasten the harness buckle. NOTE: After inserting each buckle tongue, listen for a click to help ensure proper connection. 8. Check for proper harness height and pull any excess slack up to the child’s shoulder area before tightening.
-
Page 24: Child Seat Functions
BRITAX Child Safety, Inc. Child Seat Functions Adjusting the Harness Height • In rear-facing mode, the harness straps should be in the closest position at or below your child’s shoulders. See page 7. • In forward-facing mode, the harness straps should be in the closest position at or above your child’s... -
Page 25: Using The Harness Buckle
EMBLEM/ALLEGIANCE Canadian User Guide 1. Unbuckle the harness and remove the buckle. See page 36. 2. Route the belly pad and buckle through the desired slot in the cover. NOTE: Slide the end of the belly pad over the comfort foam. -
Page 26: Using A Lock-Off
BRITAX Child Safety, Inc. Using a Lock-Off NOTE: Using a lock-off is optional if your vehicle seat belt system has a locking feature. See your vehicle owner’s manual for more information. To Open: 1. Open the locking tab. Locking 2. Open the clamp. - Page 27 EMBLEM/ALLEGIANCE Canadian User Guide Rear-Facing When properly installed in the rear- 30˚ facing position, the recline angle of the 0˚ child seat should be at least 30˚ for 45˚ children and up to 45˚ from vertical for infants unable to maintain head and 90˚...
-
Page 28: Anti-Rebound Bar
IMPORTANT: Pull up on the anti-rebound bar to ensure the connection is secure. NOTE: See Installation Videos & User Guides in the support section of the Britax website (us.britax.com/faqs) for a video demonstration of this procedure. -
Page 29: Using The Lower Universal Anchorage System (Luas) And Top Tether
EMBLEM/ALLEGIANCE Canadian User Guide Removing the Anti-Rebound Bar 1. Remove the car seat from the vehicle and place it on its back to access the underside of the seat. 2. Push the two release levers on either side of the anti-rebound bar and lift up on the bar to remove it from the seat. -
Page 30: Using The Lower Connectors
BRITAX Child Safety, Inc. Using the Lower Connectors Locating the Lower Connectors The lower connectors are located in the back of the base of the child seat. Store the connectors in the slots when not in use. To attach the lower connector to the storage slot or lower anchor: 1. -
Page 31: Impact Absorbing Tether
EMBLEM/ALLEGIANCE Canadian User Guide Impact Absorbing Tether Failure to follow the guidelines below may cause the child seat not to perform as intended. • The tether must be used at all times when installing this child seat forward-facing. Using the tether will improve the stability of your child seat and reduce the risk of injury. - Page 32 BRITAX Child Safety, Inc. To remove the tether from a tether anchor: 1. Loosen the tether. a. Tilt the adjuster tab up. b. Pull the tether webbing. 2. Remove the tether hook from the tether anchor. NOTE: The tether carry clip is...
-
Page 33: Vehicle Compatibility
EMBLEM/ALLEGIANCE Canadian User Guide Vehicle Compatibility Vehicle Seating Positions DO NOT place child seat rear-facing in the front seat of a vehicle with a passenger air bag. DEATH or SERIOUS INJURY can occur. Owners of vehicles with front passenger side airbags should refer to their owner’s... -
Page 34: Incompatible Vehicle Seat Belts
NOTE: This Britax car seat may not be compatible with every inflatable lap-shoulder belt. See FAQs in the support section of the Britax website (us.britax. com/faqs) for additional instructions. -
Page 35: Maintenance
EMBLEM/ALLEGIANCE Canadian User Guide Maintenance IMPORTANT: Before each use, check this car seat and its components to make sure they are in good condition and good working order. Seat Cover Removing the Cover Never remove the buckle tongues from the harness. - Page 36 BRITAX Child Safety, Inc. d. Pull the end of the belly pad and buckle retainer out of the buckle slot in the cover to remove. e. Turn the buckle retainer sideways and slide the buckle out of the belly pad.
- Page 37 EMBLEM/ALLEGIANCE Canadian User Guide Replacing the Cover 1. Fit the child seat cover around the child seat shell. 2. Replace the belly pad and buckle: a. Turn the buckle retainer sideways and route it through the belly pad. b. Route the belly pad...
-
Page 38: Harness Buckle
BRITAX Child Safety, Inc. 4. Slide the head restraint/ head pad cover over the front of the head restraint and attach the hook and loop fasteners at the back. Attach the elastic straps to the rear tabs. 5. Attach the hook and... - Page 39 EMBLEM/ALLEGIANCE Canadian User Guide 4. Pull the end of the belly pad and buckle retainer out of the slot in the cover to remove. 5. Turn the buckle retainer sideways and route the buckle assembly out of the belly pad.
-
Page 40: Impact Absorbing Chest Pads
BRITAX Child Safety, Inc. Impact Absorbing Chest Pads IMPORTANT: Impact absorbing chest pads are highly recommended for forward-facing mode. Removal of chest pads is optional for rear-facing mode to ensure a snug fit for small infants. Removing the Impact Absorbing Chest Pads 1. - Page 41 EMBLEM/ALLEGIANCE Canadian User Guide 8. Nest the end of the right harness strap into the left. 9. Hook the harness straps onto the yoke. Ensure that the harness straps are not twisted and that the ends of the harness straps are securely attached to the yoke.
- Page 42 BRITAX Child Safety, Inc. 7. Route the harness straps through the seat to the back. Ensure that the harness straps pass through the harness adjuster. 8. Nest the end of the right harness strap into the left. 9. Hook the harness straps onto the yoke.
-
Page 43: Cleaning
EMBLEM/ALLEGIANCE Canadian User Guide Cleaning Shell • SPONGE CLEAN the DO NOT shell using warm water • Use abrasive and mild soap. cleaners. • TOWEL DRY Cover • Refer to product DO NOT care label for wash • Bleach instructions. -
Page 44: Warranty
BRITAX Child Safety, Inc. Warranty This child seat was manufactured by Britax Child Safety, Inc. (“ Britax”). To the extent allowed by law, Britax warrants this product to the original retail purchaser as follows: LIMITED ONE-YEAR WARRANTY This product is warranted against defective materials or work- man ship for one year from the date of original purchase. -
Page 45: Notes
EMBLEM/ALLEGIANCE Canadian User Guide Notes... - Page 46 BRITAX Child Safety, Inc. Notes...
- Page 47 EMBLEM/ALLEGIANCE Canadian User Guide Notes...
- Page 49 , BRITAX , and EZ-Buckle asont des marques ® ® ® de commerce de Britax enregistrées aux États-Unis ou/au Canada. Tous droits réservés. ©2021 Britax Child Safety, Inc. Ce produit et ses composants peuvent changer sans préavis. Imprimé en États-Unis. P14165200_A:04.21...
-
Page 50: Caractéristiques Du Siège Pour Enfant
BRITAX Child Safety, Inc. Caractéristiques du siège pour enfant Avant Arrière... - Page 51 EMBLEM/ALLEGIANCE Guide d’utilisation Canadien Description 1. Housse 2. Ajusteur de la hauteur du harnais 3. Appuie-tête (EMBLEM) Coussin d’appuie-tête (ALLEGIANCE) 4. Coussinets de confort 5. Coussin de positionnement pour bébé 6. Porte-harnais 7. Verrous pour l’orientation vers l’arrière (bleu - sous la housse) 8.
-
Page 52: Information De Sécurité
• Ce siège pour enfant peut être utilisé seulement dans les classes de véhicules suivantes : voitures particulières à usages multiples, automobiles et camions. • En se fondant sur les statistiques d’accidents, Britax recommande la banquette arrière comme l’endroit le plus sûr pour installer correctement un siège pour enfant. -
Page 53: Notes Importantes
Voir l’étiquette portant le numéro de série et la date de fabrication sur le siège pour enfant (voir la page 2). • Britax n’approuve pas l’utilisation de housses, de coussins, de jouets, d’accessoires ou de dispositifs de serrage non fabriqués par Britax. Leur utilisation peut compromettre la sécurité... -
Page 54: Certification
à Britax Child Safety, Ltd., Case postale 7289, RPO Brunswick Square, Saint John NB E2L 4S6, ou bien composez le 1-888-427-4829, ou encore allez en ligne au us.britax.com/registration. -
Page 55: Information Pour L'installation De L'enfant
Information pour l’installation de l’enfant Orientation vers l’arrière : enfants de 2,3 à 18 kg (5 à 40 lb) Britax recommande que les enfant soient dans le siège pour enfant orienté vers l’arrière jusqu’au maximum de poids ou de grandeur spécifié pour le modèl du siège. -
Page 56: Installation Orientée Vers L'arrière
BRITAX Child Safety, Inc. Installation orientée vers l’arrière IMPORTANT : Le coussin de positionnement pour bébé doit être utiliser pour les enfants pesant 10 kg (22 lb) ou moins en mode orienté vers l’arrière. Ne pas utiliser le coussin avec un enfant pesant plus de 10 kg (22 lb) ou en mode orienté... - Page 57 EMBLEM/ALLEGIANCE Guide d’utilisation Canadien 5. Pousser le siège pour enfant contre le siège du véhicule tout en tirant chaque sangle d’attache inférieure pour les resserer. Installation orientée vers l’arrière avec le DUA 9 Toutes les attaches sont bien fixées et les sangles ne sont pas entortillées.
-
Page 58: Installation Avec La Ceinture Baudrier/Sous-Abdominale
BRITAX Child Safety, Inc. Installation avec la ceinture baudrier/sous-abdominale 1. Désserrez le harnais. a. Soulevez le levier d’ajustement du harnais et tirez les deux sangles du harnais vers l’avant. b. Retirez le coussin de positionnement pour bébé et débouclez le harnais. - Page 59 EMBLEM/ALLEGIANCE Guide d’utilisation Canadien 8. Pousser modérément dans le centre du siège pour enfant tout en tirant la ceinture sous-abdominale du véhicule pour éliminer le jeu et fermez le verrou (voir page 24). IMPORTANT : ceinture baudrier et sous- abodominal doit être enfiler aux travers le verrou.
-
Page 60: Installation Avec La Ceinture Sous-Abdominale
BRITAX Child Safety, Inc. Installation avec la ceinture sous-abdominale 1. Désserrez le harnais. a. Soulevez le levier d’ajustement du harnais et tirez les deux sangles du harnais vers l’avant. b. Retirez le coussin de positionnement pour bébé et débouclez le harnais. - Page 61 EMBLEM/ALLEGIANCE Guide d’utilisation Canadien 7. Pousser dans le centre du siège pour enfant tout en tirant la ceinture du véhicule pour éliminer tout jeu. REMARQUE : Vérifiez que la ceinture du véhicule est verrouillé comme indiqué par le guide d’utilisation de votre véhicule.
-
Page 62: Installation Orientée Vers L'avant
BRITAX Child Safety, Inc. Installation orientée vers l’avant IMPORTANT : Ne PAS utiliser le coussin de positionnement pour bébé en position orientée vers l’avant. IMPORTANT : Ne PAS utiliser la barre anti-rebond en position orientée vers l’avant. Installation avec le DUA... - Page 63 EMBLEM/ALLEGIANCE Guide d’utilisation Canadien 5. Pousser le siège pour enfant contre le siège du véhicule tout en tirant sur chaque sangle d’attache inférieure pour resserer. 6. Attachez la courroie d’ancrage à un boulon d’ancrage désigné (voir le manuel de l’utilisateur du véhicule) et retirer le...
-
Page 64: Installation Avec La Ceinture Baudrier/Sous-Abdominale
BRITAX Child Safety, Inc. Installation avec la ceinture baudrier/sous-abdominale 1. Retirez la courroie d’ancrage de sa pochette et placez la par-dessus le dossier du siège pour enfant. 2. Ce siège pour enfant doit être dans la position 1 ou 2 et placé... - Page 65 EMBLEM/ALLEGIANCE Guide d’utilisation Canadien 8. Poussez modérément dans le centre du siège pour enfant tout en tirant la partie du haut de la ceinture (la ceinture-baudrier) entre les fentes pour enlever le mou qui reste à travers le verrou. 9. Attachez la courroie d’ancrage à...
-
Page 66: Installation Avec La Ceinture Sous-Abodominale
BRITAX Child Safety, Inc. Installation avec la ceinture sous-abodominale 1. Retirez la courroie d’ancrage de sa pochette et placez la par-dessus le dossier du siège pour enfant. 2. Ce siège pour enfant doit être dans la position 1 ou 2 et placé... - Page 67 EMBLEM/ALLEGIANCE Guide d’utilisation Canadien 7. Attachez la courroie d’ancrage à un boulon d’ancrage désigné (voir le manuel de l’utilisateur du véhicule) et retirer le jeu (voir page 29). Enroulez l’excédent de courroie dans la bande élastique et rangez-le dans la pochette de rangement.
-
Page 68: Attacher Votre Enfant
BRITAX Child Safety, Inc. Attacher votre enfant IMPORTANT : Les coussinets de poitrine pour absorption d’impact sont fortement recommandés avec l’orientation vers l’avant. Retirez les coussinets de poitrine est en option avec l’orientation vers l’arrière afin d’assurer un ajustement parfait pour les petits enfants. - Page 69 EMBLEM/ALLEGIANCE Guide d’utilisation Canadien 7. Attachez la boucle du harnais. REMARQUE : Après avoir inséré chaque languette de la boucle, un déclic confirmera que la boucle est bien attachée. 8. Assurez-vous que la hauteur du harnais est correcte, puis tirez le jeu du harnais à...
-
Page 70: Fonctions Du Siège Pour Enfant
BRITAX Child Safety, Inc. Fonctions du siège pour enfant Ajuster la hauteur du harnais • En orientation vers l’arrière, les sangles du harnais devraient être dans la position la plus proche ou au dessous des épaules de l’enfant. Voir page 7. -
Page 71: Utiliser La Boucle Du Harnais
EMBLEM/ALLEGIANCE Guide d’utilisation Canadien 1. Détachez le harnais et retirer la boucle. Voir la page 36. 2. Passez le coussinet abdominal et la boucle à travers la fente dans la housse. REMARQUE : Glissez le bout du coussinet abdominal par-dessus la mousse de confort. -
Page 72: Utiliser Un Verrou
BRITAX Child Safety, Inc. Utiliser un verrou REMARQUE : Utilisation d’un verrou est optionnel si votre système de ceinture de sécurité du véhicule dispose d’une fonction de verrouillage. Voir le manuel du propriétaire de votre véhicule pour plus d’informations. Pour ouvrir :... - Page 73 EMBLEM/ALLEGIANCE Guide d’utilisation Canadien Orienté vers l’arrière Si le siège pour enfant est correctement 30˚ installé en position orientée vers 0˚ l’arrière, le dossier du siège pour enfant 45˚ devrait être incliné d’au moins 30° pour un enfant et jusqu’à 45° pour un bébé...
-
Page 74: Barre Anti-Rebond
IMPORTANT : Tirez sur la barre anti-rebond pour assurer la connexion est sécurisée. REMARQUE : Voir Installation Videos & User Guides dans la section support du site Britax (us.britax.com/faqs), pour obtenir une vidéo de démonstration de cette procedure. -
Page 75: Utiliser Le Dispositif Universel D'ancrage (Dua) Et Courroie D'ancrage Supérieure
EMBLEM/ALLEGIANCE Guide d’utilisation Canadien Retirer la barre anti-rebond 1. Retirer le siège pour enfant du véhicule et placez-le sur son dos pour accéder à la face inférieure du siège. 2. Poussez les deux leviers de dégagement de chaque côté de la barre anti- rebond et soulever la barre pour l’enlever du siège. -
Page 76: Utiliser Les Attaches Inférieures
BRITAX Child Safety, Inc. Utiliser les attaches inférieures Trouver les attaches inférieures Les attaches inférieures sont situées à l’arrière de la base du siège pour enfant. Rangez les attaches dans les fentes lorsqu’elles ne sont pas utilisées. Pour attacher l’attache inférieure à la fente de rangement ou à... -
Page 77: Courroie D'ancrage Pour L'absorption D'impact
EMBLEM/ALLEGIANCE Guide d’utilisation Canadien Courroie d’ancrage pour l’absorption d’impact MISE EN GARDE! Ne pas respecter les consignes ci-dessous pourrait empêcher le siège pour enfant de fonctionner tel que prévu. • La courroie d’ancrage doit être utilisé en tout temps lorsque le siège pour enfant est orienté vers l’avant�... - Page 78 BRITAX Child Safety, Inc. Pour retirer la courroie d’ancrage du boulon d’ancrage : 1. Desserrez la courroie d’ancrage. a. Faites basculer le verrou d’ajustement vers le haut. b. Tirez la courroie d’ancrage. 2. Retirez le crochet de la courroie d’ancrage du boulon d’ancrage.
-
Page 79: Compatibilité Du Véhicule
EMBLEM/ALLEGIANCE Guide d’utilisation Canadien Compatibilité du véhicule Places assises dans le véhicule MISE EN GARDE! NE PAS placer le siège pour enfant en orientation vers l’arrière sur le siège avant du véhicule avec un sac gonflable du côté passager. Ceci peut entraîner la MORT ou des BLESSURES GRAVES. -
Page 80: Ceintures De Sécurité Non Compatibles
REMARQUE : Ce siège pour enfant Britax peuvent ne pas être compatible avec toutes les ceintures gonflables. Voir les FAQ dans la section support du site Britax (us.britax.com/faqs), pour obtenir des... -
Page 81: Entretien
EMBLEM/ALLEGIANCE Guide d’utilisation Canadien Entretien IMPORTANT : Avant chaque utilisation, vérifier cet siège d’auto et ses composants pour vous assurer sont en bon état et en bon fonctionnement. Housse Enlever la housse MISE EN GARDE! N’enlevez jamais du harnais les languettes de la boucle, car elles ne peuvent être réinstallées par la... - Page 82 BRITAX Child Safety, Inc. d. Tirez sur la retenue de la boucle et le bout du coussinet abdominal pour les retirer hors de la fente de la housse. e. Tournez la retenue de la boucle de côté et glissez la boucle hors du coussinet abdominal.
- Page 83 EMBLEM/ALLEGIANCE Guide d’utilisation Canadien Replacer la housse 1. Placez la housse du siège pour enfant sur la coque. 2. Replacez le coussinet abdominal et la boucle : a. Tournez la retenue de la boucle de côté et passez-la à travers le coussinet abdominal.
-
Page 84: Boucle Du Harnais
BRITAX Child Safety, Inc. 4. Faites glisser la housse de l’appuie-tête/coussin sur le devant de l’appuie- tête et fixez les bandes à crochet et boucle à l’arrière. Attachez les bandes élastiques aux languettes arrière. 5. Attachez les bandes à crochet et boucle de la housse d’appui-tête... - Page 85 EMBLEM/ALLEGIANCE Guide d’utilisation Canadien 4. Tirez sur la retenue de la boucle et le bout du coussinet abdominal pour les retirer hors de la fente de la housse. 5. Tournez la retenue de la boucle de côté pour enlever la boucle du coussinet abdominal.
-
Page 86: Coussinets De Poitrine Pour L'absorption D'impact
BRITAX Child Safety, Inc. Coussinets de poitrine pour l’absorption d’impact IMPORTANT : Les coussinets de poitrine pour absorption d’impact sont fortement recommandés avec l’orientation vers l’avant. La dépose de tous les coussinets de poitrine est facultative pour le mode à orientation arrière pour garantir un ajustement parfait pour les petits bébés. - Page 87 EMBLEM/ALLEGIANCE Guide d’utilisation Canadien 8. Emboîtez le bout de la sangle droite du harnais dans la gauche. 9. Attachez les sangles sur la chape. Assurez que les sangles ne sont pas entortillées et que les bouts des sangles sont bien fixés à la chape.
- Page 88 BRITAX Child Safety, Inc. 7. Enfilez les sangles du harnais à travers le siège vers l’arrière. Assurez que les sangles du harnais passe à travers l’ajusteur de harnais. 8. Emboîtez le bout de la sangle droite du harnais dans la gauche.
-
Page 89: Nettoyage
EMBLEM/ALLEGIANCE Guide d’utilisation Canadien Nettoyage Coque • ESSUYEZ LA COQUE À NE PAS L’ÉPONGE à l’aide d’eau • Utiliser de tiède et de savon doux. nettoyant abrasifs • SÉCHEZ À L’AIDE D’UNE SERVIETTE. Housse • Se reporter à l’étiquette NE PAS d’entretien du produit... -
Page 90: Garantie
BRITAX Child Safety, Inc. Garantie Ce siège pour enfant a été fabriqué par Britax Child Safety, Inc. (« Britax »). Dans la mesure permise par la loi, Britax garantit ce produit à l’acheteur au détail initial comme suit : GARANTIE LIMITÉE D’UN AN Ce produit est garantit contre les vices de matériaux et de... -
Page 91: Remarques
EMBLEM/ALLEGIANCE Guide d’utilisation Canadien Remarques... - Page 92 BRITAX Child Safety, Inc. Remarques...
- Page 93 EMBLEM/ALLEGIANCE Guide d’utilisation Canadien Remarques...
- Page 96 Tel.: 1-888-427-4829 Britax Child Safety, Ltd. P.O. Box 7289, Tel.: 1-704-409-1699 RPO Brunswick Square, Saint John NB E2L 4S6 A Britax Childcare Group Limited www.Britax.ca company Une société de Britax Childcare Group Limited...
Need help?
Do you have a question about the EMBLEM and is the answer not in the manual?
Questions and answers