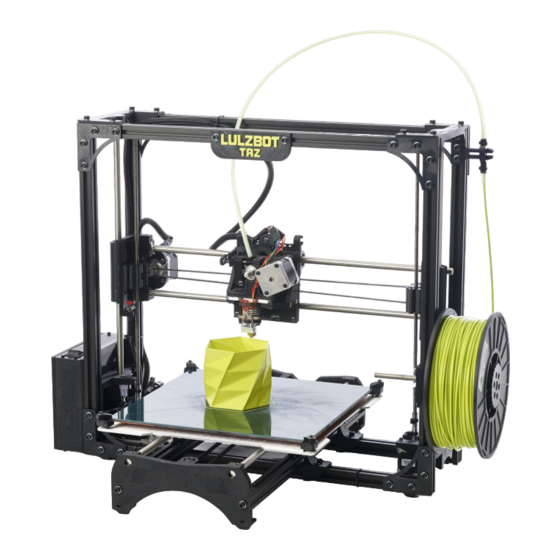
LulzBot TAZ User Manual
3d printer
Hide thumbs
Also See for TAZ:
- Quick start manual (9 pages) ,
- Start here manual (8 pages) ,
- Quick start manual (3 pages)
Table of Contents
Advertisement
Quick Links
Advertisement
Table of Contents

Subscribe to Our Youtube Channel
Related Manuals for LulzBot TAZ


Summary of Contents for LulzBot TAZ
- Page 1 LulzBot TAZ User Manual Aleph Objects, Inc.
- Page 2 Permission is granted to copy, distribute and/or modify this document under the terms of the Creative Commons Attribution-ShareAlike 3.0 Unported license (CC BY-SA 3.0). Published by Aleph Objects, Inc., 123 SW 12th Street, Loveland, Colorado, 80537 USA. For more information, call +1-970-377-1111 or go to www.LulzBot.com and www.AlephObjects.com. ISBN: 978-0-9893784-1-3...
-
Page 3: Table Of Contents
Contents WARNINGS Safety Information Read Me First! Hazards and Warnings 1 Setup Your Printer 2 3D Printer Software 2.1 Software Overview 2.2 Drivers 2.3 Slic3r 2.4 Printrun 2.5 CAD and 3D Modeling Software 3 Slic3r in Depth 3.1 Intro 3.2 Getting Slic3r 3.3 First Slice 3.4 Expert Mode 3.5 Configuration Organization... - Page 4 6.7 Hot End 6.8 Electronics 7 Advanced Usage 7.1 Intro 7.2 Changing nozzles 7.3 ABS/Acetone Glue 8 Hardware and Software Source Code 9 3D Printer Support 9.1 LulzBot 9.2 Community 10 Contact Information 10.1 Support 10.2 Sales 10.3 Websites Index Glossary...
- Page 5 List of Figures 1.1 Locate the four Y axis bolts 1.2 Remove the four Y axis bolts 1.3 Locate the four Y axis mounts on the frame 1.4 Screw in and tighten the four Y axis bolts 1.5 Connect the two connectors found at the rear of the Y axis 1.6 Connect the two connectors on the left of the print bed 1.7 Locate the two zip ties found in the bag with the manual 1.8 Tightly wrap the zip ties around the bed wires and through the...
- Page 6 List of Figures 3.12 An example of brim. 3.13 Simple Mode: Filament Settings. 3.14 Simple Mode: Printer Settings. 3.15 Shapesmith online CAD tool. 3.16 Plater 3.17 Minimug model. 3.18 STL file loaded. 3.19 FreeCAD part repair. 3.20 Expert mode speed options. 3.21 Infill pattern settings.
- Page 7 List of Figures 4.2 Filament spool mount front 4.3 Filament spool mount back 4.4 Filament run through the guide 5.1 Extruder idler release 5.2 Extruder filament slot 5.3 Nozzle height 5.4 Z end stop trigger 5.5 First layer adhesion...
-
Page 9: Warnings Safety Information
WARNINGS Safety Information... -
Page 10: Read Me First
READ THIS MANUAL COMPLETELY BEFORE UNPACKING AND POWERING UP YOUR PRINTER. Hazards and Warnings The TAZ 3D printer has motorized and heated parts. When the printer is in operation always be aware of possible hazards. Electric Shock Hazard Never open the electronics case when the printer is powered on. Before removing the electronics case cover always power down the printer and completely turn off... - Page 11 HAZARDS AND WARNINGS Static Charge Make sure to ground yourself before touching the printer, especially the electronics. Electrostatic charge can damage electronic components. To ground yourself touch a grounded source. Age Warning For users under the age of 18, adult supervision is recommended. Beware of choking hazards around small children.
-
Page 13: Setup Your Printer
Setup Your Printer... -
Page 14: Locate The Four Y Axis Bolts
first print. 2. Place the TAZ frame and Y axis assembly on a flat and level surface. Bring your attention to the Y axis assembly and find the four Y axis bolts. -
Page 15: Remove The Four Y Axis Bolts
TAZ User Manual Figure 1.2: Remove the four Y axis bolts 3. On the TAZ frame locate the four Y axis mount brackets shown in Fig. 1.3 (pg. 16). With the print surface facing up and the stepper motor end of the Y axis facing back, slide the Y axis assembly in between the Y axis mount brackets. -
Page 16: Locate The Four Y Axis Mounts On The Frame
Setup Your Printer Figure 1.3: Locate the four Y axis mounts on the frame Figure 1.4: Screw in and tighten the four Y axis bolts... -
Page 17: Connect The Two Connectors Found At The Rear Of The Y Axis
LulzBot TAZ User Manual 4. The final step of installing the Y axis is connecting the print surface connectors and Y axis connectors. Pull the print bed completely to the front of the printer to get access to the Y axis connectors. You will find matching male and female 4 pin stepper motor connectors... -
Page 18: Connect The Two Connectors On The Left Of The Print Bed
Setup Your Printer Figure 1.6: Connect the two connectors on the left of the print bed Figure 1.7: Locate the two zip ties found in the bag with the manual... -
Page 19: Tightly Wrap The Zip Ties Around The Bed Wires And Through The Strain Relief Slot
STEP. 9. Locate the power supply and USB receptacles along the back of the TAZ electronics enclosure (Fig. 1.9, page 20). Locate the power supply and the included AC power cable (Fig. 1.10, page 21). Locate the DC power cable plug on the power supply. Connect the DC locking plug into the DC connector on the TAZ electronics enclosure (Fig. -
Page 20: Power Supply And Usb Receptacles
Setup Your Printer pushed in the plug turn the locking sleeve clockwise until it is tight against the electronics enclosure (Fig. 1.12, page 22). Figure 1.9: Power supply and USB receptacles... -
Page 21: Power Supply
LulzBot TAZ User Manual Figure 1.10: Power supply Figure 1.11: 12V DC Power supply plug and receptacle... -
Page 22: The Power Supply Plug Correctly Plugged In
Setup Your Printer Figure 1.12: The power supply plug correctly plugged in 10. Locate, on the right of the power supply, the red AC voltage switch. Depending on your location you will need to change the AC voltage switch to 115V or 230V. North America is generally 115V and the majority of other regions are 230V. -
Page 23: Filament Guide
LulzBot TAZ User Manual Figure 1.13: Filament Guide Figure 1.14: Filament Guide Setting... -
Page 24: Axes Movement Directions
Setup Your Printer 13. Your TAZ 3D printer is now setup and ready to start printing. Before moving forward you should become familiar with the TAZ Cartesian type system. The printer moves in three axes: X, Y, and Z (Fig. 1.15, page 24). -
Page 25: End Stop Locations
LulzBot TAZ User Manual Figure 1.16: End stop locations... -
Page 27: 3D Printer Software
3D Printer Software... -
Page 28: Software Overview
Drivers You will need to install device drivers in order for your Windows computer to communicate with the TAZ 3D Printer. A Windows guide can be found at: https://www.lulzbot.com/support/manually-installing-drivers-windows. If you are using your TAZ 3D Printer on a Linux/Apple OS X based computer you will not need any drivers- support is already built into the operating system. -
Page 29: Slic3R Application, Stl To Gcode Generator
You can create multiple configurations for changing printer setups including nozzle sizes and desired print resolution. For ease of use we have pre-defined Slic3r profiles available in the Support/Downloads section and on the TAZ product page at www.LulzBot.com. Download the configurations to your Slic3r directory. -
Page 30: Printrun
3D Printer Software the printer (0.35mm nozzle is installed by default). Press Open and the pre-defined configuration will load into Slic3r. You can also save custom configurations for yourself by pressing the Export Config... button. A file browser will open that allows you to define a name and save your custom configuration. -
Page 31: Printrun Application For 3D Printer Control
2.4. PRINTRUN The host software, Printrun, is used to start up and control your 3D printer (Fig. 2.2, page 31). The host controls include: setting the extruder Figure 2.2: Printrun application for 3D printer control and print surface temperatures, manual control of each axis, and manual extrusion. -
Page 32: Printrun Controls
3D Printer Software to select. Make sure the port baud rate is set to 115200 in the pull down menu to the right of the port selection. You can refresh the USB ports, by clicking the Port button. Now, to connect to the printer click the Connect button. In the text output window you will see multiple return lines. - Page 33 2.4. PRINTRUN To turn on the hot end and/or printer surface click the respective Set button. The Set button will highlight orange when the temperature is set to on for that component. When the hot end or print surface is set to on you will see the temperature bar and graph display the set temperature and the current temperature.
-
Page 34: Printrun Viewer
3D Printer Software transported make sure the end stop switches are clear before resuming printing. If an axis has missed an end stop and is continuing to try to move in the negative direction, immediately turn the power switch to the off position. -
Page 35: Cad And 3D Modeling Software
Print section in this manual. CAD and 3D Modeling Software Currently LulzBot is not distributing a CAD or 3D modeling software package. However, there are multiple free/libre software packages available. Other common non-free CAD and 3D modeling software are also capable of exporting the required .STL files. - Page 36 3D Printer Software Shapesmith is a web based 3D modeling software. This means there is no required software to get started designing models. Shapesmith is also a great choice for anyone just starting out in CAD/ 3D modeling. OpenSCAD Website: http://openscad.org OpenSCAD is another free/libre CAD software;...
-
Page 37: Slic3R In Depth
Slic3r in Depth... -
Page 38: Intro
Slic3r in Depth Intro Overview Slic3r is a tool which translates digital 3D models into instructions that are understood by a 3D printer. It slices the model into horizontal layers and generates suitable paths to fill them. Slic3r is already bundled with the many of the most well-known host software packages: Pronterface, Repetier-Host, ReplicatorG, and can be used as a standalone program. - Page 39 (For more details see 3.6) Manual The latest version of this document, with L T E X source code is presently at: http://devel.lulzbot.com/Slic3r/ Installing GNU/Linux Extract the archive to a folder of your choosing. Either: Start Slic3r directly by running the Slic3r executable, found in the...
-
Page 40: First Slice
You can find the TAZ Slic3r profiles at http://download.lulzbot.com/TAZ/software/current/slic3r/config/. Once you have become familiar with your TAZ printer and the software you may want to make your own profiles with slight adjustments for particular designs. Configuration Wizard Slic3r has two features to aid newcomers: the configuration wizard, and... -
Page 41: Configuration Wizard: Welcome Screen
3.3. FIRST SLICE Figure 3.1: Configuration Wizard: Welcome Screen... -
Page 42: Configuration Wizard: Firmware Type
The gcode produced by Slic3r is tailored to particular types of firmware. The first step prompts for the firmware that the printer uses. This should have been specified when the printer was built or configured. The TAZ printer uses the RepRap (Marlin/Sprinter) gcode type. -
Page 43: Configuration Wizard: Bed Size
3.3. FIRST SLICE 2. Bed Size This setting defines the maximum distance the extruder may travel along the X and Y axis. If the dimensions are not readily available for the printer then it can be easily measured. Be sure to measure from the lower left corner where the extruder nozzle rests when in the home position to the maximum distance the nozzle can travel in each direction. -
Page 44: Configuration Wizard: Nozzle Diameter
Slic3r in Depth 3. Nozzle Diameter The diameter of the hot-end nozzle is usually clearly displayed either in the description of the hot-end, or in the associated documentation, when the hot-end is purchased. Common values are 0.5mm and 0.35mm. If the nozzle was home-made, or came from a source without a diameter given, then carefully measure the aperture as accurately as possible. -
Page 45: Configuration Wizard: Filament Diameter
3.3. FIRST SLICE 4. Filament Diameter For Slic3r to produce accurate results it must know as accurately as possible how much material is pushed through the extruder. Therefore it is vital to give it as precise a value as possible for the filament diameter. Although the filament used in FDM printers is sold as being either 3mm or 1.75mm this is only a general guide. -
Page 46: Configuration Wizard: Extrusion Temperature
Slic3r in Depth 5. Extrusion Temperature The extrusion temperature will depend on the material, and most can operate over a range of temperatures. The supplier should provide guidance as to which temperatures are suitable. A very general rule of thumb is that PLA lies between 160 C and 230 C, and ABS lies between 215 C and 250 C. -
Page 47: Configuration Wizard: Bed Temperature
3.3. FIRST SLICE 6. Bed Temperature If the printer has a heated bed then this parameter may be set. As with the extruder temperature, the value will depend on the material used. A rule of thumb is that PLA requires 60 C and ABS requires 85 C. Note: One may choose to control the bed temperature manually from the printer controller. -
Page 48: Configuration Wizard: End
Slic3r in Depth At this stage the wizard is complete and the basic configuration is defined. Figure 3.8: Configuration Wizard: End The Important First Layer Before delving into producing the first print it is worthwhile taking a little detour to talk about the importance of getting the first layer right. As many have found through trial and error, if the first layer is not the best it can be then it can lead to complete failure, parts detaching, and warping. - Page 49 3.3. FIRST SLICE Lower speeds. Slowing down the extruder for the first layer reduces the forces applied to the molten material as it emerges, reducing the chances of it being stretched too much and not adhering correctly. 30% or 50% of the normal speed is recommended.
- Page 50 Slic3r in Depth ABS usually needs more cajoling and, whilst it can print well on PET and Kapton, there are reports that people have success by applying hairspray to the bed before printing. Others have reported that an ABS slurry (made from dissolving some ABS in Acetone) thinly applied can also help keep the print attached.
-
Page 51: Simple Mode: Print Settings
3.3. FIRST SLICE Figure 3.9: Simple Mode: Print Settings. may not need such a high resolution finish, whereas a presentation piece may do so. Print speed - Shorter layers will result in smoother prints but each print will take longer, simply because the extruder must trace the pattern more times. -
Page 52: Creating A Vase From A Solid Model
Slic3r in Depth recommended to have a minimum of two perimeters as this gives some insurance that if a section of the perimeter is not printed correctly then the second perimeter will help cover it. The upper and lowermost layers that sandwich the model are filled with a Solid layers pattern. -
Page 53: An Example Of Support Material
3.3. FIRST SLICE A density value of 0.4 is enough to give almost all models good mechanical strength. A value of 0.2 is usually the minimum required to support flat ceilings. Slic3r offers several fill patterns which will be discussed in more depth in section 3.4 - Infill Choices. -
Page 54: An Example Of Brim
Slic3r in Depth bed, or where the bed is not very flat, but it is usually not required and is not recommended. The raft also requires post-processing to remove it. Speed. In simple mode there are only three speed settings to consider: Perimeters - The outline of the model may benefit from being printed slightly slower so that the outside skin of the print has fewer blemishes. -
Page 55: Simple Mode: Filament Settings
3.3. FIRST SLICE Radius - The clearance that should be given around the extruder. Take care if the extruder is not mounted centrally - take the largest safe value. Height - The vertical distance between the nozzle tip and the X axis rods, or lowest part which may interfere with a finished print. - Page 56 Slic3r in Depth the amount of plastic proportionally and should be changed in very small steps (e.g. +/- 0.05) as the effects are very visible. Temperature. These values are also filled from the wizard, but here the opportunity exists to set the temperature for the first layer (see p.48). Printer Settings The Printer Settings will be updated the least, unless Slic3r is going to be used for many printers, for example, in a 3D printer farm.
-
Page 57: Simple Mode: Printer Settings
3.3. FIRST SLICE Figure 3.14: Simple Mode: Printer Settings. Size and coordinates. The Bed size setting is taken from the wizard (see p.43) and is only used for previewing the model in the plater. The Print center is the point around which the print will be centered. A Bed size of 200mmx200mm and a Print center of 100mmx100mm would sit the print in the middle. - Page 58 Slic3r in Depth Z offset can be used to compensate for an incorrectly calibrated Z end-stop. If the nozzle stops slightly too far from the bed, then adding a negative value will offset all layers by that amount. The correct solution however is to fix the end-stop itself.
- Page 59 3.3. FIRST SLICE Placeholders can be inserted in the G-code commands . For example [next extruder] would return the index of the next extruder. The RepRap wiki is a good resource to learn about the variety of G-codes available: http://reprap.org/wiki/G-code. Note: Be sure to check that a given G-code is valid for your firmware.
- Page 60 Slic3r in Depth Additive Manufacturing File Format (AMF) was developed in response to the limited nature of the STL format. In addition to describing the geometry of the 3D model it can also describe colours and materials, as well as more complex attributes, such as gradient mixes and multiple object arrangements (constellations).
-
Page 61: Shapesmith Online Cad Tool
3.3. FIRST SLICE Figure 3.15: Shapesmith online CAD tool. Working with Plater Slic3r has a tool, called Plater, which allows one or more models to be loaded and arranged before being sliced. -
Page 62: Plater
Slic3r in Depth Figure 3.16: Plater Once you have acquired a model, drag it onto the Plater window (or use the Add button below the file list) to load it into Slic3r. In the figure below, the traditional RepRap Minimug is loaded, and is viewed from above. -
Page 63: Minimug Model
3.3. FIRST SLICE Figure 3.17: Minimug model. Figure 3.18: STL file loaded. The model can be repositioned by dragging the representation of it on the left of the screen around the bed. Note that the dimensions of the bed should match your printer, as given during the initial configuration above. On the right-hand side is the list of currently loaded files. - Page 64 Slic3r in Depth 45 /Rotate - Rotate the selected model around the Z axis, either in 45 increments clockwise or counter-clockwise, or by a given amount. Scale - Increase or decrease the size of the printed model. Split - Divides a model which consists of more than one part into it’s constituent parts, allowing each one to be arranged individually.
-
Page 65: Freecad Part Repair
3.3. FIRST SLICE Figure 3.19: FreeCAD part repair. Start FreeCAD and from the start splash page choose Working with Meshes. Load the model by dragging and dropping it onto the workspace or via the File menu. A small message in the bottom left corner will indicate if the model appears to have problems. -
Page 66: Expert Mode
Slic3r in Depth First Print At this stage Slic3r has been configured and a model has been acquired, sliced and made ready for print. Now would be the time to fire up the printer and try it out. A variety of host software is available to send the G-code to the printer. -
Page 67: Expert Mode Speed Options
3.4. EXPERT MODE Figure 3.20: Expert mode speed options. Where indicated a value can be given in percentage. This is in relation to the preceding value, e.g. 50% solid infill would be half of the value defined for infill. A few general guidelines for each option: Perimeters - In expert mode this parameter can be increased slightly as the External perimeters option can be used to ensure blemish free external faces. - Page 68 Slic3r in Depth Top solid infill - Allow time for the extrusion to cleanly cover the previous top layers and result in a tidy top surface. the last few layers should have bridged the infill structure nicely, preparing the way for a neat finish.
-
Page 69: Infill Pattern Settings
3.4. EXPERT MODE Figure 3.21: Infill pattern settings. Slic3r offers several infill patterns, four regular, and three more exotic flavours. The numbers given in brackets below each figure are a rough estimate of material used and time taken for a simple 20mm cube model Note that this is only indicative, as model complexity and other factors will affect time and material. -
Page 70: Infill Pattern: Concentric (351.80Mm / 5M:30S)
Slic3r in Depth Figure 3.24: Infill pattern: Concentric (351.80mm / 5m:30s) Figure 3.25: Infill pattern: Honeycomb (362.73mm / 5m:39s) Figure 3.26: Infill pattern: Hilbert Curve (332.82mm / 5m:28s) Figure 3.27: Infill pattern: Archimedean Chords (333.66mm / 5m:27s) -
Page 71: Infill Pattern: Octagram Spiral (318.63Mm / 5M:15S)
3.4. EXPERT MODE Figure 3.28: Infill pattern: Octagram Spiral (318.63mm / 5m:15s) Certain model types are more suited for a particular pattern, for example organic versus mechanical types. Figure 3.29 shows how a honeycomb fill may suit this mechanical part better because each hexagon bonds with the same underlying pattern each layer, forming a strong vertical structure. -
Page 72: Infill Patterns At Varying Densities
Slic3r in Depth Figure 3.30: Infill patterns at varying densities. Left to Right: 20%,40%,60%,80%. Top to Bottom: Honeycomb, Concentric, Line, Recti- linear, Hilbert Curve, Archimedean Chords, Octagram Spiral... -
Page 73: Infill Advanced Settings
3.4. EXPERT MODE Infill Optimization Slic3r contains several advanced infill settings which can help produce better extrusions. Figure 3.31: Infill advanced settings. layers - Will produce sparse vertical infill by Infill every skipping a set number of layers. This can be used to speed up print times where the missing infill is acceptable. -
Page 74: Retraction Settings
Slic3r in Depth Only retract when crossing perimeters - Retracting, to prevent ooze, is unnecessary if the extruder remains within the boundaries of the model. Care should be taken if the print material oozes excessively, as not retracting may result in enough material loss to affect the quality of the subsequent extrusion. - Page 75 3.4. EXPERT MODE extruders may need up to 4 or 5mm due to the hysteresis introduced by the tube. Lift Z - Raises the entire extruder on the Z axis by that many millimeters during each travel. This can be useful to ensure the nozzle will not catch on any already laid filament, however it is usually not necessary and will slow the print speed.
-
Page 76: Skirt Settings
Slic3r in Depth Avoid crossing perimeters (Layers and perimeters - Advanced) - Will force the nozzle to follow perimeters as much as possible to minimise the number of times it must cross them when moving around, and between, islands. This has a negative impact on both G-code generation and print times. -
Page 77: Cooling Strategy
3.4. EXPERT MODE Minimum extrusion length - Dictates a minimum number of mil- limeters that the skirt should be, should the loop around the object not be enough. Cooling Temperature plays a key part in determining print quality. Too hot and the material deforms, too cool and layer adhesion may be problematic. - Page 78 Slic3r in Depth on. This increases in intensity as the layer time decreases. The print speed remains constant until the estimated print time drops below a certain threshold (#1), this is when the print speed is reduced until it reaches it’s minimum value.
-
Page 79: Cooling Advanced Settings
3.4. EXPERT MODE Figure 3.35: Cooling advanced settings. Fan speed - Determines the minimum and maximum speeds - useful for fans that run too fast by default. Bridges fan speed - As the material stretches over wide gaps, it makes sense to try and cool it as much as possible, therefore a full fan speed is recommended. -
Page 80: Support Structure Options
Slic3r in Depth Support Material Generally, most 3D models will print with overhanging parts by up to a certain degree. The angle is determined by several factors, most notably layer height and extrusion width, and is usually around 45 . For models with larger overhangs a support structure may have to be printed below it. -
Page 81: Minimug Model, Tilted
3.4. EXPERT MODE Figure 3.37: Minimug model, tilted 45 . As with infill, there are several patterns available for the support structure. Figure 3.38: Support infill pattern: Rectilinear Figure 3.39: Support infill pattern: Rectilinear Grid... -
Page 82: Configuration Organization
Slic3r in Depth Figure 3.40: Support infill pattern: Honeycomb Pattern Spacing determines the distance between support lines, and is akin to infill density apart from being defined only in mm. If changing this attribute take into account the width of the support extrusion and the amount of support material that will adhere to the object. - Page 83 3.5. CONFIGURATION ORGANIZATION with a .ini extension. Previously saved files can be loaded with the Load Config menu option. This gives a rudimentary means to store different configuration settings for different needs. For example a set with slightly faster print speeds, or a different infill pattern.
-
Page 84: The Cutting Edge Of Slicer
Slic3r in Depth Figure 3.42: Saving a profile. Profiles can be deleted by choosing the profile to delete and clicking the red delete button next to the save button. Figure 3.43: Deleting a profile. The Cutting Edge of Slicer Building from Source Follow these steps to build from source. - Page 85 3.6. THE CUTTING EDGE OF SLICER $ cd Slic3r $ sudo perl Build.PL $ sudo cpan Wx...
-
Page 87: Loading Print Material
Loading Print Material... -
Page 88: Filament Spool Mount Parts
2. Thread the reel spindle throught the reel into the rear reel mount on the lower right hand side of the TAZ 3D Printer (fig. 4.2, page 89). Turn the spindle handle clockwise until it snugs up against the reel and then turn it back one quarter of a turn. -
Page 89: Filament Spool Mount Front
LulzBot TAZ User Manual Figure 4.2: Filament spool mount front Figure 4.3: Filament spool mount back... -
Page 90: Filament Run Through The Guide
Loading Print Material against the nut on the back of the reel mount (fig. 4.3, page 89). While holding the reel spindle handle in place tighten the wing nut against the nut on the back of the reel mount. This will keep the tension you set at the handle in place. -
Page 91: Your First 3D Print
Your First 3D Print... -
Page 92: Set Temperature
Your First 3D Print Set Temperature Make sure to first read the instructions for using the Printrun software. Connect to the printer as described in the Printrun software section (page 30). Set the hot end and print surface for ABS or PLA plastic and turn both on. -
Page 93: Home Printer
5.3. HOME PRINTER access to the hobbed bolt and filament feed hole(Fig. 5.2, page 93). Feed the end of the plastic filament into the filament feed hole (Fig. 5.2). Now you Figure 5.2: Extruder filament slot can push the filament through the extruder by slowly pushing the filament down into the hot end. -
Page 94: Nozzle Height
Your First 3D Print Figure 5.3: Nozzle height Figure 5.4: Z end stop trigger... -
Page 95: Z Print Height
file found at: bedcalib.gco http://download.lulzbot.com/TAZ/objects/calibration/bedcalib.gco The .gcode pattern should appear in the Printrun G-Code viewer. Press the Print button to begin the print. When the print starts make sure the first layer is not printing too close or too far from the print bed. Note Figure 5.5, page 95, as an example of a good first layer adhesion. -
Page 96: Remove Part
Your First 3D Print Remove Part After the part is finished printing, the heated bed will automatically cool down to 0 C. Once the bed cools you can you pop the finished part off of the printed surface. To remove the printed part, use the clam knife included in your printer kit. -
Page 97: Maintaining Your 3D Printer
Maintaining Your 3D Printer... -
Page 98: Overview
Maintaining Your 3D Printer Overview There is little maintenance needed in keeping your TAZ 3D printer running. Depending on your rate of use you will want to perform a quick check of your printer every 2-4 weeks. The following maintenance guide lines will keep your printer printing quality parts. -
Page 99: Hobbed Bolt
Over long periods or after extensive relocating of the printer you may need to re-tighten the belts on the TAZ 3D printer. For the X axis, using the 2.5mm hex driver, loosen one of the belt clamps. The belts clamps are located on the X axis carriage. -
Page 100: Hot End
Maintaining Your 3D Printer Hot End The hot end should be kept clean of extruded plastic by removing melted plastic strands with the tweezers. If melted plastic builds up on the hot end nozzle it can be cleaned with a paper towel soaked with acetone. Make sure the hot end is completely cool before attempting to clean the nozzle with acetone. -
Page 101: Advanced Usage
Advanced Usage... -
Page 102: Intro
Advanced Usage Intro After becoming familiar with printing with the TAZ 3D printer with the default settings there are a few advanced techniques that may help in getting better and more consistent prints. Some of these instructions include items and materials not included with the TAZ. With any of these additional items or materials, follow safety and usage guidelines as instructed by the manufacturer. -
Page 103: Abs/Acetone Glue
You will need an anti-seize capable of temperature of at least 250 C. ABS/Acetone Glue Acetone is not included or required with the TAZ 3D printer. An acetone safety label is included for the HDPE bottle. Acetone can cause skin irritation when prolonged skin contact occurs. It is recommended to use acetone safe gloves when applying the ABS/acetone glue. -
Page 105: Hardware And Software Source Code
Hardware and Software Source Code... - Page 106 Hardware and Software Source Code The LulzBot TAZ 3D printer is a free/libre hardware design. All of the source files are available at http://download.lulzbot.com/TAZ including: The latest version of this document, with L T E X source code. 3D models and print files for all of the printed parts in .stl, .gcode, and other original source files.
-
Page 107: 3D Printer Support
3D Printer Support... -
Page 108: Lulzbot
3D Printer Support LulzBot For common technical support questions for your TAZ 3D printer please visit lulzbot.com/support. Also, visit forum.lulzbot.com for support and tips from the LulzBot community. If you have further questions, e-mail our support team at support@lulzbot.com. Please completely read this manual before contacting for support questions or help. -
Page 109: Contact Information
Contact Information... -
Page 110: Support
Contact Information 10.1 Support Email: support@LulzBot.com Phone: +1-970-377-1111 x610 10.2 Sales Email: sales@LulzBot.com Phone: +1-970-377-1111 x600 10.3 Websites Aleph Objects, Inc., the makers of LulzBot 3D Printers: www.AlephObjects.com LulzBot 3D Printers and parts: www.LulzBot.com forum.LulzBot.com... -
Page 111: Index
Index cooling, 77 ABS, 103 acetone, 98, 100, 103 download, 28, 29, 38, 99, 106 advanced techniques, 102 drivers, 28 aluminum extrusions, 106 anti-seize, 103 Apple OS X, 28, 35, 36 electronics, x, 100, 106 axes, 33 electronics receptacles, 19 end stops, 23, 33 extrude, 33 baud rate, 31... - Page 112 INDEX Printrun, 30–32, 34, 106 hardware, 106 profiles, 83 hazards, x create, 83 heater block, x, 102 delete, 84 high resolution, 102 pronterface, 31 hobbed bolt, 99 PTFE tube, 22 home, 33 hot end, 32, 33, 92, 100, 102 RAMBo, 22, 100, 106 RepRap, 108 infill, 68 resolution, 28...
- Page 113 INDEX wires, x wrench, 102 X axis, 33 Y axis, 33 Z axis, 33...
-
Page 115: Glossary
Glossary .gcode The file extension for G-Code files 3D Printer Also referred to as additive manufacturing, is the process of fabricating objects from 3D model data, through the deposition of a material in accumulative layers. ABS Acrylonitrile Butadiene Styrene thermoplastic. Usually extrudes at 230C. - Page 116 Hot end The hot end is the whole part where the plastic melts, including the nozzle, heater block, thermistor, and heat sink. The Budaschnozzle is LulzBot’s hot end. Idler Refers to parts using a bearing (usually a 608ZZ) to add tension in belts or to add pressure against a rolling surface.
- Page 118 Colophon Created with 100% Free/Libre Software GNU/Linux T E X Memoir...
Need help?
Do you have a question about the TAZ and is the answer not in the manual?
Questions and answers