Table of Contents
Advertisement
Quick Links
Advertisement
Table of Contents

Related Manuals for LulzBot TAZ 3.0


Summary of Contents for LulzBot TAZ 3.0
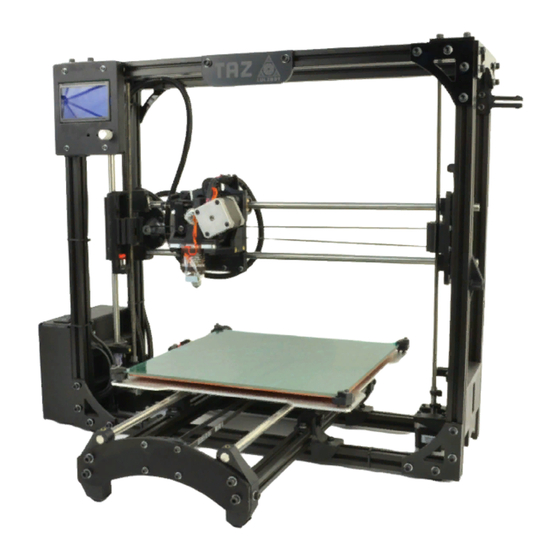
- Page 1 TAZ 3.0 User Manual Aleph Objects, Inc.
- Page 2 Permission is granted to copy, distribute and/or modify this document under the terms of the Creative Commons Attribution-ShareAlike 3.0 Unported license (CC BY-SA 3.0). Published by Aleph Objects, Inc., 626 W 66th Street, Loveland, Colorado, 80538 USA. For more information, call +1-970-377-1111 or go to www.LulzBot.com and www.AlephObjects.com. ISBN: 978-0-9893784-3-7...
-
Page 3: Table Of Contents
Contents WARNINGS Safety Information Read Me First! Hazards and Warnings 1 Setup Your Printer 1.1 Hardware Setup 1.2 ABS & Acetone Solution Prep 2 Loading Filament 3 3D Printer Software 3.1 Software Overview 3.2 Installing Drivers 3.3 Printrun 3.4 Using Printrun 3.5 CAD and 3D Modeling Software 4 Your First 3D Print 4.1 Bed Leveling... - Page 4 7.9 Electronics 8 Advanced Usage 8.1 Intro 8.2 Changing nozzles 8.3 ABS/Acetone Glue 8.4 Using 1.75mm Filament 9 Hardware and Software Source Code 10 3D Printer Support 10.1 LulzBot 10.2 Community 11 Contact Information 11.1 Support 11.2 Sales 11.3 Websites...
- Page 5 CONTENTS Index Glossary...
- Page 6 List of Figures 1.1 Axes movement directions 1.2 Locate the four Y axis bolts 1.3 Remove the four Y axis bolts 1.4 Locate the four Y axis mounts on the frame 1.5 Screw in and tighten the four Y axis bolts 1.6 Connect the two connectors found at the rear of the Y axis 1.7 Wrap and tighten a zip tie around the Y axis wires to the Y axis frame.
- Page 7 List of Figures 4.3 Extruder idler release 4.4 Extruder filament slot 4.5 Nozzle height 4.6 Z end stop trigger 4.7 First layer adhesion 5.1 Configuration Wizard: Welcome Screen 5.2 Configuration Wizard: Firmware Type 5.3 Configuration Wizard: Bed Size 5.4 Configuration Wizard: Nozzle Diameter 5.5 Configuration Wizard: Filament Diamter 5.6 Configuration Wizard: Extrusion Temperature 5.7 Configuration Wizard: Bed Temperature...
- Page 8 List of Figures 5.31 Infill patterns at varying densities. Left to Right: 20%,40%,60%,80%. Top to Bottom: Honeycomb, Concentric, Line, Rectilinear, Hilbert Curve, Archimedean Chords, Octagram Spiral 5.32 Infill advanced settings. 5.33 Retraction settings. 5.34 Skirt settings. 5.35 Cooling strategy. 5.36 Cooling advanced settings. 5.37 Support structure options.
- Page 9 List of Figures 6.1 GLCD Info Screen 6.2 Main menu 6.3 Configuration Menu 6.4 Configuration Menu...
-
Page 11: Warnings Safety Information
WARNINGS Safety Information... -
Page 12: Read Me First
WARNING! Read Me First! READ THIS MANUAL COMPLETELY BEFORE UNPACKING AND POWERING UP YOUR PRINTER. Hazards and Warnings The TAZ 3D printer has motorized and heated parts. When the printer is in operation always be aware of possible hazards. Electric Shock Hazard Never open the electronics case when the printer is powered on. - Page 13 HAZARDS AND WARNINGS Static Charge Make sure to ground yourself before touching the printer, especially the electronics. Electrostatic discharge can damage electronic components. Ground yourself by touching a grounded source. Age Warning For users under the age of 18, adult supervision is recommended. Beware of choking hazards around small children.
-
Page 15: Setup Your Printer
Setup Your Printer... -
Page 16: Hardware Setup
Setup Your Printer Hardware Setup 1. Your printer has been calibrated and tested, however, after unpacking all of the components you will need to re-mount the Y axis onto the frame and connect the bed and Y axis connectors. You will also need to re-mount the extruder tool head. -
Page 17: Locate The Four Y Axis Bolts
1.1. HARDWARE SETUP Figure 1.2: Locate the four Y axis bolts Figure 1.3: Remove the four Y axis bolts... -
Page 18: Locate The Four Y Axis Mounts On The Frame
Setup Your Printer 3. On the TAZ frame locate the four Y axis mount brackets shown in Fig. 1.4 (pg. 18). With the print surface facing up and the stepper motor end of the Y axis facing back, slide the Y axis assembly in between the Y axis mount brackets. -
Page 19: Screw In And Tighten The Four Y Axis Bolts
1.1. HARDWARE SETUP Figure 1.5: Screw in and tighten the four Y axis bolts 4. The next step of installing the Y axis is connecting the print surface connectors and Y axis connectors. Pull the print bed completely to the front of the printer to get access to the Y axis connectors. You will find matching male and female 4 pin stepper motor connectors and two pin end stop connectors. -
Page 20: Connect The Two Connectors Found At The Rear Of The Y Axis
Setup Your Printer Figure 1.6: Connect the two connectors found at the rear of the Y axis 5. Locate one of the three small black zip ties that are included in the documents bag. Wrap and tighten the zip tie around the Y axis wiring and the black Y axis frame extrusion as shown in figure 1.7 (page 21). -
Page 21: Wrap And Tighten A Zip Tie Around The Y Axis Wires To The Y Axis Frame
1.1. HARDWARE SETUP Figure 1.7: Wrap and tighten a zip tie around the Y axis wires to the Y axis frame. 6. Locate the two connectors to the left of the print bed. Connect the matching female and male large two pin heat bed connectors and the small two pin thermistor connectors, again making sure the connectors lock(Fig. -
Page 22: Connect The Two Connectors On The Left Of The Print Bed
Setup Your Printer Figure 1.8: Connect the two connectors on the left of the print bed 7. Locate the other two small black zip ties that are included in the documents bag (Fig. 1.9, page 23). Wrap the two zip ties through the slot, located on the left rear of the aluminum bed plate, and around the print bed wires (Fig. -
Page 23: Locate The Two Zip Ties Found In The Bag With The Manual
1.1. HARDWARE SETUP Figure 1.9: Locate the two zip ties found in the bag with the manual Figure 1.10: Tightly wrap the zip ties around the bed wires and through the strain relief slot... -
Page 24: Remove The Tool Head Screw
Setup Your Printer Before proceeding make sure that the four red shipping clamps on the Z axis smooth rods have been removed. 9. Move the X axis carriage to the center of the smooth rods. If you have not already done so, remove the foam from between the X axis carriage and the left hand X axis end. -
Page 25: Mount The Extruder Tool Head
1.1. HARDWARE SETUP Figure 1.12: Mount the extruder tool head Figure 1.13: Connect the two tool head connectors... - Page 26 Setup Your Printer 11. Now that the Y axis is mounted and the extruder tool head is installed you should set your printer on a stable, flat, and level surface large enough for extra space around the printer. Make sure your printer work space is clear of anything that could obstruct the movement of the printer.
-
Page 27: Power And Usb Receptacles
1.1. HARDWARE SETUP Figure 1.14: Power and USB receptacles Figure 1.15: Power supply... -
Page 28: The Power Supply Plug Correctly Plugged In
Setup Your Printer Figure 1.16: 24V DC Power supply plug and receptacle Figure 1.17: The power supply plug correctly plugged in... -
Page 29: Filament Guide
1.1. HARDWARE SETUP 14. Locate, on the right of the power supply, the red AC voltage switch. De- pending on your location you will need to change the AC voltage switch to 115V or 230V. North America is generally 115V and the majority of other regions are 230V. -
Page 30: Filament Guide Mount
Setup Your Printer Figure 1.19: Filament Guide Mount Figure 1.20: Filament Guide Setting... -
Page 31: Axes Movement Directions
1.1. HARDWARE SETUP Figure 1.21: Axes movement directions Figure 1.22: End stop locations... -
Page 32: Abs & Acetone Solution Prep
Setup Your Printer ABS & Acetone Solution Prep Please refer to section 8.3 (page 145) for instructions in preparing the ABS/Acetone Glue for use when printing with ABS. As it will take some time to dissolve the ABS into the acetone it may now be a good time to make the solution. -
Page 33: Loading Filament
Loading Filament... -
Page 34: Filament Reel Arm
filament reels but can be modified to work with other reel and spool types. 1. On the front right hand side of the TAZ 3.0 3D printer you will find the filament arm (fig. 2.1, page 34). Place the filament reel on the filament arm with the filament feeding counter clockwise. -
Page 35: Filament Run Through The Guide
LulzBot TAZ User Manual Figure 2.2: Filament run through the guide 3. Your filament reel is now mounted and ready for the next steps. 4. When changing filament, slide the opposite end of the filament through one of the holes in hub of the filament spool. This will keep the filament... -
Page 37: 3D Printer Software
3D Printer Software... -
Page 38: Software Overview
3D Printer Software Software Overview Aleph Objects, Inc., the maker of the LulzBot TAZ, completely supports free/libre hardware and software. Along with the TAZ being a free/libre hardware design, it has been tested to work with 100% free/libre software. Our source code and design files are hosted on our development server found at http://devel.lulzbot.com. -
Page 39: Printrun Application For 3D Printer Control
Printrun package can be found at https://github.com/kliment/Printrun. Printrun can be downloaded from LulzBot.com/support/downloads. Download the version for your operating system and extract. You will need an archive manager to extract the files. If you do not have one installed we recommend using 7-zip, which can be downloaded for free at www.7-zip.org. - Page 40 3D Printer Software Mac OSX Instructions Once downloaded, extract the dist folder to a location of your choice. Once extracted, double click the pronterface-mac-Mar2012.app file to install. Linux Instructions Debian—Ubuntu Once downloaded, extract the dist folder to a location of your choice.
-
Page 41: Using Printrun
3.4. USING PRINTRUN Using Printrun Figure 3.2: Printrun Printrun is used to control the printer from a computer. It is divided into 4 main parts: The buttons over the top are used to connect to the printer, load files and start & stop prints. The movement controls are on the left hand side, with the G-code preview window in the center and the Log window and Terminal command entry box on the right hand side (Fig. -
Page 42: Printrun Functions
3D Printer Software In the text output window you will see multiple return lines. If you see Printer is now online you have successfully connected to the printer. The printer control buttons on the left will also darken and become click- able after connecting. -
Page 43: Movement Controls
3.4. USING PRINTRUN Movement Figure 3.4: Movement Controls Motors off The TAZ 3D printer can be moved on all three axes independently. If you would like to do so by hand, use the Motors off button to unlock all the stepper motors. - Page 44 3D Printer Software Homing Caution: when homing, the axis will continue to move in the negative direction until the end stop switch is activated. If the printer is ever transported make sure the end stop switches are clear before resuming printing.
-
Page 45: Cad And 3D Modeling Software
3.5. CAD AND 3D MODELING SOFTWARE CAD and 3D Modeling Software Currently LulzBot is not distributing a CAD or 3D modeling software package. However, there are multiple free/libre software packages available. Other common non-free CAD and 3D modeling software are also capable of exporting the required .STL files. - Page 46 3D Printer Software The most widely used Free/Libre 3D modeling software, Blender is well documented with tutorials available on the Blender.org website. Numerous video tutorials can be also found online. Shapesmith Website: http://shapesmith.net Shapesmith is a web based 3D modeling software. This means there is no required software to get started designing models.
-
Page 47: Your First 3D Print
Your First 3D Print... -
Page 48: Bed Leveling
Your First 3D Print Bed Leveling Make sure you take the time to go through the following procedure to help ensure that your prints are consistent and trouble free. Make sure to first read the instructions for using the Printrun software. Connect to the printer as described in the Printrun software section. - Page 49 4.1. BED LEVELING Once lowered by approximately 1cm, press the Home Z button to home the Z axis. The hot end will approach the heated bed and should stop around a centimeter above the surface of the heated bed. While the Z axis is moving down pay attention to the Z axis movement and sound.
-
Page 50: Verifying The X And Y Axis Are Square
Your First 3D Print Figure 4.2: Verifying the X and Y axis are square Compare the distance measurement from the left side to the measurement on the right side. The distance measurement should be the same. If not, in Pronterface use the Motors off button to turn off the stepper motors on the TAZ 3D printer. - Page 51 4.1. BED LEVELING Leveling the Print Bed Slide a thin piece of paper underneath the nozzle in the front left corner of the bed. Adjust the Z axis end stop and home the Z axis until the tip of the nozzle applies a firm pressure on the paper. Test by attempting to slide the paper out from under the nozzle.
-
Page 52: Set Temperature
85 C for print surface; for PLA they should be set at 185 C for the hot end and 55 C for print surface. These temperatures work well for filament sourced from LulzBot, however you may need to adjust the temperature a degree or two depending on the filament source, color and type. Click the Motors Off button. -
Page 53: Home Printer
4.4. HOME PRINTER Figure 4.3: Extruder idler release you previously loosened them. Tighten the two screws until they are finger tight, then tighten them slightly more, until the top of the thumbscrews are about 10mm away from the plastic clip. In Pronterface, in the lower left hand corner of the screen there are two text entry boxes next to the ”Extrude”... -
Page 54: Z Print Height
Load the bed level.gcode file. This file can be found in the calibration directory on the SD card included with your TAZ 3D printer or at: http://www.LulzBot.com/support/downloads. Place your mouse cursor over the entry Bed Level Check, right click and select Save as Once you have downloaded the file to your computer, press the Load file button... -
Page 55: Nozzle Height
4.5. Z PRINT HEIGHT Figure 4.5: Nozzle height Figure 4.6: Z end stop trigger... -
Page 56: Your First Octopus
Your First 3D Print The .gcode file should appear in the Pronterface G-Code viewer. Press the Print button to begin the print. When the print starts make sure the first layer is not printing too close or too far from the print bed. Note Figure 4.7, page 56, as an example of a good first layer adhesion. -
Page 57: Remove Part
4.7. REMOVE PART (85C ABS/60C PLA) up to printing temperature. Once the printer is at the appropriate temperature, press the Print button to begin the print. Remove Part After the part is finished printing, the heated bed will automatically cool down to room temperature. -
Page 59: Slic3R
Slic3r... -
Page 60: Introduction
Slic3r Introduction Overview Slic3r is a tool which translates digital 3D models into instructions that are understood by a 3D printer. It slices the model into horizontal layers and generates suitable paths to fill them. Slic3r is already bundled with the many of the most well-known host software packages: Pronterface, Repetier-Host, ReplicatorG, and can be used as a standalone program. -
Page 61: Getting Slic3R
5.2. GETTING SLIC3R Getting Slic3r Slic3r is Free Software, and is licensed under the GNU Affero General Public License, version 3. Downloading From LulzBot The Slic3r version that has been tested for the TAZ printer downloaded from LulzBot.com downloads page: https://www.lulzbot.com/support/downloads. -
Page 62: First Print
Slic3r Start Slic3r directly by running the Slic3r executable, found in the bin directory, or Install Slic3r by running the do-install executable, also found in the bin folder. The archive file may then be deleted. Windows Unzip the downloaded zip file to a folder of your choosing, there is no installer script. - Page 63 Be sure to complete the Setup and First Print section of this manual before moving forward with Slic3r. If you are just beginning with 3D printing or Slic3r, LulzBot recommends starting with our pre-set Slic3r profiles. You can find the TAZ Slic3r profiles at https://www.lulzbot.com/support/downloads.
-
Page 64: Configuration Wizard: Welcome Screen
Slic3r Configuration Wizard Slic3r has two features to aid newcomers: the configuration wizard, and simple mode. Sometimes it is nice to have a helping hand when starting out with new software. The configuration wizard asks a series of questions and creates a configuration for Slic3r to start with. -
Page 65: Configuration Wizard: Firmware Type
5.3. FIRST PRINT 1. Firmware Type The gcode produced by Slic3r is tailored to particular types of firmware. The first step prompts for the firmware that the printer uses. For the TAZ printer select RepRap (Marlin/Sprinter) Figure 5.2: Configuration Wizard: Firmware Type... -
Page 66: Configuration Wizard: Bed Size
Slic3r 2. Bed Size This setting defines the maximum distance the extruder may travel along the X and Y axis. The dimension for the TAZ print surface are X: 298 and Y: 280. Be sure to measure from the lower left corner where the extruder nozzle rests when are the home position to the maximum distance the nozzle can travel in each direction. -
Page 67: Configuration Wizard: Nozzle Diameter
5.3. FIRST PRINT 3. Nozzle Diameter The diameter of the hot-end nozzle is usually clearly displayed either in the description of the hot-end, or in the associated documentation, when the hot-end is purchased. The default nozzle size on the TAZ hot end is 0.35mm. -
Page 68: Configuration Wizard: Filament Diamter
Slic3r 4. Filament Diameter For Slic3r to produce accurate results it must know as accurately as possible how much material is pushed through the extruder. Therefore it is vital to give it as precise a value as possible for the filament diameter. Although the filament used in FDM printers is sold as being either 3mm or 1.75mm this is only a general guide. -
Page 69: Configuration Wizard: Extrusion Temperature
5.3. FIRST PRINT 5. Extrusion Temperature The extrusion temperature will depend on the material, and most can operate over a range of temperatures. The supplier should provide guidance as to which temperatures are suitable. A very general rule of thumb is that PLA lies between 160 C and 230 C, and ABS lies between 220 C and 240 C. -
Page 70: Configuration Wizard: Bed Temperature
Slic3r 6. Bed Temperature If the printer has a heated bed then this parameter may be set. As with the extruder temperature, the value will depend on the material used. A rule of thumb is that PLA requires 35 C - 60 C and ABS requires 85 C. Note: One may choose to control the bed temperature manu- ally from the printer controller. -
Page 71: Configuration Wizard: End
5.3. FIRST PRINT At this stage the wizard is complete and the basic configuration is defined. Figure 5.8: Configuration Wizard: End... -
Page 72: The Important First Layer
Slic3r The Important First Layer Before delving into producing the first print it is worthwhile taking a little detour to talk about the importance of getting the first layer right. As many have found through trial and error, if the first layer is not the best it can be then it can lead to complete failure, parts detaching, and warping. - Page 73 5.3. FIRST PRINT Fatter extrusion width. The more material touching the bed, the better the object will adhere to it, and this can be achieved by increasing the extrusion width of the first layer, either by a percentage or a fixed amount. Any spaces between the extrusions are adjusted accordingly.
- Page 74 Slic3r Working with Models Yet another step lies between now and the first print - a model has to found and then sliced. Model Formats Slic3r accepts the following file types. STereoLithography (STL) files can come from a wide variety of sources and are now a de facto standard in 3D printing.
-
Page 75: Shapesmith Online Cad Tool
5.3. FIRST PRINT Figure 5.9: Shapesmith online CAD tool. Working with Plater Slic3r has a tool, called Plater, which allows one or more models to be loaded and arranged before being sliced. - Page 76 Slic3r Figure 5.10: Plater Once you have acquired a model, drag it onto the Plater window (or use the Add button below the file list) to load it into Slic3r. In the figure below, the traditional RepRap Minimug is loaded, and is viewed from above. The ring around the model is a skirt - a single perimeter, several millimeters away from the model, which is extruded first.
-
Page 77: Minimug Model
5.3. FIRST PRINT Figure 5.11: Minimug model. Figure 5.12: STL file loaded. The model can be repositioned by dragging the representation of it on the left of the screen around the bed. Note that the dimensions of the bed should match your printer, as given during the initial configuration above. - Page 78 Slic3r On the right-hand side is the list of currently loaded files. The buttons along the top of the file list allow you to arrange the models. More/Less - Adjust how many copies should be printed. 45 /Rotate - Rotate the selected model around the Z axis, either in 45 increments clockwise or counter-clockwise, or by a given amount.
-
Page 79: Simple Mode
5.4. SIMPLE MODE Printing At this stage Slic3r has been configured and a model has been acquired, sliced and made ready for print. Now would be the time to fire up the printer and try it out. A variety of host software is available to send the G-code to the printer. -
Page 80: Simple Mode: Print Settings
Slic3r Figure 5.14: Simple Mode: Print Settings. General. Layer height is the thickness of each layer, and it is the step along the vertical axis taken before extruding a new layer atop the previous one. There are several factors that influence how high each layer should be: Desired resolution - Lower layer height should result in prints with less noticeable ribs or bands, as each layer is smaller. -
Page 81: An Example Of Insufficient Top Layers
5.4. SIMPLE MODE Print speed - Shorter layers will result in smoother prints but each print will take longer, simply because the extruder must trace the pattern more times. A later goal will be to strike a balance between layer height, the speed of the printer, and the quality of the resulting print. -
Page 82: Creating A Vase From A Solid Model
Slic3r Another tip to consider: Setting the top solid layer to zero, and setting the infill also to zero, will result in a hollow receptacle, ideal for turning models into vases for example. Here manipulating the settings within Slic3r can be used to generate different kinds of prints, and not only be used to control surface accuracy. -
Page 83: An Example Of An Object Printed With Support Material
5.4. SIMPLE MODE rectilinear, line, or honeycomb. Honeycomb gives the most strength but is slower than both rectilinear or line. Support material. Printing a model from the bottom up, as with FDM, means that any significant overhangs will be printed in the air, and most likely droop or not print correctly. -
Page 84: An Example Of Brim
Slic3r Infill - As the infill is hidden this can be extruded a little faster. Take care though not to go too fast as higher speeds results in thinner extrusions, and this may affect how the extrusions bond. Travel - The jump between the end of one extrusion and the next should usually be performed as quickly as the printer will allow in order to minimise any mess caused by material oozing from the nozzle. -
Page 85: Simple Mode: Filament Settings
5.4. SIMPLE MODE Figure 5.19: Simple Mode: Filament Settings. Filament. The Diameter setting will already have been filled from the value given during the wizard (see p.68), but can be updated here. The Extrusion multiplier setting allows the fine tuning of the extrusion flow rate, and is is given as a factor, e.g. -
Page 86: Simple Mode: Printer Settings
Slic3r Figure 5.20: Simple Mode: Printer Settings. Size and coordinates. The Bed size setting is taken from the wizard (see p.66) and is only used for previewing the model in the plater. The Print center is the point around which the print will be centered. A Bed size of 200mmx200mm and a Print center of 100mmx100mm would sit the print in the middle. - Page 87 5.4. SIMPLE MODE negative value will offset all layers by that amount. The correct solution however is to fix the end-stop itself. The optimal Z endstop position is where the nozzle tip barely touches the surface of the bed when homed. A sheet of paper makes a good gauge for this very small distance.
-
Page 88: Expert Mode
Slic3r The codes specified in Start G-code are inserted at the beginning of the output file, directly after the temperature control commands for extruder and bed. Note that if temperature control commands are specified (M104 and M190) then these will replace the temperature G-codes introduced by the Filament settings. -
Page 89: Expert Mode Speed Options
5.5. EXPERT MODE Figure 5.21: Expert mode speed options. Where indicated a value can be given in percentage. This is in relation to the preceding value, e.g. 50% solid infill would be half of the value defined for infill. A few general guidelines for each option: Perimeters - In expert mode this parameter can be increased slightly as the External perimeters option can be used to ensure blemish free external faces. - Page 90 Slic3r Infill - As fast as you can without compromising the integrity of the fill structure. Faster extrusions can break and result in weak spots. Solid infill - The bottom of the model, and any additional solid layers is usually slightly slower than infill but faster than perimeters. Top solid infill - Allow time for the extrusion to cleanly cover the previous top layers and result in a tidy top surface.
-
Page 91: Infill Pattern Settings
5.5. EXPERT MODE Infill Patterns and Density There are several considerations when choosing an infill pattern: object strength, time and material, personal preference. It can be inferred that a more complex pattern will require more moves, and hence take more time and material. -
Page 92: Infill Pattern: Concentric (351.80Mm / 5M:30S)
Slic3r Figure 5.25: Infill pattern: Concentric (351.80mm / 5m:30s) Figure 5.26: Infill pattern: Honeycomb (362.73mm / 5m:39s) Figure 5.27: Infill pattern: Hilbert Curve (332.82mm / 5m:28s) Figure 5.28: Infill pattern: Archimedean Chords (333.66mm / 5m:27s) -
Page 93: Infill Pattern: Octagram Spiral (318.63Mm / 5M:15S)
5.5. EXPERT MODE Figure 5.29: Infill pattern: Octagram Spiral (318.63mm / 5m:15s) Certain model types are more suited for a particular pattern, for example organic versus mechanical types. Figure 5.30 shows how a honeycomb fill may suit this mechanical part better because each hexagon bonds with the same underlying pattern each layer, forming a strong vertical structure. -
Page 94: Infill Patterns At Varying Densities
Slic3r Figure 5.31: Infill patterns at varying densities. Left to Right: 20%,40%,60%,80%. Top to Bottom: Honeycomb, Concentric, Line, Recti- linear, Hilbert Curve, Archimedean Chords, Octagram Spiral... -
Page 95: Infill Advanced Settings
5.5. EXPERT MODE Infill Optimization Slic3r contains several advanced infill settings which can help produce better extrusions. Figure 5.32: Infill advanced settings. layers - Will produce sparse vertical infill by Infill every skipping a set number of layers. This can be used to speed up print times where the missing infill is acceptable. -
Page 96: Retraction Settings
Slic3r Only retract when crossing perimeters - Retracting, to prevent ooze, is unnecessary if the extruder remains within the boundaries of the model. Care should be taken if the print material oozes excessively, as not retracting may result in enough material loss to affect the quality of the subsequent extrusion. - Page 97 5.5. EXPERT MODE extruders may need up to 4 or 5mm due to the hysteresis introduced by the tube. Lift Z - Raises the entire extruder on the Z axis by that many millimeters during each travel. This can be useful to ensure the nozzle will not catch on any already laid filament, however it is usually not necessary and will slow the print speed.
-
Page 98: Skirt Settings
Slic3r Avoid crossing perimeters (Layers and perimeters - Advanced) - Will force the nozzle to follow perimeters as much as possible to minimise the number of times it must cross them when moving around, and between, islands. This has a negative impact on both G-code generation and print times. -
Page 99: Cooling Strategy
5.5. EXPERT MODE however the skirt function can also be used to build walls around the object in case it should be protected from drafts. Minimum extrusion length - Dictates a minimum number of mil- limeters that the skirt should be, should the loop around the object not be enough. - Page 100 Slic3r Figure 5.35 shows the strategy adopted by Slic3r. Reading from right to left, when the minimum fan threshold (#2) is reached the fan is turned on. This increases in intensity as the layer time decreases. The print speed remains constant until the estimated print time drops below a certain threshold (#1), this is when the print speed is reduced until it reaches it’s minimum value.
-
Page 101: Cooling Advanced Settings
5.5. EXPERT MODE Figure 5.36: Cooling advanced settings. Fan speed - Determines the minimum and maximum speeds - useful for fans that run too fast by default. Bridges fan speed - As the material stretches over wide gaps, it makes sense to try and cool it as much as possible, therefore a full fan speed is recommended. -
Page 102: Support Structure Options
Slic3r seconds - Slows Slow down if layer print time is below down the print if the layer will be completed within the given number of seconds. Min print speed - A lower limit on how slowly a layer can be printed. Support Material Generally, most 3D models will print with overhanging parts by up to a certain degree. -
Page 103: Minimug Model, Tilted
5.5. EXPERT MODE support automatically, otherwise the degrees given will be used. Support generation is a relatively complex topic, and there are several aspects which determine the optimal support, it is strongly recommended to set the threshold to zero and allow Slic3r to determine the support required. Small models, and those with small footprints, can sometimes break or detach from the bed. -
Page 104: Support Infill Pattern: Rectilinear
Slic3r Figure 5.39: Support infill pattern: Rectilinear Figure 5.40: Support infill pattern: Rectilinear Grid Figure 5.41: Support infill pattern: Honeycomb Pattern Spacing determines the distance between support lines, and is akin to infill density apart from being defined only in mm. If changing this attribute take into account the width of the support extrusion and the amount of support material that will adhere to the object. -
Page 105: Example Of Pattern Angle Rotated
5.5. EXPERT MODE Figure 5.42: Example of pattern angle rotated 45 . Multiple Extruders A printer with more than one extruder can be used in different ways: The additional extruder could print a different color or material; or it could be assigned to print particular features, such as infill, support or perimeters. -
Page 106: Multiple Extruder Options - Printer Settings Tab (General). Note The Two Extruders Defined In The Left-Hand Pane
Slic3r Figure 5.43: Multiple extruder options - Printer Settings Tab (General). Note the two extruders defined in the left-hand pane. Each extruder can be configured as usual, however there are additional settings which must be set which are particular to multi-extruder setups. Figure 5.44: Multiple extruder options - Printer Settings Tab (Extruder). -
Page 107: Plater With Multiple Filament Options
5.5. EXPERT MODE Because the secondary extruder will be dormant whilst the first is working, and vice-versa, it is important that the material is sufficiently retracted to stop oozing. As with the regular retraction settings (see p.96) the Length options is measured from the raw filament entering the extruder. Assigning Filaments When a printer profile with multiple extruders has been selected the Plater tab allows the selection of a different filament for each extruder. -
Page 108: Multiple Extruder Options - Print Settings Tab
Slic3r Figure 5.46: Multiple extruder options - Print Settings Tab. Configuring Tool Changes The Custom G-code subsection of the Printer Settings tab has an option for inserting G-code between tool changes. As with all custom G-code subsections, placeholder variables can be used to reference Slic3r settings. This includes the [previous extruder] and [next extruder] variables. - Page 109 5.5. EXPERT MODE Printing Multi-material Objects If a multi-material AMF file already exists, because the CAD program can export such a format, then this can be loaded into Slic3r in the usual way. The mapping between object materials and extruders is sequential, i.e. the first material is assigned to the first extruder, etc.
-
Page 110: Extrusion Widths Options
Slic3r Extrusion Width Figure 5.48: Extrusion widths options. One reason for modifying the extrusion width has already been discussed: increasing first layer extrusion width in order to improve bed adhesion (see p.73). There are some further cases where it may be beneficial to modify extrusion widths. -
Page 111: Example Model Highlighting Use Case For Variable Layer Heights
5.5. EXPERT MODE It is important to remember that if the extrusion width is expressed as a percentage then this is computed from the Layer height property, and not the Default extrusion width setting. Variable Layer Height Slic3r gives the ability to adjust the layer height between arbitrary positions along the Z axis. -
Page 112: Example With Normal Layer Height
Slic3r Figure 5.50: Example with normal layer height. The variable layer height options are available by double clicking on a part name in the Plater window. This will cause a pop-up window to be displayed which contains two tabs. The first gives some information about the model, as shown in fig. -
Page 113: Variable Layer Height Options - Info
5.5. EXPERT MODE Figure 5.51: Variable layer height options - Info. It is worth noting the height of the model, as this will be useful when calculating the maximum Z height. The second tab (fig. 5.52) presents a table where each row defines a layer height for a particular range along the Z axis, given in millimeters. -
Page 114: Variable Layer Height Options - Layers
Slic3r Figure 5.52: Variable layer height options - Layers. The resulting G-Code (fig. 5.53) shows a higher definition which should result in a higher quality print. Figure 5.53: Example with variable layer height. -
Page 115: Example Print With Variable Layer Height
5.5. EXPERT MODE Fig. 5.54 shows the example model printed. The print on the left has 0.4mm layer height throughout, whereas the print on the right has the variable layer height. Figure 5.54: Example print with variable layer height. An additional feature of the variable layers height option is that by entering a zero for a range that part of the model will not be printed. -
Page 116: Configuration Organization
Slic3r Configuration Organization There are two ways in which to organize the configuration settings: exporting and importing the configuration settings, and profiles. The former is available in both simple and expert mode, whereas profiles is only available in expert mode. Exporting and Importing Configuration The current set of configuration options can be simply exported via the Export Config File menu option. -
Page 117: Saving A Profile
5.6. CONFIGURATION ORGANIZATION Figure 5.56: Saving a profile. Profiles can be deleted by choosing the profile to delete and clicking the red delete button next to the save button. Figure 5.57: Deleting a profile. -
Page 118: Repairing Models
Slic3r Repairing Models If the 3D mesh described in the model contains holes, or edges are misaligned (known as being non-manifold), then Slic3r may have problems working on it. Slic3r will attempt to fix any problems it can, but some problems are out of its reach. -
Page 119: Advanced Topics
5.8. ADVANCED TOPICS From the menu choose Meshes->Analyze->Evaluate & Repair mesh to bring up the repair options dialog. From the options dialog choose the loaded mesh, then perform each analysis be clicking the Analyze button by each problem type, or select Repetitive Repair at the bottom to perform all checks. -
Page 120: The Clearance Cylinder Around An Extruder
Slic3r parts will not cause problems. The Extruder clearance parameters help Slic3r detect potential collisions: Radius - The clearance that should be given around the extruder. Take care if the extruder is not mounted centrally - take the largest safe value. Height - The vertical distance between the nozzle tip and the X axis rods, or lowest part which may interfere with a finished print. - Page 121 5.8. ADVANCED TOPICS Command Line Usage Slic3r can also be used from the command line instead of via the GUI, as part of a script, or as part of another tool, such as Printrun All options found in the GUI can be used from the command line in the form of switch parameters.
- Page 122 Slic3r --gcode-flavor The type of G-code to generate (reprap/teacup/makerbot/sailfish/mach3/no-extrusion, default: reprap) --use-relative-e-distances Enable this to get relative E values --gcode-arcs Use G2/G3 commands for native arcs (experimental, not supported by all firmwares) --g0 Use G0 commands for retraction (experimental, not supported by all firmwares) --gcode-comments Make G-code verbose by adding comments (default: no)
- Page 123 5.8. ADVANCED TOPICS have been applied. (mm/s^2, set zero to disable; default: 130) Accuracy options: --layer-height Layer height in mm (default: 0.4) --first-layer-height Layer height for first layer (mm or %, default: 0.35) --infill-every-layers Infill every N layers (default: 1) --solid-infill-every-layers Force a solid layer every N layers (default: 0) Print options:...
- Page 124 Slic3r --raft-layers Number of layers to raise the printed objects by (range: 0+, default: 0) --support-material-enforce-layers Enforce support material on the specified number of layers from bottom, regardless of --support-material and threshold (0+, default: 0) Retraction options: --retract-length Length of retraction in mm when pausing extrusion (default: 1) --retract-speed Speed for retraction in mm/s (default: 30) --retract-restart-extra...
- Page 125 5.8. ADVANCED TOPICS Sequential printing options: --complete-objects When printing multiple objects and/or copies, complete each one before starting the next one; watch out for extruder collisions (default: no) --extruder-clearance-radius Radius in mm above which extruder won’t collide with anything (default: 20) --extruder-clearance-height Maximum vertical extruder depth;...
-
Page 126: Post-Processing Script Option
Slic3r Post-Processing Scripts There may be times when the G-Code generated by Slic3r has to be tweaked or modified after it has been created. For this reason there exists the ability to run arbitrary scripts as part of the final steps in the slicing process In the Output options subsection of the Print Settings tab lies the Post-processing scripts option. -
Page 127: Example Post-Processing Script To Print Each Line To Output
5.8. ADVANCED TOPICS #!/usr/bin/perl -i use strict; use warnings; while (<>) { # modify $_ here before printing print; Figure 5.63: Example post-processing script to print each line to output. -
Page 128: Troubleshooting
Slic3r Troubleshooting Z Wobble Undulations in the walls of a print may be due to wobble in the Z axis. A thorough analysis of the potential causes is given by whosawhatsis his article ”Taxonomy of Z axis artifacts in extrusion-based 3d printing” however one point of particular interest for users of Slic3r is the wobble caused by motor steps not matching the pitch of the Z rods thread. -
Page 129: Slic3R Support
5.10. SLIC3R SUPPORT 5.10 Slic3r Support Slic3r Support A variety of resources are available to provide support for Slic3r. Wiki and FAQ The wiki provides up-to-date documentation, and a FAQ sub- section which may help resolve any queries or issues. https://github.com/alexrj/Slic3r/wiki/Documentation https://github.com/alexrj/Slic3r/wiki/FAQ Blog... - Page 130 Slic3r Issue Tracker If a bug may have been found in the software then an issue may be raised in the project issue tracker. github.com/alexrj/Slic3r/issues Please take the time to read through the existing issues to see whether the problem has already been submitted. Also make sure that the problem is a bug in the application, support related questions should not be submitted.
-
Page 131: Printing With The Graphic Lcd
Printing with the Graphic LCD... -
Page 132: Glcd Controller Or Printrun Host
Printing with the Graphic LCD The Graphic LCD allows you to print with the TAZ 3D printer without needing to have a computer connected or use host software such as Printrun. This will allow for more efficient space in the workspace and free up a computer for other tasks. -
Page 133: Putting Print Files On The Sd Card
6.3. PUTTING PRINT FILES ON THE SD CARD Putting Print Files On the SD Card To print from the Graphic LCD you will need to transfer .gcode print files onto the SD card. Follow the normal steps, as explained in the Slic3r chapter, to create .gcode print files on your computer. - Page 134 Printing with the Graphic LCD Status screen that will give you current temperatures, tool head coordinates, print status, and more. Shown in figure 6.1 above are the different numbered sections of the status screen. Follow the key below for more information on each section.
- Page 135 6.4. PRINTING WITH THE GRAPHIC LCD if the menu is left idle it will automatically move back to the main status screen. Figure 6.2: Main menu Preparing for a Print Before starting a print you will need to set the hot end and heat bed to the appropriate temperatures for the filament type you are using.
- Page 136 Printing with the Graphic LCD Selecting a File From the SD and Starting a Print Once the hot end and heat bed have reached the desired temperature the printer is ready to print. From the main menu select the Print from SD option.
- Page 137 If you ever need to revert back to the factory settings navigate to Configuration -> Restore Failsafe. Clicking Restore Failsafe with set all configuration settings back to the original factory settings in the firmware. For more information on the configuration settings please see the TAZ support page on LulzBot.com.
- Page 138 Printing with the Graphic LCD GLCD Controller Menu Diagram Figure 6.4: Configuration Menu...
-
Page 139: Maintaining Your 3D Printer
Maintaining Your 3D Printer... -
Page 140: Overview
PET Sheets After repeated use, the PET sheet print surface will begin to wear. Replacement PET sheets are available on LulzBot.com. To replace the PET print surface, peel off the worn PET sheet from the glass print surface. If there is any glue or plastic residue left on the glass surface, clean it with acetone or an alcohol based glass cleaner. -
Page 141: Hobbed Bolt
Software Every quarter LulzBot will release a new stable version of the software. It is best to update the software every time a new version is released. The software is as important in printing quality parts as the hardware. Each quarterly software update can bring advances in print quality. -
Page 142: Hot End
Maintaining Your 3D Printer Hot End The hot end should be kept clean of extruded plastic by removing melted plastic strands with the tweezers. If melted plastic builds up on the hot end nozzle it can be cleaned with a paper towel soaked with acetone. Make sure the hot end is completely cool before attempting to clean the nozzle with acetone. -
Page 143: Advanced Usage
Advanced Usage... -
Page 144: Intro
The TAZ 3D printer ships with a standard 0.35mm nozzle which allows small layer resolution and up to 0.35mm layers. Although the 0.35mm nozzle will be perfect for most printing applications LulzBot also offers smaller and larger nozzle sizes. In most cases the nozzle is best changed when the hot end is slightly warm. -
Page 145: Abs/Acetone Glue
8.3. ABS/ACETONE GLUE After installing the new nozzle you may need to adjust your Z home trigger setting before printing again. Refer to the Printing Your First Print section (page 47) for calibrating the Z home trigger setting. If you will be changing nozzles frequently we suggest reapplying a small amount of high temperate anti-seize to the inside threads of the nozzles. - Page 146 1.75mm filament. To print with 1.75mm filament you will need to change the PTFE tube inside the Budaschnozzle hot end. Purchase the 1.75mm conversion PTFE tube in our store at www.LulzBot.com. To change out the PTFE tube: 1. Remove the plastic filament from the extruder if there is any currently loaded by bringing the hot end up to extrusion temp and backing out the filament in Printrun...
- Page 147 8.4. USING 1.75MM FILAMENT 10. Push the PTFE tube for 1.75mm filament through the washers in the original pattern. The PTFE tube should be approximately centered in the heat sink washers with equal links of the PTFE tube sticking out of the heat sink.
-
Page 149: Hardware And Software Source Code
Hardware and Software Source Code... - Page 150 Hardware and Software Source Code The LulzBot TAZ 3D printer is a free/libre hardware design. All of the source files are available at http://download.lulzbot.com/TAZ including: The latest version of this document, with L T E X source code. 3D models and print files for all of the printed parts in .stl, .gcode, and other original source files.
-
Page 151: 3D Printer Support
3D Printer Support... -
Page 152: Lulzbot
For common technical support questions for your TAZ 3D printer please visit lulzbot.com/support. Also, visit forum.lulzbot.com for support and tips from the LulzBot community. If you have further questions, e-mail our support team at support@lulzbot.com. Please completely read this manual before contacting for support questions or help. The latest version of this information guide is also available at http://download.lulzbot.com. -
Page 153: Contact Information
Contact Information... -
Page 154: Support
Contact Information 11.1 Support Email: support@LulzBot.com Phone: +1-970-377-1111 x610 11.2 Sales Email: sales@LulzBot.com Phone: +1-970-377-1111 x600 11.3 Websites Aleph Objects, Inc., the makers of LulzBot 3D Printers: www.AlephObjects.com LulzBot 3D Printers and parts: www.LulzBot.com forum.LulzBot.com... - Page 155 Index Symbols community support, 129, 152 1.75mm filament, 145 configuration export, 116 import, 116 ABS, 145 Configuration Wizard, 64 acetone, 140, 142, 145 connecting, 41 advanced techniques, 144 cooling, 99 aluminum extrusions, 150 fans, 100 AMF, 74 slowing down, 100 anti-seize, 145 Apple OS X, 38, 45 download, 38, 61, 141, 150...
- Page 156 INDEX filament arm, 34 hot end, 52, 142, 144 Filament Settings, 84 Cooling infill, 91, 95 Bridges fan speed, 101 IRC, 129, 152 Disable fan for first n layers, Enable fan if print time is latex, 150 below t seconds, 101 layer height, 111 Fan speed, 101 license, 61...
- Page 157 INDEX Brim width, 84 Enforce support, 102 Infill, 82 Generate support material, Fill angle, 95 83, 102 Fill density, 82, 91 Overhang threshold, 102 Fill pattern, 82, 91 Pattern, 103 Fill Top/bottom fill pattern, Pattern Angle, 104 Pattern Spacing, 104 Infill before perimeters, 95 Pattern spacing, 83 Infill every n layers, 95...
- Page 158 INDEX scripting, 121 z axis, 49 scripts, 126 Z Wobble, 128 SD card, 38 Sequential Printing, 119 Shapesmith, 46 simple mode, 79 skirt, 98 Slic3r, 150 smooth rods, 140 software, 38, 45, 141, 150 Source Code, 61 source code, 150 speed, 88 spool, 34 spool holder, 34...
- Page 159 Glossary .gcode The file extension for G-Code files 3D Printer Also referred to as additive manufacturing, is the process of fabricating objects from 3D model data, through the deposition of a material in accumulative layers. ABS Acrylonitrile Butadiene Styrene thermoplastic. Usually extrudes at 230C.
- Page 160 Hot end The hot end is the whole part where the plastic melts, including the nozzle, heater block, thermistor, and heat sink. The Budaschnozzle is LulzBot’s hot end. Idler Refers to parts using a bearing (usually a 608ZZ) to add tension in belts or to add pressure against a rolling surface.
- Page 162 Colophon Created with 100% Free/Libre Software GNU/Linux T E X Memoir...
Need help?
Do you have a question about the TAZ 3.0 and is the answer not in the manual?
Questions and answers