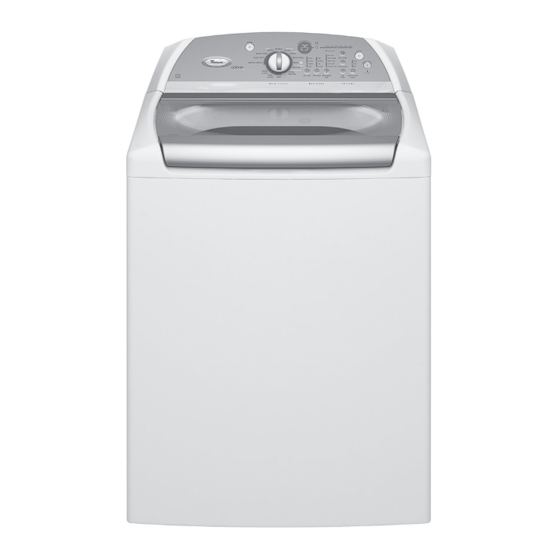
Whirlpool Cabrio WTW6400S Technical Manual

Whirlpool Cabrio WTW6400S Technical Manual

Automatic washer with 6th sense technology
Hide thumbs Also See for Cabrio WTW6400S:
Table of Contents

Advertisement

L-80
CONSUMER CARE TECHNICAL
EDUCATION GROUP PRESENTS
AUTOMATIC
WASHER
WITH 6TH SENSE
TECHNOLOGY
MODELS: WTW6400S & WTW6600S
JOB AID
Part No. 8178582

Advertisement

Table of Contents
loading

Summary of Contents for Whirlpool Cabrio WTW6400S

  • Page 1 L-80 CONSUMER CARE TECHNICAL EDUCATION GROUP PRESENTS AUTOMATIC WASHER WITH 6TH SENSE ™ TECHNOLOGY MODELS: WTW6400S & WTW6600S JOB AID Part No. 8178582...
  • Page 2 • Successfully perform necessary repairs. • Successfully return the washer to its proper operational status. WHIRLPOOL CORPORATION assumes no responsibility for any repairs made on our products by anyone other than authorized In-Home Service Professionals. Copyright © 2006, Whirlpool Corporation, Benton Harbor, MI 49022...
  • Page 3: Table Of Contents

    TABLE OF CONTENTS Page GENERAL ............. . 1-1 Washer Safety .
  • Page 4 — NOTES — - iv -...
  • Page 5: General

    GENERAL WASHER SAFETY Your safety and the safety of others are very important. We have provided many important safety messages in this manual and on your appliance. Always read and obey all safety messages. This is the safety alert symbol. This symbol alerts you to potential hazards that can kill or hurt you and others.
  • Page 6: Model & Serial Number Designations

    MODEL & SERIAL NUMBER DESIGNATIONS MODEL NUMBER MODEL NUMBER 00 S W BRAND W = Whirlpool E = Estate R = Roper I = Inglis ACCESS / FUEL T = Top Load G = Gas F = Front Load H = Horizontal...
  • Page 7: Model & Serial Number Label & Tech Sheet Locations

    MODEL & SERIAL NUMBER LABEL & TECH SHEET LOCATIONS The Model/Serial Number Label and Tech Sheet locations are shown below. Model/Serial Number Location Tech Sheet Location (Access Under Cabinet Top)
  • Page 8: Specifications

    SPECIFICATIONS MODEL NUMBERS WTW6400SW WTW6600SW, G, B PRIMARY FEATURES CAPACITY (IEC) 4.5 CU FT 4.5 CU FT USABLE CAPACITY 18 LBS (8.16 KG) 18 LBS (8.16 KG) MAX SPIN SPEED 1000 EXTERIOR LID FINISH PORCELAIN POWDER COAT SOLID GLASS TOP FINISH PORCELAIN PORCELAIN AGITATOR...
  • Page 9 MODEL NUMBERS WTW6400SW WTW6600SW, G, B SECONDARY OFF / SOFT / LOUD OFF / SOFT / LOUD TIME REMAINING TEMPS 5 - 4 ATC 5 - 4 ATC ATC TEMPS H/C , W/W, W/C, C/C H/C , W/W, W/C, C/C AUTO WATER LEVEL WATER LEVELS AUTO - NON SELECTABLE MIN.
  • Page 10: Impeller Wash Program/Selectability

    IMPELLER WASH PROGRAM / SELECTABILITY WTW 6400S D = Default Setting x = Selectable Setting o = Not Selectable...
  • Page 11 WTW 6600S D = Default Setting x = Selectable Setting o = Not Selectable...
  • Page 12 — NOTES —...
  • Page 13: Installation Information

    INSTALLATION INFORMATION INSTALLATION REQUIREMENTS TOOLS AND PARTS Alternate Parts Gather the required tools and parts before If You Have: You Will Need to Buy: starting installation. The parts supplied are in Laundry tub or Sump pump system (if not already the washer basket.
  • Page 14: Location Requirements

    LOCATION REQUIREMENTS INSTALLATION SPACING FOR RECESSED AREA AND CLOSET INSTALLATIONS Selecting the proper location for your washer The following spacing dimensions are rec- improves performance and minimizes noise ommended for this washer. This washer has and possible washer “walk.” been tested for installation with spacing of 0˝ The washer can be installed in a basement, (0 cm) clearance on the sides.
  • Page 15: Drain System

    DRAIN SYSTEM LAUNDRY TUB DRAIN SYSTEM (VIEW C) The laundry tub needs a minimum 20 gal. The washer can be installed using the stand- (76 L) capacity. The top of the laundry tub pipe drain system (floor or wall), the laundry must be at least 39˝...
  • Page 16: Electrical Requirements

    ELECTRICAL REQUIREMENTS WARNING GROUNDING INSTRUCTIONS For a grounded, cord-connected washer: This washer must be grounded. In the event of a malfunction or breakdown, grounding will reduce the risk of electrical shock by providing a path of least resistance for elec- tric current.
  • Page 17: Installation Instructions

    INSTALLATION INSTRUCTIONS WARNING Remove tape from lid. Open lid and re- move foam packing ring from washer tub. Keep foam packing ring in case you need Excessive Weight Hazard to move the washer in the future. Use two or more people to move and install washer.
  • Page 18: Connect The Inlet Hoses

    CONNECT THE INLET HOSES REMOVE DRAIN HOSE FROM WASHER CABINET Insert new flat washers (supplied) into Pull the corrugated drain hose out of the each end of the inlet hoses. Firmly seat washer by first grabbing the pull tie. Continue the washers in the couplings.
  • Page 19: Secure The Drain Hose

    CONNECT THE INLET HOSES Check for leaks TO THE WASHER • Turn on the water faucets and check for leaks. A small amount of water might en- ter the washer. You will drain this in a later step. NOTE: Replace inlet hoses after 5 years of use to reduce the risk of hose failure.
  • Page 20: Level The Washer

    LEVEL THE WASHER Check the levelness of the washer by first placing a level on the lid near the WARNING console. Next, place the level on the side of the washer in the crease between the Excessive Weight Hazard top of the washer and the cabinet. Use two or more people to move and install washer.
  • Page 21: Complete Installation

    COMPLETE INSTALLATION WARNING Check the electrical requirements. Be sure that you have the correct electrical supply and the recommended grounding method. See “Electrical Requirements,” page 2-4. Check that all parts are now installed. If Electrical Shock Hazard there is an extra part, go back through the steps to see which step was skipped.
  • Page 22 — NOTES — 2-10...
  • Page 23: Product Operation

    PRODUCT OPERATION THEORY OF OPERATION Basket—The basket is designed with a tra- INTRODUCTION ditional balance ring at the top and a flotation ™ The Cabrio Automatic Washer represents a chamber at the base. The outside surface of new design that differs from the traditional top the basket is punched to allow lint to catch on load machine.
  • Page 24 As the tub fills with water, the basket begins to Lid Lock Mechanism—Since this washer float and to rise. The splined hub components does not utilize a brake, a lid lock is used to now separate, and allow the basket to move prevent access during the spin cycles.
  • Page 25: Washer Use

    WASHER USE NOTE: Your washer model may differ slightly. STARTING THE WASHER The following is a guide to starting the washer. Periodic references to other sections of this WARNING manual provide more detailed information. USING THE PROPER DETERGENT Use only High Efficiency (HE) detergents. The package for this type of detergent will be marked “HE”...
  • Page 26 Place a load of sorted clothes into the Add color-safe bleach, (powdered or liq- washer. uid) to this dispenser, if needed. Be sure to match powdered color-safe bleach with • Load evenly to maintain washer bal- powdered detergent or match liquid color- ance.
  • Page 27: Stopping The Washer

    • Do not overfill. The dispenser holds To restart the washer: 3 oz. (94 mL), or a capful of fabric soft- Close the lid and press START. ener. To unlock the lid after the Add a Garment • The fabric softener is dispensed in the period, press PAUSE/CANCEL once.
  • Page 28: Status Lights

    CHANGING MODIFIERS AND OPTIONS ESTIMATED TIME REMAINING AFTER PRESSING START When a wash cycle is started, the estimated You can change a Modifier or Option anytime time remaining for the cycle, including fills and before the selected Modifier or Option begins. drains, will be displayed.
  • Page 29 PRESET CYCLE SETTINGS BULKY ITEMS Use this cycle to wash large items such as Cycle Preset Soil Wash/Rinse comforters, sleeping bags and blankets. This Minutes* Level** Temp cycle starts with a soak to thoroughly saturate Whitest Whites Heavy Hot/Cold your large load. This is followed by medium wash action and medium spin speeds to main- Heavy Duty Heavy...
  • Page 30 DELICATE/HANDWASH DRAIN & SPIN Use this cycle to wash lightly soiled gar- An extra drain and spin may help shorten dry- ments indicating “Machine Washable Silks” ing times for some heavy fabrics or special- or “Gentle” cycle on the care label. This cycle care items.
  • Page 31 • For most loads, use the time recommended TEMPERATURE GUIDE in the preset cycle settings. Wash Water Temperature Suggested Fabrics • For heavy soil and sturdy fabrics, press Soil Level to select more wash time, if needed. Whites and pastels •...
  • Page 32 OPTIONS DELAY WASH You can use the Delay Wash feature to delay Use these pads to select the desired options the start of a wash cycle for up to 10 hours for your wash cycle. (depending on your model). Load the washer and fill the dispensers. Close the washer lid.
  • Page 33: Normal Sounds

    EXTRA RINSE Press START to complete the cycle from where it was stopped. Press PAUSE/CANCEL twice An extra rinse can be used to aid in the removal to turn off the washer. of detergent or bleach residue from garments. This option provides an additional rinse with the same water temperature as the first rinse.
  • Page 34: Washer Care

    WASHER CARE CLEANING YOUR WASHER • Once the cleaning cycle has begun, al- low the cycle to complete. An estimated WASHER MAINTENANCE PROCEDURE cycle time will appear on the display. This washer has a special cycle that uses • If the procedure does not sufficiently im- higher water volumes in combination with liquid prove the machine freshness, evaluate chlorine bleach to thoroughly clean the inside...
  • Page 35 To winterize washer: To transport the washer: Shut off both water faucets. Shut off both water faucets. Disconnect and drain water inlet hoses. Disconnect and drain water inlet hoses. Put 1 qt (1 L) of R.V.-type antifreeze in the If the washer will be moved during freez- basket.
  • Page 36: Troubleshooting

    TROUBLESHOOTING WASHER AND COMPONENTS Washer displaying code messages Did you add too much detergent? • “LF” (Washer is taking too long to fill) Always measure detergent. Follow detergent Check the following: manufacturer’s directions. Are the water inlet hoses kinked or If excessive suds are detected, the washer clogged? will display this code while running a suds...
  • Page 37 • Are you washing items with metal snaps, Noisy, vibrating, off-balance buckles or zippers? • Is the washer level? Does the washer rock You may hear metal items touching the bas- when pushed against the corners? ket. This is normal. The washer must be level.
  • Page 38: Washer Operation

    • Did you select Deep Clean option and use Washer won’t fill, rinse or agitate; washer a handwashing detergent? stops Regular or handwashing detergents are not • Is the power cord plugged into a grounded recommended for this washer. Use only High 3 prong outlet? Efficiency (“HE”) detergent.
  • Page 39 • Is the washer overloaded? • Is there excessive sudsing? Wash smaller loads. See “Starting The Always measure detergent. Follow deter- Washer,” page 3-3 for maximum load size. gent manufacturer’s directions. If you have very soft water, you may need to use less •...
  • Page 40: Clothing Care

    • Is there excessive sudsing? Residue or lint on load Always measure detergent. Follow deter- • Did you add detergent to the dispenser? gent manufacturer’s directions. If you have very soft water, you might need to use less For best results, use the dispenser to dis- detergent.
  • Page 41 • Did you use enough detergent, or do you Load is wrinkled, twisted or tangled have hard water? • Did you unload the washer promptly? Use more detergent for washing heavy soils in cold or hard water. Water temperature Unload the washer as soon as it stops. should be at least 60°F (15.6°C) for soap to •...
  • Page 42 • Did you overload the washer? Garments damaged The wash load must be balanced and not • Were sharp items removed from pockets overloaded. Loads should move freely during before washing? washing. Empty pockets, zip zippers, snap or hook • Did you add chlorine bleach properly? fasteners before washing to avoid snagging Do not pour chlorine bleach directly onto load.
  • Page 43: Component Access

    COMPONENT ACCESS ™ This section instructs you on how to service each component inside the Cabrio Automatic ™ Washer With 6th Sense Technology. The components and their locations are shown below. COMPONENT LOCATIONS CONSOLE & TOP CABINET COMPONENTS User Interface Board &...
  • Page 44: Removing The Encoder And The User Interface Board

    REMOVING THE ENCODER AND THE USER INTERFACE BOARD Pull the knob off the control shaft. WARNING Control Knob Electrical Shock Hazard Disconnect power before servicing. Replace all parts and panels before operating. Unhook the user interface (UI) wire har- Failure to do so can result in death or ness from the cover clips.
  • Page 45 To remove the encoder, lift the locking NOTE: Before you can remove the user in- tab and turn the encoder to the left (coun- terface board, you must first remove the en- terclockwise) as far as it will go, then lift coder.
  • Page 46: Removing The Water Inlet/Dispenser Valve Assembly, Power Supply Cord, And Machine/Motor Control & Pressure Transducer

    REMOVING THE WATER INLET/ DISPENSER VALVE ASSEMBLY, POWER SUPPLY CORD, AND MACHINE/MOTOR CONTROL & PRESSURE TRANSDUCER WARNING Violet Violet White White Thermistor Electrical Shock Hazard Yellow Disconnect power before servicing. Water Inlet/Dispenser Valve Assembly Replace all parts and panels before Tape the washer lid closed.
  • Page 47 Loosen the clamps and remove the four To remove the power supply cord: hoses going to the water inlet/dispenser a) Disconnect the power supply cord valve assembly. connector from the machine/motor control. b) Remove the hex-head screw from the green ground wire. c) Slide the power supply cord strain re- lief out of the housing and remove the cord.
  • Page 48: Removing A Dispenser, The Fresh Fill Inlet Valve, And The Lid Lock

    REMOVING A DISPENSER, THE FRESH FILL INLET VALVE, AND THE LID LOCK WARNING Pry Out Tab Electrical Shock Hazard Disconnect power before servicing. Dispenser Cover Replace all parts and panels before operating. Failure to do so can result in death or electrical shock.
  • Page 49 c) Raise the cabinet top (see step 3e on c) Remove the screw from the fresh fill page 4-4 for the procedure). inlet valve and remove the valve as- sembly. d) Loosen the clamp and disconnect the end of the dispenser hose from its wa- ter inlet/dispenser valve connector.
  • Page 50 e) Disconnect the lid lock cable connector from the machine/motor control con- nector at P12. f) Pull the end of the lid lock cable from the control, and remove the lid lock and cable assembly from the washer. Lid Lock Connector P12...
  • Page 51: Removing The Lid And A Hinge

    REMOVING THE LID AND A HINGE WARNING To remove a hinge: a) Remove the lid (see step 2). b) Pull the hinge pin out of the hinge you are removing. c) Remove the top hex-head screw from the hinge you are removing. Electrical Shock Hazard Disconnect power before servicing.
  • Page 52: Removing The Basket, Basket Hub, & Lint Filter

    REMOVING THE BASKET, BASKET HUB, & LlNT FILTER c) Insert the blade of a small screwdriver WARNING into the slot in the impeller cap, then pry the cap up, and remove it. d) Remove the 7/16˝ hex-head bolt from the impeller, then lift and remove the impeller from the basket.
  • Page 53 To remove the basket hub, remove the To remove the lint filter, remove the two six screws, and lift the hub assembly from screws, and lift the filter from the tub. the basket. Lint Filter Screws Basket Hub Screws NOTE: Clean the lint from the vanes in the filter and reinstall it in the washer.
  • Page 54: Removing The Drain And Recirculation Pumps

    REMOVING THE DRAIN AND RECIRCULATION PUMPS WARNING To remove the drain pump: a) Loosen the clamps and pull the inlet and outlet drain hoses off the pump. Note that there is a tab on the outlet connector that fits into a slot in the hose.
  • Page 55 To remove the recirculation pump: a) Loosen the clamps and pull the recir- Slide Pump Hose culation hoses off the pump. Note that Onto Connector With there is a tab on the outlet connector Tab Into Hose Slot that fits into a slot in the hose. b) Remove the three 5/16˝...
  • Page 56: Removing The Drive Motor & Rotor Position Sensor

    REMOVING THE DRIVE MOTOR & ROTOR POSITION SENSOR WARNING Use a 1/4˝ Allen wrench and loosen the rotor mounting screw as far as it will go (the screw is captive and cannot be re- moved from the rotor). The rotor is seated on the splined tub shaft.
  • Page 57 10. Disconnect the power connector from the stator terminals. 11. Disconnect the wire standoff and edge connector from the rotor position sensor cover. Rotor Position Sensor Cover Tab Indents Wire Standoff Edge Connector REASSEMBLY NOTE: When you reinstall Power the drive motor rotor over the stator assembly, Connector do not grip the rotor housing around the rear edge with your fingers.
  • Page 58: Removing The Tub

    REMOVING THE TUB WARNING Keep Suspension Ball Slot Parallel With Rod Electrical Shock Hazard Disconnect power before servicing. Replace all parts and panels before c) Reach down along the side of the operating. tub, and press in on the suspension Failure to do so can result in death or rod holder locking tabs, then push the electrical shock.
  • Page 59 At the right rear corner of the washer, 11. Pull the tub out of the bottom of the washer. reach down and pull the pressure trans- 12. Remove the two 5/16˝ hex-head screws ducer tube off the tank. from the counterbalance weight and re- move the weight from the tub.
  • Page 60: Accessing The Pressure Transducer Tubing, Recirculation Tube

    ACCESSING THE PRESSURE TRANSDUCER TUBING, RECIRCULATION TUBE, AND DRAIN PUMP HARNESS WARNING Electrical Shock Hazard Rear Panel Disconnect power before servicing. Replace all parts and panels before operating. Screw (1 of 8) Failure to do so can result in death or electrical shock.
  • Page 61: Component Testing

    COMPONENT TESTING Before testing any of the components, perform • Check all connections before replacing the following checks: components, looking for broken or loose wires, failed terminals, or wires not pressed • The most common cause for control failure into connectors far enough. is corrosion on connectors.
  • Page 62: Drain Pump

    WARNING Electrical Shock Hazard Disconnect power before servicing. Replace all parts and panels before operating. Failure to do so can result in death or electrical shock. DRAIN PUMP RECIRCULATION PUMP Terminals Terminals Refer to page 4-12 for the procedure for ac- Refer to page 4-12 for the procedure for ac- cessing the drain pump.
  • Page 63: Lid Lock

    WARNING Electrical Shock Hazard Disconnect power before servicing. Replace all parts and panels before operating. Failure to do so can result in death or electrical shock. Check the lid lock motor winding and LID LOCK switches by removing P12 from the ma- chine/motor control, and checking the resistance values shown in the following Lid Lock Resistance table.
  • Page 64: Drive Motor Stator

    WARNING Electrical Shock Hazard Disconnect power before servicing. Replace all parts and panels before operating. Failure to do so can result in death or electrical shock. DRIVE MOTOR STATOR Refer to page 4-14 for the procedure for ac- cessing the drive motor. 3 Terminals Unplug washer or disconnect power.
  • Page 65: Diagnostics & Troubleshooting

    DIAGNOSTICS & TROUBLESHOOTING WARNING Electrical Shock Hazard Disconnect power before servicing. Replace all parts and panels before operating. Failure to do so can result in death or electrical shock. DISPLAY FAULT / ERROR CODES DISPLAY EXPLANATION AND RECOMMENDED PROCEDURE (Saved Code) Long Fill LF flashes when the water level does not change for a period of time after the valves are turned on OR water has disengaged the basket but control does not detect a water level change.
  • Page 66 DISPLAY If drain pump turns on when there is no water in tub, EXPLANATION AND RECOMMENDED PROCEDURE (Saved Code) Open/Close Door Lid Lid flashes when the following conditions occur: User presses START with lid open. • User presses START after 2 consecutive machine cycles without opening lid. •...
  • Page 67 DISPLAY If drain pump turns on when there is no water in tub, EXPLANATION AND RECOMMENDED PROCEDURE (Saved Code) ATC Thermistor Open/Short F then 40 flashes when the ATC Thermistor is detected to be open or shorted. See TEST #5. (F40) Motor RPS Thermistor Open/Short F then 41 flashes when the motor rotor position sensor (RPS) thermistor is detected to be open or shorted.
  • Page 68: Diagnostic Guide

    DIAGNOSTIC GUIDE ACTIVATION OF AUTOMATIC DIAGNOSTIC TEST MODE Before servicing, check the following: Be sure the washer is in standby mode • Make sure there is power at the wall outlet. (plugged in with all indicators off, or with • Has a household fuse blown or circuit break- only the Clothes Clean or Done indicator er tripped? Time delay fuse?
  • Page 69 DIAGNOSTIC: Automatic Indication 1: None of the indicators or dis- play turns on. Performs a five-minute automatic test with wa- ter functions to check major washer functions Action: Press POWER button to enter setting (door can be open). Press the same button mode.
  • Page 70 If done successfully, a single beep oc- To check FABRIC SOFTENER valve select curs and the two-digit display shows one or press the following: of the following console ID#s: 06, 08, 12, NORMAL • START (turns on Fabric 13, 14, 15, 16, 17, 18, 19, 20, 21, 44, 45, Softener valve, cycle indicator flashes) •...
  • Page 71 Manual: Door Switch Agitate: Water must cover the wash plate (or agitator vanes) to ensure the basket is float- Opening the door should cause the Clothes ing prior to agitation. Enabling agitation with- Clean or Done status indicator to turn off. out enough water may cause a fault condition Closing the door should cause the indicator to occur.
  • Page 72 Press buttons to verify function. Indica- If any of the following occur during steps, see tors will toggle on (or off) and beep tone TEST #4: will sound when buttons are pressed. • None of the indicators light up NOTE: Pressing SOIL LEVEL, SPIN •...
  • Page 73: Troubleshooting Guide

    TROUBLESHOOTING GUIDE TROUBLESHOOTING TESTS TEST #1 Supply Connections POSSIBLE CAUSE/TEST PROBLEM NOTE: Possible Cause/Test must be performed in This test assumes that proper voltage is pres- the sequence shown for each problem. ent at the outlet. 1. Supply connections. See TEST #1. WON’T POWER 2.
  • Page 74 TEST #2 Log Valve Check to see if basket will turn freely. This test checks the electrical connections to • If basket turns freely, go to step 4. the valves, and the valves themselves. • If basket does not turn freely, deter- mine what is causing the mechanical Check the relays and electrical connec- friction or lock up.
  • Page 75 With an ohmmeter, check for continuity If both visual checks pass, replace the between all pins on the P10 machine/mo- user interface assembly. tor control connector and the motor rotor Plug in washer or reconnect power. position sensor (RPS) connector. See Activate the Console and Indicators Di- Figures 2 and 4, pages 6-13 and 6-16.
  • Page 76: Automatic Temperature Control

    TEST #5 Automatic Temperature Control 11. Using an ohmmeter, measure continuity between all pins on the P9 connector and This test checks the water inlet valves, the the thermistor contacts. temperature sensor, and the machine/motor control. • If there is continuity, replace the log valve assembly.
  • Page 77 Drain Pump Motor Cover Recirculation Pump Motor Rotor Position Counterweight Motor Bolt Sensor (RPS) or Motor Connection Drive motor area, viewed from bottom. Figure 1 Motor Connector Stator Motor Rotor Position Sensor (RPS) Motor cover removed to access RPS and motor connector.
  • Page 78 Select POWER • wash cycle NORMAL • Check the resistance at the pump motor. START. Remove the connector at the motor and take measurements across pump termi- Verify that the tub fills to the top of the nals. Measurements should be as shown impeller plate (impeller models), or to a in the wiring diagram.
  • Page 79: Accessing & Removing The Electronic Assemblies

    Check the lid lock motor winding and 4. Remove the one screw holding the switches by removing P12 from the ma- machine/motor control assembly to chine/motor control and checking the the console tray. resistance values shown in the Lid Lock 5.
  • Page 80 Machine/Motor Machine/Motor Control Fabric Softener Fresh Bleach Cold Detergent Control Assembly Assembly Holding Screw Retaining Clip Pressure Hose Console Tray Console Gasket Screw Screws Console Assembly Wire Harness Retainer Locking Tab User Interface Assembly Location Of Machine/Motor Control and User Interface Assemblies Figure 3 Valve Thermistor 120 VAC Power Cord...
  • Page 81: Wiring Diagram

    WIRING DIAGRAM...
  • Page 82 — NOTES —...
  • Page 83: Product Specifications

    PRODUCT SPECIFICATIONS WARRANTY INFORMATION SOURCES IN THE UNITED STATES: FOR PRODUCT SPECIFICATIONS AND WARANTY INFORMATION CALL: FOR WHIRLPOOL PRODUCTS: 1-800-253-1301 FOR KITCHENAID PRODUCTS: 1-800-422-1230 FOR ROPER PRODUCTS: 1-800-447-6737 FOR TECHNICAL ASSISTANCE WHILE AT THE CUSTOMER’S HOME CALL: THE TECHNICAL ASSISTANCE LINE: 1-800-253-2870...

Table of Contents