Table of Contents
Advertisement
Quick Links
Advertisement
Table of Contents

Related Manuals for elmeg CS410


Summary of Contents for elmeg CS410
- Page 1 Operating instructions elmeg CS410 / CS410-U...
-
Page 3: Table Of Contents
Table of contents Description and Installation ....1 Safety notes ........2 Unpacking and placing the telephone . - Page 4 Enquiry Call ........27 Call transfer (switching) .
- Page 5 Setting the volume of the »Station guarding« tone ....63 Call waiting tone ........63 Setting the headset type .
- Page 6 Contents of the WIN-Tools CD-ROM ......86 Installing the programs from CD-ROM ......87 Appendix .
-
Page 7: Description And Installation
CS410 This system telephone is designed for connection to an internal S0-port (4 wires) of an elmeg pabx system. If you wish to connect the telephone to an internal Up0-port, be sure to install the internal Up0/S0-module into the telephone or use the external Up0/S0-converter. -
Page 8: Safety Notes
For example: Separate programming for each MSN extension number, time control feature for voice announcement related to specific MSN extension numbers, automa- tic message forwarding with newly recorded calls, recording of dictations, logging of calls, remote polling protected by PIN A special key and LED are provided for operation of the answering machine. -
Page 9: Unpacking And Placing The Telephone
Elektrostatic charges The telephone is supplied with enhanced ESD protection against the effects of electrostatic discharge that exceeds the protection level cited in the approval specification. Elevated ESD levels should nevertheless be avoided to the greatest possible extent. In some cases, elec- trostatic discharge levels can far exceed the approval limits or the resistance levels already implemented in your telephones. -
Page 10: Connecting The Telephone (Isdn And Handset Cords)
Then lay the ISDN cord in the cord groove (4) and lock it below the two cord retainers (5). CS410 telephones equipped with a Up0/S0 module or CS410-U phones may not be connected through the S -socket (3) to the ISDN connection (e.g. -
Page 11: Connecting An Configuring A Headset (Not Included)
You can connect a headset to your telephone. Ask your dealer which headset models can be used or retrieve the required information from the Internet at http://www.elmeg.com. The telephone is equipped with an 8-pin socket for connecting a headset. Headsets with a DSHG-interface (e.g. -
Page 12: Connecting The Telephone To A Pc
lied with the system to the bottom of your telephone (7). Then, route the headset cord under the cord holder. Headset socket assignments 8 - DSHG-transmitter 7 - V+ (3.3V) 6 - Microphone - (Ground) 5 - Handset (3.3V, switchable via resistor) 4 - Handset (Ground) 3 - Microphone + 2 - Ground (Ground) -
Page 13: Changing The Label Panel
Installation of a device driver is started automatically when initially connecting the telephone to a PC. Insert the WIN-Tools CD-ROM supplied with the telephone and follow the instructions displayed on the screen. You will need a hub (USB distributor) if you plan to use several USB terminal devices at your PC. -
Page 14: Pictographs
Pictographs The pictographs (symbols) described as follows have been used in these operating instruc- tions to illustrate some procedures for setting and using the telephone. Lift up the handset or start initializing selection. Replace handset. The telephone is idle. A call is signaled. The ringing tone melody sounds. You are conducting a call. -
Page 15: Telephone Display And Buttons
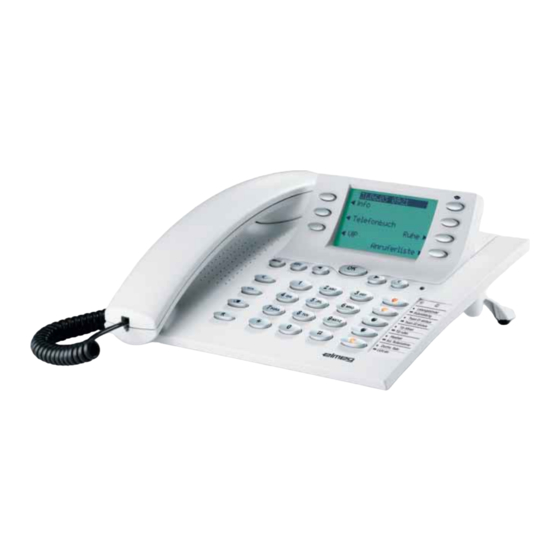
Telephone display and buttons Figure 5 Speaker Handset with connecting cord Answering machine button on the telephone (optional module) 6 Softkeys Seven-line backlit display Menu key: This key opens the programming menu. If you are already located in a menu and then press the key, either menu-specific functions are shown, or you are moved back one programming step. - Page 16 C key: Press this button to move back one menu step in the menu. If you are cur- rently in the input mode, this button can be used to delete individual characters. Asterisk key/ hash key Dial buttons Open listening / hands-free button Ending a call Redial button Enquiry button...
- Page 17 Special feature for displaying lists in the display Several entries are shown in the display as a list for certain settings or when using the phone. These lists are required for telephone directory or VIP memory programmings for example. <> The active entry (the one you have selected) is ˆVIP digit to select{} ˆ...
-
Page 18: Function And Leds
Call signaling is effected using the ringing tone that has been set for the dialed number (MSN) in each telephone. If you are using the telephone at an internal ISDN connection of certain elmeg PABX systems, you can program each MSN extension number with special ringing melodies for internal and external calls. -
Page 19: Displays For Programmed Features
Acknowledegement signals Entries or settings you make at your telephone are sometimes confirmed by acknowledge- ment signals. Positive acknowledgement signal (1 long tone): The positive acknowledgement signal indicates that your input has been accepted and sto- red by the telephone. Negative acknowledgement signal. -
Page 20: Making Calls
Making Calls Starting a call Dial number - no correction possible Dial number Dial number - correction possible Dial number To change the number or to correct a wrong entry, select the wrong figure with the arrow buttons and press C key to delete it. Now enter the correct number. If you wish to conduct the call using the handset, just lift it up after dialing the number. - Page 21 O <> O Tel. drctry Select Enter first letter entry Dialing from the phone’s directory You can store up to 250 names and numbers in the telephone directory. To select a name, you can page through the directory using the arrow buttons, or enter the specific first letter(s) of the name using the push-button set.
-
Page 22: Accepting/Rejecting A Call
Dialing from the caller/memo list The phone has a combined caller and memo list. A maximum of 30 entries (calls, memos SMS messages or UUS1- messages) are stored in this list. Entries in the caller or memo list are indicated by the »Caller list« softkey. Caller list Select entry For more information about the caller/memo list, please refer to page 33 of these operating... -
Page 23: Calling Line Identification (Anonymus Call) Restriction
Calling line identification (anonymus call) restriction You can block the display of your telephone number at your caller’s telephone if desired. You can set this function specifically for the next call, or permanently (see page 48). Suppressing calling line identification for the next call During an external or internal call, you can prevent the number from being transmitted (dis- played) to the party you have called. - Page 24 Extended redialing In the extended redialing the numbers of the last 20 calls, connections (conversations) and text messages are stored. You can view these by pressing the redial button or the arrow but- tons and subsequently have them redialed automatically. Select entry The last dialed number is displayed.
- Page 25 In the redialing function the name displays ins- ˆˆ 5/Dean ˆ tead of the number. ˆ memo? Tel. drctry ¬¬¬¬¬¬¬¬¬¬¬¬¬¬¬¬¬¬¬¬¬¬ Automatic redialing If you placed a call to a subscriber whose number is busy or who does not answer, you can then activate automatic redialing which will call that same subscriber again after about 10 se- conds.
-
Page 26: Microphone Activation/Deactivation, Open Listening And Hands-Free Calling
Microphone activation/deactivation, open listening and hands-free calling Activating/ muting the microphone The mute function allows you to switch off the handset microphone during a normal call, or the telephone microphone during hands free calling. The party you are calling will then no longer be able to hear the conversation you conduct with persons in the room (room enquiry). -
Page 27: Headset Use
Headset use You can connect a headset to your telephone. Connect and configure the headset as descri- bed on page 5. You can use the handset or the headset for making calls. Activating and deactivating the headset For headset operation, one of the functions buttons must be configured as a headset key. The LED assigned to this key indicates, whether the headset in switched on or off (LED on or off). -
Page 28: Intercom
Messages can also be received even if the »Station guarding« function is active when the »Enabling messages« function key has been programmed and is activated. You can initiate a message using the procedure described in the following, or using a pro- grammed function key. -
Page 29: Automatic Completion Of Call
Intercom calls can also be received even if the »Station guarding« function is active when the »Enable intercom calls« function key has been programmed and is activated. You can initiate intercom calls using the following procedure, or using a programmed functi- on key. -
Page 30: Parking
Programming completion of call to busy subscriber Subscriber busy or Clbckbusy Dial number does not answer The »Clbckbusy« softkey is only displayed, when automatic completion of calls are possi- ble with the exchange office or with the pabx. The features »Completion of call to busy sub- scriber«... -
Page 31: Malicious Call Identification (Mcid)
If you park two calls on an ISDN bus this bus is then disabled for further calls. “Un- parking” is possible only on the bus on which the call was also parked. Parking is only possible when only one connection is currently active with your te- lephone. -
Page 32: Keypad And Tone Frequency Dialing (Dtmf Dialing)
Keypad and tone frequency dialing (dtmf dialing) During an ongoing call you can take advantage of other features using keypad sequences or DTMF dialing. In the telephone configuration program you can set whether keypad sequen- ces or DTMF dialing is to be possible in the initial status of the telephone. The display indica- tes which other functions (keypad or dtmf) are possible. -
Page 33: Conducting Calls With Several Parties
Conducting calls with several parties Call waiting If, during an ongoing call, a second call comes in for you, the second call is signaled when “Call waiting on” is set (see page 67). waiting call (250 subscri- bers 2) accept Call with subscri- Call with subscriber 2;... -
Page 34: Broker's Call
Please note that this feature (ECT - Explicit Call Transfer) must be supported by the PABX system when transferring two (2) external calls, or, when you use your phone directly on the network termination unit, of your network service provider. Broker’s call If you have more than one connection active at your telephone (call waiting or enquiry call) (max. -
Page 35: Telephone Operation
Telephone operation Telephone directory You can store up to 250 names and numbers in the telephone directory. To select a name, you can page through the directory using the arrow buttons, or enter the specific first letter(s) of the name using the push-button set. If the name of the caller is to be shown in the display instead of the caller’s number, this number must be entered in the telephone directory with that name (including- prefix and, when used with a PABX, the line access digit). - Page 36 • you select an entry in the telephone directory with the OK key during call preparation. • you press the softkey »Info« when a call is signalled. • you press the softkey »Display« during a connection. The info text length is restricted to 42 characters. The assignments for the keypad for ente- ring letters, digits and special characters are described on page 11.
- Page 37 Deleting a telephone book entry Begin as follows: O <> O Program Tel. delete Enter first letter Select entry nos. drctry Programming a special dial (VIP tone) tone for a telephone book entry Begin as follows: <> O Program nos. Tel.
-
Page 38: Vip Memory
VIP Memory You can program VIP numbers for each of the ten buttons 1 … 0 including a name (20 cha- racters max. ) and a telephone number (26 digits max.). Making an entry into the VIP memory Begin as follows: <>... -
Page 39: Caller And Memo List
Caller and memo list The phone has a combined caller and memo list. A maximum of 30 entries (calls, memos SMS messages or UUS1- messages) are stored in this list. Entries in the caller or memo list are indicated by the softkey »Caller list«. You always have the most current entries in the list. -
Page 40: Viewing The Caller List
Viewing the caller list The telephone is idle. The softkey »Caller ˆUUS:2 08:30 ˆ list« in the lower row of the display indicates ˆTel. drctry that an entry is present in the list. Press this ˆ Quiet softkey. ˆVIP ˆ Caller list The bottom lines show the entries available in call... - Page 41 The display now shows information about the ˆ 1/Miller office ˆ0123456789 <> call. If not all information fit into the screen, use ˆto MSN-1 the arrow keys to display more. ˆ(& MSN-2) Press the C-button to leave the menu. You can ˆcall today 07:21...
- Page 42 Deleting the caller / memo list Deleting an entry <> Caller list Select the entry you delete? wish to delete Deleting all calls You can delete all entries of the caller / memo list simultaneously. Text messages you have received (SMS / UUS1) will not be deleted. <>...
-
Page 43: Sms And Uus1 Text Messages
Enter the number you wish to store as a memo. ˆMemo number create In this example: »0123456«. Confirm your entry by pressing OK. ˆ>0123456_ ¬¬¬¬¬¬¬¬¬¬¬¬¬¬¬¬¬¬¬¬¬¬ SMS and UUS1 text messages With this phone you can send and receive SMS or UUS1 messages (SMS - Short Message Service, UUS1 - User to User Signalling). - Page 44 Note that all terminal devices that are used (telephones, pabx systems) must support the fea- ture »UUS1 (User to User Signaling)«. The telephone stores all UUS1 messages you have received or sent in two separate lists. Up to 10 received an 10 sent UUS1 messages can be stored. Please not that free storage space must be available to receive UUS1 text messages.
- Page 45 Finally, you can store the text message in the ˆ Save message? appropriate list (»ok« softkey) or keep it in the temporary memory (»No« softkey). ˆNo ¬¬¬¬¬¬¬¬¬¬¬¬¬¬¬¬¬¬¬¬¬¬ Important notes for entering numbers with SMS transmission If the »Direct exchange line access« feature is switched off for your telephone, then you must enter the line access digit before the target number.
- Page 46 Press the arrow keys to view the entire text ˆ* UUS 01/03 † MSN-1 messages. ˆ2200················· Press OK to access the next menu with further ˆI'LL PROBABLY BE 30 options. ˆMINUTES ˆLATE. ¬¬¬¬¬¬¬¬¬¬¬¬¬¬¬¬¬¬¬¬¬¬ In the upper row of the display you see the date ˆUUS 01/03 today ˆ†...
- Page 47 »send« Editing and then sending the text message. To send the text message, please proceed as described for »Creating and sending text messages« (see page 38). »delete?« Deleting a text message. Automatic sending of text messages (only UUS1) You can send a UUS1 text message automatically to a caller. For this, message 1 in the list of permanently stored messages is used.
-
Page 48: Station Guarding
Error when sending or receiving an SMS Error while sending an SMS A corresponding error code is displayed in the event that for some unseen reason it is not possible to transmit an SMS. Contact the SMS Service center of your network service provi- der / carrier to find out which error codes are displayed. -
Page 49: Setting Up Cost Monitoring
Setting up cost monitoring You have the option of logging the accrued communication costs for your telephone. You must apply for this feature to your network service provider. Ask your service provider on the possibilities of charge data transmission. Please note that transfer of all cost information from the exchange office to your telephone may not always be possible for technical reasons. -
Page 50: Setting The Tariff Factor And The Currency
Viewing and deleting total costs Begin as follows: ˆTotal: > 1.55 GBP Charge Total ˆLast conn. Total ˆdelete? ¬¬¬¬¬¬¬¬¬¬¬¬¬¬¬¬¬¬¬¬¬¬ You can view the sum of the charges accrued for all MSN extension numbers. To delete them, press the »delete?« softkey. If the sum of the costs is deleted, all MSN cost accounts are also deleted simulta- neously and recognition and saving of the procedure that is used for transfer of cost information is then re-activated. -
Page 51: Programming A Charge Limitation For A Specific Extension Number
for entering letters, digits and special characters are described on page »delete?« All charge data stored in the telephone are deleted. Recognition and sa- ving of the procedure that is used for transfer of cost information (see page 43) is then re-activated. Programming a charge limitation for a specific extension number You can set up a charge account for each number (MSN) that has been entered in the tele-... -
Page 52: Displays During A Call And Charge Information
message is shown in the display »Inhibit.:MSN«. Enabling or inhibiting of a number for outgoing calls is protected by an MSN-specific PIN. You must enter this PIN in advance during configuration of the number (MSN). After that, you can inhibit or enable dialing of external numbers (outgoing calls) for this MSN. Begin as follows: >... - Page 53 Displaying information during a call The displays during calls described as follows depend on your individual settings and can therefore be different for each connection. Correct charge display is shown only if you have applied at your network service provider for transmission of charges during calls. During a call, the upper rows of the display ˆTONY ˆ02.43...
- Page 54 ges. »Never«:The charges are displayed during a call. The duration of a call is not displayed. »for Charge«: Charge data, if available, are displayed. If no charge data are available, the duration is displayed instead. »End« Display of information after completion of a call Information about a call can be shown in the display when that call is com- pleted.
-
Page 55: System Telephony
Trunk bundle buttons With modular pabx systems (elmeg ICT or higher) you can group several ISDN connections to trunk bundles. By means of a trunk bundle button, you can assign these ISDN connec- tions to a function key. When this key is pressed, hands-free calling is activated automatically and the corresponding B channel of the ISDN trunk bundle is accessed. - Page 56 Extension key You can configure dialing to an internal extension using an extension key. When the corre- sponding key is pressed hands-free calling is activated and the listed subscriber called. If a call for the listed subscriber is signaled you can accept the call by pressing the extension key.
- Page 57 on key can be programmed. Deactivation of direct calls is carried out as described in the sec- tion »Direct call« (see page 69). Headset on/off If you have a headset connected to your telephone and ready configured, you can operate it by means of a function key.
- Page 58 LED functions Function key / LED flashes flickers Line key Connection Connection on hold Extension key Incoming Team key call no B-channel Trunk bundle button available Incoming Extension key for the AM holds active con- answering answering machine nection with caller Connection with machine call AM/ Voice Box...
- Page 59 Programming a function key Programming of the function keys is effected during configuration of the system telephone with the PC. You can program the five function keys on two levels with different functions. Using the function key Press the corresponding function key. The function assigned to this key is executed. An LED associated with this particular function is switched on or off accordingly.
-
Page 60: System Menu For Pabx Systems With System Telephony Capability
The system telephone is designed for being connected to the internal ISDN connection of specific elmeg pabx systems. These devices provide a special menu with further sys- tem-specific functions. This menu and the features that it contains are managed entirely in the PABX. -
Page 61: Configuration Settings
You can define and set a specific melody and its volume for each MSN or extension number that you enter. If you are using the telephone at an internal ISDN connection of certain elmeg PABX systems, you can program special ringing melodies and a different volume for internal calls. - Page 62 In the initial setting of the telephone, 10 different melodies are stored for call signaling. These 10 melodies can not be changed. You can import a further 10 melodies into your phone via a PC. Using the Sound Manager supplied with the WIN-Tools CD-ROM, you can produce your own tunes on the PC and then load these into the telephone.
-
Page 63: Telephone Pin (Password)
Programming a default call forwarding number If you do not wish to accept a call, you can forward this call directly to a different phone num- ber (see page 16). If you frequently forward calls to the same number, you can use this number as a default set- ting in your phone. -
Page 64: Protecting Access To The Telephone Menus By A Pin
Begin as follows: Configuration inhibit Enter PIN (defaut settings 0000) In this menu you are able to configure your individual PIN (0000... 9999). Please write down the entered PIN. If you forget your PIN, you will not be able to access any of the PIN-protec- ted settings. -
Page 65: Parking Code (Default Setting)
You can assign a name (20 characters max.) to the telephone to provide it with unique identi- fication within a PABX system. You will need the telephone name for example for configuring the telephone through the interal ISDN connection of a connected elmeg pabx. The default name entered is the telephone’s serial number. - Page 66 However, sending and receiving SMS messages is only possible, when this phone is connected to specific elmeg pabx systems. Please refer to the operating in- structions for your PABX to determine whether SMS-features are provided with this particular telephone. To send or receive SMS messages with this telephone, the number for the SMS service pro- vider must be stored in the telephone.
-
Page 67: Volume Settings
Volume settings Speaker volume setting Permanent volume setting Begin as follows: Acoustic Speaker <> Use the arrow buttons to set the volume. The ˆ Loudspeaker ˆ loudness bar in the display indicates the current status. Confirm your entry by pressing OK. ˆ... -
Page 68: Acknowledgement Signals
<> Use the arrow buttons to set the volume. The ˆ Handset loudness bar in the display indicates the current status. Confirm your entry by pressing OK. ˆ - ©©-- + ¬¬¬¬¬¬¬¬¬¬¬¬¬¬¬¬¬¬¬¬¬¬ Temporary volume setting You lift the handset or you are conducting a call. Press the menu button. -
Page 69: Setting The Volume Of The »Station Guarding« Tone
Setting the volume of the »Station guarding« tone You have various options of setting your telephone to »Station guarding« (see page 42). You can set your telephone to signal incoming calls by a brief acoustic signal while »Station guar- ding« is active. The volume of that idle tone is adjustable. Begin as follows: Acoustic Quiet... -
Page 70: Setting The Headset Type
Setting the headset type If a special support feature is stored in your telephone for the headset your are using, set your phone for that headset model. For example, the LED in the microphone extension for »Firefly F142 N« from Plantronics can be activated by the telephone. -
Page 71: Possible Audio Output Features
Possible audio output features The telephone is equipped with an audio output (Audio-Out socket). Several acoustic tele- phone functions can be used in parallel with the local speaker via this output. You can also connect external speakers, for example, to allow a message to be heard in the entire office. The following features can be used with the audio output: •... -
Page 72: Further Settings
Further settings Call forwarding (call rerouting) With this telephone you can be reached, even if you are not in the vicinity of your phone. This is achieved by the system automatically forwarding calls to another internal or external num- ber. Call rerouting can be configured separately for any of the entered numbers (MSN). -
Page 73: Call Waiting Feature
(»Keypad« or »ETSI«) as descri- bed below. Use at a point-to-point connection (network termination unit) O > Configu- Service Call rerout. Keypad Telephone ration Use with an elmeg PABX O > Configu- Service Call rerout. ETSI Telephone ration Call waiting feature If, during an ongoing call, a second call comes in for you, the second call is signaled when »Call waiting on«... -
Page 74: Direct Call
set the volume of the call waiting signal and select whether a waiting call is to be signaled only one time, or several times (see page 63). When »Station guarding« is set, the call is indicated as described on page 62. If you are using the hands-free option for an active connection, waiting calls will only be signaled optically in the display. -
Page 75: Activating Direct Call
Programming a direct call number Begin as follows: Setting Direct cal MSN ext. Insert a number. ˆ Dir. call-in number In this example: »098765«. Confirm your entry by pressing OK. ˆDirect cal>098765_ ¬¬¬¬¬¬¬¬¬¬¬¬¬¬¬¬¬¬¬¬¬¬ If you are using your telephone with a PABX system, first enter the line access digit of your PABX before entering the direct dialing number. -
Page 76: Appointment Reminders
Appointment reminders You have the option of setting three different dates with your telephone. • The set appointment is signaled daily . • The set appointment is signaled once. • The set appointment is signaled weekly at the set time (date and time). Once the date and time of the set appointment are reached, an acoustic (with fixed tune and volume) and optical signal is issued. -
Page 77: Setting The Display Contrast
Deactivating an appointment reminder <> Setting Date Select appointment Setting the display contrast You can set individual contrast levels. Begin as follows: Setting Contrast <> Use the arrow buttons to set the contrast. ˆ Display contrast Confirm your entry by pressing OK. ˆ... -
Page 78: Call Filter
Automatic headset use active: The call is taken via the headset when you press an extension or line key with automatic ac- cepting of calls activated. Automatic headset use not active: The call is taken via the open listening / hands-free calling functions when you press an ex- tension or line key with automatic accepting of calls activated. -
Page 79: Setting The Time
The following example describes how to enter a new filter number. Begin as follows: > <> Setting Filter Select filter number Enter the filter number. In this example: ˆFilter number create »012345«. Confirm your entry by pressing OK. ˆ>012345_ ¬¬¬¬¬¬¬¬¬¬¬¬¬¬¬¬¬¬¬¬¬¬ Programming call filter operating modes Begin as follows: >... -
Page 80: Extended Configuration
Only limited configuration is possible when the telephone is recognized as a system telepho- ne when connected to an elmeg PABX system. You have to enter a specific code number in order to enter the telephone’s extended configuration mode. -
Page 81: Connected To A Pabx
Connected to a pabx Begin as follows: > ˆ PABX ˆType-ID Configuration PABX External line ˆNumb. length Ln.access • PABX system type (»Type-ID« softkey) Type 0: The PABX system does not transmit the line access digit on incoming calls. The line access digit must be entered in the phone. Type 1: The PABX system transmits a line access digit on incoming calls. -
Page 82: Setting The User Interface
an entry in the enable list is longer than an entry in the inhibit list that entry can be di- aled. Setting the User Interface Begin as follows: > ˆ Use variant Settings Opearation Keypad ˆMute ¬¬¬¬¬¬¬¬¬¬¬¬¬¬¬¬¬¬¬¬¬¬ • Default setting during a call (»Keypad« or »dtmf« softkey) Select whether in the initial settings »dtmf«... - Page 83 Function Display Further entries Call filter »call filter« Index of numbers (MSN-1…MSN-9), Call forwarding mode (1 - fixed, 2 - delay- Call forwarding »call forwarding« ed, 3 - when busy) and Call forwarding target. Direct call »Dir. call-in« Headset »Headset« Telephone number index (MSN1 …...
- Page 84 »n« Dummy number. If a number is entered prior to execution of a macro (or for example, dialed from the telephone) this number is used in place of the dummy number in the macro. »P« Pause (1 second) in the command sequence (between two characters/com- mands) »RE«...
- Page 85 Press Macro programming examples: Function Macro command string RE,B,0,1,2,3,4,5,LZ Key programmed for a particular number (for example: 012345 and activate LED for two se- conds) RE,f,s3,s5 Setting an appointment RE,},s6,s6,s2 Reading new text messages (UUS1) RE,f,s5,s1,N,ok,s5,s Inhibiting the phone for all outbound calls »N«: Password for the telephone 4,LE,esc (Key for level 1, activate LED)
-
Page 86: Service Functions
The display shows information about your tele- ˆ Software- ˆ Identification phone. For example:Firmware version, name, … ˆType:CS410 Feldtest 8 Press the C button to exit the menu. ˆTime:04/10/03 13:41 ˆModul:V0.01 ˆ:V3.20 16 00 01 01 ˆName:Desk 25 Country-specific settings Certain specific parameters need to be set if the telephone is to be used in a country other than the country configured as default. -
Page 87: Downloading A New Firmware
In the field »Status« click »Start Download« to begin downloading the new firmware. Downloading new firmware from the elmeg server »ELMEG GmbH & Co.KG Kommunikationstechnik« provides a server PC which can be used for loading new firmware into your telephone. In this case, the firmware is downloaded via the ISDN connection. - Page 88 Important notice for export variants: Please ask your specialized dealer/distributor for the access number of the download server for your country! Download server Number elmeg server ++49-(0)5171-901190 Initiating download of new firmware on the phone: Begin as follows: Configuration Service...
-
Page 89: Telephone Bios
Attention: The settings for the »Set« softkey are used for service and diagnosis at elmeg. Any settings you may make or modify in this menu will affect the overall functionality of your telephone. In some cases the telephone may not be able to be used if these settings are changed. -
Page 90: Reset - Resetting To Default State
You can reset the telephone to its initial state using the procedure described as follows. All of the data that you have entered previously will be deleted. If you have connected the elmeg T400 key extension module to your phone all of the data for the module will also be deleted when this procedure is executed. -
Page 91: Telephone And Pc
Telephone and PC CTI / TAPI using the telephone’s USB port The abbreviations CTI and TAPI denote the standard interface for Windows telephony appli- cations from Microsoft. Telephones and computers can work hand in hand via this interface. CTI: Computer Telephony Integration TAPI: Telephony Application Programming Interface This allows you to dial directly from TAPI-compatible Windows programs, and the calls can be used by the software. -
Page 92: Audio Applications Using The Telephone's Audio Sockets
(when the phone is connected to a PABX) or set the pa- rameters for dial ranges and charge logging. The Professional Configurator is also used for programming an optional answering machine or the optional elmeg T400 keyboard extension. • Telephone directory manager: Use the phone directory manage to to create new entries for the phone directory (see page 29) or assign a special dial tone (VIP dial tone) to individual numbers. -
Page 93: Installing The Programs From Cd-Rom
USB driver (Universal Serial Bus) Recognition and control of the phone after connecting to the USB port of the PC. For example: Example of elmeg WIN-Tools programs Important note for installation of the CAPI drivers: Before installing the new drivers, be sure to remove any existing CAPI drivers in your system (such as the drivers for an installed ISDN card), as Windows only supports one installed CAPI. - Page 94 • Windows 98SE / ME / 2000 / XP operating system • Min. 80 MB free hard disk space for installation Installation sequence • Start your PC. • Insert the CD ROM supplied with the system in the CD ROM drive of your PC. •...
-
Page 95: Appendix
9 March 1999 on radio equipment and telecommunications terminal equipment and the mutual recognition of their conformity« You can also request this EC declaration of conformity at the following Internet URL: http://www.elmeg.com/products/conformity/ Default telephone settings • The serial number is entered as the telephone name. - Page 96 • No output of audio signals over the Audio-Out port. • Numbers are identified with incoming and outgoing connections (CLIP / COLP). • Telephone number and costs are displayed. The call duration is shown when no cost data are available. •...
-
Page 97: Telephone Menus
Telephone menus »Configuration« menu »C onfiguration « Configuration inhibit Display Charge Call-Parking Service Standard call-parking Program dial number } MSN-3 Call-Parking>55 MSN-1 MSN-4 MSN-2 MSN-5 Display-Monitoring Program dial number{ MSN-8 MSN ext. MSN-6 Conversation MSN-9 Language MSN-7 MSN-10 Enter PIN Example: MSN-6 Config. - Page 98 »Acoustic« menu » Acoustic « Volume, etc. Volume, etc. Headset Ack. tones Speaker Message Quiet Date Call wait. Intercom handset Audio Out Call wait. tone Setting for using Audio Put Volume Message ˜ Hands-free calling ˜ Signaling tones repeat ˜ Speaker function Loudspeaker Appt.
- Page 99 »Setting« menu » Settings « Setting Setting Direct cal Headset Contrast Call rerout. Date Time Call wait. AUTO accept Filter Call waiting enable? Call filter OK, extended No ˜ Incoming call forwarding Use headset? Fixed delayed busy Call forwarding delay Display-Contrast MSN-3 MSN-1...
- Page 100 »Program nos.« menu » « Program nos. Program dial number Tel. drctry telephone book Program VIPs 237 Entries avail. Sp.ton. call Info delete List List Delete tbook data {} Select VIP ···········Aaaaaaaaaa Bbbbb ················ ·······Ccccccc,cccccc Ddddd, Dddd ·········· ·················Eeee Select name please {} Reprogram VIP Aaaaaaaaaa 0123456...
-
Page 101: Technical Specifications
ISDN connection: DSS1 protocol, point-to-multipoint access Channel structure: B + B + D ISDN power consumption: =< 1 Watt Up0 connection (CS410-U only) Length of ISDN connection cord: approx. 6 meters Up0 connection: DSS1 protocol, point-to-point access Channel structure: B + B + D... - Page 102 Appendix...
-
Page 103: Index
Index programming filter numbers ..72 Call LED ....12 Accepting a call ... . 16 Call rerouting . - Page 104 Connecting the telephone to the S0 . . . 4 Entering letters ... . . 11 Connecting the telephone to the Up0 . . 4 Extended configuration ..74 Controlling costs Extended redialing .
- Page 105 team key ....50 after a call ... . . 25 trunk bundle key ..49 during an ongoing call .
- Page 106 Setting the ringing tone melody Pocket money account..45 at an elmeg PABX ..12 Positive acknowledgement..13 Setting the speaker volume.
- Page 107 without calling line identification (CLIR) ....17 Unpacking and placing the telephone . . 3 Station guarding ... . 42 Unpacking the telephone .
- Page 108 Index...
-
Page 109: Brief Description Of Functions
Brief description of functions Enquiry Call Dial number Broker’s call > Connection1 Dial number Connection4 Conference Conference Dial number Call transfer with prior notice transfer Dial number Dial number Park park Enter parking code Unparking > unpark Enter parking code Call forwarding transfer Dial number... - Page 110 Completion of call to busy subscriber Clbckbusy Subscriber Dial number busy Selection of outgoing numbers (MSN) MSN1 Dial number MSN10 Activate call forwarding Setting Call delayed MSN1 rerout. busy Fi- MSN10 Dial number Deactivating call forwarding Setting Call MSN1 rerout. MSN10 Station guarding Quiet...
-
Page 111: Warranty Declaration
5. It is at the discretion of elmeg to replace the device with an identical one instead of performing repairs. Further claims for damage are not permissible. Any data stored in the device will be lost after repair work or replacement of the device. - Page 112 ELMEG GmbH & Co.KG Kommunikationstechnik Vöhrumer Str. 30 D-31228 Peine http://www.elmeg.de http://www.elmeg.com Operating instructions elmeg CS410 / CS410-U...
Need help?
Do you have a question about the CS410 and is the answer not in the manual?
Questions and answers