Table of Contents
Advertisement
Quick Links
Advertisement
Table of Contents

Related Manuals for Vermeiren Gemini 2


Summary of Contents for Vermeiren Gemini 2
- Page 1 V RM IR N Gemini 2 I N S T R U C T I O N...
- Page 2 No part of this manual may be reproduced in any form what so ever (print, photocopy, microfilm or any other process) without written permission of the publisher, or processed, duplicated or distributed by using electronic systems. © N.V. Vermeiren N.V. 2014...
-
Page 3: Table Of Contents
Tools ..........................7 Manner of delivery ...................... 7 Adjusting the seat depth Gemini 2 32 ................. 8 Adjusting the seat depth Gemini 2 40 ................. 8 Footrest Gemini 2 (Seat width 32) ................9 ... -
Page 4: Preface
First of all we want to thank you for putting your trust in us by selecting one of our wheelchairs. The Vermeiren wheelchairs are the result of many years of research and experience. During the development, special attention was given to the ease of use and the serviceability of the wheelchair. -
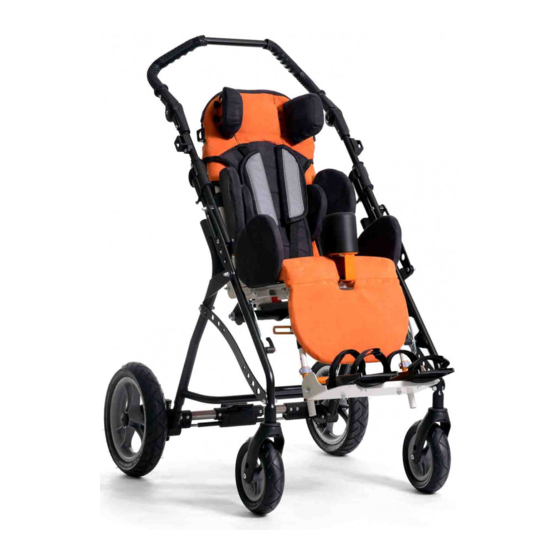
Page 5: Product Description
The wheelchair is suited for indoor and outdoor use in combination with a supervisor. The Gemini 2 can be pushed by an attendant or the parent. The modular construction allows to choose the optimal design in specific need to your child. -
Page 6: Technical Specifications
Make Vermeiren Address Vermeirenplein 1/15, B-2920 Kalmthout Type Manual wheelchair Model Gemini 2 Description Gemini 2 32 Gemini 2 40 Maximum occupant mass 35 kg 50 kg Effective seat width 320 mm 400 mm Overall width (depends on the model) -
Page 7: Components
Storage and use humidity We reserve the right to introduce technical changes. Measurement tolerance ± 15 mm / 1,5 kg / ° Table 1: Technical specifications Gemini 2 The wheelchair complies to the requirements set up in: ISO 7176-8: Requirements and test methods for static, impact and fatigue strengths. -
Page 8: Accessories
The accessory enhances the comfort of the Gemini 2. Special holes in the frame of the Gemini 2 are made to fix the cover. It suffices to lock the ends of the cover into the holes. Depending on the needs, the cover can open or closed. -
Page 9: Safety Rules
Check the profile depth and the inflation pressure of the tyres. Only use a Gemini 2 which has been adjusted to the weight and length of the child. The Gemini 2 cannot be tipped too much backwards because the shift of the centre of gravity may cause the Gemini 2 to flip backwards. -
Page 10: Assembly / Dissassembly The Wheelchair
Adjust the chair comfortably for the child It is also possible not to remove the seat frame and fold the Gemini 2 like shown in the drawing. Be aware that you first remove all the pelots and abduction wedge before completely folding the backrest to the front. -
Page 11: Mounting Or Removing The Rear Wheels
Mounting or removing the rear wheels CAUTION: Risk of injury – Check that the rear wheels are correct mounted before using the Gemini 2. The fast and safe removal of the wheels is very convenient for transport in smaller cars. -
Page 12: Operating The Brake
The central brake must be used when the wheelchair is not in motion. First stop moving / pushing the wheelchair Gemini 2 and use than the central brake. The person who is pushing the Gemini 2 is responsible for the correct usage of the brake.The Gemini 2 has been equipped with a central brake. -
Page 13: Abduction Wedge (B22)
Risk of injury – Make sure all the safety belts are locked into place before driving the Gemini 2. Every Gemini 2 has been equipped with adjustable belt to the purpose of a correct and safe seating position. These belts have an adjustable length and are mounted to the seating frame. -
Page 14: Transfer In And Out The Wheelchair
The Gemini 2 has been equipped with rubber pushing handgrips, which have been mounted, on an adjustable pushbar. This will make it easier for the person who pushes the Gemini 2 and remain a firm grip under different driving circumstances. -
Page 15: Moving On Slopes
Gemini 2 2014-03 2.11 Moving on slopes WARNING: Control your speed – Moving on slopes as slow as possible. WARNING: Consider the capacities of your attendant – If your attendant does not have enough force to control the wheelchair, activate the central brake. -
Page 16: Using Ramps
Gemini 2 2014-03 2.12.4 Using ramps WARNING: Risk of injury – Do not exceed the maximum load of the ramps. WARNING: Risk of injury - Choose the correct ramps so there cannot be caused any injury or damage. We do not accept any liability for injury or damage caused by an improper choice of ramps. -
Page 17: Installation And Adjustment
Installation and adjustment The instructions in this chapter are for the specialist dealer and the user. The Vermeiren wheelchairs Gemini 2 has been designed entirely for the comfort of your child. To find a service facility or specialist dealer near you, contact the nearest Vermeiren facility. -
Page 18: Adjusting The Seat Depth Gemini 2 32
Gemini 2 2014-03 Adjusting the seat depth Gemini 2 32 The function to alter the seat depth can be used after loosening the bolts (M6) on the seating plate (The needed tools are included in the package) and sliding the full segment into the desired position. -
Page 19: Footrest Gemini 2 (Seat Width 32)
3.5.1 Positions of the footplate By default the footplate is in a horizontal position. With the emphasis on transport and rehabilitation and getting out of the Gemini 2, the footplate must be turned into the direction of the undercarriage of the footrest. -
Page 20: Adjusting The Length Of The Footrest
Gemini 2 2014-03 3.5.2 Adjusting the length of the footrest Due to the super design of the Gemini 2, the footrest can be set into 4 different lengths: 250 – 280 – 310 - 340 mm (steps: 30 mm). Adjust them as follows: 1. -
Page 21: Footrest Gemini 2 (Seat Width 40)
3.6.1 Positions of the footplate By default the footplate is in a horizontal position. With the emphasis on transport and rehabilitation and getting out of the Gemini 2, the footplate must be turned into the direction of the undercarriage of the footrest. -
Page 22: Backrest
Risk of injury – Check the backrest is well fixated. The Gemini 2 has been equipped with a back with adjustable inclination and adjustable height. In combination with the adjustable seat and footrest will the Gemini 2 provide optimal settings for your child. - Page 23 Gemini 2 to tip backwards, which can cause injuries to the user of the Gemini 2! Adding additional elements to the Gemini is only allowed after careful consideration and in collaboration with one of our retailers.
-
Page 24: Seat
The construction of the Gemini 2 makes it very easy to adjust the inclination and depth of the seat. Also a full conversion of the orientation of the seating parts towards the person who is pushing the Gemini 2 has been made very easy and fast to accomplish. - Page 25 is well fixated. A wide range in adjustments allows the Gemini 2 to be positioned in many ways. From an almost vertical position (ideal for revalidation) till a laying position. By tightening the adjustment bars, the full seating part will be unmovable.
- Page 26 Gemini 2. The Gemini 2 stands for comfort when it comes to removing or switching positions of the seating element. As such, you can push the Gemini 2 with your child facing forward or facing towards you. ...
-
Page 27: Side Supports (Pelots)
Gemini 2 2014-03 The seat of the Gemini 2 can only be extended with additional elements after approval of your retailer. Side supports (Pelots) 3.9.1 Head pelots Adjusting width: 1. Loosen the two knurled knobs on the rear side of the backrest. - Page 28 Gemini 2 2014-03 3.9.2 Backrest pelots (large) Adjusting height: 1. Loosen the two screws . 2. Move the backrest pelot up or down until the desired height (2 positions: steps 40 mm). 3. Retighten the two screws . 4. Check that the pelot is well fixated.
-
Page 29: Tyre Changing
Gemini 2 2014-03 3.10 Tyre changing NOTE: Always make sure that the wheels are sufficiently inflated, since it could affect the driving behaviour. NOTE: We do not accept any liability for wheels not supplied by the manufacturer. NOTE: There must be no air in the tube before it can be removed. -
Page 30: Maintenance
Gemini 2 2014-03 To ensure that the wheel inflated correctly, admit only so much air initially that the tyre can still be easily pushed inwards by using your thumbs. If the check-lines are equidistant from the edge of the rim on both sides of the tyre, then the tyre is centered properly. If not - let out the air and position the tyre afresh. - Page 31 Dealer´s stamp: Dealer´s stamp: Date: Date: Dealer´s stamp: Dealer´s stamp: Date: Date: Dealer´s stamp: Dealer´s stamp: Date: Date: For service checklists an additional technical information, please see our specialist dealers nearest to you. More information on our website at: www.vermeiren.com.
- Page 32 Fax: +41(0)31 818 40 98 website: www.reatime.it website: www.vermeiren.ch e-mail: info@reatime.it e-mail: info@vermeiren.ch Poland Spain / Portugal Vermeiren Polska Sp. z o.o Vermeiren Iberica, S.L. Carretera de Cartellà, Km 0,5 Łączna PL-55-100 Trzebnica Sant Gregori Parc Industrial, Edifici A Tel: +48(0)71 387 42 00...
Need help?
Do you have a question about the Gemini 2 and is the answer not in the manual?
Questions and answers