Table of Contents
Advertisement
Available languages
Available languages
Quick Links
Advertisement
Chapters
Table of Contents

Related Manuals for Vermeiren Gemini 2


Summary of Contents for Vermeiren Gemini 2
- Page 1 VERMEIREN Gemini 2 U S E R M A N U A L M A N U E L D ' U T I L I S A T I O N G E B R U I K S A A N W I J Z I N G...
- Page 2 Instructions for specialist dealer All rights reserved, including translation. This instruction manual is part and parcel of the product and must accompany every product sold. Version: D, 2021-06 Tous droits réservés, y compris la traduction. Instructions pour les distributeurs Ce manuel d'instructions fait partie du produit et doit accompagner chaque produit vendu.
-
Page 3: Table Of Contents
Gemini 2 2021-06 Contents Contents Contents ........................1 Preface........................2 Your product ....................3 Accessories ....................3 Before use ..................... 4 Intended use ....................4 Explanation of symbols ................. 4 General safety instructions ................4 Transport ....................... 5 Assembling / Disassembling the wheelchair ..........5 Storage ...................... -
Page 4: Preface
To ensure your safety, and to prolong the lifetime of your product, please take good care of it and have it checked and serviced on a regular basis. This manual reflects the latest product developments. Vermeiren has the right to implement changes to this type of product without any obligation to adapt or replace similar products previously delivered. -
Page 5: Your Product
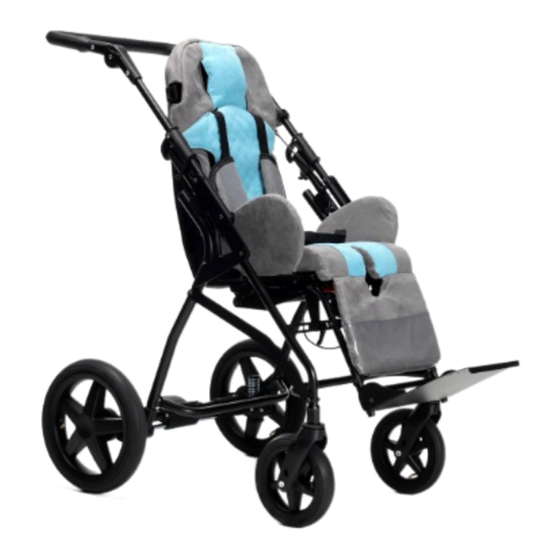
8. Driving wheels (rear wheels) 9. Brake 10. Frame 11. Location identification plate Accessories The following accessories are available for the Gemini 2: Rain cover Canopy Leg cover Foot fixation strips Side cushions Stabilisation and support pieces... -
Page 6: Before Use
§5. It is not designed for transportation of goods or objects, nor for any use other than previously described. Only use accessories and spare parts approved by Vermeiren. Please read all technical details and limits of your wheelchair in chapter 5. -
Page 7: Transport
Gemini 2 2021-06 Before use Transport 2.4.1 Moving out of the way The best way to move the wheelchair is to make use of the wheels and roll the wheelchair. If this is not possible (e.g. when the rear wheels are taken off for transportation in a car), firmly grasp the frame on the front and rear. -
Page 8: Storage
The same instructions apply for both options. It is also possible not to remove the seat and fold the Gemini 2. Be aware that you should first remove all the accessories and supports before completely folding the backrest to the front. -
Page 9: Using Your Wheelchair
Make sure the wheelchair is on a flat horizontal surface before releasing the brakes. Never release both brakes simultaneously. Gemini 2 brakes are operated by one central brake lever: Push the central brake in direction (1) to activate the brake. - Page 10 Gemini 2 2021-06 Using your wheelchair 3.2.2 Backrest inclination Seat width 32: 1. Loosen the lever (4) on the rear side of the backrest. 2. Push or pull the backrest tubes in the desired position (from folded position for easy transport, to lying down position: 0°...
- Page 11 Gemini 2 2021-06 Using your wheelchair 3.2.4 Footrest inclination 1. Loosen the levers (8) on both sides. 2. Adjust the footrest to the desired position (stepless; range 83° for seat width 32, range 85° for seat width 40). 3. Retighten both levers (8).
- Page 12 Gemini 2 2021-06 Using your wheelchair 3.2.7 Side supports (optional) Head pelots Adjusting width: 1. Loosen the two knurled knobs (12) on the rear side of the backrest. 2. Move the head pelot (13) inwards or outwards until the desired position (stepless, range 25 mm each side).
-
Page 13: Transfer In And Out Of The Wheelchair
Gemini 2 2021-06 Using your wheelchair Backrest pelots height The backrest pelots (16) can be placed in 2 positions (40 mm distance). Slightly lift the pelot upwards to detach it from the backrest. Place it in the desired position by placing the screws (17) through the holes in the backrest. -
Page 14: Riding The Wheelchair
Gemini 2 2021-06 Using your wheelchair 3.3.1 Correct position in the wheelchair Some recommendations for a comfortable use of the wheelchair: Position your backside as close as possible to the backrest. Make sure your upper legs are horizontal. If needed, adjust the length of the footrests. -
Page 15: Maintenance
CAUTION Repairs and replacements may only be undertaken by trained persons and only genuine replacement parts of Vermeiren should be used. The service frequency depends on the frequency and intensity of use. Contact your dealer to agree to a common timetable for inspection/maintenance/repair. -
Page 16: Troubleshooting
Gemini 2 2021-06 Maintenance 4.2.3 Disinfection Risk of damage CAUTION Disinfections may only be undertaken by trained persons. Consult your specialist dealer. Troubleshooting Even if you use your wheelchair properly, a technical problem may occur. If this is the case, contact your local specialist dealer. -
Page 17: Technical Specifications
Gemini 2 2021-06 Technical specifications Technical specifications The technical details below are only valid for this wheelchair, at standard settings and optimal ambient conditions. Take these details into account during use. The values are no longer applicable if your wheelchair has been modified, damaged or suffers from severe wear. - Page 19 Gemini 2 2021-06 Table des matières Table des matières Table des matières..................... 1 Préface........................2 Votre produit ....................3 Accessoires ....................3 Avant l’utilisation ..................4 Utilisation prévue................... 4 Explication des symboles ................4 Instructions générales de sécurité..............4 Transport ....................... 5 Montage / démontage du fauteuil roulant ............
-
Page 20: Préface
Pour assurer votre sécurité et prolonger la durée de vie de votre produit, prenez-en grand soin et faites-le contrôler ou entretenir régulièrement. Ce manuel est le reflet des derniers développements du produit. Vermeiren a le droit d’apporter des modifications à ce type de produit sans être tenu d'adapter ou de remplacer des produits similaires fournis précédemment. -
Page 21: Votre Produit
8. Roues motrices (roues arrière) 9. Freins 10. Cadre 11. L'emplacement de la plaque d'identification Accessoires Les accessoires suivants sont disponibles pour le Gemini 2 : Housse de pluie Capote Couvre-jambes Bandes de fixation des pieds Coussins latéraux ... -
Page 22: Avant L'utilisation
5. Il n'est pas destiné au transport de marchandises ou d'objets, ni à tout autre usage que celui décrit précédemment. Utilisez uniquement des accessoires et des pièces de rechange approuvés par Vermeiren. Consultez également les détails techniques et les limites de votre fauteuil au chapitre 5. -
Page 23: Transport
Gemini 2 2021-06 Avant l’utilisation Transport 2.4.1 Dégagement de l’espace Le meilleur moyen de déplacer le fauteuil roulant consiste à le faire rouler sur ses roues. Si cela n'est pas (par exemple en cas de retrait des roues arrière pour le transport dans une voiture), saisir fermement le cadre à... - Page 24 10. Ajustez le siège pour le confort de votre enfant et installez tous les accessoires qui ont été retirés pour le transport (voir §Error! Reference source not found.). *Le siège de Gemini 2 peut être installé avec votre enfant tourné vers l'avant ou vers vous lorsque vous poussez. Les mêmes instructions s'appliquent pour les deux options.
-
Page 25: Entreposage
Gemini 2 2021-06 Avant l’utilisation Entreposage Assurez-vous que votre fauteuil roulant est entreposé dans un environnement sec pour éviter la formation de moisissure et l’endommagement du rembourrage, voir également le chapitre 5. -
Page 26: Utilisation
Vérifiez que le fauteuil roulant se trouve sur une surface horizontale plane avant de relâcher les freins. Ne relâchez jamais les deux freins en même temps. Les freins du Gemini 2 sont actionnés par un levier de frein central: ... - Page 27 Gemini 2 2021-06 Utilisation 3.2.2 Inclination du dossier Largeur du siège 32: 1. Desserrez le levier (4) à l'arrière du dossier. 2. Poussez ou tirez sur les tubes du dossier jusqu'à la position souhaitée (à partir de la position repliée - facile pour le transport - jusqu'à...
- Page 28 Gemini 2 2021-06 Utilisation 3.2.4 Inclination du repose-pieds 1. Desserrez les leviers (8) des deux côtés. 2. Réglez le repose-pieds à la position souhaitée (sans palier ; plage 83° pour la largeur d'assise 32, plage 85° pour la largeur d'assise 40).
- Page 29 Gemini 2 2021-06 Utilisation 3.2.7 Supports latéraux (en option) Pelotes de tête Réglage de la largeur: 1. Desserrez les deux boutons crantés (12) à l'arrière du dossier. 2. Déplacez la pelote de tête (13) vers l'intérieur ou l'extérieur jusqu'à la position désirée (sans palier, plage de 25 mm de chaque côté).
- Page 30 Gemini 2 2021-06 Utilisation Hauteur du pelotes de dos Les pelotes de dossier (16) peuvent être placées dans 2 positions (distance de 40 mm). Soulevez légèrement la pelote vers le haut pour la détacher du dossier. Placez-le dans la position souhaitée en plaçant les vis (17) dans les trous du dossier.
-
Page 31: Transfert Dans Et Hors Du Fauteuil Roulant
Gemini 2 2021-06 Utilisation Transfert dans et hors du fauteuil roulant Risque de blessures et/ou dommages ATTENTION Ne vous levez pas sur les palettes. 1. Placez le fauteuil roulant aussi près que possible de la chaise, du canapé ou du lit concerné... -
Page 32: Entretien
ATTENTION Les réparations et les remplacements ne peuvent être réalisés que par des personnes formées, et seules des pièces de remplacement d'origine de Vermeiren peuvent être utilisées. La fréquence d'entretien dépend de la fréquence et de l'intensité de l'utilisation. Prenez contact avec votre commerçant pour convenir d'un rendez-vous pour une inspection/un... -
Page 33: Résolution Des Problèmes
Gemini 2 2021-06 Entretien 4.2.3 Désinfection Risque de dommages ATTENTION La désinfection ne peut être réalisée que par des personnes qualifiées. Renseignez-vous auprès de votre revendeur spécialisé à cet égard. Résolution des problèmes Même si vous utilisez votre fauteuil roulant de façon appropriée, les problèmes techniques ne sont pas exclus. -
Page 34: Spécifications Techniques
Gemini 2 2021-06 Spécifications techniques Spécifications techniques Les détails techniques ci-dessous concernent uniquement ce fauteuil roulant, avec des réglages standard et dans des conditions ambiantes optimales. Veuillez tenir compte de ces détails pendant l’utilisation. Les valeurs ne sont plus valables si votre fauteuil roulant a été modifié, endommagé ou présente une usure sérieuse. - Page 35 Gemini 2 2021-06 Inhoudsopgave Inhoudsopgave Inhoudsopgave ......................1 Voorwoord ........................2 Uw product ....................3 Accessoires ....................3 Voor gebruik ....................4 Beoogd gebruik ..................... 4 Gebruikte symbolen ..................4 Algemene veiligheidsmaatregelen ..............4 Transport ....................... 5 De rolstoel monteren/demonteren ..............5 Opslag ......................
-
Page 36: Voorwoord
Deze handleiding houdt rekening met de recentste productontwikkelingen. De Firma Vermeiren behoudt zich het recht voor om wijzigingen aan dit type product door te voeren zonder verplicht te zijn om voordien geleverde producten aan te passen of te vervangen. -
Page 37: Uw Product
6. Voetplaat 7. Stuurwielen (voorwielen) 8. Aandrijfwielen (achterwielen) 9. Remmen 10. Frame 11. Locatie identificatieplaat Accessoires Volgende accessoires zijn beschikbaar voor de Gemini 2: Regenhoes Kap Beenbedekking Voetfixatiestrips Zijkussens Onderdelen voor stabilisatie en steun Neem contact op met de vakhandelaar voor meer informatie over andere accessoires. -
Page 38: Voor Gebruik
§5. Het is niet bedoeld om goederen of objecten te vervoeren, noch voor enig ander gebruik dan hiervoor beschreven. Gebruik enkel accessoires en reserveonderdelen die werden goedgekeurd door Vermeiren. Lees eerst alle technische details en limieten van uw rolstoel in §5. -
Page 39: Transport
Gemini 2 2021-06 Voor gebruik Transport 2.4.1 Uit de weg zetten De beste manier om de rolstoel te dragen is om gebruik te maken van de wielen en zo de rolstoel verder te rollen. Als dit niet mogelijk is (bv. wanneer de achterwielen verwijderd zijn voor transport in de auto), grijp de rolstoel stevig vast aan de voorzijde van het frame en de handgrepen. -
Page 40: Opslag
Voor beide opties gelden dezelfde instructies. Het is ook mogelijk om de zit niet te verwijderen en de Gemini 2 op te vouwen. Denk eraan om eerst alle accessoires en steunen weg te halen vooraleer de rug naar voor te vouwen. -
Page 41: Uw Rolstoel Gebruiken
Zorg ervoor dat alvorens de remmen los te zetten, de rolstoel vlak staat. Los nooit beide remmen tegelijk. De remmen van Gemini 2 worden bediend met de centrale remhendel: Duw de centrale rem in richting (1) om de rem te activeren. - Page 42 Gemini 2 2021-06 Uw rolstoel gebruiken 3.2.2 Ruginclinatie Zitbreedte 32: 1. Maak de hendel (4) aan de achterkant van de rug los. 2. Duw of trek de rugbuizen in de gewenste positie (van opgevouwen positie - gemakkelijk voor transport - tot liggende positie: 0° - 45°). De rug stopt automatisch wanneer de maximale inclinatie bereikt wordt.
- Page 43 Gemini 2 2021-06 Uw rolstoel gebruiken 3.2.4 Voetsteun inclinatie 1. Draai de hendels (8) aan beide zijden los. 2. Verstel de voetsteun tot de gewenste positie (traploos; bereik 83° voor zitbreedte 32, bereik 85° voor zitbreedte 40). 3. Draai beide hendels (8) terug vast.
- Page 44 Gemini 2 2021-06 Uw rolstoel gebruiken 3.2.7 Zijsteunen (optioneel) Hoofdpelotten Breedte aanpassen: 1. Maak de twee gekartelde knoppen (12) aan de achterkant van de rug los. 2. Beweeg de hoofdpelot (13) naar binnen of buiten tot de gewenste positie (traploos, bereik 25 mm aan iedere kant).
- Page 45 Gemini 2 2021-06 Uw rolstoel gebruiken Rugpelotten hoogte De rugpelotten (16) kunnen in 2 posities geplaatst worden (40 mm bereik). Til de pelot een beetje naar boven tot het los komt van de rug. Plaats het in de gewenste positie door de schroeven (17) in de gaten van de rug te steken.
-
Page 46: Transfer In En Uit De Rolstoel
Gemini 2 2021-06 Uw rolstoel gebruiken Transfer in en uit de rolstoel Gevaar voor letsel en/of schade VOORZICHTIG Ga niet op de voetplaten staan. 1. Plaats de rolstoel zo dicht mogelijk bij de stoel, zetel of bed van/naar waar u zich wilt verplaatsen. -
Page 47: Onderhoud
VOORZICHTIG Reparaties en vervangingen mogen enkel uitgevoerd worden door opgeleid personeel, en enkel originele onderdelen van Vermeiren mogen hierbij gebruikt worden. De onderhoudsfrequentie hangt af van de frequentie en intensiteit van gebruik. Neem contact op met uw vakhandelaar om een tijdschema vast te leggen voor nazicht/onderhoud/reparatie. -
Page 48: Probleemoplossing
Gemini 2 2021-06 Onderhoud 4.2.3 Ontsmetting Gevaar voor beschadiging VOORZICHTIG Ontsmetting mag enkel worden uitgevoerd door getraind personeel. Neem contact op met uw vakhandelaar. Probleemoplossing Ook wanneer u de rolstoel correct gebruikt, is het toch mogelijk dat er een technisch probleem optreedt. -
Page 49: Technische Specificaties
Gemini 2 2021-06 Technische specificaties Technische specificaties Onderstaande technische gegevens zijn enkel geldig voor deze rolstoel, met standaard instellingen en optimale omgevingscondities. Houd bij gebruik rekening met deze details. Deze waarden zijn niet meer van toepassing als uw rolstoel werd gewijzigd, of wanneer hij beschadigd of ernstig versleten is. - Page 51 Gemini 2 2021-06 Inhalt Inhalt Inhalt ........................1 Vorwort ........................2 Ihr Produkt ..................... 3 Zubehör ......................3 Vor der Benutzung ..................4 Bestimmungsgemäße Verwendung .............. 4 Zeichenerklärung ..................4 Allgemeine Sicherheitshinweise ..............4 Transport ....................... 5 Zusammenbau / Auseinandernehmen des Rollstuhls ........5 Lagerung .......................
-
Page 52: Vorwort
Um Ihre Sicherheit zu gewährleisten und die Nutzungsdauer Ihres Produkts zu verlängern, sollten Sie es gut behandeln und regelmäßig überprüfen und/oder warten lassen. Dieses Handbuch enthält die neuesten Produktentwicklungen. Vermeiren behält sich das Recht vor, Veränderungen an dieser Art von Produkt vorzunehmen, ohne eine Verpflichtung einzugehen, ähnliche bereits ausgelieferte Produkte anzupassen oder auszutauschen. -
Page 53: Ihr Produkt
6. Fussplatte 7. Lenkräder (Vorderräder) 8. Antriebsräder (Hinterräder) 9. Bremsen 10. Rahmen 11. Typenschild Zubehör Für den Gemini 2 ist das folgende Zubehör erhältlich: Regenschutz Verdeck Beinabdeckung Fußbefestigungsstreifen Seitliche Polsterung Stabilisierungs- und Stützteile Für weiteres Zubehör setzen Sie sich mit Ihrem Fachhändler in Verbindung. Er berät Sie gern. -
Page 54: Vor Der Benutzung
Er ist nicht dafür vorgesehen, Sachen oder Objekte zu transportieren oder zu anderen Zwecken als zuvor beschrieben benutzt zu werden. Verwenden Sie ausschließlich von Vermeiren genehmigte Zubehör- oder Ersatzteile. Sehen Sie sich auch die technischen Daten und die Einschränkungen Ihres Rollstuhls in §5 ... -
Page 55: Transport
Gemini 2 2021-06 Vor der Benutzung Transport 2.4.1 Beiseiteschaffen Am besten lässt sich der Rollstuhl transportieren, indem die Räder verwendet und der Rollstuhl geschoben wird. Sollte dies nicht möglich sein (beispielsweise wenn die Hinterräder für den Transport in einem Auto abgenommen wurden), greifen Sie den Rahmen fest an der Vorderseite und Hinterseite. -
Page 56: Lagerung
Ihnen gerichtet ist. Für beide Varianten gelten die gleichen Anweisungen. Es ist ebenfalls möglich, den Sitz nicht zu entfernen und den Gemini 2 zu falten. Achten Sie darauf, dass Sie zuerst sämtliche Zubehörteile und Stützen entfernen, bevor Sie die Rückenlehne vollständig nach vorn klappen. -
Page 57: Verwendung
Achten Sie darauf, dass der Rollstuhl auf einer flachen, horizontalen Fläche steht, bevor Sie die Bremsen lösen. Lösen Sie niemals beide Bremsen gleichzeitig. Die Bremsen des Gemini 2 werden mit einem zentralen Bremshebel bedient: Drücken Sie die zentrale Bremse in Richtung (1), um sie zu aktivieren. -
Page 58: Komfort-Einstellungen
Gemini 2 2021-06 Verwendung Komfort-Einstellungen Verletzungsgefahr und/oder Beschädigung WARNUNG Vergewissern Sie sich, dass alle Einstellungen sicher befestigt sind, bevor Sie den Rollstuhl benutzen. 3.2.1 Sitzneigung 1. Drücken Sie den Hebel (3) an der Seite des Schiebebügels. 2. Drücken Sie die Vorderseite des Sitzes nach unten bzw. - Page 59 Gemini 2 2021-06 Verwendung 3.2.3 Rückenhöhe Entfernen Sie den Bezug, um die Höhe der Rückenlehne zu verändern. 1. Lösen Sie die beiden Flügelmuttern (6) an der Rückseite der Rücken. 2. Bewegen Sie den oberen Teil (Kopfstütze) (7) der Rücken auf- oder abwärts, bis die gewünschte Rückenhöhe erreicht ist.
- Page 60 Gemini 2 2021-06 Verwendung 3.2.6 Fußauflagen (optional) Der Winkel der Fußauflagen (10) kann in verschiedene Positionen eingestellt werden (Sitzbreite 32: 5 Positionen, 10°-Schritte - Sitzbreite 40: 4 Positionen, 8,5°-Schritte). 1. Lösen Sie die Flügelmuttern (11) an der Unterseite der Fußplatte.
- Page 61 Gemini 2 2021-06 Verwendung Einstellen der Höhe: 1. Lösen Sie die zwei Rändelschrauben (14) seitlich an die Pelotte. 2. Bewegen Sie die Kopfpelotte (15) nach oben oder unten, bis die gewünschte Höhe erreicht ist (stufenlos, Bereich 25 mm). 3. Ziehen Sie die Rändelschrauben (14) wieder fest.
-
Page 62: Setzen In Den Rollstuhl
Gemini 2 2021-06 Verwendung 3.2.8 Abduktionskeil (optional) Abduktionskeil (18) zwei Flügelmuttern (19) befestigt. Er lässt sich leicht entfernen bzw. wieder anbringen, indem die Flügelmuttern (19) gelöst/festgezogen werden. Der Abduktionskeil kann über einen Abstand von 115 mm nach vorne/hinten bewegt werden. -
Page 63: Fahren Mit Dem Rollstuhl
Gemini 2 2021-06 Verwendung Fahren mit dem Rollstuhl Gefahr von Verletzungen und Schäden VORSICHT Achten Sie vor jeder Benutzung auf Folgendes: o Feststellbremsen funktionieren einwandfrei. o Reifen sind in gutem Zustand, siehe Kapitel 4. Verhindern Sie, dass Ihre Finger von den Radspeichen erfasst werden. -
Page 64: Wartung
Wartungspunkte Gefahr von Verletzungen und Schäden VORSICHT Reparaturen und Teileaustausch dürfen nur von geschultem Personal durchgeführt werden und es dürfen nur Originalersatzteile von Vermeiren verwendet werden. Die Wartungshäufigkeit hängt von der Häufigkeit und Intensität der Nutzung ab. Wenden sich Ihren Händler,... -
Page 65: Störungsbeseitigung
Gemini 2 2021-06 Wartung 4.2.3 Desinfektion Beschädigungsgefahr VORSICHT Eine Desinfektion darf nur von dafür geschultem Personal durchgeführt werden. Wenden Sie sich hierfür an Ihren Fachhändler. Störungsbeseitigung Auch bei ordnungsgemäßer Benutzung Ihres Rollstuhls kann ein technisches Problem auftreten. In diesem Fall wenden Sie sich bitte an Ihren Fachhändler. -
Page 66: Technische Daten
Gemini 2 2021-06 Technische Daten Technische Daten Die nachstehenden technischen Daten gelten für diesen Rollstuhl nur bei Standardeinstellungen und optimalen Umgebungsbedingungen. Berücksichtigen Sie diese Details bei der Benutzung. Die Werte gelten nicht mehr, falls Ihr Rollstuhl modifiziert wurde, beschädigt ist oder starke Verschleißerscheinungen aufweist. - Page 67 Gemini 2 2021-06 Indice Indice Indice ........................1 Premessa........................2 Il prodotto ...................... 3 Accessori ...................... 3 Prima dell’uso ....................4 Uso previsto ....................4 Significato dei simboli ..................4 Istruzioni generali di sicurezza ..............4 Trasporto ....................... 5 Montaggio e smontaggio del passeggino ............5 Magazzinaggio ....................
-
Page 68: Premessa
Per garantire la propria sicurezza e prolungare la durata del prodotto, trattarlo con cura e farlo controllare e/o sottoporlo a manutenzione con regolarità. Questo manuale rispecchia gli sviluppi più recenti del prodotto. Vermeiren si riserva il diritto di introdurre modifiche di questo tipo di prodotto senza alcun obbligo di adattare o sostituire i prodotti analoghi consegnati in precedenza. -
Page 69: Il Prodotto
9. Freni 10. Telaio 11. Posizione della targhetta di identificazione Accessori Per il modello Gemini 2 sono disponibili i seguenti accessori: Parapioggia Baldacchino Copri gambe Strisce di fissaggio del piede Cuscini laterali Pezzi di stabilizzazione e supporto Per informazioni su ulteriori accessori, rivolgersi al rivenditore specializzato che saprà... -
Page 70: Prima Dell'uso
Uso previsto Questo paragrafo fornisce una breve descrizione dell’uso previsto della carrozzina. Gli altri paragrafi aggiungono inoltre alle istruzioni ulteriori avvertenze di rilievo. Vermeiren desidera in tal modo portare all’attenzione dell’utente gli eventuali usi errati che possono presentarsi. Indicazioni e controindicazioni: La carrozzina può essere spinta da un accompagnatore o da un genitore. -
Page 71: Trasporto
Gemini 2 2021-06 Prima dell’uso Trasporto 2.4.1 Spostamento Il modo migliore per trasportare la carrozzina è facendola scorrere usufruendo delle ruote. Se ciò non è possibile (per es. quando le ruote posteriori sono state tolte per il trasporto in auto), afferrare saldamente il telaio dalla parte anteriore e posteriore. -
Page 72: Magazzinaggio
(vedere §Error! Reference source not found.). *Il seggiolino di Gemini 2 può essere installato con il bambino rivolto in avanti o rivolto verso di voi mentre spingete. Le stesse istruzioni valgono per entrambe le opzioni. -
Page 73: Utilizzo
Accertarsi che la carrozzina sia su una superficie piana prima di rilasciare i freni. Non rilasciare mai entrambi i freni contemporaneamente. I freni di Gemini 2 sono azionati da una leva centrale del freno: Spingere il freno centrale nella direzione (1) per attivare il freno. - Page 74 Gemini 2 2021-06 Utilizzo 3.2.2 Inclinazione dello schienale Larghezza del sedile 32: 1. Allentare la leva (4) che si trova nella parte posteriore dello schienale. 2. Tirare o spingere i tubi dello schienale nella posizione desiderata (dalla posizione ripiegata - facile per il trasporto - nella posizione distesa: 0°...
- Page 75 Gemini 2 2021-06 Utilizzo 3.2.4 Inclinazione del poggiapiedi 1. Allentare le leve (8) su entrambi i lati. 2. Regolare il poggiapiedi nella posizione desiderata (senza gradini; gamma 83° per la larghezza del sedile 32, gamma 85° per la larghezza del sedile 40).
- Page 76 Gemini 2 2021-06 Utilizzo 3.2.7 Supporti laterali (opzionale) Supporti per la testa Regolazione della larghezza: 1. Allentare le due manopole zigrinate (12) che si trovano nella parte posteriore dello schienale. 2. Spostare il supporto per la testa (13) verso l'interno o verso l'esterno fino alla posizione desiderata (senza gradini, gamma 25 mm per lato).
- Page 77 Gemini 2 2021-06 Utilizzo Altezza delle sopporte dello schienale Le sopporte dello schienale (16) possono essere posizionate in 2 posizioni (40 mm di distanza). Sollevare leggermente el sopporte verso l'alto per staccarla dallo schienale. Posizionarlo nella posizione desiderata mettendo le viti (17) attraverso i fori dello schienale.
-
Page 78: Trasferimento Della Carrozzina All'interno E All'esterno
Gemini 2 2021-06 Utilizzo Trasferimento della carrozzina all'interno e all'esterno ATTENZIONE Rischio di lesioni e/o danni Non stare in piedi sui poggiapiedi. 1. Posizionare la carrozzina il più vicino possibile alla sedia, alla poltrona o al letto verso il quale si desidera trasferire il paziente. -
Page 79: Manutenzione
ATTENZIONE Riparazioni e sostituzioni devono essere eseguite esclusivamente da personale con un’opportuna formazione e utilizzando unicamente ricambi originali Vermeiren. La frequenza dell'assistenza dipende dalla frequenza e dall’intensità dell’uso. Concordare con il proprio rivenditore un calendario comune per le attività di ispezione / manutenzione / riparazione. -
Page 80: Soluzione Dei Problemi Di Funzionamento
Gemini 2 2021-06 Manutenzione 4.2.3 Disinfezione Rischio di danni ATTENZIONE La disinfezione deve essere eseguita esclusivamente da personale con un’opportuna formazione. Consultare il proprio rivenditore specializzato. Soluzione dei problemi di funzionamento Anche se si utilizza la carrozzina nel modo corretto, è comunque possibile che si verifichi un problema tecnico. -
Page 81: Specifiche Tecniche
Gemini 2 2021-06 Specifiche tecniche Specifiche tecniche I dettagli tecnici riportati di seguito sono validi soltanto per la carrozzina oggetto del manuale, con le impostazioni standard e in condizioni ambiente ottimali. Durante l’uso, tenere conto di questi dati di dettaglio. - Page 83 Gemini 2 2021-06 Índice Índice Índice ........................1 Introducción ....................... 2 Su producto ....................3 Accesorios ....................3 Ante de su uso ....................4 Uso previsto ....................4 Explicación de los símbolos ................4 Instrucciones generales de seguridad ............4 Transporte .....................
-
Page 84: Introducción
Para garantizar su seguridad y prolongar la vida útil de su producto, cuídelo bien y asegúrese de realizar revisiones y el mantenimiento correspondiente de manera regular. Este manual refleja los desarrollos más recientes del producto. Vermeiren se reserva el derecho a implementar cambios en este tipo de producto sin que ello suponga obligación alguna de adaptar o cambiar productos similares previamente entregados. -
Page 85: Su Producto
9. Frenos 10. Chasis 11. Placa de identificación de ubicaciones Accesorios La Gemini 2 cuenta con los siguientes accesorios: Cubierta para la lluvia Capota Cubrepiernas Tiras de fijación para los pies Cojines laterales Piezas de estabilización y apoyo Si busca otros accesorios, póngase en contacto con su distribuidor especializado. -
Page 86: Ante De Su Uso
§5. No está diseñada para transportar mercancías u objetos, o para otros usos que no sean los descritos anteriormente. Utilizar sólo accesorios y piezas de repuesto aprobadas por Vermeiren. Consulte todos los datos técnicos y las limitaciones de la silla de ruedas en el capítulo 5. -
Page 87: Transporte
Gemini 2 2021-06 Ante de su uso Transporte 2.4.1 Retirar del camino La mejor forma de transportar la silla es empujarla y utilizar las ruedas. Si no es posible (porque haya que levantar las ruedas traseras para cargarla en un coche, por ejemplo), cójala por el armazón delantero y trasero. -
Page 88: Almacenamiento
Se aplican las mismas instrucciones para ambas opciones. También es posible no quitar el asiento y plegar la Gemini 2. Tenga en cuenta que primero debe quitar todos odos los accesorios y soportes para poder plegar completamente el respaldo sobre la parte delantera. -
Page 89: Utilizar La Silla De Ruedas
Asegúrese de que la silla de ruedas se encuentre en una superficie horizontal plana antes de soltar los frenos. Nunca suelte ambos frenos a la vez. Los frenos del Gemini 2 se accionan mediante una palanca de freno central: ... - Page 90 Gemini 2 2021-06 Utilizar la silla de ruedas 3.2.2 Inclinación del respaldo Ancho del asiento 32: 1. Afloje la palanca (4) situada detrás del respaldo. 2. Empuje o tire de los tubos del respaldo en la posición deseada ( 0° - 45° desde la posición plegada, que facilita el transporte, hasta la posición de tumbado).
- Page 91 Gemini 2 2021-06 Utilizar la silla de ruedas 3.2.4 Inclinación del reposapiés 1. Afloje las palancas (8) de ambos lados. 2. Ajuste el reposapiés en la posición deseada (sin escalonamiento; rango de 83° para la anchura de asiento 32, rango de 85°...
- Page 92 Gemini 2 2021-06 Utilizar la silla de ruedas 3.2.7 Soportes laterales (opcional) Pelotas de cabeza Ajuste de la anchura: 1. Afloje los dos pomos moleteados (12) que hay detrás del respaldo. 2. Mueva el soporte del reposacabezas (13) hacia adentro o hacia fuera hasta la posición deseada (sin escalones, rango de 25 mm a cada lado).
- Page 93 Gemini 2 2021-06 Utilizar la silla de ruedas Altura de los pelots del respaldo Los pelots del respaldo (16) pueden colocarse en 2 posiciones (40 mm de distancia). Levante ligeramente el pelot hacia arriba para separarlo del respaldo. Colóquelo en la posición deseada colocando los tornillos (17) a través de los orificios del respaldo.
-
Page 94: Traslado A La Silla De Ruedas Y Desde Esta
Gemini 2 2021-06 Utilizar la silla de ruedas Traslado a la silla de ruedas y desde esta PRECAUCIÓN Riesgo de lesiones y daños No se ponga de pie en los reposapiés. 1. Coloque la silla de ruedas lo más cerca posible de la silla, el sillón o la cama desde la que desea trasladarse o a la que desee ir. -
Page 95: Mantenimiento
PRECAUCIÓN Cualquier reparación o cambios sólo pueden llevarse a cabo por personal debidamente cualificado y sólo pueden utilizarse piezas de recambio Vermeiren originales. La frecuencia de los mantenimientos depende de la frecuencia e intensidad de uso. Póngase en contacto con su distribuidor para acordar un horario común para realizar inspecciones, mantenimientos y reparaciones. -
Page 96: Resolución De Problemas
Gemini 2 2021-06 Mantenimiento La tapicería puede limpiarse con agua templada y jabón suave. No utilizar productos de limpieza abrasivos. 4.2.3 Desinfección Riesgo de daños PRECAUCIÓN La desinfección sólo puede llevarla a cabo personal debidamente cualificado. Consultar con su distribuidor especializado al respecto. -
Page 97: Especificaciones Técnicas
Gemini 2 2021-06 Especificaciones técnicas Especificaciones técnicas Los datos técnicos expuestos a continuación son sólo válidos para esta silla de ruedas, con configuración estándar y en condiciones ambientales óptimas. Tener en cuenta estos datos durante la utilización de la silla para ducha. - Page 99 Gemini 2 2021-06 Spis treści Spis treści Spis treści ........................2 Wstęp ........................3 Państwa produkt ................... 4 Akcesoria ...................... 4 Opis produktu ....................5 Przewidziane zastosowanie ................5 Objaśnienie symboli ..................5 Ogólne instrukcje bezpieczeństwa ..............5 Transport ....................... 6 Składanie / rozkładanie wózka inwalidzkiego ..........
-
Page 100: Wstęp
Aby zagwarantować bezpieczeństwo i wydłużyć okres eksploatacji swojego produktu proszę o niego dbać oraz regularnie kontrolować i serwisować. Niniejsza instrukcja odzwierciedla najnowszy stan rozwoju produktu. Firma Vermeiren jest uprawniona do wdrażania zmian tego typu produktu bez zobowiązań do dostosowywania lub wymiany podobnych produktów dostarczonych wcześniej. -
Page 101: Państwa Produkt
7. Koła skrętne (przednie) 8. Koła napędowe (tylnie) 9. Hamulce 10. Rama 11. Płytka określająca położenie 1.1 Akcesoria Dla modeli Gemini 2 dostępne są następujące akcesoria: Osłona przeciwdeszczowa Daszek Osłona na nogi Listwy mocujące stopy Poduszki boczne ... -
Page 102: Opis Produktu
§5. Nie jest przeznaczony do transportu towarów, przedmiotów ani innego wykorzystania niż wcześniej opisane. Używać wyłącznie akcesoriów i części zapasowych zatwierdzonych przez Vermeiren. Należy się zapoznać ze wszystkimi danymi technicznymi i ograniczeniami wózka, które wskazano w rozdziale 5. -
Page 103: 2.4 Transport
Gemini 2 2021-06 Opis produktu 2.4 Transport 2.4.1 Przesuwanie na bok Najlepszym sposobem przenoszenia wózka inwalidzkiego jest prowadzenie go z wykorzystaniem jego kół. Jeśli nie jest to możliwe (np. w przypadku demontażu tylnych kół w celach transportu wózka w samochodzie), należy mocno chwycić wózek za ramę z przodu i z tyłu. Nie należy podnosić... -
Page 104: 2.6 Przechowywanie
10. Wyreguluj fotelik dla wygody dziecka i zainstaluj wszelkie akcesoria, które zostały zdjęte na czas transportu (patrz §Error! Reference source not found.). * Fotelik Gemini 2 może być zainstalowany z dzieckiem zwróconym przodem do kierunku jazdy lub zwróconym przodem do Ciebie podczas pchania. Dla obu opcji obowiązują te same instrukcje. -
Page 105: Sposób Użycia
Przed zwolnieniem hamulców upewnij się, że wózek inwalidzki znajduje się na płaskiej, poziomej powierzchni. Nigdy nie zwalniaj obu hamulców jednocześnie. Hamulce Gemini 2 obsługiwane są przez jedną centralną dźwignię hamulca: Aby włączyć hamulec, naciśnij centralny hamulec w kierunku (1). - Page 106 Gemini 2 2021-06 Sposób użycia 3.2.2 Regulacja nachylenia oparcia Szerokość siedziska 32: 1. Poluzuj dźwignię (4) umieszczoną na tylnej stronie oparcia. 2. Popchnij lub pociągnij rury oparcia w żądanym kierunku (od pozycji złożonej, zapewniającej łatwy transport, do pozycji leżącej: 0° - 45°). Oparcie zatrzymuje się...
- Page 107 Gemini 2 2021-06 Sposób użycia 3.2.4 Nachylenie podnóżka 1. Poluzować dźwignie (8) po obu stronach. 2. Ustawić podnóżek w pożądanej pozycji (bezstopniowo, zakres: 83° dla szerokości siedziska 32, 85° dla szerokości siedziska 40). 3. Ponownie zaciśnij obie dźwignie (8). 4. Sprawdź, czy podnóżek jest odpowiednio zamocowany.
- Page 108 Gemini 2 2021-06 Sposób użycia 3.2.7 Wsporniki boczne (opcjonalnie) Peloty głowicy Regulacja szerokości: 1. Poluzuj dwa pokrętła (12) umieszczone na tylnej stronie oparcia. 2. Przesuń wspornik boczny głowy (13) do środka lub na zewnątrz do żądanej pozycji (bezstopniowo, zakres 25 mm z każdej strony).
- Page 109 Gemini 2 2021-06 Sposób użycia Wysokość pelot oparcia Peloty oparcia (16) mogą być umieszczone w 2 pozycjach (odległość 40 mm). Lekko unieść pelotę do góry, aby odłączyć ją od oparcia. Umieścić ją w żądanej pozycji, przekładając śruby (17) przez otwory w oparciu.
-
Page 110: Wsiadanie I Zsiadanie Z Wózka Inwalidzkiego
Gemini 2 2021-06 Sposób użycia 3.3 Wsiadanie i zsiadanie z wózka inwalidzkiego Ryzyko odniesienia obrażeń i/lub uszkodzenia UWAGA Nie wolno stawać na płytach podnóżka. 1. Ustaw wózek jak najbliżej krzesła, kanapy lub łóżka na/z którego przenosi się użytkownik. 2. Upewnij się, że oba hamulce wózka inwalidzkiego są zaciągnięte. -
Page 111: Konserwacja
Ryzyko obrażeń i uszkodzeń UWAGA Naprawy i wymiana części mogą być przeprowadzane tylko przez przeszkolone osoby i wolno korzystać z oryginalnych części zamiennych Vermeiren. Częstotliwość serwisowania zależy od częstotliwości i intensywności użytkowania. Skontaktować się z dystrybutorem celem uzgodnienia harmonogramu inspekcji / konserwacji / naprawy. -
Page 112: Rozwiązywania Problemów
Gemini 2 2021-06 Konserwacja 4.2.3 Dezynfekcja Ryzyko uszkodzenia UWAGA Dezynfekcja może być przeprowadzana tylko przez przeszkolone osoby. Skonsultować się ze specjalistycznym dystrybutorem. 4.3 Rozwiązywania problemów Nawet w przypadku prawidłowego korzystania z wózka może wystąpić problem techniczny. W takim przypadku należy skontaktować się z lokalnym specjalistycznym dystrybutorem. -
Page 113: Parametry Techniczne
Gemini 2 2021-06 Parametry techniczne Parametry techniczne Poniższe szczegóły techniczne dotyczą tylko wózka inwalidzkiego przy standardowych ustawieniach i optymalnych warunkach otoczenia. Podczas użytkowania należy wziąć pod uwagę te szczegóły. Wartości nie mają już zastosowania, gdy wózek inwalidzki został zmodyfikowany, uszkodzony lub jest poważnie zużyty. - Page 115 Gemini 2 2021-06 Obsah Obsah Obsah ........................1 Úvod ........................2 Tento výrobek ....................3 Příslušenství ....................3 Před použitím ....................4 Určené použití ....................4 Vysvětlivky symbolů ..................4 Obecné bezpečnostní pokyny ............... 4 Přeprava ....................... 5 Montáž / demontáž invalidního vozíku ............5 Skladování...
-
Page 116: Úvod
Aby byla zajištěna vaše bezpečnost a prodloužena životnost tohoto výrobku, věnujte mu řádnou péči a nechávejte jej pravidelně kontrolovat a opravovat. V tomto návodu se odráží nejnovější vývoj výrobku. Společnost Vermeiren má právo provádět změny tohoto typu výrobku, aniž by měla povinnost upravit či nahradit podobné výrobky, které již... -
Page 117: Tento Výrobek
8. Hnací kola (zadní kola) 9. Brzdy 10. Rám 11. Umístění identifikačního štítku Příslušenství Pro Gemini 2 je k dispozici následující příslušenství: Kryt proti dešti Sluneční stříška Kryt nohou Nožní pásky Boční polštáře Stabilizační a podpůrné prvky... -
Page 118: Před Použitím
§ 5. Není určen pro přepravu zboží či předmětů ani pro jakýkoli jiný účel, než je popsán výše. Používejte pouze příslušenství a náhradní díly schválené společností Vermeiren. Přečtěte si všechny technické detaily a omezení tohoto invalidního vozíku v kapitole 5. -
Page 119: Přeprava
Gemini 2 2021-06 Před použitím Přeprava 2.4.1 Přenášení invalidního vozíku Nejlepší způsob pro přenášení invalidního vozíku je využít jeho odbrzděných kol k pohybu. Není-li to možné (např. když jsou vyjmuta zadní kola kvůli přepravě ve vozidle), pevně uchopte rám na přední a zadní straně. K uchopení invalidního vozíku nepoužívejte nožní opěrky ani kola. -
Page 120: Skladování
(viz §Error! Reference source not found.). * Sedačku Gemini 2 lze instalovat tak, aby dítě bylo otočeno směrem dopředu nebo k vám při tlačení. Pro obě možnosti platí stejné pokyny. Mějte na paměti, že před úplným sklopením opěradla dopředu byste měli nejprve odstranit veškeré... -
Page 121: Použití Invalidního Vozíku
Brzdy jsou seřiditelné a mohou se opotřebovat. Před každým použitím zkontrolujte stav brzd. Před uvolněním brzdy ověřte, že je invalidní vozík na rovném vodorovném povrchu. Nikdy neuvolňujte obě brzdy současně. Brzdy vozíku Gemini 2 se ovládají jednou centrální brzdovou pákou: Pro aktivaci brzdy zatlačte centrální brzdu ve směru (1). - Page 122 Gemini 2 2021-06 Použití invalidního vozíku 3.2.2 Sklon zádové opěrky Šířka sedadla 32: 1. Povolte páčku (1) na zadním boční straně zádové opěrky. 2. Zatlačte nebo vytáhněte trubky zádové opěrky do požadované polohy (ze složené polohy pro snadnou přepravu do polohy vleže: 0° - 45°).
- Page 123 Gemini 2 2021-06 Použití invalidního vozíku 3.2.4 Sklon opěrky nohou 1. Povolte páčky (8) na obou stranách. 2. Nastavte opěrku nohou do požadované polohy (plynule, rozsah: 83° pro šířku sedadla 32, 85° pro šířku sedadla 40). 3. Znovu utáhněte obě páčky (8).
- Page 124 Gemini 2 2021-06 Použití invalidního vozíku 3.2.7 Boční podpěry (volitelné) Hlavice peloty Nastavení šířky: 1. Uvolněte vroubkované matice (12) v zadní části zádové opěrky. 2. Posuňte hlavovou pelotu (13) dovnitř nebo ven do požadované polohy (plynule, rozsah 25 mm na každou stranu).
-
Page 125: Přesun Do Invalidního Vozíku A Z Něj
Gemini 2 2021-06 Použití invalidního vozíku Výška pelot opěradla Peloty opěradla (16) lze umístit do dvou poloh (vzdálenost 40 mm). Mírně nadzvedněte pelotu směrem nahoru, aby se oddělila od opěradla. Umístěte ji do požadované polohy umístěním šroubů (17) do otvorů v opěradle. -
Page 126: Jízda V Invalidním Vozíku
Gemini 2 2021-06 Použití invalidního vozíku 3.3.1 Správná poloha v invalidním vozíku Doporučení pro komfortní použití invalidního vozíku: Zajistěte polohu zad co nejblíže k opěradlu. Ověřte, že máte stehna v horizontální poloze. V případě potřeby upravte délku nožních opěrek. -
Page 127: Údržba
Riziko zranění a poškození POZOR Opravy a výměny smějí provádět pouze vyškolené osoby. Přitom je třeba používat pouze originální náhradní díly společnosti Vermeiren. Servisní intervaly závisejí na intenzitě a frekvenci používání. Požádejte svého prodejce o společnou dohodu na rozvrhu kontrol/údržby/oprav. -
Page 128: Řešení Problémů
Gemini 2 2021-06 Údržba Řešení problémů I když tento invalidní vozík používáte správně, může se vyskytnout technický problém. V tomto případě se obraťte na místního odborného prodejce. Riziko zranění a poškození invalidního vozíku VAROVÁNÍ NIKDY nezkoušejte opravit invalidní vozík sami. -
Page 129: Technické Údaje
Gemini 2 2021-06 Technické údaje Technické údaje Technické údaje uvedené níže platí pouze pro tento invalidní vozík při standardních nastaveních a optimálních podmínkách okolí. Během používání berte tyto údaje v úvahu. Pokud byl tento invalidní vozík upraven, poškozen nebo došlo k jeho velkému opotřebení, nebudou tyto hodnoty platné. - Page 131 Service registration form Service registration form This product (name): …………………………………….. was inspected (I), serviced (S), repaired (R) or disinfected (D): By (stamp): By (stamp): By (stamp): Kind of work: I / S / R / D Kind of work: I / S / R / D Kind of work: I / S / R / D Date: Date:...
- Page 132 Vermeiren GROUP Vermeirenplein 1 / 15 2920 Kalmthout website: www.vermeiren.com...
Need help?
Do you have a question about the Gemini 2 and is the answer not in the manual?
Questions and answers