Table of Contents
Advertisement
Advertisement
Table of Contents

Related Manuals for Belling PBi60 AU


Summary of Contents for Belling PBi60 AU
- Page 1 BELLING PBi 60 AU Mk2 SERVICE MANUAL...
-
Page 2: Table Of Contents
35-35 PART LIST PBI 60 AU MK 2..............36-36 WIRING DIAGRAM................37-37 REPAIR AND MAINTAINANCE DISASSEMBLY PROCEDURES............38-40 COMPONANT REMOVAL..............41-45 FAULTFINDING GUIDES..............46-47 INDUCTION PRESENTATION............48-59 THIS MANUAL COVERS THE FOLLOWING MODELS :- BELLING PBi 60 AU MK 2... -
Page 3: Product Identification Page
PRODUCT IDENTIFICATION Appliance rating plate location The appliance rating plate is located on the right-hand side of the front frame and also on the rear service panel YEAR MONTH NUMBER OF PRODUCTION FOR THE MONTH PRODUCT IDENTIFICATION CODE It is important that during all service calls the model and serial numbers are recorded on all paper work. -
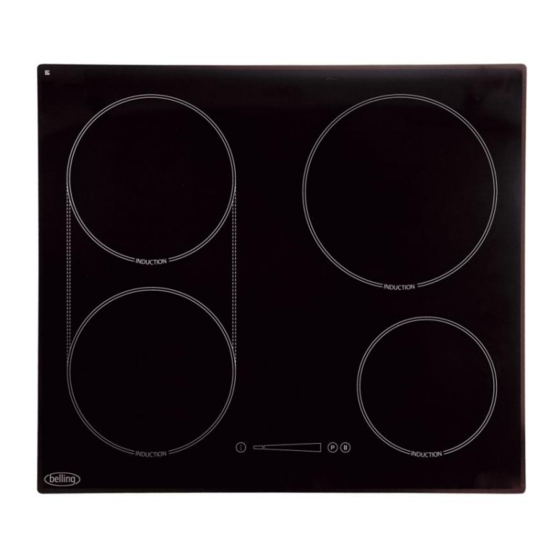
Page 4: User Guide
Users Guide & Installation Handbook Belling Built in Induction Hob PBi60 AU... - Page 5 Contents Warranty ........... . Before using your appliance .
- Page 6 our warranty Should you need it ..Inside the paperwork which has come with this appliance, there is a leaflet and card explaining the terms of our extended warranty and guarantee. In order to apply for our five year guarantee, simply fill in the details on the card and post it off, this will register your appliance.
- Page 7 Before Using Your Hob Thank you for purchasing a new Belling Induction This appliance is for Hob. Its stylish and practical design will enhance your use in a domestic kitchen only, it is not kitchen and make cooking a pleasure. Even if you...
- Page 8 Safety Keep children away from the vicinity of the hob when you are cooking. • Use pans with a flat base which are stable in use, and avoid using any old misshapen pans or any pan which is unstable when placed on a flat surface. •...
- Page 9 Safety Advice Smoke alarm - buy a smoke alarm fitted with a ‘hush button’ which can silence the alarm instantly should it activate accidentally & does not necessitate the removal of the battery (except to change for a new one). Fire Blanket - consider having a fire blanket in your kitchen, mounted on the wall where you can get to it easily &...
- Page 10 Safety & Induction Detection of an object or a pan on the heating zone A small object - such as a fork, a spoon or even a ring - placed on a hob cooking zone on its own is not detected as a pan.
-
Page 11: Using The Induction Hob
USING THE INDUCTION HOB About the induction hob The induction hob provides the most energy efficeint hob technology avail- able. The induction system provides superior heat up and cool down times for pans - you get fast, precise, repeatable power control. As induction only heats up the pan, there is no lost heat from the cooking process, which in turn, limits the heat... - Page 12 USING THE INDUCTION HOB Cookware for induction hobs Cookware for inductio n cooking zones must be made of metal and have magnetic properties. The base must also be the correct diameter. Suitable Cookware for Induction Hobs Unsuitable Cookware Enameled steel pots with a thick base Pots made of copper, Cast Iron pots with an enameled base stainless steel, aluminium,...
- Page 13 INDUCTION HOB FUNCTIONS PBI60 mk2 Induction Hob Description Symbol Feature Induction power is the most efficient means of cooking food on a hob, providing fast heat up Eco Power and boiling times Slide your finger down the stylish & accurate Power slide Power Slider or simply touch the control at the control...
- Page 14 USING THE INDUCTION HOB Touch Controls Touch controls The touch controls for your induction have been designed to provide you with finger tip control of your hob, providing accurate and repeatable power settings for cooking and an easy clean surface that can be easily wiped over. When a cook zone is acti- vated the power setting is displayed for each zone individually, Using the Touch Controls Using the Touch Controls...
- Page 15 Special Hob Functions USING THE INDUCTION HOB Central On/Off switch. Special Hob Functions The central on/off switch enables all of the cooking zones to be switched off simulta- neously at a touch of a button, so when you have finished cooking or are called away from the kitchen for any reason you can rest assured that everything is under control and safe.
- Page 16 USING THE INDUCTION HOB Recall oops! Have you switched off your hob accidentally. Easily recall you hob settings with this function To operate: If the pause Led is active when you switch back on, select the pause button and touch anywhere along the slider control. Note:- all cook zones will automatically resume to the previous settings...
- Page 17 USING THE INDUCTION HOB Auto Heat Up Helps to take the worry out of pans boiling over and burning food! No need to stand over the pan, allows you to do other tasks whilst maintaining control over the pan. The Auto Heat Up delivers power full power (9) to the zone for a fixed period of time before automatically turning back down to the desired setting.
- Page 18 End of Auto Heat Period USING THE INDUCTION HOB Initially, while the cook zone is at the highest setting, “A” will flash alternately with End of auto Heat Period your selected lower setting. Then, when the period of highest setting is over, “A” will stop flashing and the cook zone will automatically reduce the heat to your preset lower setting.
-
Page 19: Minute Minder
USING THE INDUCTION HOB Minute Minder The minute minder buzzes when the time set has expired. Does not switch off any zone. To operate 1) Turn on the hob, using the on/off switch. 2) Select the timer (do not activate any cook zone). 3) Set the right hand digit up to 9 minutes (Single Minutes Units) and wait a couple of seconds. - Page 20 Timer auto switch off USING THE INDUCTION HOB Timer auto switch off The timer can be set to automatically turn off a cooking zone. All four cook zones can be simultaneously timed to turn off automatically. Cook zones can be set for a maximum time of 99 minutes. Warning! Never leave the hob unattended when in use, even when you have set the timer to turn off the cook zone...
- Page 21 USING THE INDUCTION HOB Griddle Zone with Bridge Pan detection Function When a zone has been activated but no pan has been placed on the cook zone, this means the hob only uses power when a suitable pan is placed on the zone, this reduces the energy used during the cooking process, i.e.
- Page 22 USING THE INDUCTION HOB Overheat pan protection The hob is equipped with additional safety systems that help to prevent cookware from overheating, providing an additional level of safety not available on convention- al hobs such as gas and ceramic hobs. Approx Glass Surface Intelligent hob safety system...
-
Page 23: Child Lock
USING THE INDUCTION HOB Child Lock This feature is to help prevent accidental switching on of the hob, especially by young children. To Activate: 1) Select the On/Off Key. 2) Simultaneously touch the RHF cook zone and the Power Boost keys, the hob should beep. - Page 24 Cooking Tips • Green vegetables(spinach , broccoli, sorrel, etc) or vegetables rich in sulphur compounds (cabbage, onions, etc) should be cooked without a lid in plenty of boiling water; they will cook more quickly, and will keep their green colour (some vegetables only), vitamin and minerals content.
- Page 25 Care & Cleaning Some cooking operations generate a considerable amount of grease. This, combined with spillage, can Always allow the hob to cool before cleaning. become a hazard if allowed to accumulate on the hob Always: switch off the through lack of cleaning. In extreme cases this may electricity supply amount to misuse of the appliance and could invalidate before cleaning this...
- Page 26 Care & Cleaning Care and maintenance Before using the hob for the first time, appl y a thin coat- ing of cleaner conditioner to the ceramic glass, and polish the surface with a clean cloth. The conditioner gives a protective covering to the ceramic glass which not only makes the hob easier to clean, but also ensures that you will gain maximum life out of this product.
-
Page 27: The Hob
Troubleshooting The hob produces a smell the first few times it is used • Heat a pan full of water on each zone for half an hour. Pans make a noise during cooking!! • This is caused by vibration due to the passage of energy from the hob to the pan. On a high setting this is quite normal for certain types of saucepan. -
Page 28: Installation Instructions
Installation Instructions General information Installation should only be carried out by a qualified We recommend that you install this appliance in a installer or engineer. work top which is a mini- Please keep to the following points most carefully; mum 38mm deep. The hob can be fitted into •... - Page 29 Installation Instructions Installation advice - cabinetry Dealing with sides, cross-rails and back-panels in cabinetry Depending on the cabinets, the worktop thickness and the hob positioning, it is possible for the hob base and/or the clamp brackets to interfere with parts of the cabinet.
- Page 30 Installation Instructions Installation above an oven 50mm Refer to the manufacturer’s instructions for clearances 5mm min above the oven. air gap We recommend a 9mm gap between the bottom of the hob and appliance, should the work surface be less than 38mm deep.
- Page 31 Installation Instructions Fitting into worktop • Cut a hole in the work surface to the Cutout required required size. See table for relevant 550mm WIDTH dimensions. 480mm A clearance of at least 50mm should be DEPTH maintained between the cutout and any Clearance required rear or side wall.
- Page 32 Installation Instructions Recessed Method (selected models) Recess the work top to the appropriate depth and Important: Clamps may be reversed to fit either shape to fit the hob. 30mm or 40mm deep Apply the self adhesive seal to the underside of the work top.
- Page 33 Installation Instructions Connect to the electricity supply Warning: This appliance must be earthed. Important: Ensure that you route all mains electri- The hob must be installed by a competent electrician, cal cables well clear of any using a suitable double pole control unit, with 3mm mini- adjacent heat source,...
-
Page 34: Technical Data
Technical Data Electrical supply/load 240V 50Hz 7.0kW Countries of Destination: AU = Australia, NZ = New Zealand Warning: This appliance must be earthed. Data badge is located on the underside of the hob. -
Page 35: Contact Details
Glen Dimplex Australia, Unit 2, 205 Abbotts Road, Dandenong South, Victoria 3175 Australia Glen Dimplex Australia, Unit 2, 205 Abbotts Road, Dandenong, e-mail: sales@glendimplex.com.au web: www.glendimplex.com.au South Victoria 3175, Australia e-mail: sales@glendimplex.com.au Model Names: web: www.glendimplex.com.au Model names: Belling PBi60 Hob AU 082752600b 082752601... -
Page 36: Part List Pbi 60 Au Mk 2
PRODUCT: BEL PBi 60 AU Mk2 Induction Hob COLOUR: Black CODE: 444440569 ISSUE: DATE: Product Product Description Replace Date 073103848 HOB MECH hob ind tc 0057 083021700 Bridge EGO 75.97009.001 0174 503021300 CLAMP 0175 083021400 Cable clamp EGO 968.199 083080700 filter board 083080800 Power board... -
Page 37: Wiring Diagram
Belling FSE 60 I Issue A - Page 1/2 Wiring colour code: Bk - Black, Bn - Brown, Bu - Blue, Gn - Green, Or - Orange, R - Red, W - White, Y - Yellow, P - Pink. Mains Voltage Wiring Diagram for Induction Hob... -
Page 38: Disassembly Procedures
Belling FSE 60 I Issue A - Page 2/2 Wiring colour code: Bk - Black, Bn - Brown, Bu - Blue, Gn - Green, Or - Orange, R - Red, W - White, Y - Yellow, P - Pink. Mains Voltage Wiring Diagram for Induction Hob... -
Page 39: Repair And Maintainance
BELLING PBI 60 AU MK 2 REPAIR MAINTAINANCE PROCEDURES... - Page 40 IMPORTANT BEFORE CARRYING OUT ANY SERVICING WORK ALWAYS DISCONNECT FROM THE ELECTRICAL SUPPLY...
-
Page 41: Componant Removal
1) REMOVAL OF INDUCTION UNIT FROM COOKTOP REMOVE COOKTOP FROM KITCHEN WORKTOP BY RELEASING CLIPS UNDERNEATH REMOVE 11X SCREWS FROM FRAME SUPPORT LIFT AWAY INDUCTION UNIT FROM THE HOTP INDUCTION UNIT REMOVED FROM HOB TOP... - Page 42 REPLACEMENT OF COMPONANTS INDUCTION UNIT COMPONANTS THE INDUCTION UNIT CONSISTS OF THE FOLLOWING COMPONANTS INDUCTORS MOUNTING PLATE USER INTERFACE GENERATOR (POWER BOARD AND FILTER BOARD) Inductors Mounting plate User Interface FILTER BOARD Generator POWERBOARD...
- Page 43 A) INDUCTION PODS DISCONNECT WIRING FROM MAIN TERMINAL BLOCK DISCONNECT TEMP SENSOR FROM CONNECTION REMOVE INDUCTION POD BY RELEASING CLIPS FROM MOUNTING PLATE B) USER INTERFACE RELEASE 2 XCLIPS FROM PLASTIC MOUNTING BOX LIFT USER INTERFACE AWAY DISCONNECT LINBUS CABLES FROM L/H SIDE...
- Page 44 C) MAIN POWER BOARD (GENERATOR ) TO SEPARATE THE MAIN POWER BOARD FROM THE MOUNTING PLATE REMOVE 1X SCREW LIFT UP THE CLIP AS SHOWN TO RE- LEASE THE INDUCTION UNIT FROM THE MOUNTING PLATE BY SLIDING FORWARD AWAY FROM THE REMAINING RETAINING CLIPS...
- Page 45 C) MAIN POWER BOARD (GENERATOR ) COOLING FAN FILTER BOARD LINKS MAIN POWER BOARD...
-
Page 46: Faultfinding Guides
BELLING PBI 60 AU MK 2 FAULTFINDING GUIDES... - Page 47 EGO G5 Induction Touch, Service Matrix, GDHA Ref 083006200, EGO Reference 75.08012.519 Warning! Ensure product is fully isolated from the mains circuit before opening up product. Part Description Tools Required:- GDHA Part No EGO Spare Part/Kit No. Customer Service Step 1 Customer Service Step 2 Customer Service Step 3 Customer Service Step 4...
Need help?
Do you have a question about the PBi60 AU and is the answer not in the manual?
Questions and answers