Table of Contents
Advertisement
Advertisement
Table of Contents
Troubleshooting

Related Manuals for Eaton PV240


Summary of Contents for Eaton PV240
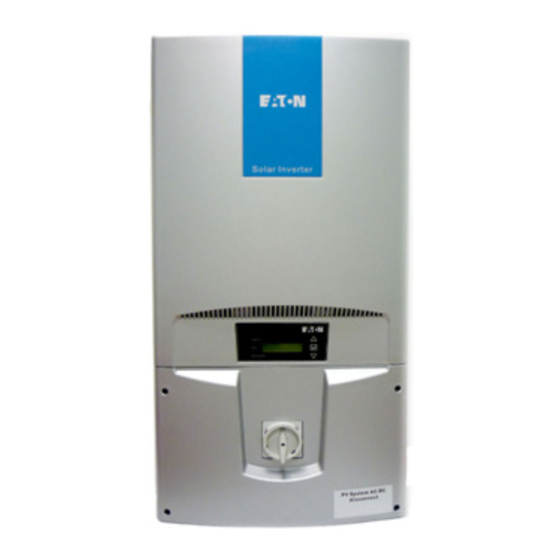
- Page 1 Eaton Grid-Tied PV Inverter User Manual Ver. 1.1...
-
Page 2: Table Of Contents
4.5 LED Indicators ---------------------------------------------------------------------- 11 4.6 Control Keys and LCD Displays ----------------------------------------------- 12 4.7 Night backlight Button ------------------------------------------------------------ 13 5. Installation of Eaton Grid-Tied PV Inverter ---------------------- 14 5.1 Open the packing ------------------------------------------------------------------ 14 5.2 Visual check the PV Inverter ---------------------------------------------------- 14 5.3 Identify the Eaton Grid-Tied PV Inverter ------------------------------------- 15... -
Page 3: Important Safety Notification
Eaton grid-tie PV Inverter which must be followed during installation and maintenance for of the inverters. The Eaton grid-tie PV Inverter is designed and tested in order to meet international safety requirements, but yet as with all electrical and electronic equipment, certain precautions must be observed during the installation and operation of the Eaton grid-tie PV Inverter. -
Page 4: Safety Symbols
Multi-Meter Multi-meter symbol indicates a multi-meter should be used for measuring in order to ensure the proper functionality of measured components. Tools Tools symbol indicates some specific tools are required during the installing procedure. Eaton Corporation Page 4 Ver 1.1... -
Page 5: Introduction
1. Introduction This manual describes all the information needed to install and operate an Eaton PV240, PV250, PV260 and PV270 grid-tie PV Inverter (“PV Inverter”). IMPORTANT In order to avoid problems during the install procedure, it is recommended to read the entire user manual before starting any install procedures. -
Page 6: Limited Warranty
2. Limited Warranty Eaton grid-tie PV Inverter comes with a 10-year warranty. This warranty covers all defects due to design, manufacturing and components. This warranty does not cover damages resulting from: Seal on the product is broken Improper transportation and delivery... -
Page 7: Product Overview
The PV Inverter converts DC to AC and feeds in to the Public Utility via the AC-Connection unit. The following figure shows the general configuration for a PV Inverter a grid PV System: Inverter AC Power DC Power Eaton Corporation Page 7 Ver 1.1... -
Page 8: Introducing Eaton Grid-Connected Pv Inverter
4.2 Introducing Eaton Grid-Connected PV Inverter Eaton grid-tied PV Inverter converts direct current (DC) power generated by a PV panel into alternating current (AC), which is compatible with the local electrical distribution network; also called the public utility, or grid system. The Eaton grid-tied PV Inverter is designed with a transformer less topography. -
Page 9: Dimensions And Weight
4.3 Dimensions and Weight 17.1 in. 33.4 in. 8.4 in. Figure 4.3: Dimension and Weight of PV Inverter Measuring Weights: Model PV238 PV240 PV250 PV260 PV270 Net Weight (lbs) 90.4 101.4 101.4 Eaton Corporation Page 9 Ver 1.1... -
Page 10: Control And Display Overview
4.4 Control and Display Overview Figure 4.4: Overview of Eaton PV Inverter A. LCD Display LCD screen displays all measured values and parameters. B. LED Indicators There are three indicators used to indicate the operating status. C. Control Keys They are three control keys available to switch between each display menu and configure the settings for the LCD. -
Page 11: Led Indicators
4.5 LED Indicators Eaton grid-connected PV Inverter has three built-in LED indicators which will provide information of the operational status: Figure 4.5: LED Indicators Power-On LED Indicator It is a green LED indicator which will light up in green when the feed-in DC voltage from PV array has reached to the minimum operating voltage for PV Inverter. -
Page 12: Control Keys And Lcd Displays
4.6 Control Keys and LCD Displays Eaton grid-connected PV Inverters are equipped with three control keys which could be used to switch between each display menus. Figure 4.6: Control keys and LCD displays A) Upper Arrow Control Key Arrow control key is used to advance the display menu. Once the button has been pressed, the display menu appears pressing again advances the display to the next menu. -
Page 13: Night Backlight Button
4.7 Night backlight Button Figure 4.7: The location of night backlight button Eaton grid-connected PV Inverter will switch-off during the evening as nightfall approaches. During the switch-off period, the LCD no longer displays any information since there is not feed-in DC (input) power. Therefore, users will not be able to check the daily operation data nor information of the current day in night time. -
Page 14: Installation Of Eaton Grid-Tied Pv Inverter
2 x PV238 Name Plate (Only available for PV240 model) IMPORTANT For PV240 model, user will be able to use manual function of dip switch in order to modify power the PV240 into 3800W output. This is why there are 2 additional rating labels included in the accessories box for the PV240 model. -
Page 15: Identify The Eaton Grid-Tied Pv Inverter
5.3 Identify the Eaton Grid-Tied PV Inverter The structure of the Eaton grid-tied PV Inverter can be divided into two parts, main housing and wiring box shown in figure 5.3.1. The main housing contains the electrical components that are used for power conversion and... - Page 16 Fig. 5.3.3: Wiring Box Name Plate IMPORTANT For the PV240 model, the user will be able to use the manual function of a dip switch in order to down power the PV240 model into 3800W output. After adjusting is finished, the name plate should be replaced since the defaulted settings of inverter have been changed.
- Page 17 DC generator, read and follow all notifications from the warning label as a reminder in order to prevent any electrical shock that can happen during the configuration period. Figure 5.3.4: Warning Label Plate Eaton Corporation Page 17 Ver 1.1...
-
Page 18: Mounting Inverter
-20 and 45° C. IMPORTANT It is Important to not install the Eaton grid-tied PV Inverter under direct sunlight. This is because the exposure of direct sunlight my cause an internal heating and also result in a reduction of output power, which is known as derating protection. - Page 19 The PV Inverter shall be installed in a vertical position. In order to avoid heat dissipating issues, it is also ensure there are no any obstacles located or installed near by the PV Inverter. Figure 5.4.3: Installing Position and Location Eaton Corporation Page 19 Ver 1.1...
- Page 20 Fix the bracket by using outer mounting holes A rectangular-shaped mounting bracket that shipped with the Eaton grid-tied PV Inverter is able to be used with all types of walls such as...
- Page 21 6 outer holes on the wall, drive in the 6 mounting anchors, then screw in the 6 M4 screws to each screwing point as illustrated below: Type A handling mode Figure 5.4.5: Corner screwing fixing mode Type B handling mode Figure 5.4.6: Central Point Fixing Mode Eaton Corporation Page 21 Ver 1.1...
- Page 22 Figure 5.4.7: Install PV Inverter into mounting bracket IMPORTANT Check the mounting bracket again before the PV Inverter is hung on the bracket. It is recommended to have least 2 service personnel for this procedure due to the weight of unit. Eaton Corporation Page 22 Ver 1.1...
- Page 23 An ESD glove should be worn during the cable wiring, replacing the fuses and installing the components. iii) Turn off DC/AC switch from the wiring box as illustrated below: Figure 5.4.9: Turn off DC/AC Switch Eaton Corporation Page 23 Ver 1.1...
- Page 24 A M5 hexagon head screwdriver is required for the procedure. Remove the top cover of disconnect box and then find the highlighted location from the below figure and then insert 2 M4 size screws: Figure 5.4.11: Screwing Location for the Safety Screws Eaton Corporation Page 24 Ver 1.1...
-
Page 25: Wiring Box Overview
Super RS485 Interface Card 8 fuse holders for DC Input (Shipped with dummy fuses) DC input terminal Protection MOV for AC Output side AC output terminal AC Utility configuration dip switch RS232 Interface Port Eaton Corporation Page 25 Ver 1.1... -
Page 26: Hardware Functioning
C. DC/AC Disconnect It is the disconnect switch that is used to turn-on and turn-off the power of the PV Inverter. The switch disconnects both the DC and AC voltage to the PV Inverter. Eaton Corporation Page 26 Ver 1.1... - Page 27 D. Fault Signal Terminal The Eaton grid-tied PV Inverter has a built-in fault signal terminal, which can be connected simultaneously with an error indicator besides the LCD screen. A female connector is included within the accessories box. System installers or servicer personnel are able to use this female connector to connect with an LED error indicator.
- Page 28 Figure 6.2.3: Failure Operating Mode Eaton Corporation Page 28 Ver 1.1...
- Page 29 To ensure the rating of the fuses that are used for the each model is correct, it is strongly recommended the installer purchase the AC fuses that have already been tested by Eaton. The recommended list for the AC Fuses:...
- Page 30 C) TRX LED indicator: It indicates when the firmware is uploading from Ez Logger Lite to Super RS485 card. It will be lit-up in red and blink at 2Hz during signal transferring. Eaton Corporation Page 30 Ver 1.1...
- Page 31 Press the pin 1 and pin 2 to set the DIP Switch into “on” mode for card in the terminal inverter (farthest from Data Logger or PC). For all the others, set it to “off”. A 5 inverter example setup is pictured below. Eaton Corporation Page 31 Ver 1.1...
- Page 32 Figure 6.2.6 illustrates the proper connection model that used for the 5 Eaton gird-connected PV Inverters with Ez Logger Lite. For Inverter 1, 2, 3, 4, set DIP Switch “off”; for last inverter (inverter 5), press pin 1 and pin 2 to set DIP Switch “on”.
- Page 33 I) Multiple Connections - Combination Usage The combined connection of RJ-45 PoE port and terminal block can be implemented, but it is not recommended. However, figure 6.2.10 describes an example of a mixed configuration use. Eaton Corporation Page 33 Ver 1.1...
- Page 34 When wiring the Super-485 card from PV Inverter to PV Inverter, please connect the same pin of the Super-485 card (Receive Pin to Receive Pin and Transmit Pin to Transmit Pin) as figure shown in 6.2.12: Eaton Corporation Page 34 Ver 1.1...
- Page 35 For further instructions, a SUPER-RS485 manual is available with a detailed configuration that can be used by qualified service personnel or system installer. Please contact the supplier in order to obtain this user manual as the reference. Eaton Corporation Page 35 Ver 1.1...
- Page 36 Current (DC) side. According the NEC 690.15-18, fuse holders can be used to disconnect the PV modules for serving. The Eaton grid-tied PV Inverter is shipped with dummy fuses (solid aluminum cylinders in the shape of the proper fuses). Since there are four pairs of DC...
- Page 37 (information) that had been indicated within the National Electrical Code(NEC), ANSI/NFPA 70. To ensure trouble-free fuse protection, Eaton recommends using fuses that have been tested by Eaton. The specifications for fuses from Littelfuse and KLKD series can be downloaded from www.littlefuse.com.
- Page 38 J. AC Output Terminal Block It is the terminal block that is used to connect AC cables from the utility system, also known as the public grid. Each model of the Eaton grid-tied PV Inverter requires different sizes of AC cables. The following table...
- Page 39 The dip switch is located at the right-bottom side of wiring box, which just under RS485 interface card and nearby the RS232 interface port as below shown in figure 6.2.15: Figure 6.2.15: Utility Configuration DIP Switch Eaton Corporation Page 39 Ver 1.1...
- Page 40 L. RS232 Interface (for service purpose) The Eaton gird-tied PV Inverter is equipped with a versatile communications interface and can be used with a stand-alone monitoring software called “Pro Control” to monitor the operating status of a single PV inverter or multiple PV Inverters through RS485 or RS232 interface.
-
Page 41: Maximum Ac Short-Circuit Current
6.4.2 and figure 6.4.3. The total quantity of knockouts of PV Inverter is listed in a table as reference for installing. Left-hand side Back side Right-hand side Underside Figure 6.4.1: Knockout Directions of Wiring Box Eaton Corporation Page 41 Ver 1.1... - Page 42 6.4.2. Each knockout has two different levels of opening area that can be used, inner level area and outer level area, as figure 6.4.3 indicates. Eaton Corporation Page 42 Ver 1.1...
- Page 43 Figure 6.4.4: Knocking points of inner level Left-hand side Right-hand side Knocking Point Knocking Point Figure 6.4.5: Knocking points of outer level Tools A M4 size slotted screwdriver and hammer are required for the opening procedure of knockouts. Eaton Corporation Page 43 Ver 1.1...
- Page 44 Be sure to follow all instructions to strike/knock-out the opening hole by the proper procedures. Otherwise, the opening area of knockout can be easily damaged if improper tools are used or any improper procedures are done for the opening, please beware. Eaton Corporation Page 44 Ver 1.1...
-
Page 45: Connecting The Pv Inverter
Figure 7.1.1: Implement a conduit to the wiring box IMPORTANT Conduit is not the part of accessories supplied with the Eaton grid-tied PV Inverter. Therefore, it is important to ensure to use the water tight conduits. - Page 46 PV modules which must not exceed 600V IMPORTANT The Eaton grid-tied PV Inverter is designed with a transformer less topography. It is not recommended to connect with the PV modules that require positive (+) or negative (-) polarity to ground.
- Page 47 The size selection of DC cables should be refer with cable size requirement in the National Electrical Code(NEC), ANSI/NFPA 70 in order to select the proper size of DC cables that can be used with the PV inverter, please beware of this. Eaton Corporation Page 47 Ver 1.1...
- Page 48 In last, turn off the circuit breaker for the PV sting of DC input side and then continue with the procedures in next section in order to complete the configuration cabling for the AC side. Eaton Corporation Page 48 Ver 1.1...
-
Page 49: Ac Wiring Connections
7.2 AC Wiring Connections Configuration of Utility Grid Eaton grid-connected PV Inverter can be installed with the following type of utility grid systems by 2 wire or 3 wire AC cables, and with a ground cables as illustrated in the table below. - Page 50 DIP switch during the installing period. Figure 7.2.1: Utility Configuration Setting DIP Switch IMPORTANT It is important to before starting the AC complete the DIP switch settings wiring connections. Eaton Corporation Page 50 Ver 1.1...
- Page 51 277Vac System 240V:120V split phase PV2XX ON ON ON L1 L2 N 240Vac Split 240V:120V Stinger PV2XX OFF OFF OFF 208Y/120-V L1 L2 N 208Y/120-V PV2XX: Model Name (PV238, PV240, PV250, PV260 and PV270) Eaton Corporation Page 51 Ver 1.1...
- Page 52 Figure 7.2.2.1: Install a conduit on an open hole Ensure the AC utility system that selected is able to use with Eaton grid-connected PV Inverter. After utility system confirmed, to select the correct setting of utility configuration setting DIP switch with the following instructions that mentioned in section 7.2.1 before to start...
- Page 53 The following table is shown the information of cables size and tightening torque that should be used in the position (1) pole / position (2) pole / position (3) pole in the AC terminal when a 208V grid system applied with the PV inverter: Model PV240 PV250 PV260 PV270 Terminal block...
- Page 54 Section D table, above. And then turn on the circuit breaker from the utility panel or switchboard in order used then multi-meter to measure and confirm the AC voltage of PV system is connected in a proper setting. Eaton Corporation Page 54 Ver 1.1...
- Page 55 Last, reinstall the top cover of wiring box by tightens 4 M5 screws as illustrated below: Figure 7.2.2.5: Secure the wiring box Eaton Corporation Page 55 Ver 1.1...
-
Page 56: Lcd Displays Function Tree
Frequency Display the AC frequency and the instant-output Output Power power of the unit. Press Version and Output Power Menu Display the firmware version and the Version instant-output power of the unit. Output Power Eaton Corporation Page 56 Ver 1.1... -
Page 57: Second Level Display Menu
It is a menu that will display output energy for the past 12 months. EXIT Display Menu It is a menu that used to return back to Etoday menu, a level 1 display menu. Eaton Corporation Page 57 Ver 1.1... -
Page 58: Date And Hour Display Menu
IMPORTANT Operational data will be recorded by the date and hour. Therefore, it is important to ensure the time of inverter is adjusted correctly. Eaton Corporation Page 58 Ver 1.1... -
Page 59: Maintenance
9. Maintenance 9.1 External cooling fan replacement For PV240 and PV250 models, there is no cooling fan designed for the external housing, but an internal fan designed within PV inverter for the thermal management. Therefore, “FAN Lock” is the only failures message that user will retrieve from the LCD if the operation of internal cooling fan has failed. - Page 60 Unfastening all screws located in each corner as highlighted in figure 9.1.2. After the screws are removed, lift out the top cover of the cooling fan from PV Inverter as figure below: indicated the Figure 9.1.2: Screws for the external cooling fan Eaton Corporation Page 60 Ver 1.1...
- Page 61 Install a new cooling fan by connecting its power cable to PV Inverter. Then re-tighten the 4 screws at the top cover. Switch on the DC/AC disconnect in order to complete the fan replacement procedure. Eaton Corporation Page 61 Ver 1.1...
-
Page 62: Cleaning The Lcd Display
The selection of the DC fuses must follow the instructions outlined in chapter g. DC protection of section 6.2 within the manual. Remove the fuse cover from the fuse holders as shown in figure 9.3.1: Figure 9.3.1: Remove the fuse cover Eaton Corporation Page 62 Ver 1.1... - Page 63 9.3.4. It is important to ensure the fuse cover is inserted tightly into fuse holder in order to complete the fuse replacement and re-installation procedure. Figure 9.3.4: Install the fuse cover Eaton Corporation Page 63 Ver 1.1...
-
Page 64: Specifications
10. Specifications Model PV238 PV240 PV250 PV260 PV270 Input (DC) Nominal DC 360V Voltage Max. PV 600V Open Voltage Start-up Voltage 150V Shutdown Typical 80V Voltage Working Voltage 100 ~ 515 V Range Full Rating 225 ~ 500V 200 ~ 500 V... - Page 65 Operational - 25 ~ + 50 Temperature Communication RS232 / Super-485 Interface RS485 Protocol Standard Protocol, Eaton Proprietary Protocol Humidity 0 to 95%, Non-Condensing Ground Fault Internal GFCI and Isolation diction function (UL1741) Protection DC Disconnect DC & AC Switch...
- Page 66 Model PV238 PV240 PV250 PV260 PP270 General AC Surge Protection Grid Interface IEEE1547 (2003), IEEE1547.1(2005) Regulation Safety UL1741 (2010), CSA C22.2 No.107.1-01 FCC Part 15 Class B IEC 61000-6-2 IEC 61000-6-3 Mechanical Wall Mounted Dimension 17.1 x 33.4 x 8.4 in...
-
Page 67: Trouble Shooting
Frequency = Grid frequency in xx.xHz xx.xHz Feeding Current Iac=xx.xA Feeding current amount in xx.xA PV Array Voltage Vdc=xxx.xV Input voltage from PV array, xxx.xVDC PV Array Current Idc=xx.xA Input current from PV array, xx.xA Eaton Corporation Page 67 Ver 1.1... - Page 68 The relay between the inverter and grid is not Output Relay Failure Relay failure functional Output DC Injection too DC Inj high Output DC injection too high high EEPROM EEPROM Problem EEPROM inside has data access problem failure Eaton Corporation Page 68 Ver 1.1...
-
Page 69: Trouble Shooting Actions
PV Inverter and Utility system. If detected grid voltage is out of permissible range, contact the system installer to check the feed-in AC voltage and contact the utility operator for further action. Eaton Corporation Page 69 Ver 1.1... -
Page 70: Eaton Corporation Page
Corrective Actions: Check the AC Cables Connections, especially the grounding cables. Ensure all the cables are connected properly. Restart the PV Inverter. If fault remains, disconnect the PV Inverter and contact the system installer. Eaton Corporation Page 70 Ver 1.1... - Page 71 Select a new location for the installation when if it is necessary. D) Relay Fault: Fault Conditions: The relay between inverter and grid is not functional Corrective Actions: Restart the PV Inverter. If fault remains, disconnect the PV Inverter and contact the system installer. Eaton Corporation Page 71 Ver 1.1...
- Page 72 If fault remains, disconnect the PV Inverter and contact the system installer. H) High DC bus Conditions: The DC BUS inside is higher than expected. Corrective Actions: Restart the PV Inverter. If fault remains, disconnect the PV Inverter and contact the system installer. Eaton Corporation Page 72 Ver 1.1...
- Page 73 J) Damp Failure Condition: The resistance stick is working outside the permissible range. Corrective Actions: Restart the PV Inverter. If fault remains, disconnect the PV Inverter and contact the system installer. Eaton Corporation Page 73 Ver 1.1...
Need help?
Do you have a question about the PV240 and is the answer not in the manual?
Questions and answers