Table of Contents
Advertisement
Advertisement
Table of Contents

Related Manuals for LifeSize Room 200


Summary of Contents for LifeSize Room 200
- Page 1 ® LifeSize Room 200 Installation Guide...
- Page 2 LifeSize Communications. Trademark Acknowledgments LifeSize® is the trademark of LifeSize Communications Inc. All other trademarks are the property of their respective owners. Patent Notice For patents covering LifeSize®...
-
Page 3: Preparing For Installation
• direct illumination of the subject matter and camera lens • colored lighting • harsh side lighting or strong light from above Consult your administrator or LifeSize Partner for specific lighting requirements for your environment. LifeSize Room 200 Installation Guide... -
Page 4: Supported Display Types And Resolutions
• 1920 x 1080i60 The primary output of LifeSize Room 200 defaults to 720p60 and will work with any 720p HDMI display. To learn how to change the resolution for 1080 HDMI displays, refer to “Changing Display Resolution” on page 18. -
Page 5: Placement Behind A Firewall
Domain Name Service Server If you intend to use domain addresses for placing calls you must configure a Domain Name Service (DNS) server, or use a Dynamic Host Configuration Protocol (DHCP) server that automatically sets a DNS server. LifeSize Room 200 Installation Guide... -
Page 6: Initial Configuration
* (star) and # (pound) up to 16 characters in length. Note: If you set a user password, you can also use the administrator password to access user preferences. Administrator Password: ________________________________________________ User Password: _______________________________________________________ LifeSize Room 200 Installation Guide... - Page 7 When placing a call using the remote control or using the Video button on the phone you can dial either phone numbers or IP addresses. This enables systems inside a corporate network without access to a gateway to call other LifeSize systems in the network using system IP addresses. LifeSize Room 200 Installation Guide...
- Page 8 If you wish to use a device connected to line in 1 or line in 2 on the codec as the active microphone, you must choose the corresponding line in option manually for Active Microphone. LifeSize Room 200 Installation Guide...
- Page 9 A built-in acoustic echo canceller and noise reducer are active when Microphone In, Camera 1, or Line In is the active microphone. The built-in acoustic echo canceller automatically attempts to adjust audio volume for optimum levels. LifeSize Room 200 Installation Guide...
- Page 10 Typical levels during a call peak around –28 to –22 dB DFS. The AEC and AGC attempt to keep the RMS transmit level below –20 dB DFS. The following images show what appears in an audio meter at various levels. LifeSize Room 200 Installation Guide...
- Page 11 Use the audio meter to visually verify that the transmit level peaks in the desired -28 to -22 dB range. LifeSize recommends a volume setting of 5 to 8 for Active Microphone Volume for most LifeSize MicPod applications. LifeSize Room 200 Installation Guide...
- Page 12 Line Out. If you are using LifeSize Phone for audio, set these preferences to Phone. By default, Video Call Audio Output is set to Line Out; Voice Call Audio Output is set to Phone. LifeSize Room 200 Installation Guide...
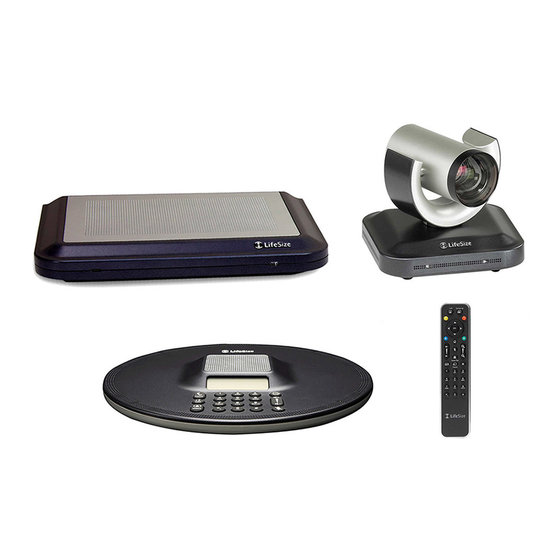
- Page 13 Test Left or Test Right. The tone is sent simultaneously to both line out and the HD video out of display 1. LifeSize Room 200 Components Your LifeSize Room 200 package contains the following components: • One of the following audio components: LifeSize Phone LifeSize MicPod—(see “Optional Peripherals”...
- Page 14 Installing a LifeSize Room 200 System Before you install a LifeSize video communications system, read the document LifeSize Safety and Regulatory Notices for important safety information. The document is available on the documentation CD-ROM and from the Support page of www.lifesize.com.
- Page 15 LifeSize Camera 200 is supported only when connected to HD in on the codec. If you purchased a second LifeSize Camera 200 for use with LifeSize Room 200, insert the HDMI cable for the second camera into the port on the rear side of the camera and...
- Page 16 LifeSize MicPod product box as described in “Attaching the LifeSize MicPod Strain Relief Clip” on page 22. If you are using dual LifeSize MicPods for audio, refer to “Configuring Dual LifeSize MicPods” on page 21 for a description of supported configuration options. LifeSize Room 200 Installation Guide...
-
Page 17: Connecting A Pstn Phone Line
LifeSize codec and the other end to a phone jack on the wall. Locking the LifeSize Codec You can lock the LifeSize codec with a secure loop to prevent physical removal of the device. For assistance, contact your LifeSize Partner or LifeSize Customer Support. LifeSize Room 200 Installation Guide... -
Page 18: Changing Display Resolution
Changing Display Resolution The primary output on LifeSize Room 200 defaults to 720p60 and will work with any 720p HDMI display. To change display resolution, navigate to Administrator Preferences : Appearance : Displays and choose Display 1 Resolution. You can change the resolution to 1920x1080i60 or 1920x1080p30 and it will work with most 1080 HDMI displays. -
Page 19: Configuring A Second Display
To use the Calls + Presentations + DVI-I Input or Simulcast Calls + DVI-I Input options, you must set Display 1 and Display 2 to the same resolution. Otherwise, you will see a warning message and this option with be forced to Presentations + DVI-I Input. LifeSize Room 200 Installation Guide... -
Page 20: Optional Peripherals
Reserved for future use. a. Auxiliary Video In is typically used to connect a DVD or VCR to share standard video content with the far end during a presentation or to view the content locally. LifeSize Room 200 Installation Guide... -
Page 21: Configuring Dual Lifesize Micpods
The No Active Microphone indicator does not appear in the status bar and the Active Microphone field in the System Information page reports Microphone In as the active microphone. LifeSize Room 200 Installation Guide... -
Page 22: Attaching The Lifesize Micpod Strain Relief Clip
Attach the strain relief clip to the codec and route the LifeSize MicPod cable through the strain relief clip as shown in the following diagram. To obtain a replacement strain relief clip, contact your LifeSize Partner. LifeSize Room 200 Installation Guide... -
Page 23: Verifying Your Installation
Improperly connected or loose cables are common causes of problems with hardware units. When investigating a system problem, first inspect all the external controls and cable connections. Ensure that connections are correct and secure, and that nothing is obstructing the cables. LifeSize Room 200 Installation Guide... -
Page 24: Configuring Display Output From Lifesize Phone
4. Disconnect the PSU from the AC source. Connect the PSU to the LifeSize codec. Reconnect the PSU to the AC source. If the LifeSize codec fails to boot and the green LED on the PSU dims, the codec may be the source of the problem. LifeSize Room 200 Installation Guide... -
Page 25: Ip Address Displays Invalid Value
• Ensure that the camera is properly connected to the LifeSize codec as described in “Installing a LifeSize Room 200 System” on page 14. • Verify that the blue LED on the front of the camera is lit and not blinking, indicating that power is active. -
Page 26: Attached Video Input Device Not Working
Indicates that the system does not have an active microphone. Check the device’s connections and then check the option you selected for the Active Microphone preference. Network Identifies the network status, as follows: Status connected (green indicator) in progress (yellow indicator) disconnected (red indicator) LifeSize Room 200 Installation Guide... - Page 27 Warning: Temperatures that require the codec to reboot can permanently damage codec components. Ensure the room that houses the codec is properly ventilated and temperature controlled. LifeSize Room 200 Installation Guide...
Need help?
Do you have a question about the Room 200 and is the answer not in the manual?
Questions and answers