Table of Contents
Advertisement
Quick Links
Advertisement
Table of Contents

Related Manuals for LifeSize Room 220


Summary of Contents for LifeSize Room 220
- Page 1 ® LifeSize Room 220 Installation Guide...
- Page 2 LifeSize Communications. Trademark Acknowledgments LifeSize® is the trademark of LifeSize Communications Inc. All other trademarks are the property of their respective owners. Patent Notice For patents covering LifeSize®...
-
Page 3: Preparing For Installation
The size, shape, layout and occupancy of the room dictate where you place your video conferencing components. For example, in a multi-user conference room, place a LifeSize MicPod or LifeSize Phone at the center of the participants as their detection patterns are omnidirectional. -
Page 4: Supported Display Types And Resolutions
• 1920 x 1080i60 The primary output of LifeSize Room 220 defaults to 720p60 and will work with any 720p HDMI display. To learn how to change the resolution for 1080 HDMI displays, refer to “Changing Display Resolution” on page 18. -
Page 5: Placement Behind A Firewall
Placement Behind a Firewall LifeSize recommends that you place your system behind a firewall and block, at minimum, the following ports: • 22 (SSH) • 23 (Telnet) • 80 (HTTP) • 443 (HTTPS) If you require these ports to remain open, ensure that you change the default administrator and command line interface passwords to be very secure. -
Page 6: Initial Configuration
Initial Configuration During the installation process, your LifeSize system prompts you to configure it for the first time. LifeSize recommends that you gather all the necessary information prior to installation. The following sections provide guidelines for collecting and a means of recording this data. - Page 7 Note: Pulse dialing is not supported. When placing a call using the Voice button on a LifeSize Phone connected to the system and voice dialing is set to touch tone, you can only dial phone numbers using PSTN connectivity. When voice dialing is set to VoIP, you can dial IP addresses as well as phone numbers.
- Page 8 Network Settings By default, DHCP is enabled on LifeSize systems. If you choose Disabled for the DHCP preference, you must enter an IP address (the locally configured IP address if not assigned by a DHCP server), Subnet Mask (used to partition the IP address into a network and host identifier), and Default Gateway (the IP address of the default gateway the system uses).
- Page 9 Audio Preferences: Active Microphone Volume You can adjust the audio level for the active microphone by selecting Active Microphone Volume and pressing OK on the LifeSize remote control. Note: A built-in acoustic echo canceller and noise reducer are active when Microphone In, Camera 1, or Line In is the active microphone.
- Page 10 If you choose LifeSize Phone as the active microphone, the Active Microphone Volume preference is not available. The LifeSize Phone microphones adjust volume automatically. The voice stream bypasses all processing in the LifeSize system, including the volume and tone controls, and is fed directly into the transmitted voice path.
- Page 11 Use the audio meter to visually verify that the transmit level peaks in the desired -28 to -22 dB range. LifeSize recommends a volume setting of 5 to 8 for Active Microphone Volume for most LifeSize MicPod applications. LifeSize Room 220 Installation Guide...
- Page 12 1 or line in 2 is not selected as the active microphone. Audio Preferences: Video and Voice Call Output If you plan to use external speakers other than LifeSize Phone for audio in both video and voice calls, ensure that the Video Call Audio Output and Voice Call Audio Output preferences are set to Line Out.
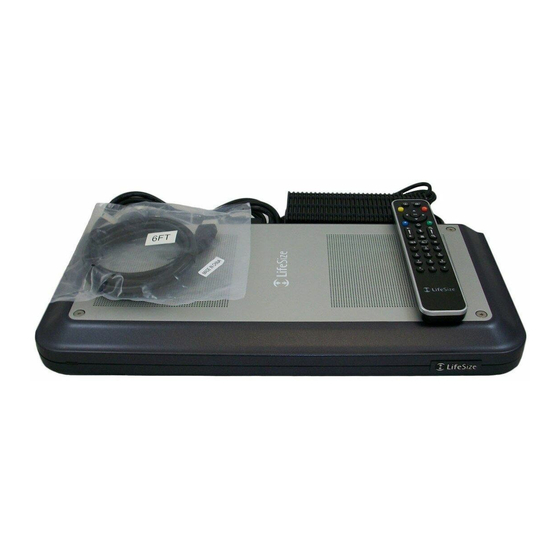
- Page 13 LifeSize Phone LifeSize MicPod—(see “Optional Peripherals” on page 20 for the dual LifeSize MicPod option) • LifeSize Camera 200 with standard 3 meter (9.8 foot) HDMI cable • LifeSize Room 220 Codec • LifeSize Remote Control (including three AAA batteries) •...
- Page 14 Face the back of the codec or ensure that all connectors are visible when connecting a cable to the codec. To install the components of your LifeSize system, remove all components from the product packaging, including cables, and place them in the desired positions in your conference room.
- Page 15 3. To connect a LifeSize Camera 200 to the codec, insert the HDMI cable into the HD port on the rear side of the camera and plug the opposite end into the port marked with the HD in 1 symbol on the back of the codec.
- Page 16 Configure your system using the LifeSize video communications system interface. b. If you are using a single LifeSize MicPod for audio, insert the end of the cable from the LifeSize MicPod into the microphone port marked with the microphone symbol on the back of the codec.
-
Page 17: Connecting A Pstn Phone Line
The LifeSize system starts and illuminates a blue LED on the front of the codec. See “Status Icons” on page 26 for more information about the state of the system as it boots or as conditions change. -
Page 18: Changing Display Resolution
Changing Display Resolution The primary output onLifeSize Room 220 defaults to 720p60 and will work with any 720p HDMI display. To change display resolution, navigate to Administrator Preferences : Appearance : Displays and choose Display 1 Resolution. You can change the resolution to 1920x1080i60 or 1920x1080p30 and it will work with most 1080 HDMI displays. -
Page 19: Configuring A Second Display
To use the Calls + Presentations + DVI-I Input or Simulcast Calls + DVI-I Input options, you must set Display 1 and Display 2 to the same resolution. Otherwise, you will see a warning message and this option with be forced to Presentations + DVI-I Input. LifeSize Room 220 Installation Guide... -
Page 20: Optional Peripherals
For use with devices and laptops for presentations or to share PC data. Accepts both digital video and VGA analog signals with the proper adapter cable. For devices and PCs with VGA output, LifeSize includes a DVI-A to VGA cable. An HDMI source can be used with an adapter. For more information about supported resolutions and audio support, refer to the LifeSize Video Communications Systems Administrator Guide. -
Page 21: Configuring Dual Lifesize Micpods
LifeSize MicPods directly to the female ends of the splitter. If the LifeSize MicPods are installed in an area where the cord could be pulled or tripped upon, refer to “Attaching the LifeSize MicPod Strain Relief Clip” on page 22. -
Page 22: Attaching The Lifesize Micpod Strain Relief Clip
Attaching the LifeSize MicPod Strain Relief Clip If the LifeSize MicPod is installed in an area where the cord could be pulled or tripped upon, LifeSize recommends using the strain relief clip included with your LifeSize MicPod to reduce the chance of disconnecting or damaging the plug or the LifeSize video communications system codec. -
Page 23: Verifying Your Installation
Verifying Your Installation The LifeSize Video Systems Administrator Guide explains how to place a test call to verify your installation. It also explains additional adjustments you may need to make to your LifeSize configuration and your network if you use: •... -
Page 24: Configuring Display Output From Lifesize Phone
4. Disconnect the PSU from the AC source. Connect the PSU to the LifeSize codec. Reconnect the PSU to the AC source. If the LifeSize codec fails to boot and the green LED on the PSU dims, the codec may be the source of the problem. -
Page 25: Ip Address Displays Invalid Value
Video from the camera appears in a small window on the main screen of the user interface above the Redial list. If no video from the camera appears, do the following: • Ensure that the camera is properly connected to the LifeSize codec as described in “Installing a LifeSize Room 220 System” on page 14. •... -
Page 26: Attached Video Input Device Not Working
Attached Video Input Device Not Working When you connect a video input device that has capabilities not supported by a LifeSize system, the status Out of range appears on the System Information page for that input. The device may be in a mode that the codec does not support. Changing the mode may help. - Page 27 Warning: Temperatures that require the codec to reboot can permanently damage codec components. Ensure the room that houses the codec is properly ventilated and temperature controlled. LifeSize Room 220 Installation Guide...
Need help?
Do you have a question about the Room 220 and is the answer not in the manual?
Questions and answers