Table of Contents
Advertisement
Quick Links
Advertisement
Table of Contents

Summary of Contents for LifeSize Icon Flex
- Page 1 Lifesize Icon Flex Guide ® ™ January 2016 Lifesize Icon Flex...
-
Page 2: System Components
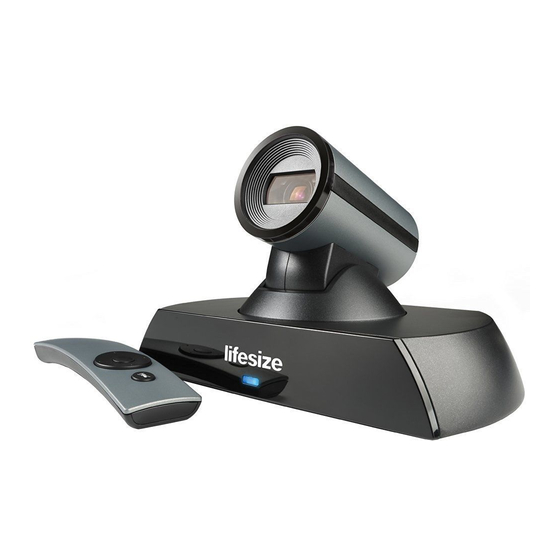
Lifesize Icon Flex Guide Welcome to Lifesize Icon Flex Lifesize Icon Flex plugs directly into your computer’s USB port to provide high-definition video and audio conferencing through Lifesize Cloud or any supported third-party video software. No additional software or device configuration is required. -
Page 3: Led Indicators
This can mitigate damage caused by tripping or inadvertently straining the cable connectors. NOTE Lifesize cables are not plenum rated. Do not route them through a plenum. LED Indicators Lifesize Icon Flex has three status LEDs: LED Location... - Page 4 Lifesize Icon Flex Guide Optional Lifesize Phone has four status LEDs with a touch display: LED Location Color Status Red (solid) Power on in progress Red (blinking) Call muted Power on complete, ready to use Blue (blinking) Incoming or outgoing call in progress...
-
Page 5: Remote Control
Lifesize Icon Flex Guide Remote Control Use the remote control to adjust your camera position and audio output during and before a call. The following functions are available: • volume • zoom • camera control (pan, tilt and center) •... -
Page 6: Before You Start
Lifesize Icon Flex Guide Before You Start Before beginning, read the Lifesize Safety and Regulatory Notices for important safety information. WARNING Do not place objects that can generate heat or obstruct airflow in front of, on top of, or behind a video device. This can cause the system to overheat and restart. - Page 7 Start your video application. • In your video application preferences, select Lifesize Icon Flex as the video source. You can also set the Lifesize Phone (if connected) as your audio device; this places the phone in Do Not Disturb mode.
- Page 8 Thread the Lifesize Link cable through the cable retention support clip and slide the connecting end securely into the bracket. With the cable retention support bracket attached, insert the Lifesize Link cable into the port on the back of Lifesize Icon Flex. Tighten the connecting screw securely to the device, but do not over tighten.
- Page 9 Lifesize Icon Flex Guide Insert the other end of the cable into the Lifesize Digital MicPod. Lifesize Digital MicPod is not supported with the Lifesize Phone. NOTE on the back of Lifesize Icon Flex. Attach the Insert the power cord into the power outlet marked other end into the power adapter and plug the adapter into a power outlet.
- Page 10 Thread the Lifesize Link cable through the cable retention support clip and slide the connecting end securely into the bracket. With the cable retention support bracket attached, insert the Lifesize Link cable into the port on the back of Lifesize Icon Flex. Tighten the connecting screw securely to the device, but do not over tighten.
- Page 11 Lifesize Icon Flex Guide Insert the other end of the Lifesize Link cable into a matching port on the Lifesize Phone. Connect your Ethernet (RJ-45) cable to your Lifesize Icon Flex.
- Page 12 Insert the power cord into the power outlet marked other end into the power adapter and plug the adapter into a power outlet. Both Lifesize Icon Flex and Lifesize Phone will automatically power on when plugged in to the power source.
-
Page 13: Accessing Your Corporate Directory
Address. Accessing the Administrator Interface using a Static IP Address If your Lifesize Icon Flex is not connected to a network, access the administrator interface using a default static IP address. Connect your computer to the Lifesize Icon Flex RJ-45 port using an Ethernet cable. -
Page 14: Automatic Software Upgrades
Locate the upgrade file you downloaded to your computer in step 2. Hold down your mouse button and drag the file to the Lifesize Icon Flex drive in your computer’s external drive list, then release it. If your computer prompts you to copy the file to this location, choose Yes. -
Page 15: Troubleshooting
Always handle cables and connecting hardware carefully. They can be easily damaged if inserted into the wrong port. IP Address Shows an Invalid Value If the IP address on your Lifesize Phone display is invalid or does not appear, one of the following conditions might exist: Condition... - Page 16 Using the tip of a pen or a thin stylus, press and hold the reset button for approximately one second. Wait until a Lifesize Icon Flex entry appears in your computer’s external drive list. This could take up to a minute.
- Page 17 ©2016 Lifesize, Inc. All rights reserved. Lifesize has made every effort to ensure that the information contained in this document is accurate and reliable, but assumes no responsibility for errors or omissions. Information in this document is subject to change without notice.


Need help?
Do you have a question about the Icon Flex and is the answer not in the manual?
Questions and answers