Sign In
Upload
Download
Table of Contents
Contents
Add to my manuals
Delete from my manuals
Share
URL of this page:
HTML Link:
Bookmark this page
Add
Manual will be automatically added to "My Manuals"
Print this page
×
Bookmark added
×
Added to my manuals
Manuals
Brands
Ricoh Manuals
All in One Printer
B039
Service manual
Ricoh B039 Service Manual
Gestetner, lanier, ricoh, savin mfp
Hide thumbs
1
2
3
4
5
6
7
8
9
10
Table Of Contents
11
12
13
14
15
16
17
18
19
20
21
22
23
24
25
26
27
28
29
30
31
32
33
34
35
36
37
38
39
40
41
42
43
44
45
46
47
48
49
50
51
52
53
54
55
56
57
58
59
60
61
62
63
64
65
66
67
68
69
70
71
72
73
74
75
76
77
78
79
80
81
82
83
84
85
86
87
88
89
90
91
92
93
94
95
96
97
98
99
100
101
102
103
104
105
106
107
108
109
110
111
112
113
114
115
116
117
118
119
120
121
122
123
124
125
126
127
128
129
130
131
132
133
134
135
136
137
138
139
140
141
142
143
144
145
146
147
148
149
150
151
152
153
154
155
156
157
158
159
160
161
162
163
164
165
166
167
168
169
170
171
172
173
174
175
176
177
178
179
180
181
182
183
184
185
186
187
188
189
190
191
192
193
194
195
196
197
198
199
200
201
202
203
204
205
206
207
208
209
210
211
212
213
214
215
216
217
218
219
220
221
222
223
224
225
226
227
228
229
230
231
232
233
234
235
236
237
238
239
240
241
242
243
244
245
246
247
248
249
250
251
252
253
254
255
256
257
258
259
260
261
262
263
264
265
266
267
268
269
270
271
272
273
274
275
276
277
278
279
280
281
282
283
284
285
286
287
288
289
290
291
292
293
294
295
296
297
298
299
300
301
302
303
304
305
306
307
308
309
310
311
312
313
314
315
316
317
318
319
320
321
322
323
324
325
326
327
328
329
330
331
332
333
334
335
336
337
338
339
340
341
342
343
344
345
346
347
348
349
350
351
352
353
354
355
356
357
358
359
360
361
362
363
364
365
366
367
368
369
370
371
372
373
374
375
376
377
378
379
380
381
382
383
384
385
386
387
388
389
390
391
392
393
394
395
396
397
398
399
400
401
402
403
404
405
406
407
408
409
410
411
412
413
414
415
416
417
418
419
420
421
422
423
424
425
426
427
428
429
430
431
432
433
434
435
436
437
438
439
440
441
442
443
444
445
446
447
448
449
450
451
452
453
454
455
456
457
458
459
460
461
462
463
464
465
466
467
468
469
470
471
472
473
474
475
476
477
478
479
480
481
482
483
484
485
486
487
488
489
490
491
492
493
494
495
496
497
498
499
500
501
502
503
504
505
506
507
508
509
510
511
512
513
page
of
513
Go
/
513
Contents
Table of Contents
Troubleshooting
Bookmarks
Table of Contents
Service Manual
Table of Contents
Important Safety Notices
B120 (Rla Only)
Installation
Installation Requirements
Environment
Machine Level
Minimum Space Requirements
Power Requirements
Copier Installation
Power Sockets for Peripherals
Accessory Check
Installation Procedure
Platen Cover Installation
Accessory Check
Ardf Installation
Accessory Check
Installation Procedure
Adf Installation
Accessory Check
Installation Procedure
Two-Tray Paper Tray Unit Installation
Accessory Check
One-Tray Paper Tray Unit Installation
Imb Installation
Accessory Check
Installation Procedure
Dram Installation
Anti-Condensation Heater Installation
Tray Heaters
Upper Tray Heater
Lower Tray Heater (Two-Tray Model Only)
Tray Heaters for the Optional Paper Feed Units
Key Counter Installation
Preventive Maintenance
Pm Tables
Preventive Maintenance Schedules
How to Clear the Pm Counter
Replacement and Adjustment
General Cautions
Pcu (Photoconductor Unit)
Transfer Roller
Scanner Unit
Laser Unit
Fusing Unit
Paper Feed
Important
Special Tools and Lubricants
Exterior Covers & Operation Panel
Rear Cover
Rear Lower Cover (Two-Tray Models Only)
Copy Tray
Left Upper Cover
Front Upper Left Cover and Operation Panel
Right Upper Cover
Top Rear Cover
Left Cover
Front Long Cover
Front Right Cover
Right Rear Cover
Right Door
By-Pass Tray
Left Lower Cover (Two-Tray Models Only)
Right Lower Cover (Two-Tray Models Only)
Platen Cover Sensor
Scanner Section
Exposure Glass/Df Exposure Glass
Exposure Glass
DF Exposure Glass
Lens Block
Exposure Lamp, Lamp Stabilizer Board
Original Width Sensor
Original Length Sensor
Sensor Positions
Changing the Original Sensor Positions (8K/16K)
Procedure
Scanner Motor
Scanner H
Adjustment of 2Nd Scanner Position
Adjustment of 1St and 2Nd Scanner Alignment
Laser Unit
Location of "Caution" Decal
Toner Shield Glass
Laser Unit
Ld Unit
Polygonal Mirror Motor
Laser Unit Alignment Adjustment
Pcu Section
Pcu
Pick-Off Pawls
Toner Density Sensor
Opc Drum
Charge Roller and Cleaning Brush
Cleaning Blade
Developer
After Replacement or Adjustment
Toner Supply Motor
Paper Feed Section
Paper Feed Roller
Friction Pad
Paper End Sensor
Exit Sensor
Non-Duplex Models
Duplex Models
By-Pass Feed Roller and By-Pass Paper End Sensor
Registration Roller
By-Pass Paper Size Sensor
Registration Clutch
Registration Sensor
Upper Paper Feed Clutch and By-Pass Feed Clutch
Relay Clutch
Relay Sensor
Lower Paper Feed Clutch
Vertical Transport Sensor
Paper Size Switch
Image Transfer
Image Transfer Roller
Image Density Sensor
Fusing
Fusing Unit
Thermistor
Fusing Lamp
Hot Roller
Thermofuse and Thermostat
Hot Roller Stripper Pawls
Pressure Roller and Bushings
Nip Band Width Adjustment
Duplex Unit (Duplex Models Only)
Duplex Exit Sensor
Duplex Entrance Sensor
Duplex Inverter Sensor
Duplex Transport Motor
Duplex Inverter Motor
Duplex Control Board
Other Replacements
Quenching Lamp
High-Voltage Power Supply Board
Imb (Memory Board)
Bicu (Base-Engine Image Control Unit)
Iob (I/O Board)
Main Motor
Rear Exhaust Fan
Left Exhaust Fan
Psu (Power Supply Unit)
Gearbox
Replacement Procedure
Gear Arrangement Within the Gearbox
Copy Adjustments: Printing/Scanning
Printing
Registration - Leading Edge/Side-To-Side
Blank Margin
Main Scan Magnification
Scanning
Registration: Platen Mode
Magnification
Standard White Density Adjustment
Adf Image Adjustment
Registration and Blank Margin
Sub-Scan Magnification
Troubleshooting
Service Call Conditions
Sc Code Descriptions
Electrical Component Defects
Sensors
Switches
Blown Fuse Conditions
Led Display
Bicu
Iob
Firmware Modification History
Service Tables
Using Service Program Modes
Accessing SP Modes
Accessing Copy Mode from Within an SP Mode
How to Select a Program Number
To Input a Value or Setting for an SP Mode
Sp Mode Tables
SP1-XXX (Feed)
SP2-XXX (Drum)
SP4-XXX (Scanner)
SP5-XXX (Mode)
SP6-XXX (Peripherals)
SP7-XXX (Data Log)
Test Pattern Printing (Sp5-902)
Input Check (Sp5-803)
Output Check (Sp5-804)
Output Check Table
Copy Jam History (Sp7-903)
Smc Printing (Sp5-992)
Original Jam History Display (Sp7-905)
Memory All Clear (Sp5-801)
Using a Flash Memory Card
Without Using a Flash Memory Card
Program Upload/Download
Program Download (SP5-827)
Program Upload (SP5-826)
Nvram Data Upload/Download
NVRAM Data Download (SP5-825)
NVRAM Data Upload (SP5-824)
Aps and Platen/Adf Cover Sensor Output Display (Sp4-301)
Adf Aps Sensor Output Display (Sp6-901)
Serial Number Input (Sp5-811)
ID Sensor Error Analysis (Sp2-221)
User Tools
How to Enter and Exit User Tools
User Tools Table
System Setting Table
Copy Features Table
Detailed Section Descriptions
Overview
Component Layout
Paper Path
Drive Layout
Board Structure
Block Diagram
Copy Process Overview
Development
Scanner Drive
Original Size Detection in Platen Mode
Image Processing
Sbu (Sensor Board Unit)
Auto Image Density (Ads)
Ipu (Image Processing Unit)
Image Processing Path
Imb (Memory Controller and Dram)
Video Control Unit (Vcu)
Overview
Laser Exposure
Auto Power Control (Apc)
Ld Safety Switch
Photoconductor Unit (Pcu)
Drive
Drum Charge
Charge Roller Voltage Correction
ID Sensor Pattern Production Timing
Drum Charge Roller Cleaning
Developer Mixing
Development Bias
Toner Supply
Toner Bottle Replenishment Mechanism
Toner Supply Mechanism
Toner Density Control
Overview
Toner Density Sensor Initial Setting
Toner Concentration Measurement
Vsp/Vsg Detection
Toner Supply Reference Voltage (Vref) Determination
Toner Supply Determination
Toner Supply Motor on Time Determinations
Toner Supply in Abnormal Sensor Conditions
ID Sensor
TD Sensor
Toner Near End/End Detection and Recovery
Toner Near End Detection
Toner Near End Recovery
Toner End Detection
Toner End Recovery
Drum Cleaning and Toner Recycling
Drum Cleaning
Toner Recycling
Paper Feed
Overview
Paper Feed Drive Mechanism
Paper Feed and Separation Mechanism
Paper Lift Mechanism
Paper End Detection
Paper Size Detection
Paper Tray
By-Pass Tray
Side Fences
Paper Registration
Image Transfer and Paper Separation
Overview
Image Transfer Current Timing
Transfer Roller Cleaning
Paper Separation Mechanism
Image Fusing and Paper Exit
Overview
Fusing Drive and Release Mechanism
Fusing Entrance Guide Shift
Pressure Roller
Fusing Temperature Control
Overview
Fusing Lamp Control
Pre-Heat Mode (Fusing Idling)
To Prevent Offset When Making Multiple Copies on Small-Width Paper
Reduced Copy Speed with Narrow Paper
Overheat Protection
Duplex Unit
Overall
Drive Mechanism
Basic Operation
Larger than A4 Short-Edge/Lt Short-Edge
Up to A4 Short-Edge/Lt Short-Edge
Feed in and Exit Mechanism
Energy Saver Modes
Overview
Low Power Mode
Entering Low Power Mode
What Happens in Low Power Mode
Returning to Stand-By Mode
Night/Off Mode
Entering Night/Off Mode
What Happens in Night/Off Mode
Returning to Stand-By Mode
Advertisement
Quick Links
1
Service Manual
Download this manual
®
®
®
B039/B040/B043/B120
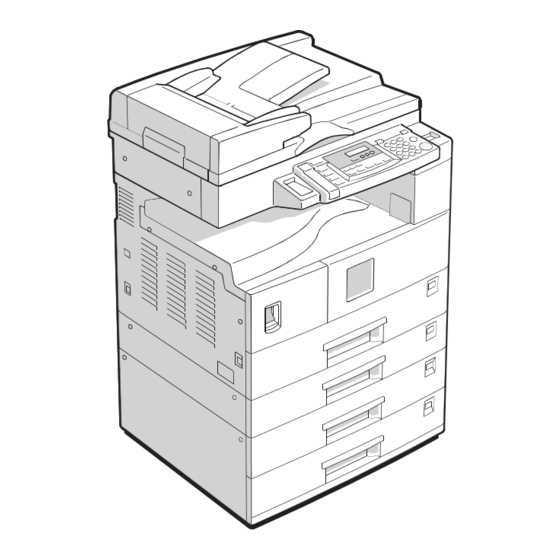
SERVICE MANUAL
001129MIU
RICOH GROUP COMPANIES
Table of
Contents
Previous
Page
Next
Page
1
2
3
4
5
Advertisement
Table of Contents
Need help?
Do you have a question about the B039 and is the answer not in the manual?
Ask a question
Questions and answers
Related Manuals for Ricoh B039
All in One Printer Ricoh Aficio 1015 Copy Reference Manual
Ricoh aficio 1015: user guide (100 pages)
All in One Printer Ricoh Aficio 1113 Operating Instructions Manual
(80 pages)
Fax Machine Ricoh 1018 Operating Instructions Manual
Fax option type 1018 (74 pages)
Printer Accessories Ricoh 1018 Operating Instructions Manual
Printer controller (60 pages)
All in One Printer Ricoh Aficio 1015 Operating Instructions Manual
System settings (32 pages)
All in One Printer Ricoh B064 Service Manual
Ricoh mfp service manual (1060 pages)
All in One Printer Ricoh B064 Service Manual
(25 pages)
All in One Printer Ricoh B064 Service Manual
(927 pages)
All in One Printer Ricoh B064 SERIES Service Manual
(1465 pages)
All in One Printer Ricoh B022 Parts Catalog
Ricoh mfp parts catalog (121 pages)
All in One Printer Ricoh Russian-C2a Service Manual
(313 pages)
All in One Printer Ricoh B089 Service Manual
(849 pages)
All in One Printer Ricoh B079 Service Manual
(868 pages)
All in One Printer Ricoh B051 Service Manual
Ricoh mfp service manual (1211 pages)
All in One Printer Ricoh Aficio 1013 Service Manual
(384 pages)
All in One Printer Ricoh B010 Service Manual
Ricoh group companies gestetner, savin (342 pages)
This manual is also suitable for:
B120
B040
B043
Aficio 1015
Aficio 1018
Aficio 1018d
...
Show all
Aficio 1113
1502
1802
1802d
1312
5515
5518
5518d
Ld013
2515
2518
2518d
Table of Contents
Print
Rename the bookmark
Delete bookmark?
Delete from my manuals?
Login
Sign In
OR
Sign in with Facebook
Sign in with Google
Upload manual
Upload from disk
Upload from URL


Need help?
Do you have a question about the B039 and is the answer not in the manual?
Questions and answers