Table of Contents
Advertisement
Quick Links
®
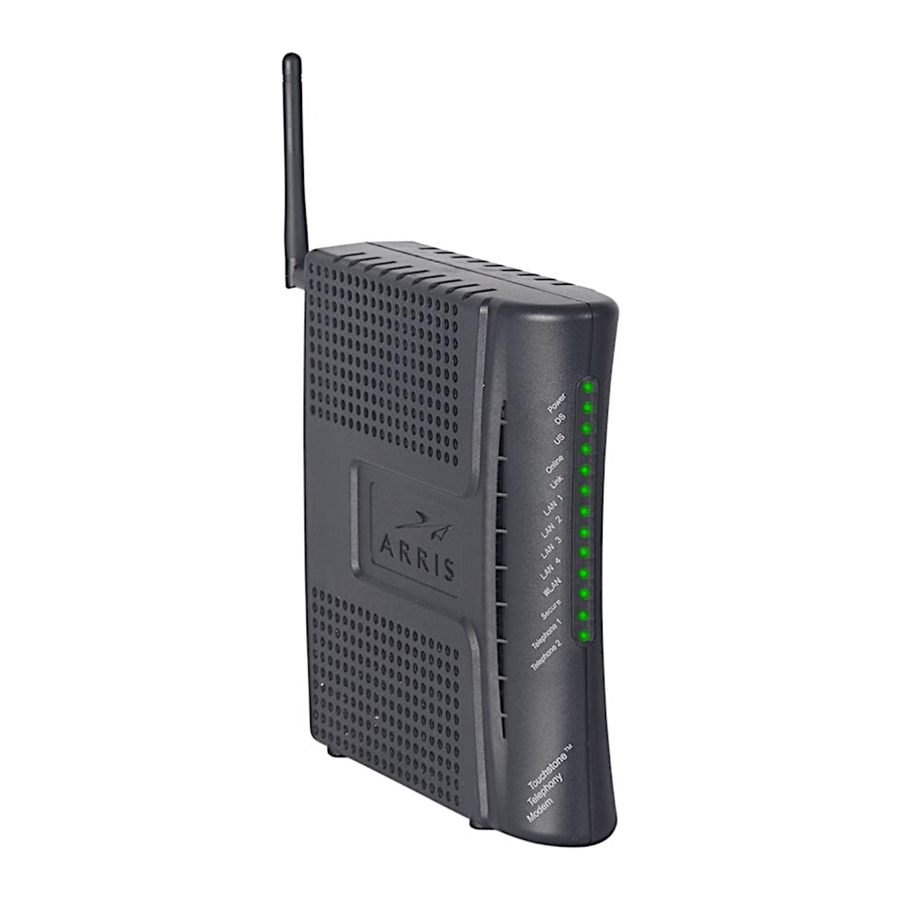
Touchstone
WTM652
Telephony Modem
User's Guide
Get ready to experience the Internet's express lane! Whether you're checking out
streaming media, downloading new software, checking your email, or talking with
friends on the phone, the Touchstone WTM652 Telephony Modem brings it all to
you faster and more reliably. All while providing toll quality Voice over IP telephone
service and both wired and wireless connectivity. Some models even provide a Lithi-
um-Ion battery backup to provide continued telephone service during power out-
ages.
The Touchstone Telephony Modem provides four Ethernet connections for use as
the hub of your home/office Local Area Network (LAN). The Touchstone Telephony
Modem also provides 802.11b/g wireless connectivity for enhanced mobility and
versatility. In addition, the Touchstone Telephony Modem provides for up to two
separate lines of telephone service.
Installation is simple and your cable company will provide assistance to you for any
special requirements. The links below provide more detailed instructions.
Safety Requirements
Getting Started
Battery Installation and Removal (WTM652G only)
Installing and Connecting Your Telephony Modem
Configuring Your Wireless Connection
Configuring Your Ethernet Connection
Using the Telephony Modem
Troubleshooting
Glossary
Advertisement
Table of Contents

Subscribe to Our Youtube Channel
Related Manuals for Arris Touchstone WTM652


Summary of Contents for Arris Touchstone WTM652
- Page 1 Get ready to experience the Internet’s express lane! Whether you’re checking out streaming media, downloading new software, checking your email, or talking with friends on the phone, the Touchstone WTM652 Telephony Modem brings it all to you faster and more reliably. All while providing toll quality Voice over IP telephone service and both wired and wireless connectivity.
-
Page 2: Export Regulations
Users must take full responsi- bility for their applications of any products specified in this document. The information in this document is proprietary to ARRIS. -
Page 3: Safety Requirements
Usage Troubleshooting Glossary Safety Requirements ARRIS Telephony Modems comply with the applicable requirements for perform- ance, construction, labeling, and information when used as outlined below CAUTION Risk of shock Mains voltages inside this unit. No user serviceable parts inside. Refer service to qualified personnel only! - Page 4 AC ground network. All plug-in cards within the computer must be properly installed and grounded to the computer frame per the manufac- turer’s specifications. Touchstone WTM652 Telephony Modem User’s Guide...
-
Page 5: Fcc Part
Consult the dealer or an experienced radio/TV technician for help. Changes or modifications to this equipment not expressly approved by the party re- sponsible for compliance could void the user’s authority to operate the equipment. Touchstone WTM652 Telephony Modem User’s Guide... -
Page 6: European Compliance
CE marking in accordance with the above applicable Direc- tive(s). A copy of the Declaration of Conformity may be obtained from: ARRIS Interna- tional, Inc., 3871 Lakefield Drive, Suite 300, Suwanee, GA 30024. As indicated by this symbol, disposal of this product or battery... -
Page 7: Getting Started
Usage Troubleshooting Glossary Getting Started About Your New Telephony Modem The Touchstone WTM652 Telephony Modem is DOCSIS or Euro-DOCSIS compliant with the following features: • Speed: much faster than dialup or ISDN service • Convenience: supports Ethernet and 802.11b/g wireless connections; both can be used simultaneously •... -
Page 8: What's On The Cd
You may need a splitter if you have a TV already con- nected to the cable outlet that you want to use. You can buy a splitter from Phone Cable any electronics retailer and most discount stores; you may also need a short Touchstone WTM652 Telephony Modem User’s Guide... -
Page 9: Getting Service
Do I need a user ID or password to access the Internet or my e-mail? • Will my phone number(s) change? • What new calling features will I have and how do I use them? Touchstone WTM652 Telephony Modem User’s Guide... -
Page 10: System Requirements
To determine FOR HOME OR OFFICE USE which model you have purchased, refer to the image at the left. The model num- ber is on the label affixed to the Telephony Modem. Model Number Touchstone WTM652 Telephony Modem User’s Guide... -
Page 11: Ethernet Or Wireless
To connect five or more computers to the Ethernet ports, you will need an Ethernet hub (available at computer retailers). For more information about connecting two or more computers, contact your cable service provider. Touchstone WTM652 Telephony Modem User’s Guide... -
Page 12: What About Security
• If you use the wireless LAN, make sure you enable wireless security on the Telephony Modem (for the same reasons that you should run only secured proxies). See “Wireless Configuration” for help. Touchstone WTM652 Telephony Modem User’s Guide... - Page 13 Maximum backup battery — provides up to 24 hours of backup time, de- pending on model and usage. It replaces the battery door, and increases the height of the Telephony Modem by about 5/8 inch (16 mm). Touchstone WTM652 Telephony Modem User’s Guide...
- Page 14 Pull back the battery door latch and remove the battery door. Set the door aside. Align the guides on the battery with the slots on the Telephony Modem as shown below, and slide the battery into the bay. Battery Slot Battery Guide Touchstone WTM652 Telephony Modem User’s Guide...
- Page 15 Replace the battery door: insert the hinge tabs in the receiver slots, and close the door until the latch snaps into place. Receiver Hinge tabs Slots Touchstone WTM652 Telephony Modem User’s Guide...
- Page 16 The battery should slide into the bay without significant force. Line up the slots in the battery bay with the guides on the battery and apply even pressure on both ends of the battery. WRONG WRONG RIGHT Touchstone WTM652 Telephony Modem User’s Guide...
- Page 17 Started Installation Installation Configuration Configuration Usage Troubleshooting Glossary Replace the battery door: insert the hinge tabs in the receiver slots, and close the door until the latch snaps into place. Receiver Slots Hinge Tabs Touchstone WTM652 Telephony Modem User’s Guide...
- Page 18 Push straight down on the Tele- phony Modem until the battery latch clicks into place. Note: You may need to push down gently on the front of the Telephony Modem to latch the battery into place. Touchstone WTM652 Telephony Modem User’s Guide...
- Page 19 2a Basic Backup battery removal: Insert a finger behind the battery tab where shown below, and place your thumb over the other end of the battery. Pull out gently until the battery disconnects and slides out of the bay. Touchstone WTM652 Telephony Modem User’s Guide...
- Page 20 Wireless Ethernet Battery Safety Started Installation Installation Configuration Configuration Usage Troubleshooting Glossary 2b Extended Backup battery removal: Pull the strap until the battery discon- nects and slides out of the bay. Battery Pull Strap Touchstone WTM652 Telephony Modem User’s Guide...
- Page 21 Installation Configuration Configuration Usage Troubleshooting Glossary Maximum Backup Battery Removal Grasp the battery and pull back on the latch at the front of the battery. Latch Gently rock the battery out of the bay. Touchstone WTM652 Telephony Modem User’s Guide...
-
Page 22: Installing And Connecting Your Telephony Modem
CAUTION Risk of equipment damage Only qualified installation technicians should connect the Telephony Modem to house wiring. Incumbent telephone service must be physi- cally disconnected at the outside interface box before making any connections. Touchstone WTM652 Telephony Modem User’s Guide... -
Page 23: Front Panel
TM Reset button: resets the Telephony Modem as if you power cycled the unit. Use a pointed non-metallic object to press this button. G Cable: connector for the coaxial cable. H Power: connector for the power cord. Touchstone WTM652 Telephony Modem User’s Guide... -
Page 24: Selecting An Installation Location
Blocking the vents may cause overheating. • How close are your wireless devices? The Telephony Modem wireless connec- tion range is typically 100–200 feet (30m–65m). A number of factors can af- fect connection range, as described below. Touchstone WTM652 Telephony Modem User’s Guide... - Page 25 By limiting your network’s range, you reduce interference with other networks and make it harder for unwant- ed users to find and connect to your network. Touchstone WTM652 Telephony Modem User’s Guide...
-
Page 26: Mounting The Telephony Modem
Slip both mounting slots (in the back of the Telephony Modem) over the screws, then slide the case down until the narrow end of the keyhole slot contacts the screw shaft. Proceed to Connecting the Telephony Modem. Touchstone WTM652 Telephony Modem User’s Guide... -
Page 27: Connecting The Telephony Modem
The Power light on the front of the Telephony Modem lights up, then flashes once (refer to the LED table on page 44). See Troubleshooting if the Power light does not turn on. Touchstone WTM652 Telephony Modem User’s Guide... - Page 28 Note: If you are connecting to a computer, use the Ethernet cable included in the Telephony Modem package. Connect one end of the telephone cable to the telephone port on the back of the Telephony Modem (A or B). Connect the other end to the telephone. Touchstone WTM652 Telephony Modem User’s Guide...
-
Page 29: Configuring Your Wireless Connection
Internet with a wireless connection. If your computer is equipped with a 802.11b/g wireless LAN card, you may wish to configure the WTM652 wireless settings. At a minimum, ARRIS suggests that you configure se- curity settings. -
Page 30: Accessing The Configuration Interface
Use the connection utility for your operating system to connect to the wire- less LAN arris54g (this is the Telephony Modem’s factory default SSID). In your web browser, open the page http://192.168.2.1/ to display the Status screen: Touchstone WTM652 Telephony Modem User’s Guide... - Page 31 first time, leave the Password field blank. Click the Submit button to return to the Status screen. Note: The Access bar should now show Logout in place of Login. Proceed to Configuring System Settings. Touchstone WTM652 Telephony Modem User’s Guide...
-
Page 32: Configuring System Settings
• Enter New Password: Enter a password that you will remember but is not easy to guess. • Confirm new Password: Enter the same password again. Touchstone WTM652 Telephony Modem User’s Guide... -
Page 33: Setting Up Your Wan Connection
Dynamic connection type. If your cable company requires a different connection type, you should have an information sheet that shows the proper connection type to select and other information need- ed to set up the connection. Touchstone WTM652 Telephony Modem User’s Guide... - Page 34 If you need to clone your computer’s MAC address, click the Change WAN MAC Address link and proceed to Setting the MAC Address. c. Click the Save button. d. Proceed to Configuring the LAN Channel and Name. Touchstone WTM652 Telephony Modem User’s Guide...
- Page 35 If you need to enter DNS settings, click the link and proceed to Setting Up DNS. c. Click the Save button. d. Proceed to Configuring the LAN Channel and Name. Touchstone WTM652 Telephony Modem User’s Guide...
- Page 36 If you need to change the MTU size or fill in the Service Name, enter the in- formation as specified by your cable company. c. Click the Save button. d. Proceed to Configuring the LAN Channel and Name. Touchstone WTM652 Telephony Modem User’s Guide...
- Page 37 ISP.” c. If you need to enter DNS settings, click the link and proceed to Setting Up DNS. d. Click the Save button. e. Proceed to Configuring the LAN Channel and Name. Touchstone WTM652 Telephony Modem User’s Guide...
-
Page 38: Setting The Mac Address
(and press Return). The wireless interface is eth1 (un- less there is no Ethernet adapter, in which case the in- To configure DNS settings, proceed to Setting Up DNS. Otherwise, proceed terface is eth0). Configuring the LAN Channel and Name. Touchstone WTM652 Telephony Modem User’s Guide... -
Page 39: Setting Up Dns
IP addresses in the DNS Address and Secondary DNS Ad- dress fields. If you have not received DNS server information, check Automatic from ISP. Click the Save button to return to the Status screen. Proceed to Configuring the LAN Channel and Name. Touchstone WTM652 Telephony Modem User’s Guide... - Page 40 SSID by listening to wireless traffic. • Protected Mode: Set to On only if needed to overcome interference. Click the Save button. Proceed to Configuring Wireless Security. Touchstone WTM652 Telephony Modem User’s Guide...
-
Page 41: Configuring Wireless Security
Generate button to the right of the text box to create the hex key. Note: Do not make changes to the other items unless required by your oth- er wireless equipment. Click the Save button. Touchstone WTM652 Telephony Modem User’s Guide... -
Page 42: Configuring Wi-Fi Protected Setup (Wps)
If your client device has a WPS PIN number: Check the WPS Enable box in the WTM652 screen, and enter the client’s PIN in the Enrollee PIN field on the WTM652 screen. Touchstone WTM652 Telephony Modem User’s Guide... - Page 43 Internet. If you want to further customize your configuration, proceed as follows: • Configuring the Firewall • Configuring DDNS • Configuring Wireless Bridging If you have any problems, proceed to Troubleshooting. Touchstone WTM652 Telephony Modem User’s Guide...
-
Page 44: Configuring The Firewall
Fill in a row as follows: • Description: the service name. • Inbound port: the beginning and ending ports of the range required to support this service. These are the ports that outside clients use to access your server. Touchstone WTM652 Telephony Modem User’s Guide... - Page 45 • Type: choose one of TCP, UDP, or BOTH. • Block Time: choose Always to set up a permanent block, or Block to specify days and times to block access. Touchstone WTM652 Telephony Modem User’s Guide...
- Page 46 Click the Add button to add a blank row to the filter list. Enter the MAC address of the computer you want to add to the filter. Do not enter colons or dashes in between the hex digits. For information about find- Touchstone WTM652 Telephony Modem User’s Guide...
-
Page 47: Configuring Ddns
After setting up a DDNS account, follow these steps to configure the Telephony Modem to contact the DDNS provider. Click the Firewall link in the navigation menu, then click DDNS. The DDNS window appears. Touchstone WTM652 Telephony Modem User’s Guide... - Page 48 If MAC address filtering is enabled, the router and each Access Point must have the MAC addresses of the other devices in their access lists. Follow these steps to set up wireless bridging. The steps assume you have already configured the devices as described above. Touchstone WTM652 Telephony Modem User’s Guide...
- Page 49 Make sure you enter the wireless (WLAN) MAC address; the Ethernet and WAN connections have different MAC addresses. Click the Save button to save your changes. Touchstone WTM652 Telephony Modem User’s Guide...
-
Page 50: Configuring Rip
DHCP server to assign addresses) Action Follow these steps to configure RIP. Click the Lan Setup link in the navigation menu, then click RIP Settings. The RIPv2 Settings window appears: Touchstone WTM652 Telephony Modem User’s Guide... - Page 51 If NAT is enabled, choose Disable in the NAT Enable/Disable field at the bottom of the screen. Select Enable from the RIP Enable/Disable menu. If your routers need to authenticate to each other, choose the authentica- tion type and enter an authentication key. Click Save. Touchstone WTM652 Telephony Modem User’s Guide...
-
Page 52: Configuring Your Ethernet Connection
TCP/IP Configuration for Windows 2000 • TCP/IP Configuration for Windows ME • TCP/IP Configuration for Windows XP • TCP/IP Configuration for Windows Vista • TCP/IP Configuration for Windows 7 • TCP/IP Configuration for MacOS X Touchstone WTM652 Telephony Modem User’s Guide... -
Page 53: Tcp/Ip Configuration For Windows 98Se
From the computer, select Start > Settings > Control Panel. Double click on the Network icon in the Control Panel. Click the Configuration tab in the Network window to display the list of Network Adapters. Touchstone WTM652 Telephony Modem User’s Guide... - Page 54 Click OK to accept the new settings, and OK again to close the Configura- tion window. You may have to restart your computer in order for your computer to obtain a new IP address from the network. Touchstone WTM652 Telephony Modem User’s Guide...
-
Page 55: Tcp/Ip Configuration For Windows 2000
Properties. Note: If your computer has more than one Ethernet card, you may have to select the appropriate Ethernet card in the Connect using: area of the Local Area Connection Properties window. Touchstone WTM652 Telephony Modem User’s Guide... - Page 56 Click OK to accept the new settings, and OK again to close the Configura- tion window. You may have to restart your computer in order for your computer to obtain a new IP address from the network. Touchstone WTM652 Telephony Modem User’s Guide...
-
Page 57: Tcp/Ip Configuration For Windows Me
From the computer, select Start > Settings > Control Panel. Double click on the Network icon in the Control Panel. Click the Configuration tab in the Network window to display the list of Network Adapters. Touchstone WTM652 Telephony Modem User’s Guide... - Page 58 Click OK to accept the new settings, and OK again to close the Configura- tion window. You may have to restart your computer in order for your computer to obtain a new IP address from the network. Touchstone WTM652 Telephony Modem User’s Guide...
-
Page 59: Tcp/Ip Configuration For Windows Xp
From the computer, select Start > Settings > Control Panel and double click on the Network Connections icon in the Control Panel. Click the Configuration tab in the Network window to display the list of Network Adapters. Touchstone WTM652 Telephony Modem User’s Guide... - Page 60 Click OK to accept the new settings, and OK again to close the Configura- tion window. You may have to restart your computer in order for your computer to obtain a new IP address from the network. Touchstone WTM652 Telephony Modem User’s Guide...
-
Page 61: Tcp/Ip Configuration For Windows Vista
Configuration Configuration Usage Troubleshooting Glossary TCP/IP Configuration for Windows Vista Follow these steps to configure the Ethernet interface for use with Touchstone prod- ucts. Open the Vista Control Panel. Double-click Network and Sharing Center. Touchstone WTM652 Telephony Modem User’s Guide... - Page 62 Glossary Click Manage network connections. If prompted for a connection, choose Local Area Connection. Double-click the Local Area Connection to open the Status window: If Windows requests permission to continue, click Continue. Click Properties. Touchstone WTM652 Telephony Modem User’s Guide...
- Page 63 Troubleshooting Glossary Double-click Internet Protocol Version 4 (TCP/IPv4). Select Obtain an IP address automatically and Obtain DNS server address automatically, unless instructed otherwise by your cable provider. Click OK to close the Properties windows. Touchstone WTM652 Telephony Modem User’s Guide...
-
Page 64: Tcp/Ip Configuration For Windows 7
Configuration Configuration Usage Troubleshooting Glossary TCP/IP Configuration for Windows 7 Follow these steps to configure the Ethernet interface for use with Touchstone prod- ucts. Open the Windows 7 Control Panel. Click Network and Internet. Touchstone WTM652 Telephony Modem User’s Guide... - Page 65 Getting Wireless Ethernet Battery Safety Started Installation Installation Configuration Configuration Usage Troubleshooting Glossary Click Network and Sharing Center. Click Local Area Connection to open the Status window. Touchstone WTM652 Telephony Modem User’s Guide...
- Page 66 Select Obtain an IP address automatically and Obtain DNS server address automatically, unless instructed otherwise by your cable provider. Click OK to close the Properties windows and then click Close to back out of the remaining setup screens. Touchstone WTM652 Telephony Modem User’s Guide...
- Page 67 Follow these steps to configure the Ethernet interface for use with Touchstone prod- ucts. Open System Preferences, either by choosing System Preferences from the Apple menu or by clicking the System Preferences icon in the dock. Click the Network icon. Touchstone WTM652 Telephony Modem User’s Guide...
- Page 68 Choose Automatic from the Location drop-down menu, and Built-in Eth- ernet from the Show menu. Choose the TCP/IP tab, if necessary. Choose Using DHCP from the Configure IPv4 menu. If necessary, click the Renew DHCP Lease button. Close the System Properties application. Touchstone WTM652 Telephony Modem User’s Guide...
-
Page 69: Using The Telephony Modem
(touching), or there may be undesired voltage on the lines. If this pattern persists for more than 10 seconds, disconnect the telephone lines from the Tele- phony Modem, then call a wiring technician for assistance. Touchstone WTM652 Telephony Modem User’s Guide... - Page 70 AC Power Flash = Not Flash = Not Off = connected connected connected Internet not to the to the available Flash Internet Internet Computer Activity No AC Power Firmware (normal Flash Flash Upgrade operation) Touchstone WTM652 Telephony Modem User’s Guide...
- Page 71 Off = Computer not Off = Computer not AC Power Flash = Off-hook connected connected Off = disabled Flash = Computer Flash = Computer Activity Activity No AC Power Firmware Upgrade (normal operation) (normal operation) (normal operation) Touchstone WTM652 Telephony Modem User’s Guide...
- Page 72 = Off-hook not connected not connected Off = disabled Flash = Com- Flash puter Activity Computer Activity On = On-hook No AC Power Flash = Off-hook Off = disabled Firmware Upgrade (normal operation) (normal operation) Touchstone WTM652 Telephony Modem User’s Guide...
- Page 73 Computer Battery Internet Internet activity Off = Battery No AC power Power Flash Battery Flash Installed Battery No AC Power Battery Firmware (normal (normal Flash Flash Upgrade operation) operation) Touchstone WTM652 Telephony Modem User’s Guide...
- Page 74 See “Cable Modem Start Up Sequence” Below Retrieving telephone net- Flash work information Retrieving telephone line Flash information Activating telephone Flash Flash service Normal Operation * = Battery LED only applies to those models with battery backup Touchstone WTM652 Telephony Modem User’s Guide...
- Page 75 The TM Reset button is recessed to prevent accidental resets. Use a pointed non- metallic object to press this button. TM Reset The diagram to the left shows the location of the Reset buttons. Touchstone WTM652 Telephony Modem User’s Guide...
-
Page 76: Troubleshooting
MAC address of that computer. Click the Refresh button to update the listing. Note: The DHCP client list does not show devices that have manually assigned IP addresses. Touchstone WTM652 Telephony Modem User’s Guide... - Page 77 Click the Refresh button to update the listing. Click the Save button to download the current log to your computer (the file is named log_web.txt). Click the button to clear both the system and firewall logs. Note: You may have to scroll down to access the buttons. Touchstone WTM652 Telephony Modem User’s Guide...
-
Page 78: Backing Up And Restoring The Configuration
Click the Choose File button. Your browser prompts you to find the saved configuration file. After locating the saved configuration file, click the Restore button. The Telephony Modem restarts the router with the restored configuration. Touchstone WTM652 Telephony Modem User’s Guide... - Page 79 The router resets itself after erasing the current configuration. Note: If you want to restore the current configuration after restoring factory defaults, see Backing Up and Restoring the Configuration first. Touchstone WTM652 Telephony Modem User’s Guide...
-
Page 80: General Problems And Solutions
Telephony Modem and CATV outlet, remove the splitters and connect the Telephony Modem directly to the out- let. Proceed to the Ethernet or wireless solutions (next page) if necessary. Touchstone WTM652 Telephony Modem User’s Guide... - Page 81 If other sites download quickly, wait for a few minutes and try again. Usage during peak hours may also affect the connec- tion speed. Other communications on the LAN, or interference with wireless connec- tions, may slow down your connection. Touchstone WTM652 Telephony Modem User’s Guide...
- Page 82 If a known good phone is used and you still don’t have dial tone, try a different phone cable. If a new phone and cable do not re- store dial tone, call your service provider. Touchstone WTM652 Telephony Modem User’s Guide...
- Page 83 Contact your cable company or a qualified wiring technician to correct the house wiring. If you still do not have dial tone, contact your service provider. Touchstone WTM652 Telephony Modem User’s Guide...
- Page 84 DHCP allows the cable company to configure your computer’s networking software for you. Domain Name Service (Server). An IP service that associates a domain name (such as www.example.com) with an IP address. Touchstone WTM652 Telephony Modem User’s Guide...
- Page 85 A hardware or software device that prevents unauthorized access to a pri- vate network from the Internet. The WTM652 provides a built-in firewall. Gateway The device, usually a router, that connects devices on a given IP subnet to other IP subnets. Touchstone WTM652 Telephony Modem User’s Guide...
- Page 86 Internet. The MAC address is printed on a label on the bottom of your Telephony Modem. Protocol A set of rules and formats that determines the communication behavior of network entities at a given layer. Touchstone WTM652 Telephony Modem User’s Guide...
- Page 87 Avoid plugging your computer or Telephony Modem into a switched outlet to avoid disruptions. TCP/IP Transmission Control Protocol/Internet Protocol. The protocols used to facil- itate communications across one or more connected networks. Touchstone WTM652 Telephony Modem User’s Guide...
- Page 88 Wired Equivalent Privacy, a common standard for encrypting data sent over a wireless LAN. Wi-fi Protected Access, a standard for encrypting data sent over a wireless LAN. WPA offers improved security over WEP. Touchstone WTM652 Telephony Modem User’s Guide...
- Page 89 Cable Modem Start Up Sequence Using the Reset Buttons Troubleshooting Viewing Connection Information ARRIS, Touchstone, and the ARRIS logo are trademarks or Viewing the DHCP Client List Viewing the Security Log registered trademarks of ARRIS Group. All other trade- Backing Up and Restoring the Configuration...
Need help?
Do you have a question about the Touchstone WTM652 and is the answer not in the manual?
Questions and answers