Electrolux E23CS75DSS0 Service Manual
2008 electrolux side-by-side refrigerator service manual
Hide thumbs
Also See for E23CS75DSS0:
- Specification (1 page) ,
- Use & care manual (40 pages) ,
- Installation instructions (3 pages)

Related Manuals for Electrolux E23CS75DSS0


Summary of Contents for Electrolux E23CS75DSS0
- Page 1 Appliance 911 Appliance 911 Forum 2008 Electrolux Side-By-Side Refrigerator Service Manual (with Perfect Temperature Drawer ... see Addendum A) 5995485595 (Rev. A) August 2008...
-
Page 2: Safe Servicing Practices - All Appliances
Electrolux Home Products cannot be responsible, nor assume any liability, for injury or damage of any kind arising from the use of this manual. -
Page 3: Table Of Contents
Table of Contents Table of contents Care & cleaning tips ..............24 Vacation & moving tips ............24 Replacing light bulbs ............25 Safe Servicing Practices - All Appliances......2 Before you call ..............26 Section A - Installation Running your refrigerator ...........26 Important safety instructions ..........6 Temperatures are too cold ..........27 Electrical information ..............6 Temperatures are too warm ..........27... - Page 4 Temp Mode/Temp Display .............41 Notes ..................55 Alarms and Signals ...............41 Control Removal and Installation ..........56 Temperature Alarm .............41 Food Compartment Light Switch ..........59 Alarm condition ..............41 Freezer Compartment Light Switch ........59 Reset button ...............41 Lighting Control ..............59 Door Ajar LED (Flashing Green) .........42 Temperature Resistance Chart ..........60 Show Room Setting ..............43 Section D - Air Circulation ........
- Page 5 Spills or Leaks ..............82 To remove solenoid assembly ..........102 Skin or Eye Contact ...............82 To test solenoid assembly ..........103 Combustility of HFC-134a .............83 To remove lamp socket and light bulb ......103 Leak Testing ...............83 Ice Auger and Crusher Assembly ........103 Bulk Delivery and Storage ..........83 To remove crusher blades ..........104 Filling and Charging Operations..........83...
-
Page 6: Section A - Installation
Section A - Installation Important safety instructions Electrical information WARNING WARNING You must follow these guidelines to ensure Please read all safety instructions before that your refrigerator’s safety mechanisms are using your new refrigerator. operating correctly. General Safety • The refrigerator must be plugged into •... -
Page 7: Location
Section A - Installation Door opening This Use & Care Guide provides general operating instructions for your model. Use the refrigerator only as instructed in this Use & Care Guide. Before NOTE starting the refrigerator, follow these important The refrigerator doors are designed to shut by first steps. -
Page 8: To Level The Doors Using The Lower Hinge
Section A - Installation To level the doors using the lower hinge: 1 If the refrigerator door is lower than the freezer door, raise the refrigerator door by turning the adjustment screw clockwise. (See illustration.) 2 If the freezer door is lower than the refrigerator door, raise the freezer door by turning the adjustment screw clockwise. -
Page 9: Removing The Doors
Section A - Installation Removing the Doors If your refrigerator will not fit through an entrance area, you can reduce its size by removing the doors. Check first by measuring the entrance. Required Tools You will need the following tools: Tools Necessary: Socket Adjustable... - Page 10 Section A - Installation 2 Trace lightly around the hinge with a pencil. This makes reinstallation easier. 3 Detach the water tube from the connector located below the freezer door. The connector releases when you press its outer sleeve inward. Non-Adjusting Hinge (some models) 3 Remove the two bottom hinge screws and hinge if necessary.
-
Page 11: Door Handle Mounting Instructions
Section A - Installation Door Handle Mounting Instructions 1 Remove handles from carton and any other protective packaging. 2 Position freezer handle end caps over upper and lower pre-installed shoulder bolts (A) that are fastened into door, ensuring the holes for the set screws are facing towards the refrigerator door. (See Figure 1.) 3 While holding handle firmly against door, fasten upper and lower Allen set screws (B) with supplied Allen wrench. -
Page 12: Connecting The Water Supply
Connecting The Water Supply About your refrigerator’s water supply 3 Unscrew the plastic cap from the water valve inlet at the rear of your refrigerator. Discard The automatic ice & water dispenser on your the cap. refrigerator requires a permanent water supply to function correctly. -
Page 13: Section B - Refrigerator Cabinet
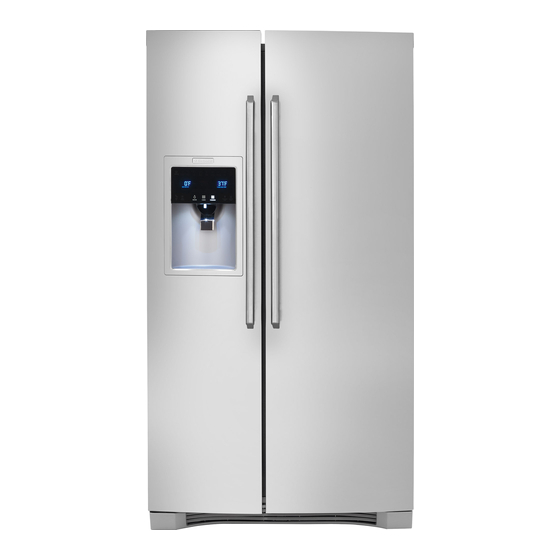
Section B - Refrigerator Cabinet Understanding features and terms Your Electrolux refrigerator is designed for optimal convenience and storage flexibility. Use the illustration below to familiarize yourself with product features and terminology. NOTE Features may vary according to model. -
Page 14: To Change The Position Of A Shelf
Section B - Refrigerator Cabinet CAUTION NOTE To avoid injury from breakage, handle The Cantilever Sliding Glass Shelf has spacers tempered glass shelves carefully. (side screws) on the sides of the brackets to securely hold the shelf in place. To relocate the shelf to a different location, the NOTE spacers must be turned in (clockwise). -
Page 15: Crisper Humidity Control
Section B - Refrigerator Cabinet Doors Crisper humidity control Crisper drawers include a sliding control for Storage bins adjusting the humidity inside the crisper. This The doors to your freezer and fresh food feature can extend the life of certain fresh compartments use a system of modular storage vegetables that keep longer in high humidity. -
Page 16: Accessories
Section B - Refrigerator Cabinet Accessories Dairy compartment Tall bottle retainer The tall bottle retainer Use the dairy compartment, at the top of the fresh keeps tall containers food compartment door, for short term storage of in the bin from cheese, spreads, or butter. -
Page 17: Priming The Water Supply
Section B - Refrigerator Cabinet Priming the water supply Using the ice maker after installation system IMPORTANT Your refrigerator’s water supply system includes The ice maker is turned on at the factory so it can several tubing lines, an advanced water filter, work as soon as you install your refrigerator. -
Page 18: Ice Maker/Dispenser Tips
Section B - Refrigerator Cabinet Ice maker/dispenser tips 4 Allow the ice bin to dry completely before replacing in the freezer. • Ice cubes stored too long may develop an odd flavor. Empty the ice container as 5 Remove ice chips and clean the ice bin shelf explained below. -
Page 19: Locating The Filters
Section B - Refrigerator Cabinet Locating the filters NOTE Your refrigerator is equipped with separate water The electronic touch panel, located at the freezer and air filtering systems. The water filter system door, includes controls to monitor the status of filters all dispensed drinking water, as well as your air filter. -
Page 20: More About Your Advanced Water Filter
Section B - Refrigerator Cabinet More about your advanced water filter 7 Press a drinking glass against the water dispenser while checking for any leaks at the The PureAdvantage ice and water filter housing. Any spurts and sputters that filter system is tested and certified occur as the system purges air out of the by NSF International, the nationally dispenser system are normal. -
Page 21: Ideas For Storing Foods
Section B - Refrigerator Cabinet Ideas for storing foods door shelves. These foods are best stored in the freezer interior where the temperature Fresh food storage varies less. • Keep the fresh food compartment Ideas for saving energy between 34° F and 40° F with an optimum temperature of 37°... -
Page 22: Normal Operating Sounds & Sights
Section B - Refrigerator Cabinet Understanding the sounds you may hear Your new, high-efficiency refrigerator may introduce NOTE unfamiliar sounds. These sounds normally indicate your refrigerator is operating correctly. Some Energy efficient foam in your refrigerator is not a surfaces on floors, walls, and kitchen cabinets may sound insulator. -
Page 23: Protecting Your Investment
Section B - Refrigerator Cabinet Protecting your investment Keeping your refrigerator clean maintains appearance and prevents odor build-up. Wipe up any spills immediately and clean the freezer and fresh food compartments at least twice a year. When cleaning, take the following precautions: •... -
Page 24: Care & Cleaning Tips
Section B - Refrigerator Cabinet Care & cleaning tips Part Cleaning Agents Tips and Precautions Interior & Door • Soap and water • Use 2 tablespoons of baking soda in 1 quart of warm water. Liners • Baking soda and •... -
Page 25: Replacing Light Bulbs
Section B - Refrigerator Cabinet Replacing light bulbs Both the freezer and fresh food compartments of your refrigerator include light bulbs that will need replacing from time to time. Some lights have covers that you will need to remove before replacing the bulbs. -
Page 26: Before You Call
Digital temperature • Electronic control system • Call your Electrolux service representative, displays are flashing. has detected a performance who can interpret any messages or number problem. codes flashing on the digital displays. -
Page 27: Temperatures Are Too Cold
Section B - Refrigerator Cabinet Temperatures Are Too Cold Problem Cause Correction Freezer temperature • Freezer control is set • Set freezer control to a warmer setting. Allow 24 too cold. Refrigerator too cold. hours for temperature to stabilize. temperature is satisfactory. -
Page 28: Water/Moisture/Frost Inside Refrigerator
Section B - Refrigerator Cabinet Water/Moisture/Frost Inside Refrigerator Problem Cause Correction • • Moisture collects on inside Weather is hot and The rate of frost buildup and internal sweating of refrigerator walls. humid. increases. • • Door is slightly See Problem section, Opening/Closing of Doors/ open. -
Page 29: Automatic Ice Maker
Section B - Refrigerator Cabinet Automatic Ice Maker Problem Cause Correction Ice maker is not • Ice maker power switch is Off. • Turn on power switch. making any ice. • Water supply is not connected • Connect water supply (see Installation to refrigerator. -
Page 30: Ice Dispenser
Section B - Refrigerator Cabinet Ice Dispenser Problem Cause Correction Dispenser will • Water supply is not connected. • Connect water supply (see Connecting The not dispense ice. Water Supply section). • • Ice storage container is empty. Ensure ice maker is turned on. When the first supply of ice is dropped into the container, the dispenser should operate. -
Page 31: Odors In Refrigerator
Section B - Refrigerator Cabinet Odors In Refrigerator Problem Cause Correction Interior is dirty. • Interior needs to be cleaned. • See Care & Cleaning Tips. • Food with strong odors is stored • Cover food tightly. Turn on air filtration in refrigerator. -
Page 32: Section C - Electrical Components
Section C - Electrical Components Electrical Grounding All refrigerators are equipped with a power supply cord incorporating a three-prong grounding plug and a ground wire which is attached to the refrigerator cabinet for protection against shock hazard. Each electrical component is either cabinet mounted or connected through a ground wire to the cabinet to complete the ground. -
Page 33: Run Capacitor
Section C - Electrical Components To Check/Replace The Overload Discharge capacitor by shorting across terminals with 500K (1 watt) resistor for one Protector minute. Disconnect electrical supply to refrigerator. Use ohmmeter set on the “Ohms times Remove bale wire holding relay to 1000”... -
Page 34: Compressor Run Circuit
Section C - Electrical Components Compressor Run Circuit • With a shorted relay or capacitor, the compressor will start, and the overload When the self-heating solid state relay has reached protector will open. sufficient temperature, it will abruptly change from •... -
Page 35: The Power Input Electronic Control (Inverter)
Section C - Electrical Components The Power Input Electronic 115 Volts directly from the service cord. It receives a 2 to 5 volt DC signal from the main control board Control (Inverter) located under the refrigerator in the left front opening behind the bottom grill. -
Page 36: Compressor
Section C - Electrical Components COMPRESSOR If the voltage checks good remove the inverter from the compressor by removing The compressor has a 3 phase, 4 pole Brushless one screw at the bottom of the inverter DC motor. that goes through the bracket welded L ubric ation to the compressor. -
Page 37: Perimeter And Mullion Hot Tube
Section C - Electrical Components Perimeter and Mullion Hot NOTE Tube When replacing the fan blade, press the blade onto the motor shaft until the blade bottoms out To reduce the possibility of condensation forming on the shaft. on the exterior of the cabinet in high humidity areas, units are equipped with a one piece perimeter and mullion hot tube which is part of the refrigeration system. -
Page 38: Defrost Thermostat
Section C - Electrical Components Defrost Thermostat NOTE The defrost thermostat is a temperature sensing The Defrost Thermostat Replacement Kit comes device. Wired in series with the defrost timer and with a new thermostat, 2 solderless connectors the evaporator defrost heater, it senses the rise in and two pieces of heat shrink to allow for splicing evaporator temperature during a defrost cycle and the new thermostat to the connector plug. - Page 39 Section C - Electrical Components Remove ice container and rail assembly. The 12. Remove screw holding drain trough to multiconnector at back of rail assembly must cabinet . be disconnected before rail assembly will 13. Lift up and pull evaporator and drain trough come free.
-
Page 40: Section C - Electronic Control System
Section C - Electronic Control System Example 1 IQ-TOUCH (VERSION B) Example 2 Wave-Touch (VERSION A) Description Standard Compressor Motorized pump (115VAC) that creates the high Damper Assembly and low pressures required for heat exchange. The Motorized door (+12VDC) located between the Standard Compressor is controlled by a relay. -
Page 41: Alarm
Section C - Electronic Control System Alarm NOTE Audible Transducer (Piezo) The term “Power On Reset” (POR) will appear many times in the alarm and service test sections. Control, Main Board Power On Reset simply means you unplug the Power Supply product at the household electrical outlet, wait 2 minutes and plug the product back into the outlet. -
Page 42: Door Ajar Led (Flashing Green)
Section C - Electronic Control System Door Ajar LED (Flashing Green) Top Right Corner Top Right Corner Either door is open for five minutes. LED blinks and Reset the control beeps. Condition is reset if the door is closed or the Reset button is pressed. Centered between displays Top Right Corner... -
Page 43: Show Room Setting
Section C - Electronic Control System Show Room Setting Advance Into Defrost Cycle Manually. Activation Activation Press and hold Freezer Temperature UP Press and hold Fresh Food Temperature UP (WARMER) key while pressing the Freezer (WARMER) Key while pressing the fresh food temperature DOWN (COLDER) key 5 times within temperature DOWN (COLDER) key 3 times within 6 seconds. -
Page 44: Wave-Touch
Section C - Electronic Control System Wave-Touch Level: User Variable Options (some models) Your refrigerator is equipped with a Wave-Touch Panel user interface display. It is only necessary to touch the glass. There is no need to press with force. There are three levels of display. Level: Sleep Mode Touching the options icon displays the following options:... -
Page 45: Alarms
Section C - Electronic Control System Wave-Touch /IQ-Touch (-) indicators will appear on either side of the displayed temperatures. “Sabbath Mode” (some models) 3 Press the + or – indicator to adjust the temperature to the desired setting. The Sabbath Mode is a feature that disables The temperature display will begin to blink portions of the refrigerator and its controls for both with the first touch. -
Page 46: Iq-Touch
Section C - Electronic Control System IQ-Touch (some models) IMPORTANT Pressing the system off icon does not turn off power to your refrigerator. You must unplug the power cord from the wall outlet. Setting cooling temperatures 1 Touch the glass panel to illuminate the display to the Plus (+) and minus (-) indicators which appear on either side of the displayed temperatures. - Page 47 Section C - Electronic Control System Wave-Touch IQ-Touch...
-
Page 48: Performance Data
Section C - Electronic Control System PERFORMANCE DATA NO LOAD & NO DOOR OPENINGS AT MID-POINT CONTROL SETTING 65°F (18°C) Ambient 90°F (32°C) Ambient Type A with Run/Start Capacitor Variable Speed Standard Variable Speed Standard Operating Time 74 to 84% 32 to 40% 100% 55 to 65%... -
Page 49: Dispenser Control
Section C - Electronic Control System REFRIGERATOR J7-1 OUT 1A CONTROL OUT 2A J7-2 DAMPER FF DOOR SW. SENSE J2-2 MOTOR OUT 1 B J7-3 REFRIGERATOR LIGHTS OUT 2 B J7-4 J1-1 J6-5 NTC - FF J6-6 FZR DOOR SW. SENSE LINE J2-1 FREEZER LIGHTS... - Page 50 Section C - Electronic Control System P.T.C. STARTER WITH RUN CAPACITOR LT. BLU (N) WHITE START (L) PUR VARIABLE SPEED CONTROL BOX GRN/YEL BLK/WHT 5V+ BLK COMP. OVERLOAD 5V- RED STARTER MOTOR RED/BLK *CAPACITOR IS ONLY USED WITH VARIABLE SPEED COMPRESSOR SOME P.T.C.
- Page 51 Section C - Electronic Control System...
-
Page 52: Service Diagnostics Mode
Section C - Electronic Control System Service Diagnostics Mode With a series of key presses, a service technician will be able to view data, via the display and exercise loads to help troubleshoot the product. Following is a list of capabilities. View Firmware Version (What version of software) express... -
Page 53: Test 2 - Defrost Heater Test
Section C - Electronic Control System Test 2 - Defrost Heater Test. Test 15 - Evaporator Fan Push the ON/OFF pad and the heater will come Push theON/OFF pad and the fan will run at low on. Push the ON/OFF pad again and the heater speed. -
Page 54: Firmware Versions
Section C - Electronic Control System Manual Defrost NOTE To enter the manual defrost mode press and hold The Ambient Thermistor is mounted on and part the FF up and FF down at the same time for 6 of the lower control board. seconds this will advance the control into a normal defrost cycle. -
Page 55: Notes
Section C - Electronic Control System Notes:... -
Page 56: Control Removal And Installation
Section C - Electronic Control System Control Removal and With the control removed you can remove the power supply board from the back of the control Installation by removing the 4 screws and disconnecting the wiring harness connector for the powers board to CAUTION the control. - Page 57 Section C - Electronic Control System This will give you access to the wiring connectors With the cover removed, you can reach down the so you can disconnect the power board and pull the right side of the damper control from the top and control box out from the front of the refrigerator.
- Page 58 Section C - Electronic Control System To reinstall the damper, make sure the damper Snap the new sensor into the bracket, plug it into door is closed all the way. Then follow the removal the connector, then push the bracket straight back instructions in reverse order.
-
Page 59: Food Compartment Light Switch
Section C - Electronic Control System Remove the sensor from under the clip, disconnect from the connector plug and replace. Reassemble in reverse order. NOTE To test the thermistors, check the temperature in the location of the thermistor. Use the chart on page C28 to test the thermistor for proper resistance at the temperature you are making your test at . -
Page 60: Temperature Resistance Chart
Section C - Electronic Control System Temperature Resistance Chart for Negative Temperature Coefficient Thermistors (± 2 %) Temperature F Ohms Temperature F Ohms 163,823 60,352 158,343 58,545 153,066 56,798 147,984 55,109 143,088 53,476 138,372 51,897 133,828 50,369 129,449 48,892 125,229 47,462 121,161 46,076... - Page 61 Section C - Electronic Control System Temperature F Ohms Temperature F Ohms 24,653 10,500 23,989 10,246 23,346 10,000 22,721 9,760 22,116 9,527 21,528 9,300 20,958 9,079 20,405 8,864 19,869 8,655 19,348 8,451 18,843 8,253 18,352 8,060 17,876 7,872 17,414 7,689 16,965 7,511 16,529...
-
Page 62: Section D - Air Circulation
Section D - Air Circulation Automatic Defrost Models and keeps the damper door closed during the complete defrost cycle. Principals Of Automatic Defrost Operation Automatic defrost refrigerators operate on the principle that moisture or frost transfers or migrates to the coldest surfaces (evaporator) in the freezer compartment. -
Page 63: Section E - Refrigeration System
Section E - Refrigeration System Reclaim: NOTICE To reprocess refrigerant to new product Instructions given here are furnished as a guide. specifications by means which may include Persons attempting to use these instructions to distillation. Will require chemical analysis of the make repairs to the sealed refrigeration system refrigerant to determine that appropriate product should have a working knowledge of refrigeration... -
Page 64: Soldering
Section E - Refrigeration System Soldering Perimeter Hot Tube To reduce the possibility of condensation forming WARNING on the exterior of the cabinet in high humidity Wear approved safety glasses when working areas, a perimeter hot tube (refrigerant tube) with or on any pressurized system or has been installed in the unit. -
Page 65: Testing For Refrigerant Leaks
Section E - Refrigeration System amount of refrigerant loss). NOTE Low suction pressure (vacuum). The line piercing valve (clamp-on type) should be Low wattage. used for test purposes only. It must be removed from system after it has served its purpose. The condenser will be “warm to cool”, depending on the amount of refrigerant lost. -
Page 66: Compressor Replacement
Section E - Refrigeration System Compressor Replacement To Use Dry Nitrogen To Flush The System: Remove compressor and filter-drier. Connect CAUTION process coupling to outlet tube of condenser. Fasten cloth over other end of coil to prevent NEVER install a new compressor without first old oil from spraying over room. -
Page 67: Installing A New Compressor
Section E - Refrigeration System NOTE CAUTION DO NOT use compressor if you do not To flush evaporator and heat exchanger you hear this sound. must remove evaporator from inside product to disconnect cap tube. If the compressor checks OK, reinstall the plug. Do not remove any of the plugs again until the Disconnect capillary tube from evaporator. - Page 68 Section E - Refrigeration System Figure E1 After refrigerant is completely recovered, 12. Solder all connections according to soldering cut suction and discharge lines as close procedure. to compressor as possible. Leave only 13. Remove original filter-drier. enough tubing to pinch off and seal defective compressor.
-
Page 69: Evaporator Replacement
Section E - Refrigeration System Evaporator Replacement Cut suction line in front of weld at evaporator. Using a file, score and break the cap tube CAUTION just in front of the weld. (See Figure 2.) Always use the TORCH GUARD heat shield part number 5304418872, behind evaporator To replace the before attempting to solder. -
Page 70: Heat Exchanger Replacement
Section E - Refrigeration System Heat Exchanger Replacement Remove rivet in retainer at top of old evaporator. Slide evaporator out top of drain trough. CAUTION 10. Transfer defrost heater from old evaporator Always use the TORCH GUARD heat shield to new evaporator, then slide evaporator into behind evaporator before attempting to solder. - Page 71 Section E - Refrigeration System Old heat Push the heat exchanger location exchanger through the hole in the cabinet. Drill 1/2 inch hole Install the armorflex through cabinet over the heat exchanger. 1 inch below old Seal hole using the heat exchanger.
-
Page 72: Perimeter Hot Tube Repair Kit
Section E - Refrigeration System Perimeter Hot Tube Repair Kit Cut at filter-drier inlet. Cut at weld between condenser and hot tube. Effective July 1, 1992, Section 608 of the Clean Air Act prohibits Individuals from knowingly venting ozone depleting compounds used as refrigerants into the atmosphere while maintaining, servicing, repairing, or disposing of refrigerant equipment. -
Page 73: Installing The Heater Wire - Step 3
Section E - Refrigeration System NOTE Wire splice connector to heater Take the time to remove all the bends from the heater (caused from being rolled up) by pulling the heater and braid through a shop rag with a small amount of silicone on the rag and laying it in a roll at the open end of the Hot Tube. -
Page 74: Filter-Drier Installation
Section E - Refrigeration System Install process tube adaptor to filter-drier. CAUTION Evacuate and charge system using the DO NOT unbraze the old filter-drier from the recommended procedure described under system. This will vaporize and drive moisture Evacuating and Recharging. from the desiccant back into the system. -
Page 75: Equipment Needed
Section E - Refrigeration System Equipment Needed for Evacuation & Evacuating System Recharging: WARNING • Heated charging cylinder R-134a systems are particularly susceptible • Standard 3-port manifold gauge set: to moisture contamination which can only be prevented by evacuating the system for a - 4 charging hoses minimum of 30 minutes to attain a minimum - Tee fitting with valve core stem removed... -
Page 76: Charging The System
Section E - Refrigeration System Close hand shut-off valve to vacuum pump. Allow system to sit for five minutes. Watch compound gauge for several minutes. Turn on refrigerator compressor. Run If reading rises, there is a leak in the system, compressor for a few minutes and monitor go to step 6. - Page 77 Section E - Refrigeration System Hot Tube Pressure Compound Evaporator Gauge Gauge Gauge Manifold T-Fitting Filter Drier Process Tube Adapters Heated Charging Cylinder Compressor 2 Stage Condenser Vacuum Pump Figure E2 Evacuating and Recharging Connections...
-
Page 78: Section E - R-134A Service Information
Section E - R-134a Service Information Products using R-134a refrigerant will generally NOTICE have a longer capillary tube to maintain a similar Instructions given here are furnished as a guide. flow rate and some models will have a larger Persons attempting to use these instructions to condenser to reduce the discharge pressures and make repairs to the sealed refrigeration system lower start-up sound transmission. -
Page 79: Water In The Refrigeration System
Section E - R-134a Service Information At the earliest stage of development work on To achieve the required 29.9 inch (500 micron) R-134a, tests were carried out on a different type of vacuum, a properly maintained two-stage vacuum synthetic oil known as Poly-Alkaline Glycol (PAG). pump in good condition is required. -
Page 80: Refrigerant Leaks
Electrolux Home products does not approve the use of the Sweep Charge for sealed system repair. This method of servicing sealed systems we know is often used to repair products in the field. -
Page 81: Hfc-134A, Cfc-12 Pressure Temperature Chart
Section E - R-134a Service Information HFC-134a, CFC-12 Pressure Temperature Chart °F °C HFC-134a CFC-12 °F °C HFC-134a CFC-12 -51.1 21.8* 19.0* 12.8 51.1 52.0 -48.3 20.4* 17.3* 15.6 57.3 57.7 -45.6 18.7* 15.4* 18.3 63.9 63.8 -42.8 16.9* 13.3* 21.1 70.9 70.2... -
Page 82: Inhalation Toxicity
R-134a Health & Safety Information Inhalation Toxicity Spills or Leaks HFC-134a poses no acute or chronic hazard If a large release of vapor occurs, such as from when it is handled in accordance with DuPont a large spill or leak, the vapors may concentrate recommendations and when exposures are near the floor or low spots and displace the oxygen maintained at or below the DuPont Acceptable... -
Page 83: Combustility Of Hfc-134A
R-134a Health & Safety Information Filling and Charging Operations Always wear protective clothing when there is a risk of exposure to liquid HFC-134a. Where • Before evacuating cylinders or refrigeration splashing is possible, always wear eye protection equipment, any remaining refrigerant should and a face shield. -
Page 84: Section F - Ice Maker
Section F - Ice Maker Rear Mounted Ice Maker Ice Maker Components The automatic ice maker is mounted in the freezer Ice Mold (Figure F5) compartment. It is attached to a bracket extending The ice mold is die-cast aluminum with the ice up from the back of the auger motor cover. -
Page 85: Thermostat
Section F - Ice Maker Mounting Plate Back View The solenoid coil draws 10 to 20 watts of power. The coil is wired in series with the mold heater, across the supply voltage. Timing Cam Motor Thermostat (Figure F6) The thermostat is a single-pole, single throw (SPST), bimetallic, disk-type, thermal switch. -
Page 86: On/Off Switch
Section F - Ice Maker Test Cycling Ice Maker On/Off Switch (Figure F5 & 6) (See Ice A single-pole, single-throw switch is mounted on Maker Testing Procedures. the right side of the housing at the front of the ice It may be necessary, on occasion, to test-cycle maker. -
Page 87: Parts Replacement
Section F - Ice Maker To Replace Fill Trough (Figure F6) EXAMPLE: An ice maker is test-cycled and the water fill sample is 93 cubic centimeters. Remove ice maker form Freezer. Subtracting 80 cc from 93, the adjustment needed Push trough retaining tab back against the is 13 cc. -
Page 88: To Replace Motor
Section F - Ice Maker To Replace Motor and Switch Mounting Plate plate to support housing. Disconnect six hold switch wire leads. Remove ice maker from freezer. Remove two hold switch mounting screws. Remove front Cover. Remove hold switch. Remove two screws that attach mounting plate to support housing. -
Page 89: To Replace Ice Mold And Heater
Section F - Ice Maker Fault Diagnosis Disconnect TCO from two wire nuts. One end is connect to the cable assembly and Complaint - Ice Maker Fails to Start the other end is connected to the motor and Check to see if ice maker control arm is mold heater. -
Page 90: Complaint - Ice Maker Fails To Stop At End Of Cycle
Section F - Ice Maker Complaint-Ice Maker Fail to Stop at End of Complaint-Ice Maker Produces Undersized Ice Cycle Pieces Ensure that ice maker mold is level. With the ejector blades in the starting position, check the hold switch terminals”C” and “NO” for Check for partial restriction in supply line or continuity. -
Page 91: Ice Maker Testing Procedures
Section F - Ice Maker Ice Maker Testing Procedures Operating Cycle Operating Cycle Illustrations - Manual Cycle Operation of the ice Maker, water refilling, and controlled ice storage, require proper functioning To manually cycle ice maker: and timing of all components. Turn the On Off switch to ON Consider the following: Press in on switch holding the spring loaded... - Page 92 Section F - Ice Maker • Ice Maker connected to electricity. • Mold temperature above 9°F. Ice Maker connected to electricity. • Thermostat closes. Ice Maker connected to electricity. Mold temperature above 9 • Motor starting. Mold temperature above 9 Thermostat closes.
- Page 93 Section F - Ice Maker Ice Maker connected to electricity. Mold temperature above 9 Thermostat closed. • Ice Maker connected to electricity. Motor rotating. Mold Heating. • Mold temperature above 9°F. Ice Maker connected to electricity. Control Arm swinging up. •...
- Page 94 Section F - Ice Maker Ice Maker connected to electricity. Mold temperature above 9 Thermostat closed. • Ice Maker connected to electricity. Motor starts to rotate as ice brakes loose. • Mold temperature above 9°F. Mold Heating. Ice Maker connected to electricity. •...
- Page 95 Section F - Ice Maker Ice Maker connected to electricity. Mold temperature above 9 Thermostat closed. Motor is rotating. • Ice Maker connected to electricity. Mold Heating. • Mold temperature above 9°F. Control Arm swinging up. Ice Maker connected to electricity. •...
- Page 96 Section F - Ice Maker • Ice Maker connected to electricity. • Mold temperature above 40°F. • Thermostat opens. Ice Maker connected to electricity. Ice Maker connected to electricity. • Motor is rotating. Mold temperature above 40 Mold temperature above 40 •...
- Page 97 Section F - Ice Maker • Ice Maker connected to electricity. • Mold temperature above 9°F. Ice Maker connected to electricity. • Thermostat open. Mold temperature above 9 Ice Maker connected to electricity. • Motor is rotating. Thermostat open. Mold temperature above 9 •...
-
Page 98: Operating Cycle Illusttations - Manual
Section F - Ice Maker • Ice Maker connected to electricity. • Mold temperature above 9°F. • Thermostat open. Ice Maker connected to electricity. Mold temperature above 9 • Motor not rotating. Thermostat open. • Mold heater off. Motor not rotating. •... - Page 99 Section F - Ice Maker Step 3 Step 4 Step 5 Step 6...
- Page 100 Section F - Ice Maker Step 7 Step 8 Step 9 Step 10...
-
Page 101: Ice Maker Wiring Diagram (Enlarge View)
Section F - Ice Maker Ice Maker Wiring Diagram (Enlarged View) -
Page 102: Section G - Ice And Water Dispenser
Section G - Ice and Water Dispenser Ice Dispenser Container & 8. Remove four (4) motor mounting screws and pull Auger Motor free from Motor Cover. Rail Assembly 9. Replace assembly in reverse order. The Ice Dispenser Container slides into the To Test Auger Motor: Rail Assembly mounted directly below the Ice 1. -
Page 103: To Test Solenoid Assembly
Section G - Ice and Water Dispenser to Solenoid Assembly on the back of Motor Cover. (See Figure G1) 6. Disconnect two (2) leads hooked to solenoid coil (Leads are blue with a white stripe and white - See Figure G1). 7. -
Page 104: To Remove Crusher Blades
Section G - Ice and Water Dispenser To replace Crusher Blades: The feature layout used on the ice and water side by sides will be a Seven Selector Dispenser. 1. Remove Auger Nut to gain access to Crusher Blades. Each blade is separated by Spacer. Seven Selection Dispenser: (See Figure (See Figure G6) 2. -
Page 105: Dispenser Operation
Section G - Ice and Water Dispenser DISPENSER OPERATION Then remove the screws two screws at the top of the control. Now you can lift up on the control The dispenser has a user interface section in the assembly while you tip it out at the top. This will control in the door. - Page 106 Section G - Ice and Water Dispenser When the glass is pulled away from the actua- The lower control board will also send a 12 VDC signal to the relay board and the coil of the relay tor the Actuator switch will open the signal to the which will pull the contact set closed.
-
Page 107: To Replace Ice Door And/Or Door Spring
Section G - Ice and Water Dispenser The lights will turn on when the actuator is pushed in or by touching the light pad on the control board in the freezer door. To replace the light assembly snap the clear plastic housing containing the lights and board out of the dispenser housing. -
Page 108: Testing The Dispenser
Section G - Ice and Water Dispenser Testing the Dispenser 8.Perform the following tests; Test Passing Result General Information Water Valve Valve actuates. During normal operation, certain components Auger Motor Auger runs with freezer can fail independently with no cascading door closed. -
Page 109: Sections 1-12
Section G - Ice and Water Dispenser Section 1 Section 1 Fix 120V connection at service cord. (troubleshoot harness) and retest (UI B) Is freezer- Is 120V present Does display Are door hinge Is the power (UI A) machine at ice maker liner show “CE”... - Page 110 Section G - Ice and Water Dispenser Section 2 Section 2 Are outputs correct on the Replace valve harness at water and retest valve connector? (120V) Is 120V present at main board J3- pin 4 (tan wire) Repair/replace connector when harness and paddle depressed retest...
- Page 111 Section G - Ice and Water Dispenser Section 3 Section 3 Are outputs Section 4 correct on the Replace auger harness at auger motor and retest motor connector? Are outputs (120V) correct on the Replace cube/ harness at cube/ crush solenoid crush solenoid and retest connector?
- Page 112 Section G - Ice and Water Dispenser Section 4 Section 4 Are outputs correct on the Replace cube/ harness at cube/ crush solenoid crush solenoid and retest connector? (120V) Is 120V present at main board J3- Is freezer - pin 3 (blue/white machine Connect and wire) connector...
- Page 113 Section G - Ice and Water Dispenser Section 5 Section 5 Are all light bulbs Replace bulbs burned out? and retest Section 4 Are outputs correct on the Replace cube/ harness at cube/ crush solenoid Does light switch crush solenoid and retest have continuity Replace switch...
- Page 114 Section G - Ice and Water Dispenser Section 6 Section 6 Flapper Are paddle Repair/replace microswitch connection and connections at retest. switch intact? Is 6 wire Repair/replace connection to UI harness and driver board retest intact? Is microswitch Repair/replace properly microswitch mounted? Is microswitch...
- Page 115 Section G - Ice and Water Dispenser Section 7 Section 7 Are paddle Repair/replace microswitch connection and connections at retest. switch intact? Is 6 wire Repair/replace connection to UI harness and driver board retest intact? Is microswitch Repair/replace properly microswitch mounted? Is microswitch actuated by...
- Page 116 Section G - Ice and Water Dispenser Section 8 Is 120V present Section 8 at door harness Is door hinge Repair/replace connection to ice connection harness and intact? retest and water relay board? Is freezer - Is 120V present machine Connect and at freezer liner compartment...
- Page 117 Section G - Ice and Water Dispenser Section 9 Section 9 Is 6 wire Repair/replace connection to UI harness and driver board retest intact? Replace ice and water module. Is problem corrected? Replace UI and retest 599485595 August 2007 G 15...
- Page 118 Section G - Ice and Water Dispenser Section 10 Section 10 Is J3 connector at Repair/replace ERF2500++ harness and intact? retest Is continuity from Repair/replace J3 connector to harness and each device retest prestent? Replace ERF2500++ Is problem corrected? Replace UI and retest G 16 599485595...
- Page 119 Section G - Ice and Water Dispenser Section 11 Section 11 Section 11 Is freezer - Repair/replace machine harness and compartment retest inline connected? Is freezer - Repair/replace machine harness and compartment retest inline connected? Go to individual failure sections Go to individual failure sections Section 12...
-
Page 120: Section H - Water System
Section H - Water System Water Systems water to flow through, replace the valve. It is not necessary to replace the whole valve assembly if one coil is bad. The two valves can be separated by Water for the ice maker and water dispenser is controlled by a dual coil valve and a single coil inserting a screwdriver at point A in Figure H1. -
Page 121: Water Tanks
Section H - Water System Water Tanks Counter Depth refrigerators will have a roll tube tank assembly as shown in Figure H4. The water line from the primary water valve (single coil valve) goes behind the trim, located on the right side of the inside food compartment liner, to the water filter. -
Page 122: To Test The Water Fill System
Section H - Water System the coil on the primary and the green coil on the To Test The Water Fill System secondary valve to resolve the problem. The wiring harness has two diodes in the line between the fill switch on the ice maker and the Voltage Readings are Different Between green coil of the secondary water valve, as well as Primary and Secondary Valve Coils... -
Page 123: Chilled Water Valve
Section H - Water System Chilled Water Valve There are a number of connections in the wiring of a refrigerator. On the ice maker, the wiring runs Low/No Voltage One point we need to cover in our testing is good connections at all points in the ice and water Place a glass against the actuator and push in to through the plug by the condenser fan motor up At Coil(s) - Page 124 Section H - Water System VOLTAGE READINGS AT GREEN COIL OF SECONDARY VALVE When Ice Maker is Filling: Voltage at Outlet Voltage at Coil 120 VAC 100 ± 10% VAC Normal 100 VAC 85 ± 10% VAC Normal at 105 VAC (Will require use of 50 watt coil) 100 - 120 VAC 20 - 76 VAC Bad connection, Fill Switch, or Heater in Ice Maker.
-
Page 125: Addendum A - Perfect Temperature Drawer
Addendum A - Perfect Temperature Drawer Perfect Temperature Drawer IMPORTANT (some models) Do not operate the drawer without the insulation The Perfect Temperature Drawer will mount in panels. The drawer comes with a removable wine place of the meat keeper drawer above the crisper rack drawers. -
Page 126: To Service The User Interface Board And Touch Control
Addendum A - Perfect Temperature Drawer The drawer cover has the membrane and user 10 Pin Connector For User Interface Board Wiring interface board mounted in the center front section Harness Coming From Cover of the plastic frame. The frame on the bottom side also holds the roller track that the drawer itself will sit in to allow it to be a full pull drawer. -
Page 127: To Service The Ntc Thermistor And Wiring Harness
Addendum A - Perfect Temperature Drawer To service the NTC Thermistor and wiring Control Unit harness: Remove drawer. Reach behind cover on right side and release connector plug from cover harness to main control unit. Remove cover from inside refrigerator and turn it over on a clean flat surface. -
Page 128: To Replace The Control Board
Addendum A - Perfect Temperature Drawer CAUTION Damper Heater Ground yourself to the refrigerator cabinet before dissembling any electronic parts. To replace the control board: Disconnect all harness connections from control board. Place a small screwdriver under black retainer in center of control board. Carefully pry it off post coming through Figure 12 control board. -
Page 129: To Service The Fan And Motor Assembly
Addendum A - Perfect Temperature Drawer If the drawer is calling for heat the damper will be NOTE closed and the electric heater will be on. The fans will pull the return air over the heater allowing it to The capacitor will come as part of the heater. raise the drawer temperature. -
Page 130: Normal Operation
Addendum A - Perfect Temperature Drawer Normal Operation defrost cycle. At this point, the control will re-open the damper. (See Figure 16.) This display will show the setpoint temperature when no error conditions exist and flash the error Thermistor to Sense Defrost Cycle code if an error exists. -
Page 131: Service Mode
Addendum A - Perfect Temperature How To Test The Perfect Temperature Damper Test – Display shows d1 for stepper test active, or d0 for stepper test idle. Drawer NOTE Service Mode Activation – This mode is accessible only when Drawer must be in place for this test. the drawer is in OFF mode. -
Page 132: Temperature Resistance Chart
Addendum A - Perfect Temperature Drawer Temperature resistance chart for Negative Temperature Coefficient Thermistors Temperature F Ohms Temperature F Ohms 46,219 25,394 44,875 24,706 43,574 24,040 42,315 23,393 41,096 22,766 22,158 39,917 21,569 38,775 20,996 37,670 20,441 36,601 19,902 35,565 34,562 19,380 33,590... -
Page 133: Ptd Service Data Sheet & Wiring Diagram
ice maker information service data sheet test cycling 241868703 Press the momemtary contact on the ON/OFF switch PERFORMANCE DATA NO LOAD & NO DOOR OPENINGS AT MID-POINT ice & Water - aUtOMatic deFrOst for approximately 15 seconds. Ice maker will continue to CONTROL SETTING side BY side - r134a 65°F (18°C) Ambient...
Need help?
Do you have a question about the E23CS75DSS0 and is the answer not in the manual?
Questions and answers