
Related Manuals for Electrolux EI26SS30J


Summary of Contents for Electrolux EI26SS30J
-
Page 1: Guia De Uso Y Cuidado
Use & Care Guide Side-By-Side Refrigerator Guia de Uso y Cuidado Refrigerador de dos puertas Guide d’utilisation et d’entretien Réfrigérateur à compartiments juxtaposés 241868905 July 2010... -
Page 2: Table Of Contents
Finding Information Please read and save this guide Thank you for choosing Electrolux, our new premium brand in home appliances. This Use & Care Guide is part of our commitment to customer satisfaction and product quality throughout the service life of your new appliance. -
Page 3: Important Safety Instructions
Read product labels for warnings regarding flammability and other hazards. • Do not operate the refrigerator in the presence of explosive fumes. • Avoid contact with any moving parts of the automatic ice maker. -
Page 4: Electrical Information
• Avoid connecting refrigerator to a Ground Fault Interrupter (GFI) circuit. IMPORTANT To turn off power to your refrigerator, unplug the power cord from the wall outlet. -
Page 5: Installation
• If possible, place the refrigerator out of direct sunlight and away from the range, dishwasher or other heat sources. • The refrigerator must be installed on a floor that is level and strong enough to support a fully loaded refrigerator. -
Page 6: Door Opening
Your refrigerator should be positioned to allow easy access to a counter when removing food. For best use of drawers and freezer baskets, the refrigerator should be in a position where both the refrigerator and freezer doors can be fully opened. Guidelines for final positioning of your refrigerator: •... -
Page 7: Getting Through Narrow Spaces
Getting through narrow spaces If your refrigerator will not fit through an entrance area, you can reduce its size by removing the doors. Check first by measuring the entrance. Required Tools You will need the following tools: Top Hinge Tools Necessary:... -
Page 8: To Remove The Freezer Door
Removing The Doors To remove the freezer top hinge cover: 1 Remove the two screws from each cover over the top door hinges. 2 Lift hinge cover straight up and off. To remove the freezer door: 1 Detach the multi-wire cable connector located above the top hinge. -
Page 9: Installing Door Handles
3 While holding handle firmly against door, fasten upper and lower Allen set screws (B) with supplied Allen wrench. 4 Repeat steps 2 and 3 to install refrigerator handle. Ensure the holes for the set screws are facing towards the freezer door. NOTE All set screws should be tightened and sub-flush (Allen set screw should be seated just below the surface of the end cap) of handle end cap. -
Page 10: Connecting The Water Supply
Smart Choice® water line kit 5305513409 (with a 6 ft. Stainless Steel Water Line) and for homes without an existing valve, Electrolux recommends its Smart Choice water® line kit 5305510264 (with a 20 ft. Copper Water Line with self-tapping saddle valve). Please refer to www.electroluxappliances.com for more... - Page 11 To ensure that your water dispenser works properly, this system must be completely filled with water when your refrigerator is first connected to the household water supply line.
-
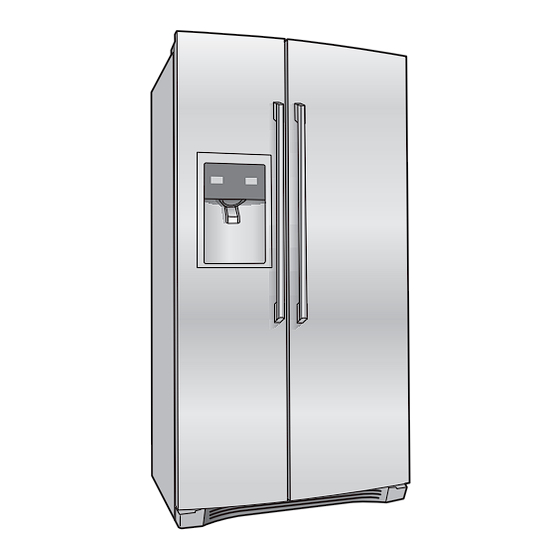
Page 12: Feature Overview
Feature Overview Understanding features and terms Your Electrolux refrigerator is designed for optimal convenience and storage flexibility. Use the illustration below to familiarize yourself with product features and terminology. Door Light Switch Fixed Door Bin Container Glass Shelf Small Basket... -
Page 13: Controls
Controls Wave-Touch IQ-Touch... -
Page 14: Setting Cooling Temperatures
Pressing the system off icon does not turn off power to your refrigerator. You must unplug the power cord from the wall outlet. Setting cooling temperatures Level: User Variable Options Conserves energy by increasing the time between automatic defrost. - Page 15 Wave-Touch /IQ-Touch “Sabbath Mode” (some models) The Sabbath Mode is a feature that disables portions of the refrigerator and its controls for both Wave-Touch and IQ-Touch , in accordance with observance of the weekly Sabbath and religious holidays within the Orthodox Jewish community.
- Page 16 Controls IQ-Touch (some models) Your refrigerator is equipped with a Glass Touch Panel user interface display. It is only necessary to touch the glass. There is no need to press with force. There are three dispenser modes: Water Ice Cubes...
- Page 17 All other modes are turned off until the alarm is acknowledged. Power Fail...
-
Page 18: Storage Features
Sliding shelves can be pulled forward as far as their built-in stops allow. Sliding shelves cannot be separated from their mounting brackets. Drawers Your refrigerator includes a variety of storage drawers. These drawers usually are located in fixed positions at the bottom of the fresh food compartment. -
Page 19: Crisper Humidity Control
To remove the Crisper Drawer: 1 Wearing safety glasses, gently place a flat- head screwdriver behind the snap between the metal slide and the crisper pan. 2 Carefully rotate a quarter (1/4) turn. Do not use a prying motion as this may damage your crisper. - Page 20 The Perfect Temp Drawer (PTD) was designed to keep food items at a precise temperature that is cooler, the same, or warmer than the fresh food side of the refrigerator. The PTD is shipped turned OFF. When first turned on or after a power outage the PTD may show “HI°F”...
- Page 21 IMPORTANT The two drop in insulating inserts need to remain in place while the Perfect Temp Drawer is on. Removing the inserts will cause the temperature of the crispers below it to be affected. The drop in insulating inserts can be hand washed with mild soap.
-
Page 22: Storage Bins
Refrigerator on/off button and the Perfect Temp Drawer When the refrigerator is turned off by pressing the main Wave-Touch or IQ-Touch on/off button the Perfect Temp Drawer will also be turned off. When the refrigerator is turned back on the Perfect Temp Drawer will resume operation at the temp setting that was set before the refrigerator was turned off. -
Page 23: Door Bin
Tall bottle retainer The tall bottle retainer keeps tall containers in the bin from falling forward when opening or closing the refrigerator door. To install, snap the ends of the retainer over the edge of the retainer wall as shown in the illustration. -
Page 24: Dairy Compartment
Storage Features Dairy compartment Use the dairy compartment, at the top of the fresh food compartment door, for short term storage of cheese, spreads, or butter. The dairy compartment, which includes a lift-up cover that may be locked and a dairy divider (some models), is designed to be warmer than the open storage area to accommodate these types of food. -
Page 25: Automatic Ice & Water Maker/Dispenser
IMPORTANT Your ice maker is turned on at the factory so it can work as soon as you install your refrigerator. If you cannot connect a water supply, turn the ice maker’s On/Off switch to Off. Otherwise, the ice maker’s fill valve may make a loud chattering... -
Page 26: Cleaning The Ice Maker
• Occasionally shake the ice container to keep ice separated. • If your refrigerator is not connected to a water supply or the water supply is turned off, turn off the ice maker by pressing the On/Off switch. - Page 27 If the auger is not properly aligned when replacing the ice bin, the refrigerator will only dispense Crushed Ice. The freezer door may also not close properly causing warm air to leak...
-
Page 28: Changing The Filter
Order new filters by calling toll-free, 877/808-4195, visiting www.electroluxappliances.com, or seeing the dealer where you bought your refrigerator. Electrolux recommends that you order extra filters when you first install your refrigerator, and that you replace your filters at least once every six months. -
Page 29: More About Your Advanced Water Filter
More about your advanced water filter The PureAdvantage filter system is tested and certified by NSF International to NSF/ANSI Standards 42 and 53 for the reduction of claims specified on the performance data sheet. Do not use with water that is microbiologically unsafe or of unknown quality without adequate disinfection before or after the system. -
Page 30: Storing Food & Saving Energy
Ideas for saving energy Installation • Locate the refrigerator in the coolest part of the room, out of direct sunlight, and away from heating ducts or registers. Do not place the refrigerator next to heat-producing appliances such as a range, oven, or dishwasher. -
Page 31: Normal Operating Sounds & Sights
(except when fridge is in Sabbath Mode). Air control valve may produce a light humming during operation. NOTE Energy efficient foam in your refrigerator is not a sound insulator. NOTE During automatic defrost cycle, a red glow in the back wall vents of your freezer compartment is normal. -
Page 32: Care & Cleaning
If you store or move your refrigerator in freezing temperatures, be sure to completely drain the water supply system. Failure to do so could result in water leaks when the refrigerator is put back into service. Contact a service representative to perform this operation. -
Page 33: Care & Cleaning Tips
Occasion Tips Short Vacations • Leave refrigerator operating during vacations of 3 weeks or less. • Use all perishable items from refrigerator compartment. • Turn automatic ice maker off and empty ice bucket, even if you will only be gone for a few days. -
Page 34: Replacing Light Bulbs
Care & Cleaning Replacing light bulbs Both the freezer and fresh food compartments of your refrigerator include light bulbs that will need replacing from time to time. Some lights have covers that you will need to remove before replacing the bulbs. Always use bulbs that are designed for appliance lighting. -
Page 35: Warranty
Your appliance is covered by a one year limited warranty. For one year from your original date of purchase, Electrolux will repair or replace any parts of this appliance that prove to be defective in materials or workmanship when such appliance is installed, used, and maintained in accordance with the provided instructions. -
Page 36: Solutions To Common Problems
Solutions To Common Problems Before you call... If you experience a problem with your refrigerator or notice a product behavior or condition you do not understand, you can usually avoid a call to your service representative by referring to this section for an answer. -
Page 37: Temperatures Are Too Cold
• Set freezer control to a colder setting. Allow 24 hours for temperature to stabilize. • Set refrigerator control to a colder setting. Allow 24 hours for temperature to stabilize. • Adjust Meat Keeper temperature control to a colder setting. -
Page 38: Water/Moisture/Frost Inside Refrigerator
Water collects on bottom side of drawer cover. Moisture collects in bottom of drawer. Moisture collects on outside of refrigerator or between doors. Perfect Temp Drawer (some models) Problem Display does not illuminate or shows “CE”. Display shows “LOC” when buttons are pressed. -
Page 39: Automatic Ice Maker
Ice cubes are hollow or smaller than normal. • Ice has bad odor and Ice has picked up odor or taste. flavor from strong food stored in refrigerator or freezer. • Ice not used frequently enough. Correction • Turn on power switch. •... -
Page 40: Water Dispenser
Solutions To Common Problems Ice Dispenser Problem Cause Dispenser will • not dispense ice. • • • • • Ice dispenser is • jammed. • • • Water Dispenser Problem Cause Dispenser will • not dispense water. • • • •... -
Page 41: Odors In Refrigerator
Door(s) will not • Door was closed too hard, causing close. other door to open slightly. • Refrigerator is not level. It rocks on the floor when moved slightly. • Refrigerator is touching a wall or cabinet. • Drawers are Food is touching shelf on top of difficult to move.
Need help?
Do you have a question about the EI26SS30J and is the answer not in the manual?
Questions and answers