Ness D8x Installation & Programming Manual
Alarm control panel
Hide thumbs
Also See for D8x:
- Installation & programming manual (76 pages) ,
- User manual (40 pages) ,
- User manual (32 pages)

Subscribe to Our Youtube Channel
Related Manuals for Ness D8x


Summary of Contents for Ness D8x
- Page 1 Automation Ness iComms/aComms compatible ness D8x / D16x alarm Control panel Available with Navigator, Saturn or KPX keypad options InstallatIon & programmIng manUal 7.8.1 Revision...
- Page 2 Ness. Ness reserves the right to make changes to features and specifications at any time without prior notification in the interest of ongoing product development and improvement.
-
Page 3: Table Of Contents
Mains Report Delay ............. 48 Listen-in to dialler ............48 Swinger Shutdown ............49 Line Fault Monitor ............49 Programming options specific to the D8x/D16x panels Remote access options ........50–51 version 6 and later are marked with the symbol. -
Page 4: Product Features
• All inputs and outputs are heavily protected against lightning and high voltage supply transients. • Optional output expander. DIALLER • Full remote upload/download by PC and modem using NessComms™ software. • View system status and arm/disarm using NessComms™. • Remote control of outputs via telephone. • Contact ID Format - Two 14 digit phone numbers plus one “follow me” number. • Audible Voice format feature. • Phone line monitoring (activates output). • Dialler ‘Listen in’ option for installers. • Auto Test calls. • Pulse or DTMF dialling. • True dial tone detection. • Hex programmable client codes as required by some central stations. Ness D8x / D16x Control Panel – Installation Manual... -
Page 5: Nesscomms Features
MiniCENtRAL to Clipsal C-Bus the Ness MiniCENtRAL C-Bus interface combined with a Ness D8x or D16x control panel gives you full two-way C-Bus control and all the features and benefits of a powerful alarm panel. ■ Fully Clipsal approved C-Bus Enabled Product. -
Page 6: Installation Notes
LISTEN PINS then remove power by briefly removing one of the battery leads then re-connect. the Zone 6 Ness panels are supplied with 2k2 1% tolerance Metal Film resistors. Diagnostics. Connect an ESD. heartbeat LED should now be flashing continuously, proceed to step 2. -
Page 7: Inputs And Outputs
AC inPut terMinALs A maximum of 2 x 1 Watt Strobes (Ness Part No. NOI300) can be these terminals are for the connection of the Ness plugpack. the connected to this output. -
Page 8: Connection Diagram
Relay Board and the Output Expander Board connect to See page 78. options without a PC. the Aux header on the D8x/D16x main board but you cannot Requires D8x/D16x connect both at the same time. If required, the Relay Board version 7.4 or later. -
Page 9: Connection Diagram
HORN 100-238 Top Hat screamer RESET SPEAKER (NOI110) SIREN The terminal block should STROBE LIGHT be mounted inside the (NOI300) siren cover. © 2004 ness Security Products Ness D8x / D16x Control Panel – Installation Manual... -
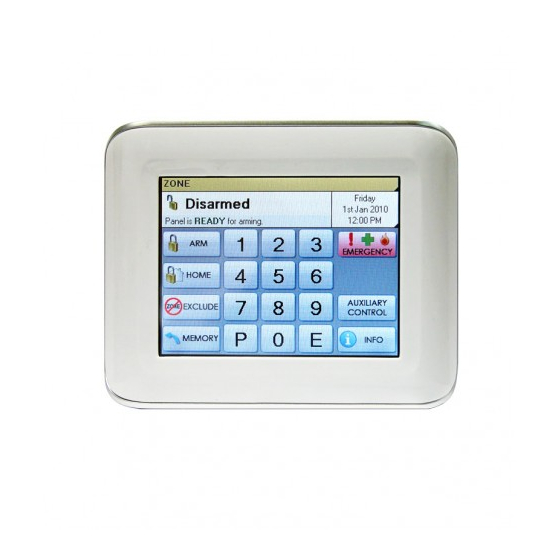
Page 10: Keypad
RADIO, HOME, ZONE Radio Supervision alarm (Device number is indicated by zone lights) 100m (total cable length to all keypads). HOME, ZONE Wired Zone Supervision alarm (Zone number is indicated by zone lights) Ness D8x / D16x Control Panel – Installation Manual... -
Page 11: Operation Summary
Selection Mode. See page 20 for more Press to enable/disable tDZ operation. information on temporary Day temporary Day Zone mode enabled is indicated by the Home icon flashing. Zones. Ness D8x / D16x Control Panel – Installation Manual... -
Page 12: Quick Start Programming
INStALLER this function displays the panel software version when in program mode. Displayed in decimal format by the zone LEDs. Example, version V6.1 is displayed by flashing 6 followed by 1. Ness D8x / D16x Control Panel – Installation Manual... -
Page 13: How To Enter Program Mode
Notes: 1. A NessPD can store defaults for both a D8x and a D16x at the same time. NessPD auto-recognises the panel type and will not copy D8x options into a D16x (or vice versa). Repeat steps 1 to 5 to copy data from both panels. -
Page 14: User Codes
– p116e USer CoDeS p201e – p256e D8x and D16x version 5 and later have 56 user Codes which are used to operate the panel by a variety of methods. progrAm moDe LeVeL user, Installer, Remote by PC (except Each user Code can be assigned to either a KEyPAD CODE or a RADIO KEy or an radio keys and access cards). - Page 15 REX codes. See page 78. P239E 5e RADIO CODE. Enables selected user codes as Radio Codes P240E for operation by Ness Radio Key or Radio Keypad. (Page 72 P241E - how to program Radio Codes). P242E 6e READER CODE 1.
-
Page 16: Timers
[enter neW tiMe] e new time is displayed one digit at a time eXAMPLe: to program siren time to be 4 minutes: • Siren times of longer than 5 minutes are P29e 4e contrary to noise pollution regulations in most areas. Ness D8x / D16x Control Panel – Installation Manual... -
Page 17: Vibration Sensitivity
Normal Zone or Vibration zone at the same PROgRAMMINg SEQuENCE: time. P37e or P38e [Zone no]e toggles zones ON and OFF • To convert zone/s back to a Normal Zone, turn on the required zone/s at P30E. reLAteD optIoNS P301E 5E-7E Request to Exit (REX) Ness D8x / D16x Control Panel – Installation Manual... -
Page 18: Zone Assignment
P60E 1E. to deselect the option, select a different zone type in the DELaY grouP . • When a zone is selected for this type, it is automatically deselected from any other zone type in the DELAy gROuP . Ness D8x / D16x Control Panel – Installation Manual... -
Page 19: Area Partitioning
In this example, we have assigned zone 1 to both areas, so it becomes a Common Zone. P45e use the [Zone no] e sequence to turn on only zones 1–4. P46e use the [Zone no] e sequence to turn on zone 1 and zones 5–8. Ness D8x / D16x Control Panel – Installation Manual... -
Page 20: Home Mode
Zones. the selected zones are indicated by entering program mode. default beep warning tone. See P126E 4E. the corresponding zone number. Ness D8x / D16x Control Panel – Installation Manual... -
Page 21: Home Zones
FOR DAy ZONES: Instant alert when a delivery door is opened, [Zone no] on: the zone is a Day zone doorway alert for a shop. See page 20 for information on tEMPORARy DAy ZONES. Ness D8x / D16x Control Panel – Installation Manual... -
Page 22: Zone To Output Mapping
[Zone no] oFF: the zone will not trigger the Keypad Sonalert [Zone no] on: the zone will trigger the Keypad Sonalert NoteS • 0e will turn all selections OFF. MeMory e will turn all selections ON. Ness D8x / D16x Control Panel – Installation Manual... - Page 23 P59e [Zone no]e toggles the options ON and OFF MeMory e will turn all selections ON. [Zone no] oFF: the zone will not trigger the auX2 output [Zone no] on: the zone will trigger the auX2 output Ness D8x / D16x Control Panel – Installation Manual...
-
Page 24: Various Options
If the resistor is unsealed, (either by open circuit or short circuit), the panel will arm Area1, (Area2 will be ignored). KEySWItCH WIRINg. A momentary or latching keyswitch can be wired as shown. Ness D8x / D16x Control Panel – Installation Manual... - Page 25 P60e 8e toggles the option ON and OFF P144E 1E, AuX4 output when Area2 armed. oFF: auX3 & auX4 outputs turn on instantly, (Default). on: auX3 & auX4 outputs turn on at the end of exit time. Ness D8x / D16x Control Panel – Installation Manual...
-
Page 26: Tamper/Keypad Panic Output Mapping
7E on: Keypad Panic alarm to Keypad Sonalert output • A Keypad Panic Alarm can be caused by the PANIC keys on the keypad (* E 8E on: Keypad Panic alarm to Siren output or ** together, depending on Option P64E6E). Ness D8x / D16x Control Panel – Installation Manual... -
Page 27: System Operation Shortcuts
Exit time is multiplied by 10 P28E Exit time. eXAMPLe: if P28e = 22 seconds then if P62e 8e is on, the exit time is 22 x 10 = 220 seconds. Ness D8x / D16x Control Panel – Installation Manual... -
Page 28: Home Mode Output Mapping
7E on: Day Mode to Keypad Sonalert output 8E on: Day Mode to Siren output For ZoNe to oUtpUt mAppINg for armed & 24hr states – see options p54e – p59e, page 22-23. Ness D8x / D16x Control Panel – Installation Manual... -
Page 29: Miscellaneous Options
P64e 4e toggles the option ON and OFF P120E 2E Home Arm chirps. oFF: no arm/Disarm siren chirps P120E 3E Radio Key AuX button arms on: Siren & Strobe outputs will chirp on arm/disarm Home Mode. Ness D8x / D16x Control Panel – Installation Manual... - Page 30 Keypad Medical alarm Applies only to the standard Ness LCD on: Keypad Medical alarm enabled keypad, not the Ness KPX keypad. See options P126E for KPX double key options. Ness D8x / D16x Control Panel – Installation Manual...
-
Page 31: Zone Supervision Options
+ E will reset Supervision alarms. Supervision for rADIo ZoNeS the purpose of Radio Supervision is to verify the correct operation of Ness Radio PIRs. the Supervision signal from the Radio PIR tells the panel that the device has not been removed from radio range and is in working order. - Page 32 FACtory DeFAULt OFF: Supervision Siren output disabled. PROgRAMMINg SEQuENCE: reLAteD optIoNS P66e 4e toggles the option ON and OFF P65E Supervised Zones. oFF: Supervision Siren output disabled on: Supervision Siren output enabled Ness D8x / D16x Control Panel – Installation Manual...
-
Page 33: Supervision Time
4 hours: • The Supervision timer is reset on exit P67e 04e from Installer Program Mode and on Arm or Disarm. reLAteD optIoNS P65E Supervised Zones. P66E 1E–4E Supervision Alerts. P66E 7E–8E Supervision time Speed-up. Ness D8x / D16x Control Panel – Installation Manual... - Page 34 DoUbLe preSS rADIo pANIC p68e 1e Setting this option ON enables Double Press Panic for Ness Radio Keys, if fitted. the Available in D8x/D16x V6 and later. panel will look for two radio Panic signals in a row to sound the Panic alarm.
-
Page 35: Misc. Options
P64E 4E Radio Key Chirps. P69E 5E Home Arm by Radio Key. oFF: Quiet Chirps disabled P120E 2E Home Arm chirps. on: Quiet Chirps enabled P120E 3E Radio Key AuX / arms Home Monitor Ness D8x / D16x Control Panel – Installation Manual... - Page 36 P69e 4e toggles the option ON and OFF NoteS oFF: Keypad gives 3 beeps on arming the keypad beeps on Arm/Disarm when on: Keypad gives 6 beeps on arming Arming/Disarming by keypad, keyswitch or by Radio Key. Ness D8x / D16x Control Panel – Installation Manual...
- Page 37 1. Exit beeps cannot be stopped (i.e. by pressing a key on the keypad). 2. If another event causes a different keypad beep, the exit beeps resume once the event beeps are finished. Ness D8x / D16x Control Panel – Installation Manual...
-
Page 38: Telephone Numbers
SpeCIAL CHArACter key eNtry keypAD DISpLAy PAuSE (1.6sec) ARM Key * (Star) HOME Key # (Hash) EXCLuDE Key Ness D8x / D16x Control Panel – Installation Manual... -
Page 39: Account Numbers
NessComms™ up/download without callback is allowed by turning off option P90E 8E. reLAteD optIoNS P90E 8E Enable Callback. PROgRAMMINg SEQuENCE: P81e existing telephone number is displayed [enter neW teLePhone no] e new Telephone No.4 is displayed one digit at a time Ness D8x / D16x Control Panel – Installation Manual... -
Page 40: Report Zone Alarms
Zones selected to be Account No.2 zones will report their Alarms, Restorals and Installer mode or NessComms. Excludes on Client code 2. FACtory DeFAULt PROgRAMMINg SEQuENCE: none P79e [Zone no]e toggles the option ON and OFF Ness D8x / D16x Control Panel – Installation Manual... -
Page 41: Report Miscellaneous Alarms
1E on: Send restoral immediately P76E Report zone restorals. 2E on: Send restoral after siren time 3E on: Send restoral on Disarm & seal 4E on: Send restoral on Disarm always Ness D8x / D16x Control Panel – Installation Manual... -
Page 42: Test Call Options
1E on: auto Select Dialling (PuLSE or DtMF) • tHe DeCADIC (or pULSe) DIALLINg 2E on: Pulse Dialling always oN tHIS DeVICe IS UNSUItAbLe For USe oN tHe teLeCom NetWork IN 3E on: DtMF Dialling always NeW ZeALAND. Ness D8x / D16x Control Panel – Installation Manual... -
Page 43: Dialler Format Options
Arm/Disarm by Autotimer 4 Arm/Disarm by Autotimer 5 Shortcut Arm Arm/Disarm by Autotimer 1 Arm/Disarm by Autotimer 6 Arm/Disarm by Autotimer 7 Arm/Disarm by Autotimer 2 Arm/Disarm by Autotimer 8 Arm/Disarm by Autotimer 3 Ness D8x / D16x Control Panel – Installation Manual... -
Page 44: Audible Voice Format
VOICE format to the Follow Me telephone number, (P00E). FACtory DeFAULt OFF. PROgRAMMINg SEQuENCE: P86e 6e turns the option ON on: Contact iD + audible voiCE format enabled Ness D8x / D16x Control Panel – Installation Manual... -
Page 45: Dialling Options
(up to the maximum number of calls). PROgRAMMINg SEQuENCE: P87e 4e toggles the option ON and OFF oFF: Maximum 10 dialling attempts on: Maximum 4 dialling attempts Ness D8x / D16x Control Panel – Installation Manual... -
Page 46: Area1, Area2 Open/Close Reports
OFF: No Strobe Flash on kiss-off. P88e 4e toggles the option ON and OFF reLAteD optIoNS oFF: no Strobe Flash on kiss-off P88E 3E Siren Chirp on kiss-off. on: Strobe Flash on kiss-off enabled Ness D8x / D16x Control Panel – Installation Manual... -
Page 47: Other Reports
PROgRAMMINg SEQuENCE: ON: Auto Exclude Reports enabled. P88e 8e toggles the option ON and OFF reLAteD optIoNS oFF: no auto Exclude reports P88E 7E Manual Exclude Reports. on: auto Exclude reports enabled Ness D8x / D16x Control Panel – Installation Manual... -
Page 48: Enable Test Calls
Listen-In off, go back into Installer Program mode and toggle the option OFF. to the Siren output. PROgRAMMINg SEQuENCE: P89e 3e toggles the option ON and OFF oFF: Method 2 Listen-in disabled on: Method 2 Listen-in enabled Ness D8x / D16x Control Panel – Installation Manual... -
Page 49: Swinger Shutdown
Australia and New Zealand). OFF: Clock uses mains frequency timing. PROgRAMMINg SEQuENCE: P89e 7e toggles the option ON and OFF oFF: Clock uses mains frequency timing on: Clock uses internal timing Ness D8x / D16x Control Panel – Installation Manual... -
Page 50: Remote Access Options
P90e 3e toggles the option ON and OFF NoteS • Remote Access must also be enabled. oFF: no remote arming on: remote arming enabled reLAteD optIoNS P90E 1E Enable upload/Download. See page 80 for details on Remote Operation by telephone. Ness D8x / D16x Control Panel – Installation Manual... -
Page 51: Remote Disarming
Callback using telephone Number 4. P90E 1E Enable upload/Download. P81E telephone Number 4, Callback. PROgRAMMINg SEQuENCE: P90e 8e toggles the option ON and OFF oFF: no Callback on: Callback Mode enabled Ness D8x / D16x Control Panel – Installation Manual... -
Page 52: Required Rings
[Zone no]E oFF: Memory Warning operates normally for that zone • 0e will turn all selections OFF. [Zone no]E on: Memory Warning is disabled for that zone MeMory e will turn all selections ON. Ness D8x / D16x Control Panel – Installation Manual... -
Page 53: Clear Radio Devices
P99e [Enter new code]e [Enter new code again]e (Unlike User Codes, the installer code is not displayed when programming) For a complete list of factory default values, see the Programming Options Summary on pages 81–85. Ness D8x / D16x Control Panel – Installation Manual... -
Page 54: Output Expander Options
Zone 13 Arm Home Arm Home Zone 13 Zone 14 Mains Fail Mains Fail Zone 14 Zone 15 Battery Fail Battery Fail Zone 15 Zone 16 Ext. tamper Ext. tamper Zone 16 Ness D8x / D16x Control Panel – Installation Manual... -
Page 55: Day Zone Follower
PROgRAMMINg SEQuENCE: P119e 1e-16e toggles the option ON and OFF [Zone no]E oFF: output Expander zone alarm disabled for that zone [Zone no]E on: output Expander zone alarm enabled for that zone Ness D8x / D16x Control Panel – Installation Manual... -
Page 56: Keyswitch Disarm Only
P64E 6E Strobe Flash on Home Arming by Radio. p120e 3e rADIo AUx bUttoN ArmS Home moDe this option enables the AuX button on a Ness RK4 Radio Key to arm Home Mode. Note this option enables Radio Key Home When this option is enabled, options P122E 3E & 4E will be disabled, (AUX button to Arming chirp s regardless of the state Aux2 options. -
Page 57: Entry Delay Extender
(if enabled) to disarm Area2. Note, the keyswitch Available in D8x/D16x V5.6 and later. cannot arm Area2, only disarm. Though it can can both arm & disarm Area1. reLAteD optIoNS P60E 2E, 3E. P120E 1E, 4E, 5E. oFF: option Disabled. (Factory default). on: option Enabled. Ness D8x / D16x Control Panel – Installation Manual... -
Page 58: Aux1 Output Options
P121E is one of several options which control the behaviour of the AuX1 output. Installer mode or NessComms. One of the most powerful features of the D8x/D16x panels is the flexibility to control the AuX outputs by various events and alarms. If the AuX1 output does not behave as FACtory DeFAULt expected, please check all related options such as Autotimers and P141E options. -
Page 59: Aux1 Output Options
PROgRAM or later. Press P145E (the existing Pulse time will be displayed). FACtory DeFAULt Press [NEW tIME] E (the new Pulse time will be displayed). 20 sec. reLAteD optIoNS P141E 8E Ness D8x / D16x Control Panel – Installation Manual... -
Page 60: Aux2 Output Options
P122E is one of several options which control the behaviour of the AuX2 output. Installer mode or NessComms. One of the most powerful features of the D8x/D16x panels is the flexibility to control the AuX outputs by various events and alarms. If the AuX2 output does not behave as FACtory DeFAULt expected, please check all related options such as Autotimers and P142E options. -
Page 61: Aux2 Output Options
PROgRAM or later. Press P146E (the existing Pulse time will be displayed). FACtory DeFAULt Press [NEW tIME] E (the new Pulse time will be displayed). 20 sec. reLAteD optIoNS P142E 8E Ness D8x / D16x Control Panel – Installation Manual... -
Page 62: Aux3 Output Options
P123E is one of several options which control the behaviour of the AuX3 output. Installer mode or NessComms. One of the most powerful features of the D8x/D16x panels is the flexibility to control the AuX outputs by various events and alarms. If the AuX3 output does not behave as FACtory DeFAULt expected, please check all related options such as Autotimers and P143E options. - Page 63 PROgRAM or later. Press P147E (the existing Pulse time will be displayed). FACtory DeFAULt Press [NEW tIME] E (the new Pulse time will be displayed). 20 sec. reLAteD optIoNS P143E 8E Ness D8x / D16x Control Panel – Installation Manual...
-
Page 64: Aux4 Output Options
P124E is one of several options which control the behaviour of the AuX4 output. Installer mode or NessComms. One of the most powerful features of the D8x/D16x panels is the flexibility to control the AuX outputs by various events and alarms. If the AuX4 output does not behave as FACtory DeFAULt expected, please check all related options such as Autotimers and P144E options. -
Page 65: Aux4 Output Options
PROgRAM or later. Press P148E (the existing Pulse time will be displayed). FACtory DeFAULt Press [NEW tIME] E (the new Pulse time will be displayed). 20 sec. reLAteD optIoNS P144E 8E Ness D8x / D16x Control Panel – Installation Manual... -
Page 66: Enable/Disable Hardwire Zones
[Zone no]E on: Hardwired zones enabled for that zone p126e kpx/SAtUrN keypAD optIoNS the Ness KPX and Saturn Keypad is an enhanced LCD keypad compatible with the D8x/ Available in D8x/D16x V6 and later. D16x version 6 and later control panels. -
Page 67: Autotime Description And Examples
FeAtUreS AUto-tIme FeAtUreS D8x/D16x V6 onwards features sophisticated new automation features making full use of the onboard Real time Clock and a set of powerful yet simple to program options. ARM or DISARM AutOMAtICALLy at pre-programmed times of day or day of the week. -
Page 68: Realtime Clock Programming
1E OFF 1. Press p392e. 2. Press 1e to turn the option ON or OFF. turn the option ON to enable user codes. Ness D8x / D16x Control Panel – Installation Manual Ness D8x / D16x Control Panel – Installation Manual... - Page 69 - one to turn the AuX ON & the other to turn it OFF. Note. AuX outputs must be enabled for control by Autotimers at options P121E-P124E. Ness D8x / D16x Control Panel – Installation Manual Ness D8x / D16x Control Panel – Installation Manual...
-
Page 70: Signal Strength Test
NoteS rADIo SIgNAL StreNgtH teSt • Signal strength of Radio Keys can the Radio Signal Strength test can be used to test the radio signal from any Ness radio be tested in uSER PROgRAM Mode or INStALLER PROgRAM Mode. device. the strength of the radio signal received is displayed on the zone lights 1 to 8 and beeped by the keypad. -
Page 71: Radio Device Programming
Reed Switches send Supervision signals. PROgRAMMINg RADIO DEVICES SUperVISIoN reLAteD optIoNS up to 8 or 16 radio devices can be assigned to the D8x and D16x, (one per zone). P65e Supervised Radio Zones. P66e Radio Supervision Alerts. PROgRAMMINg SEQuENCE – NO REStORALS P67e Radio Supervision time. -
Page 72: Radio Key Programming
Each of the 56 user Codes, except for the Master Code, can be programmed to P203E be Radio Codes. this allows up to 55 Ness Radio Keys to be used for Arming and P204E Disarming of the panel. the Ness RKP Radio Keypad can also be used with the P205E D8/D16, (see the RKP installer manual). -
Page 73: Serial Output Options
[not used] p199e SERIAL OutPut OPtIONS D8x and D16x V5.6 and later have the option for two way serial data communications Available in D8x/D16x V5.6 and later. via the onboard RS232 SERIAL port. Alarm and system messages can be sent and progrAm moDe LeVeL keypad/status request data can be received. -
Page 74: Access Control Options
AuX outputs by access card, the reader to which the card is assigned must be programmed to operate one of the four AuX outputs. • First, enable one or more AUX outputs to be a Reader output, P121E 8E, P122E 8E, P123E 8E and P124E 8E. • If using more than one 101-014 Ultraprox Reader, enable P301E 1E to Use Reader Addresses. • Next, assign which reader will trigger which AUX output. P318E - P338E Ness D8x / D16x Control Panel – Installation Manual... - Page 75 1e USe reADer ADDreSSeS If ON then all readers connected to the D8x/D16x must have set addresses of 1, 2 or 3. the progrAm moDe LeVeL data is then sent in an extended format that includes the reader address. (use up to three Installer mode or NessComms.
- Page 76 ACCeSS CoNtroL Strobe FLASH oN Arm/DISArm by reADer p301e 8e this option enables strobe flash when arming and disarming by Reader. (D8x/D16x tHIS optIoN IS AVAILAbLe IN versions prior to V5.4 had strobe flash permanently enabled). D8x/D16x V5.3 AND LAter...
- Page 77 P318E, P328E, P338E. P319e, P329e or P339e existing Reader Output Time is displayed one digit at a time [enter neW VALue] e new value is displayed one digit at a time Ness D8x / D16x Control Panel – Installation Manual...
-
Page 78: Weigand Reader Wiring Diagram
When multiple readers are used, the panel needs to identify the individual readers. In this mode the panel is compatible with the 101-091 Ness IDteck Fingerprint Reader or the 101-014 Ness ultraprox the 101-014 Ness ultraprox Weigand Readers can be Weigand Reader. -
Page 79: Monitoring Operation
CeNtrAL StAtIoN moNItorINg the Ness D8x and D16x control panels have an on-board digital dialler which can send CENTRAL STATION MONITORING detailed alarm messages to a central monitoring station. the digital messages can include information about the zone/s which caused the alarm, tamper alarms, low battery or mains failure reports, and it can also (by user number) identify the users who arm and disarm the system. -
Page 80: Remote Operation
Finished – hang up reLAteD optIoNS P141E 5E, telephone remote control of AuX1 P142E 5E, telephone remote control of AuX2 P143E 5E, telephone remote control of AuX3 P144E 5E, telephone remote control of AuX4 Ness D8x / D16x Control Panel – Installation Manual... - Page 81 P226E P227E P228E P229E P230E P231E P232E P233E P234E P235E P236E P237E P238E P239E P240E P241E P242E P243E P244E P245E P246E P247E P248E P249E P250E P251E P252E P253E P254E P255E P256E Ness D8x / D16x Control Panel – Installation Manual...
-
Page 82: Programming Options Summary
6 beeps on Arming Home arm by radio key ON/OFF Disable Mains Fail Alarm Options marked "u" can be programmed in User Program Mode Exit BEEPS - Full Arm Exit BEEPS - Home Mode All options can be programmed in Installer Program Mode Ness D8x / D16x Control Panel – Installation Manual... - Page 83 Door open too Long (DotL) alarm to auX2 Delayed Closing Reports Reader [x] output to AuX2 Manual Exclude Reports p123e 3E Enable AuX3 for Autotime Auto Exclude Reports Reader [x] output to AuX3 Ness D8x / D16x Control Panel – Installation Manual...
- Page 84 Real time Clock set DAy 01 (01-31) p343e Real time Clock set MONtH 01 (01-12) p344e Real time Clock set yEAR 09 (00-63) p345e Real time Clock VIEW DAy OF WEEK (Sun=1) Ness D8x / D16x Control Panel – Installation Manual...
-
Page 85: Programming Options Summary
20 sec [not used] [not used] AuX3 tOggLE AuX1 tOggLE See pages 68, 69 for descriptions of Autotimer AuX3 PuLSE AuX1 PuLSE related options. AuX4 tOggLE AuX2 tOggLE AuX4 PuLSE AuX2 PuLSE Ness D8x / D16x Control Panel – Installation Manual... -
Page 86: Specifications And Approvals
RADIO Header ....... Multi-pin connector for the Ness Radio Interface (100-200). SERIAL Header ...... Serial data port for data input.output and direct connect programming using NessComms™ software. READER Header ....Multi-pin port for connecting up to 3 Ness proximity access card readers. OutPutS Siren ........ -
Page 87: Release Notes
3. Ascii messages now include D8x output results. New messages are added to indicate the states of the D8x outputs – including the AuX, Siren, Strobe, 5. Enhanced RS232 Serial Interface. Full two way serial data via the onboard Reset etc. -
Page 88: Installation Record
DATE PURCHASED: DATE INSTALLED: INSTALLATION RECORD INSTALLATION COMPANY: TELEPHONE: MONITORING COMPANY: NESS D8 ALARM CONTROL PANEL TELEPHONE: NESS D16 ALARM CONTROL PANEL P26E ENTRY DELAY TIME 1 Seconds ZONE ASSIGNMENT P27E ENTRY DELAY TIME 2 Seconds P28E EXIT DELAY TIME...
Need help?
Do you have a question about the D8x and is the answer not in the manual?
Questions and answers