Polycom SoundPoint 550 User Manual
Hide thumbs
Also See for SoundPoint 550:
- User manual (108 pages) ,
- Owner's manual (68 pages) ,
- Manual (29 pages)

Subscribe to Our Youtube Channel
Related Manuals for Polycom SoundPoint 550


Summary of Contents for Polycom SoundPoint 550
- Page 1 Polycom® SoundPoint IP® 550/560 Phone User Guide UC Software 4.0.1 November 2011 1725-12567-001 Rev. E...
- Page 2 As between the parties, Polycom, Inc., retains title to and ownership of all proprietary rights with respect to the software contained within its products. The software is protected by United States copyright laws and international treaty provision.
-
Page 3: About This Guide
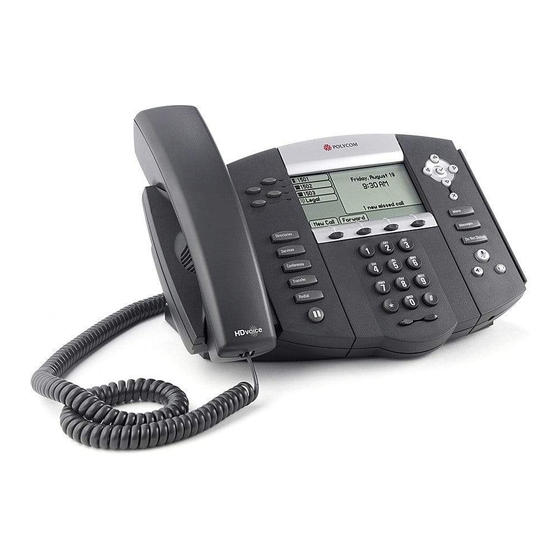
About This Guide Thank you for choosing the Polycom® SoundPoint IP 550/560, a full-duplex, hands-free SIP desktop phone. This unit provides business telephony features and functions such as multiple call appearances, call hold, transfer, and conference over an IP network. - Page 4 User Guide for the SoundPoint IP 550/560 Phone...
-
Page 5: Table Of Contents
Registering Your Phone ......... 1–7 Using the Polycom Web Configuration Utility ..... . 1–8 2 Using the Basic Features of Your Phone . - Page 6 User Guide for the SoundPoint IP 550/560 Phone Calling and Answering from a Locked Phone ....2–26 Logging Into Phones ......... . . 2–27 Logging In and Out of a Phone .
- Page 7 Testing Phone Hardware ........5–7 Regulatory Notices ....Regulatory Notices–1 End-User License Agreement for Polycom® Software...
- Page 8 User Guide for the SoundPoint IP 550/560 Phone viii...
-
Page 9: Getting Started With Your Phone
Getting Started with Your Phone This chapter provides basic installation instructions and information for obtaining the best performance with the Polycom® SoundPoint IP 550/560 desktop phone. The SoundPoint IP 550/560 provides a powerful, yet flexible IP communications solution, delivering excellent voice quality. The high-resolution graphic display supplies content for call information, multiple languages, directory access, and system status. -
Page 10: Features Of Your Phone
User Guide for the SoundPoint IP 550/560 Phone Features of Your Phone The features of your SoundPoint IP 550/560 phone are: Item Description Message Waiting Indicator Alert for voice and text (instant) messages. Arrow Keys Scroll through displayed information. Select a field of displayed data. Delete displayed data. - Page 11 Getting Started with Your Phone Item Description Feature Keys: Allow you to quickly access important features with a single press. Microphone Mute Mutes audio transmission locally during calls and conferences. Allows you to place and receive calls through Headset an optionally connected headset. Allows for hands-free communication during Speakerphone calls.
- Page 12 User Guide for the SoundPoint IP 550/560 Phone Item Description Color Graphic Display Shows the user interface of the phone. For more infomration, refer to Information Status page 1-7. Associated line icons are described in the following table. Line/Speed Dial Key Use these keys to activate up to four lines or speed dials that can be assigned to your phone.
- Page 13 Getting Started with Your Phone Icons associated with the line keys appear on the graphic display and represent: Icon Description Registered line (solid) Registered shared line Unregistered line (outline) Voice mail/Text messages Speed dial Ringing Call in progress with HD Voice Call in progress Call Forward Held/On Hold Line...
-
Page 14: Before You Use Your Phone
User Guide for the SoundPoint IP 550/560 Phone Before You Use Your Phone This section includes information on how to navigate the phone’s menus, how to enter data, and how to read the phone’s information status bar. The background and key colors that appear on your SoundPoint IP 550/560 phone Note may differ from what appears in this user guide. -
Page 15: Information Status
Getting Started with Your Phone If you want to... Then do this... Enter special characters Press *, #, <1>, <0> one or more times quickly in alphanumeric mode. Press * or # once or twice quickly in numeric mode. To enter a space, press <0> three times quickly in alpha mode. -
Page 16: Using The Polycom Web Configuration Utility
IP address of your phone, and the user name and password login credentials of the phone user or the phone administrator. Note For detailed information on accessing, navigating, and using the utility, see the Polycom Web Configuration Utility User Guide, available from the Technical Bulletins Support page... - Page 17 Getting Started with Your Phone From the Web Configuration Utility login screen, select User, and then enter the User password. The factory default password for a User is 123. Note Click Submit. The Web Configuration Utility Home screen is displayed. 1 - 9...
- Page 18 User Guide for the SoundPoint IP 550/560 Phone 1 - 10...
-
Page 19: Using The Basic Features Of Your Phone
Using the Basic Features of Your Phone Your SoundPoint IP 550/560 desktop phone is designed to be used like a regular phone on a public switched telephone network (PSTN). You call place a call, transfer a call to someone else, or conduct a conference call. At any time, at most one active call may be in progress on your phone. -
Page 20: Placing Calls
User Guide for the SoundPoint IP 550/560 Phone If you require additional information or assistance with your phone, contact your system administrator. Placing Calls You can place a call using your SoundPoint IP 550/560 phone over the handset, speakerphone, or headset. You can dial the number first, and then choose the method you will use to speak to the other party. - Page 21 The maximum URL or IP address length is 32 characters. For example, 10.3.0.42, sip:jane@polycom.com . Press the URL soft key and enter the URL or IP address. Use * for “.” and # for “@”.
-
Page 22: Answering Calls
User Guide for the SoundPoint IP 550/560 Phone To place a call using the headset: Do one of the following: >> — With the optional headset connected, press or the New Call soft key to obtain dial tone. Press Dial the desired number using the dial pad. —... - Page 23 Using the Basic Features of Your Phone • A single Line Key per line • Multiple Line Keys per line If your phone is configured with multiple call appearances, refer to Using Multiple Call Appearances on page for instructions on how to answer a call.
- Page 24 User Guide for the SoundPoint IP 550/560 Phone To answer a call using the Hands-Free Speakerphone: If “Handsfree mode disabled” appears on the graphic display after you press the Note speakerphone key your system administrator has disabled the speakerphone on your phone.
-
Page 25: Ending Calls
Using the Basic Features of Your Phone — To answer the call, press the line key. If you hold the line key, you can bring up the caller’s information and press the Answer soft key to answer the call. Ending Calls To end a call: Do one of the following: >>... -
Page 26: Placing Calls On Hold
User Guide for the SoundPoint IP 550/560 Phone Placing Calls on Hold During a call, press or the Hold soft key. The hold icon will display on the line key label. Press again or the Resume soft key to retrieve the call. The registered line icon appears as the line indicator. -
Page 27: Hosting Conference Calls
Using the Basic Features of Your Phone Hosting Conference Calls You can create a conference with other parties using the phone’s local conference feature. You can create a conference at any time between an active call and a call on hold (on the same or another line) by pressing the Join soft key. - Page 28 User Guide for the SoundPoint IP 550/560 Phone 2. Press or the Confrnc soft key to create a new call. The active call is placed on hold. If configured for single key-press conferences, all conference participants hear the Note dial tone and ringback when the conference host places a call to a new party. 3.
-
Page 29: Managing Conference Calls
Using the Basic Features of Your Phone A conference similar to this one will now exist. 8. Repeat steps 5 to 7 until you have added all intended parties. Managing Conference Calls You are currently in a conference call.A screen like the one below is shown on your phone. - Page 30 User Guide for the SoundPoint IP 550/560 Phone 2. Do one of the following: — To add a new party, press the Add soft key. Call another party as you would using or the Confrnc soft key (outside the conference management feature). The other parties are put on hold.
-
Page 31: Adding Parties To Conference Calls
Using the Basic Features of Your Phone — To place a party on hold, select the party, and then press the Hold soft key. The held party cannot hear any parties and no party can hear the held party. Press the Resume soft key to return the party to the conference. If the held party presses on their phone, the party will remain on hold within the conference even if you press the Resume soft key. - Page 32 User Guide for the SoundPoint IP 550/560 Phone To add a party to a conference call using the Join soft key: 1. From the Manage Conference page, press or the Hold soft key. The other parties in the conference call are placed on hold. Note If configured for local conference hold, the other parties in the conference call can continue to speak with each other while you place the new call.
-
Page 33: Joining Conferences
Using the Basic Features of Your Phone Joining Conferences To join two conferences: Previously you set up two separate conference calls between a number of parties. Only one conference can be active at a time. From the idle screen, press the Join soft key. >>... -
Page 34: Transferring Calls
User Guide for the SoundPoint IP 550/560 Phone Transferring Calls A call can be transferred in one of three ways: • Consultative transfer—The party to whom you want to transfer the call answers their phone before you transfer the call or hang up. You can consult with them before completing the transfer. - Page 35 Using the Basic Features of Your Phone 2. Place a call to the desired recipient of the call. Refer to Placing Calls page for calling methods. 3. As soon as you hear the ring-back sound or after the party answers (and you speak to the party), press or the Trnsfer soft key.
-
Page 36: Forwarding Calls
User Guide for the SoundPoint IP 550/560 Phone Forwarding Calls There are two ways to forward incoming calls to another party: • Static Forwarding: Incoming calls are forwarded in special cases (before ringing, if there is no answer, or if the line is busy). •... - Page 37 Using the Basic Features of Your Phone If you selected Always, enter a number to forward all future incoming calls to. If you selected No Answer, enter a number to forward all unanswered incoming calls to and how many rings to wait before forwarding (one ring is approximately six seconds).
-
Page 38: Enabling Do Not Disturb
User Guide for the SoundPoint IP 550/560 Phone To disable call forwarding: 1. From the idle screen, press the Forward soft key. 2. If multiple lines are configured on your phone, select the line to forward from the list using 3. -
Page 39: Assigning Speed Dial Keys
Using the Basic Features of Your Phone To enable Do Not Disturb: Press >> A flashing icon and text on the graphic display indicate that Do Not Disturb is enabled. Calls received while Do Not Disturb is enabled are logged in the Missed Calls list unless configured to be forwarded to another party by your system administrator. - Page 40 User Guide for the SoundPoint IP 550/560 Phone In the figure below, the phone has one line key, and speed dial keys for Byron, Lauren, and Andrew. To dial Byron, Lauren, or Andrew, press the associated line key. Note To quickly access a list of speed dial index numbers, press the Up Arrow key from the idle screen.
-
Page 41: Using Voice Mail
The index can be any value between the next available index value and the maximum (value of 9999). Polycom recommends that you assign speed dial index values consecutively. For example, if you assign the third Line Key to the speed dial index value “2”, assign the fourth Line Key to the speed dial index value “3”. -
Page 42: Locking And Unlocking The Phone
User Guide for the SoundPoint IP 550/560 Phone Your phone indicates the presence of new voice mail messages by a flashing Message Waiting Indicator LED on the front of the phone and a visual notification on the screen. If your phone has multiple lines, an individual line indicator icon indicates voice mail messages on that line. -
Page 43: About Your User Password
Using the Basic Features of Your Phone When your phone is locked, the messages “This phone is locked” and “Authorized calls only” scroll on the status bar. Messages that were displayed before the phone was locked do not display. About Your User Password You are assigned a user password so you can answer calls from your locked phone and unlock the phone. -
Page 44: Calling And Answering From A Locked Phone
User Guide for the SoundPoint IP 550/560 Phone — DND when locked - You will not receive indication of any incoming calls. Calls will go directly to voice mail (if enabled) and display in your Missed Calls list when you unlock the phone. Enabling DND when locked on shared lines disables ringing only. -
Page 45: Logging Into Phones
Using the Basic Features of Your Phone — Press the New Call soft key. From the Place an Authorized Call screen, select the number you want to call, and then press the Dial soft key. The following screen shows an example of the Place an Authorized Call screen. -
Page 46: Logging In And Out Of A Phone
User Guide for the SoundPoint IP 550/560 Phone You can log in to a phone by entering your user ID and password. Default passwords are preset at the factory to the numerals 123. If a phone is in the logged out state and requires a user login, you may be able to Note use the phone to place emergency calls to standard emergency numbers (such as 911) and other pre-configured phone numbers. - Page 47 Using the Basic Features of Your Phone The User Login screen displays, as shown next. Enter your user ID and user password, then press the Log in soft key. If your login credentials are accepted, the phone updates to display your personal phone profile, and the home screen displays, as shown next.
-
Page 48: Placing Calls From Phones That Are In The Logged Out State
User Guide for the SoundPoint IP 550/560 Phone The Logout screen displays with a confirmation message, as shown next. Press the Yes soft key. Your personal profile is no longer accessible, and the phone displays either the User Login screen for the next user login, or the default phone profile for anonymous users. -
Page 49: Changing Your User Password
By default, user passwords are factory preset to the numerals 123. Your Note administrator can change this default password if needed. Polycom recommends that you change your password when you first log in to a phone. Your user ID is managed only by your administrator, meaning you cannot change it yourself. - Page 50 User Guide for the SoundPoint IP 550/560 Phone 2 - 32...
-
Page 51: Using The Advanced Features Of Your Phone
Using the Advanced Features of Your Phone This chapter provides operating instructions for the advanced features of the SoundPoint IP 550/560 phone. The topics include: • Using Multiple Call Appearances • Using Text Messaging • Using Buddy Lists • Broadcasting Messages Using Push-to-Talk and Group Paging •... - Page 52 User Guide for the SoundPoint IP 550/560 Phone For example, the following figure shows an active call with Lauren Gates on line 3161. The following figure shows an incoming call from Jack Jones on the same line. To answer an incoming call when configured for multiple call appearances: Do one of the following: >>...
-
Page 53: Using Text Messaging
Using the Advanced Features of Your Phone Your phone can display two call appearances at one time. If more than two calls are taking place on the same line, a counter displays on the display. Use the down arrow to access additional calls, or call appearances. To place an additional call on the same line, place the active call on hold, and then press the New Call soft key. - Page 54 User Guide for the SoundPoint IP 550/560 Phone To send a text message: 1. Do one of the following: — Press Select Instant Messages. Screen options may vary with your application. Voice Mail may be accessible with a Note single key press. Contact your system administrator about this option. —...
-
Page 55: Using Buddy Lists
Using the Advanced Features of Your Phone Using Buddy Lists A buddy list is a list of users/devices whose status, or presence, you can monitor. Users update their presence setting (for example, “Be right back”, “Busy”, or “Out to lunch”), and you can view their status in real-time from your phone. -
Page 56: Managing Buddies
User Guide for the SoundPoint IP 550/560 Phone Managing Buddies Manage your buddies by selecting the contacts whose presence you want to monitor. These contacts form your buddy status list. You add contacts to your buddy status list from your contact directory. Note If your call server is Microsoft Live Communications Server 2005, refer to Integrating With Microsoft Live Communications Server 2005... -
Page 57: Integrating With Microsoft Live Communications Server 2005
Using the Advanced Features of Your Phone 8. Press to return to the idle screen. Integrating With Microsoft Live Communications Server 2005 Your system administrator can configure your phone to work with Microsoft Live Communications Server 2005 and communicate with others using Microsoft Office Communicator and Windows Messenger. -
Page 58: Integrating With Microsoft Lync Server 2010
User Guide for the SoundPoint IP 550/560 Phone 6. For Access, toggle to select Enabled. When enabled, you are allowing the contact to see your presence. When disabled (default), you are not allowing the contact to see your presence. 7. Press to return to the idle screen. -
Page 59: Broadcasting Messages Using Push-To-Talk And Group Paging
Using the Advanced Features of Your Phone Calling Your Buddies To place a call from your buddy list: 1. Do one of the following: Press , and select Features > Presence > Buddy Status. Select the Buddies soft key. 2. Scroll to desired buddy in the list. 3. -
Page 60: Push-To-Talk Mode
User Guide for the SoundPoint IP 550/560 Phone placed on hold. Phones play Priority broadcasts at the phone’s current audio level. • Emergency (for Group/Channel 25)—Broadcasts sent to Group/Channel 25 are considered Emergency broadcasts. All phones receive Emergency broadcasts (even if Do Not Disturb is enabled), and play them immediately. - Page 61 Using the Advanced Features of Your Phone To send a PTT broadcast: 1. Press the Talk soft key to select a channel to broadcast on. Note To automatically send a PTT broadcast on the default channel, press and hold the Talk soft key, and then go to step 4.
- Page 62 User Guide for the SoundPoint IP 550/560 Phone 3. To start the broadcast, press and hold the Talk soft key. (You need to press the Talk soft key throughout the entire broadcast.) You’ll hear a ‘transmitting’ beep, and then the phone displays the channel you are using (‘To:Teachers (Channel 18)’, as shown next).
- Page 63 Using the Advanced Features of Your Phone You’ll receive broadcasts on the channels you’re subscribed to as well as Channel 24 (the Priority channel) and Channel 25 (the Emergency channel). If you’ve enabled Do Not Disturb on your phone, you’ll only receive Emergency broadcasts.
- Page 64 User Guide for the SoundPoint IP 550/560 Phone Ending PTT Broadcasts You can end a PTT broadcast by releasing the Talk soft key, or by tapping the End PTT soft key. After you end a broadcast, the channel remains open so others can respond.
- Page 65 Using the Advanced Features of Your Phone To update the default channel: 1. Press , then select Settings > Basic > Preferences > Paging/PTT Configuration > PTT Push to Talk. 2. Press the Edit soft key. 3. Enter the new default channel. 4.
-
Page 66: Group Paging Mode
User Guide for the SoundPoint IP 550/560 Phone 2. From the PTT Channel Configuration screen, use the down arrow key to locate Accept While Busy, then press the Select soft key. 3. From the Accept While Busy screen, use the left or right arrow key to select Enabled or Disabled, then press the Ok soft key. - Page 67 Using the Advanced Features of Your Phone Note To automatically send a page to the default paging group, press the Paging soft key. 2. From the Paging Groups List screen, select the paging group to send the page to (as shown next). The list displays the default paging group, the most recent group you paged, and other paging group that you can page.
- Page 68 User Guide for the SoundPoint IP 550/560 Phone You’ll receive pages on the paging groups you’re subscribed to as well as Group 24 (Priority pages) and Group 25 (Emergency pages). If you enabled Do Not Disturb, you’ll only receive Emergency pages. Non-emergency pages won’t display or play on your phone.
- Page 69 Using the Advanced Features of Your Phone An incoming page plays from the speakerphone by default. If you lift the handset or press the Headset key, you’ll hear a dial tone. Your system administrator can change your phone’s configuration so that you can Note change where the page plays: the speakerphone, headset, or handset.
-
Page 70: Accessing Features With Your Login Credentials
User Guide for the SoundPoint IP 550/560 Phone Allowing Pages to Play During Active Calls The Accept While Busy option allows pages to come in as active calls (if enabled) or held calls (if disabled). If enabled, a page will interrupt telephone calls and you’ll be able to hear the audio of both the telephone call and the page. -
Page 71: Updating Your Phone's Configuration
Using the Advanced Features of Your Phone To re-submit or enter your login credentials: 1. Press , then select Settings > Basic> Login Credentials. The Login Credentials Domain screen displays. 2. Enter the domain, user name, and password, then press the Submit soft key. - Page 72 User Guide for the SoundPoint IP 550/560 Phone Note Do not restart your phone to upload a new configuration. Instead, refer to Accessing Features with Your Login Credentials on page 3-30. Call lists are automatically cleared when you restart the phone. Note To restart the phone: 1.
-
Page 73: Customizing Your Phone
Customizing Your Phone You can customize your Polycom® SoundPoint IP 550/560 desktop phone by adjusting settings such as: time and date, display contrast, and ring type. You can add contacts to the phone’s directory manually or from call lists. You can handle incoming calls from different contacts in different ways. -
Page 74: Changing The Display Contrast
User Guide for the SoundPoint IP 550/560 Phone You can select from various formats for the time and date display. You can also disable the time and date so they do not display on the phone. To configure the time and date formats: 1. -
Page 75: Changing The Backlight Intensity
Customizing Your Phone 2. Select Settings > Basic > Contrast. 3. Press the Up or Down soft keys, or the volume keys, to increase or decrease the display contrast. 4. Press the Ok soft key to accept your changes. 5. Press to return to the idle screen. - Page 76 User Guide for the SoundPoint IP 550/560 Phone 3. Select Backlight On Intensity. 4. Scroll to select high (default), medium, low, or off, and then press the Select soft key. Press the Save soft key to accept your changes. 5. Select Backlight Idle Intensity. 6.
-
Page 77: Changing The Backlight Timeout
This feature allows you to answer your phone from your headset if you are using one. For information on headsets that provide Polycom supported electronic hookswitch features for placing, answering, and ending calls, refer to Technical Bulletin 37477 SoundPoint IP Family Headset Compatibility List, available from http://www.polycom.com/support/voice/soundpoint_ip/VoIP_Technical_Bulletins_pu... - Page 78 User Guide for the SoundPoint IP 550/560 Phone To select a headset that supports electronic hookswitch: 1. Press 2. Select Settings > Basic > Preferences > Headset > Analog Headset. 3. Scroll to select your headset, and then press the Select soft key. 4.
-
Page 79: Selecting The Correct Headset For Electronic Hookswitch
This feature allows you to answer your phone from your headset if you are using one. For information on headsets that provide Polycom supported electronic hookswitch features for placing, answering, and ending calls, refer to Technical Bulletin 37477 SoundPoint IP Family Headset Compatibility List, available from http://www.polycom.com/support/voice/soundpoint_ip/VoIP_Technical_Bulletins_pu... -
Page 80: Changing The Audible Ringer
User Guide for the SoundPoint IP 550/560 Phone 4. Scroll to select the desired ring type. To hear the selected ring type, press the Play soft key. 5. Press the Select soft key to change to the selected ring type. 6. -
Page 81: Changing The Language
Customizing Your Phone 3. Scroll to select the desired ring destination. Choose Speaker, Handset, Headset, or Active as the alerting destination for the audible ringer. 4. Press the Select soft key to change to the selected audible ringer. 5. Press to return to the idle screen. -
Page 82: Changing The Background
User Guide for the SoundPoint IP 550/560 Phone 4. Press the Select soft key to change to the highlighted language. Text that appears on the graphic display will change to the language of your choice. 5. Press to return to the idle screen. Changing the Background You can change the picture or design that appears on the graphic display. -
Page 83: Changing The Soft Key Label Color
Customizing Your Phone 3. Scroll to highlight the background you want. 4. Press the Select soft key to change to the highlighted background. 5. Press to return to the idle screen. Changing the Soft Key Label Color You can change the soft key label color that appears on the graphic display. A default soft key label color displays when the phone starts up (shown below). -
Page 84: Muting The Microphone
User Guide for the SoundPoint IP 550/560 Phone 2. Select Settings > Basic > Preferences > Label Color. Using the dialpad keys 1, 3, 7, and 9 change the soft key color to your desired color. The Label soft key on the right reflects your changes. Note When the color of the label reaches a certain level of whiteness, “Cannot save this color. -
Page 85: Managing Call Lists
Customizing Your Phone Managing Call Lists Your phone maintains local lists of missed, received, and placed calls. Each list can contain up to 100 entries. Press followed by Call Lists > Missed Calls, Received Calls, or Placed Calls (shown below). Manage the call list by doing the following: •... -
Page 86: Managing Contacts
User Guide for the SoundPoint IP 550/560 Phone Managing Contacts You can store a large number of contacts in your phone's local contact directory, accessible by pressing and selecting Contact Directory. You can dial or search for a contact in this directory. You may be able to add, edit, and delete contacts. - Page 87 Customizing Your Phone 5. Enter first and/or last name of the contact from the keypad. Use the 1/A/a soft key to select between numeric and upper/lower case alphanumeric modes. Use the Encoding soft key to access special characters in other languages. 6.
- Page 88 User Guide for the SoundPoint IP 550/560 Phone Block Buddy fields, refer to Managing Buddies on page 3-6.Press the Save soft key to accept your changes. 10. Press to return to the idle screen. Adding Contacts From Call Lists To add a contact to the local contact directory from a call list: 1.
-
Page 89: Editing Contacts
Customizing Your Phone 4. Press the View soft key. The contact’s information appears on the graphic display. 5. Press the Save soft key to save the contact in the local contact directory. “Entry saved” appears on the graphic display. Only the first name, last name, and phone number are saved. -
Page 90: Deleting Contacts
User Guide for the SoundPoint IP 550/560 Phone 7. Press to return to the idle screen. You can quickly edit a contact associated with a speed dial key by pressing and Note holding the contact’s speed dial key, and then performing steps 5 to 7. Deleting Contacts To delete a contact from the local contact directory: 1. -
Page 91: Searching For Contacts
Customizing Your Phone 2. Select Corporate Directory. 3. Search for the contact. Refer to Searching the Corporate Directory on page 4-20. 4. Press the View soft key. The contact’s information appears on the graphic display. 5. Press the Dial soft key. Searching for Contacts Searching the Contact Directory To search for a contact in the local contact directory:... - Page 92 User Guide for the SoundPoint IP 550/560 Phone 5. Press the Search soft key again. You can dial any successful matches from the resulting information on the graphic display. Searching the Corporate Directory To search for a contact in the corporate directory (if enabled): 1.
- Page 93 Customizing Your Phone 3. Search for the contact in one of the following ways: — In the search line, enter the first few characters of the contacts’s last name using the dial pad. For example, to search for Carol Woller, enter wo in the search line.
-
Page 94: Managing Incoming Calls
User Guide for the SoundPoint IP 550/560 Phone — Press the AdvFind soft key, enter search values in the displayed fields. For example, enter Byron Smith as the first name and last name. Press the Submit soft key. In this example, Bryon Smith appears in the search results. -
Page 95: Rejecting Calls
Customizing Your Phone To set a distinctive ring type for a contact: 1. Press 2. Select Contact Directory. 3. Scroll to highlight the contact. You can also use the * key to page up and the # key to page down. 4. -
Page 96: Diverting Calls
User Guide for the SoundPoint IP 550/560 Phone 4. Press the Edit soft key, and then scroll down to the Auto Reject field. 5. Toggle to select Enabled. 6. Press the Save soft key to accept your changes. 7. Press to return to the idle screen. -
Page 97: System Customizations
Customizing Your Phone 8. Press the Save soft key to accept your changes. 9. Press to return to the idle screen. System Customizations Support for multiple lines, multiple line keys per line, or shared lines can be configured by your system administrator. See your system administrator for details regarding these customizations. - Page 98 User Guide for the SoundPoint IP 550/560 Phone 4 - 26...
-
Page 99: Troubleshooting Your Phone
Troubleshooting Your Phone This chapter contains general troubleshooting information to help you solve any problems you might encounter when you use your Polycom® SoundPoint IP 550/560 phone. The tables in this chapter list possible trouble symptoms, the likely causes of these problems, and the recommended corrective actions to take. -
Page 100: Power And Startup
User Guide for the SoundPoint IP 550/560 Phone Power and Startup Symptom Problem Corrective Action There are power issues. The SoundPoint IP 550/560 Do one of the following: phone has no power. • Check if the phone is properly plugged into a functional AC outlet. -
Page 101: Access To Screens And Systems
Troubleshooting Your Phone Access to Screens and Systems Symptom Problem Corrective Action There is no response when you The SoundPoint IP 550/560 Do one of the following: press a feature key. phone is not in an active state. • Press the keys more slowly. •... -
Page 102: Audio
User Guide for the SoundPoint IP 550/560 Phone Audio Symptom Problem Corrective Action There is no audio on the The connections are not correct. Do one of the following: headset. • Ensure the headset is plugged into the jack marked Headset at the rear of the phone. - Page 103 Troubleshooting Your Phone Symptom Problem Corrective Action The phone does not ring. Ring volume is low. Do one of the following: • Adjust the ringing level from the front panel using the volume up/down keys • Check the Alerting Destination from Menu >...
-
Page 104: Displays
User Guide for the SoundPoint IP 550/560 Phone Displays Symptom Problem Corrective Action There is no display. Power is not correctly applied to Do one of the following: the SoundPoint IP 550/560 The display is incorrect. • Check that the screen is illuminated. phone or the SoundPoint IP The display has bad contrast. -
Page 105: Productivity Suite
Troubleshooting Your Phone Productivity Suite Symptom Problem Corrective Action You are trying to access one of The license is not installed on Do the following: the following features, but it is not your phone or it has expired. • Press the Menu key, then select available on your phone: Status >... - Page 106 User Guide for the SoundPoint IP 550/560 Phone 5 - 8...
-
Page 107: Regulatory Notices
Polycom, Inc. Do not remove (or allow anybody else to remove) any product identification, copyright or other notices. - Page 108 Replacement products or parts may be new or reconditioned. Polycom is expected to warrant any replaced or repaired product or part for ninety (90) days from shipment, or the remainder of the initial warranty period, whichever is longer. Products returned to Polycom must be sent prepaid and packaged appropriately for safe shipment, and it is recommended that they be insured or sent by a method that provides for tracking of the package.
- Page 109 In accordance with Part 15 of the FCC Rules, the user is cautioned that any changes or modifications not expressly approved by Polycom, Inc. could void the user’s authority to operate the equipment. This equipment may not be used on a coin service or party line.
- Page 110 This SoundPoint IP 550/560 SIP is marked with the CE mark. This mark indicates compliance with EC Directives 2006/95/EC and 2004/108/EC. A full copy of the Declaration of Conformity can be obtained from Polycom Ltd., 270 Bath Road, Slough, Berkshire, SL1 4DX, UK.
- Page 111 PTC220 Paragraph 8.3.1 Digital Telephone Loudness Rating This Polycom SoundPoint IP560 VoIP Telephone was made to comply with PTC220 paragraph 8.2.1 by installing a New Zealand specific version of software known as 3.1.0.5891. All samples of this telephone connected to the Telecom network must have this software version installed to be fully compliant with this Telepermit.
- Page 112 Modification of these Polycom Soundpoint IP 320, 330, 430, 550, 650 VoIP Telephones for the New Zealand network 5. All samples of Polycom Soundpoint IP 320, 330, 430, 550, 650 VoIP Telephones connected to the Telecom network shall be modified as described in KTL Test Report Nos.
- Page 113 Agreement. 1. GRANT OF LICENSE. Subject to the terms of this Agreement, Polycom grants to you a nonexclusive license to install and use the Software Product included with the Polycom product that incorporates or uses the Software Product (the “Product”).
- Page 114 If the Software Product is labeled as an upgrade, you must be properly licensed to use the software identified by Polycom as being eligible for the upgrade in order to use the Software Product. A Software Product labeled as an upgrade replaces and/or supplements the software that formed the basis for your eligibility for the upgrade.
- Page 115 Polycom with a copy of your receipt, or to replace any defective media with software which substantially conforms to applicable Polycom published specifications. Any replacement Software Product will be warranted for the remainder of the original warranty period or thirty (30) days, whichever is longer.
- Page 116 10.3 Contact. If you have any questions concerning this Agreement, or if you desire to contact Polycom for any reason, please contact the Polycom office serving your country.
Need help?
Do you have a question about the SoundPoint 550 and is the answer not in the manual?
Questions and answers