Table of Contents
Advertisement
Quick Links
Short instructions
TechniSat
DigiCorder Satellite receiver
Your unit carries the CE symbol and complies with all relevant EU standards. Subject to change and printing errors. Correct as at 05/08
TechniSat and DigiCorder HD S2 X are registered tradehighlights of TechniSat Digital GmbH Postfach 560 54541 Daun www.technisat.de
Advertisement
Chapters
Table of Contents

Related Manuals for TechniSat EUROKLASSIK 1


Summary of Contents for TechniSat EUROKLASSIK 1
- Page 1 Your unit carries the CE symbol and complies with all relevant EU standards. Subject to change and printing errors. Correct as at 05/08 TechniSat and DigiCorder HD S2 X are registered tradehighlights of TechniSat Digital GmbH Postfach 560 54541 Daun www.technisat.de...
- Page 2 Automatic Search Satellite Channel searching Transponder Manual Search Country Protection of minors Time zone Program journal Date/Time Standby clock Basic settings Settings IRC code Screen format Quickstart Picture settings HDMI resolution Audio language HDMI colour space Sound settings Subtitle language TV SCART mode Antenna configuration Dolby Digital...
-
Page 3: Table Of Contents
Contents: Safety advice ..............................3 When not in operation ..........................4 Help:................................5 Initial installation............................5 Switching on and off ...........................6 Channel selectios ............................6 Optional channels ............................7 Additional channel information ........................7 Volume control ............................8 TV/Radio switching ............................8 Access Electronic Programme Guide (EPG): ..................8 Hard disk operation ...........................8 Recording ..............................8 Playback ..............................12... -
Page 4: When Not In Operation
In the following cases, you should disconnect the unit from the mains power supply, and consult a quali- fied technician: > the mains cable or the mains plug is damaged > the unit was exposed to liquid, or liquid has run into the unit >... -
Page 5: Help
Operation with a rotating antenna b During operation with a rotating antenna, connect the DiSEqC engine (Level 1.2) with the LNB input 1. Connection to a television set d Connect the receiver (HDMI output) and TV (HDMI input) via an HDMI cable. If your TV is suitably equipped, it will automatically switch to the HDMI input when the digital receiver is switched on. -
Page 6: Switching On And Off
DiSEqC > If you have DiSEqC components in your receiving installation, highlight the field Activate and confirm by pressing OK Position A/Option A > Use the arrow keys up/down to highlight the satellite you wish to receive at the DiSEqC setting Position A/Option A and confirm by pressing OK. -
Page 7: Optional Channels
Using the numeric keys > You may use the numeric keys to enter the desired channel number. For example: 1 for channel 1 1, then 4 for channel 14 2, then 3, then 4 for channel 234 When entering a channel number consisting of several digits, you have approx. 3 seconds after pressing each number to complete the entry. -
Page 8: Volume Control
Volume control > Adjust the volume of your digital receiver using the Volume + key to increase the volume, and Volume – to decrease the volume. > Press the mute key to switch the sound on or off. TV/Radio switching >... - Page 9 Warning! For technical reasons, it is not possible to receive two broadcasts, which are both transmitted in HD format, at the same time. To utilise all the recording facilities of your receiver, you should ensure it is con- nected via two independent antenna connections. This allows you to use the following combinations of recording and playback: - Record one broadcast and at the same time, play back another broadcast (even from a different TV channel;...
- Page 10 Automatically end recording Option 1 > Press the On/Standby key. Now a selection window appears, which should show the details of the cur- rent recording. > Use the arrow keys up/down to highlight the line with the desired action. > Confirm by pressing OK. The receiver completes recording of the broadcast and subsequently reverts to standby mode.
- Page 11 > In the selection window use the arrow keys up/down to select the desired source (TV or Radio) and confirm by pressing OK. Depending on the previous setting, either the TV or the radio channel list will now be displayed. >...
-
Page 12: Playback
Delete timer programming > To delete an existing timer setting, access the timer overview function. > Subsequently, use the arrow keys up/down to select the timer to be deleted. > Press the yellow function key Delete. A message will be displayed: “Do you really want to delete this timer?”... -
Page 13: Pause/Still Picture
Accessing the PVR navigator: The PVR navigator can be accessed in the following ways: During normal operation > Press the OK key to open the channel list navigator. > Press the green function key PVR to switch to the PVR navigator. >... -
Page 14: Slow Motion
Slow motion > By pressing the right arrow key once, the recording is played back at slow motion speed and the indica- tion “I_” appears on the display. Single frame progress > Press the arrow key up to display the next frame in a forwards direction and press down for display the previous frame in the backward/reverse direction. -
Page 15: Playback/Reproduction Of Pictures
Fast Forward and Rewind > During playback, press the blue function key Fast Forward or the red function key Rewind, several times if applicable, to advance or rewind the track at 4x, 16x or 64x normal speed. > During the 64x speed, press the blue or red function button to go forwards or backwards in 10 minute steps. - Page 16 Manage recordings This menu allows you to manage your recordings. > Press the OK button, to access the recording submenu. A list appears of the recordings contained on the hard disk. > Use the up/down arrow keys to select the desired recording. Delete >...
- Page 17 Extracting a section This function allows you to copy a section of a recording. A new recording is generated, consisting only of this section. The recording from which this section is copied remains in memory unchanged. To extract a section, proceed as follows: The beginning and end of the section that is to be copied must be indicated by two highlighters.
- Page 18 Please be careful to note, that only MP3 files can be managed from the Music menu, and only JPG files from the Images menu. > Call up the menu Manage hard drive as described above. > Use the arrow keys up/down to highlight the line Copy music or Copy images, in order to manage the relevant files.
-
Page 19: Sort Channels / Configure Favourites List
Hard disk information > By pressing the OK button, information concerning the integrated hard disk is displayed. Hard disk properties > Press the OK button, to see an overview of the filled capacity of the hard disk and the number of record- ings it contains. - Page 20 Select e.g. All broadcasters, to display all available channels in the overall list or All new, to display only newly found channels since the last search was carried out or All English, to display only English lan- guage channels. > Confirm by pressing OK. Now, depending on your selection, a channel list containing e.g. all channels, all new or all English-language channels will be displayed.
-
Page 21: Exit Menus
> Press the yellow function key Sort to enter the new position of the channel into memory. Exit Menus Press the TV/Radio key to return to normal operation. Further Information in more detail can be found on the Internet at the site www.technisat.com 2233560000700... - Page 25 Integrated Video Recorder P P V V R R DigiCorder HD S2X Digital Twin HD-Receiver with integrated Hard drive Operating manual With two PCMCIA slots for use with CI modules. For receiving free-to-air and encrypted (e.g. VIACCESS, CONAX, IRDETO, SECA etc.) HD satellite Programmes.
-
Page 26: Contents
1 Contents 1 Contents ..........2 2 Illustrations . - Page 27 6.6.7 Network settings ........... . .26 7 Operation .
- Page 28 8.1.2.5 How to programme new event timer ........46 8.1.3 Timeshift function .
-
Page 29: Illustrations
Remote control option: By switching the remote control option, this remote control unit can be used to control two TechniSat receivers and one TechniSat television set with the same coding. > To switch the remote control option, press the desired key (SAT1, SAT2 or TV) -
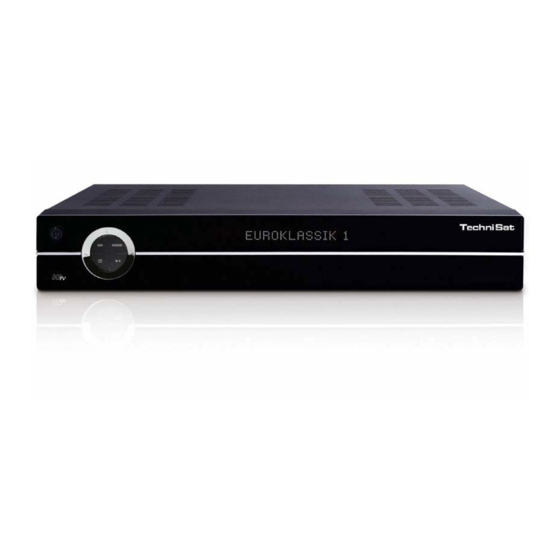
Page 30: Front Of Unit
Front of unit CI module Alphanumeric CI module Eject buttons for Arrow keys Standby display slot 2 CI modules slot 1 Back Play/Pause USB socket Mode OK-key Card-reader: > Insert the CONAX-Smartcard (golden chip facing downwards and in the direction of insertion) until the point of contact in the card-reader. - Page 31 9.2.4 EPG channel ............69 9.2.5 Selecting a TV channel .
- Page 32 For this reason you should occasionally visit the TechniSat homepage, to download the current version of the operating manual. We wish you many years of viewing pleasure with your TechniSat DigiCorder HD S2X ! Your TechniSat Team Your unit bears the CE mark and meets all the necessary EU standards.
-
Page 33: Please Read This First
3 Please read this first > Before starting to use your receiver, please check that all the components have been supplied correctly. The following should be included:1 digital receiver, 1 mains cable, 1 remote control, 1 operating manual, 1 guarantee card, 2 batteries (1.5V microcells). >... -
Page 34: Safety Notes
There is no provision for this drive to be exchanged other than by an authorised TechniSat retailer/technician. Any unauthorised replacement of the hard drive will mean that TechniSat will no longer guarantee that the appliance complies with legal requirements (e.g. laws relating to appliance and product safety, laws relating to electromagnetic compatibility of appliances). -
Page 35: When Not In Use
We recommend that you save a backup copy of the data on your DigiCorder before handing the receiver over to the specialists for maintenance. Recreating data is not part of the maintenance and repair work. TechniSat will accept no responsibility for loss of or damage to data during the repair process... -
Page 36: Connecting The Dvb Receiver
4 Connecting the DVB receiver Mains connection Connection between the LNB 1 and the LNB input 1 of the DVB receiver. (Please note: when operating the unit with one antenna signal, the LNB must be connected to the LNB input 1.) Connection between the LNB 2 and the LNB input 2 of the DVB receiver. -
Page 37: Mains Power Connection
The references a b c etc. mentioned below relate to the illustration on page 12. 4.1 Mains power connection The digital receiver should only be connected to the mains power supply when all the cable connections with other components of the system have been made. This helps to avoid damage to the digital receiver as well as to other components. -
Page 38: Video Cassette Recorder (Vcr)
4.4 Video cassette recorder (VCR) Connect the video recorder to the SCART socket VCR. During playback, the video recorder will provide a switching signal to the digital receiver. This will allow the video recorder signal to be routed automatically to the TV set. If your video recorder does not supply a switching current, use the 0/AV key to switch your digital receiver to the external input AV. -
Page 39: Initial Installation
5 Initial installation After you have read the safety notes and connected the unit as described in Chapter 4, switch the unit on as described in Chapter 7. When switching on the receiver for the first time, the starting window of the installation assistant AutoInstall will be displayed. - Page 40 > Use the green function key Accept to confirm and accept the selection, and to go to the antenna configuration Antenna configuration This step of the installation allows you to adjust the setting of your digital receiver to the configuration of your antenna. >...
- Page 41 All the satellites included in your antenna configuration will be scanned for Programmes. This procedure may take a few minutes. Please note any messages displayed on screen. Loading EPGplus data Your digital receiver has an Electronic Programme Guide, EPGplus Electronic Programme Guide.
-
Page 42: Settings
6 Settings Now that you have connected your new digital receiver, and commenced operating it, you can, if you wish, proceed to optimise its functions for your preferences. 6.1 Operating language This menu item gives you the opportunity of setting the language used in all the menus according to your preference. -
Page 43: Date/Hourt
6.2.3 Date/hour In this menu point decide whether the hour and the date should be automatically read in from a determined programme after switching on. > By pressing the OK key another window will open. > In this window use the up/down arrow keys to select either the entry Automatic or select the programme from which the hour and the date should be read in and confirm the selection with OK. -
Page 44: Sound Settings
> Now, using the up/down arrow keys, mark the line Picture Settings. > Confirm by pressing OK. The Menu Picture settings will appear. > Use the arrow keys up/down to move the marker within the menu and to change the individual positions as indicated. When selecting a menu item, please also note any messages displayed on screen. -
Page 45: Antenna Adjustment And Settings
> Confirm by pressing OK. The Menu Picture settings will appear 6.4.1 Audio speech > In this line, use the arrow keys left/right to select your preferred language. Where an appropriate signal is broadcast, this function will, after a scan, automatically set this language. -
Page 46: Multi-Tenna
prematurely terminated, the satellite positions ASTRA and EUTELSAT will be pre- programmed. If you also wish to receive other satellites, or if you are using a different LNB, set your digital receiver to the desired data as follows: > Use the Menu key to call up the Main menu. >... -
Page 47: Setting The Switching Matrix
Record a programme and at the same time another programme from the same reception field (1 programme in HD format and 1 programme in SD format or 25 programmes in SD format) or show any programme from the hard drive. Simultaneously record two programmes from the same reception band (15 programme in HD format and 1 programme in SD format or 2 programmes in SD5format). -
Page 48: Additional Settings/Lnb Properties
System examples Example 1: 2 satellites (Twin-LNBs) Example 2: 4 satellites (Twin-LNBs) Example 3: 4 satellites (Quattro-LNBs) Astra 19,2°/ Eurobird-Astra 28,5°/ Astra 19,2°/ Eurobird-Astra 28,5°/ Eutelsat 13° Astra 19,2° Eutelsat 13° Türksat 42° Türksat 42° Eutelsat 13° Multiswitch Multiswitch Outputs Outputs Position Position... -
Page 49: Rotating Antenna
Polarisation > Use the up/down arrow keys to enter the desired polarisation plane (horizontal or vertical). Symbol rate The symbol rate indicates the volume of data broadcast per second. This figure could be shown as, for example, 27500 (27500 symbols per second). >... -
Page 50: Display Time Information Banner
If the function is switched on you can configure four lists of favourites (main list, favourites 1, favourites 2 and favourites 3). The ex-works programming can be found in the main list. When the function is switched off only the main list is active. 6.6.2 Display time Information Banner >... - Page 51 > Press the red function key Back. A corresponding query then appears. > If you wish to accept the changes, use the arrow keys left/right to click on the field Yes, and confirm by pressing OK. You will now return to the previous menu. >...
-
Page 52: Operation
7 Operation 7.1 Switching on and off > Switch the digital receiver on by pressing the On/Standby either on the receiver or on the remote control. > Press the key again to switch the receiver off again. > The receiver is now in standby mode, and (if activated in Point 6.2.4) the display panel will show the current time. -
Page 53: Calling Up Blocked Programmes
> Press the OK key. The active programme list will be displayed. > Now, with the assistance of the option key you can open a window with the types of programme lists (TV lists, TV provider lists and overall TV lists). The active programme list type is marked. -
Page 54: Option Channels
> Insert a CI module in one of the slots. > Insert the Smartcard in the card slot of the CI module. Ensure that the gold-coloured chip of the Smartcard is on the upper surface, in the direction in which the card is inserted. -
Page 55: Volume Control
7.4 Volume control You have the facility to adjust the volume of your digital receiver. This facilitates the easy operation of the receiver, as it means you have all the important functions on a single remote control, and will only rarely have to resort to using the remote control of the television set. When you switch on the digital receiver, sound will be reproduced at the volume level last set. -
Page 56: Return To Last Programme Previously Selected
> Use theTV/Radio key to switch the digital receiver to radio mode. The receiver will now switch to the last radio programme previously selected. > Press the TV/Radio key again to return to the last television programme previously selected 7.7 Return to last programme previously selected >... -
Page 57: Videotext
7.12 Videotext 7.12.1 Using the Videotext decoder of your television set If transmitted, the Videotext is forwarded to your television set. To operate the videotext options, you must use the remote control of your television set. If there should be any problems related to the display on your television screen, such as an overlapping of videotext contents and picture, you should set your digital receiver to FBAS mode (Point 6.3.4). -
Page 58: Subtitles
7.13 Subtitles Where subtitles are broadcast, this will be indicated by the message Subtitle select. If you have switched on the function Subtitles (as per Point 6.4.2), these will be displayed automatically, provided that they are being broadcast in the language selected. If subtitles are being broadcast only in other languages, or are broadcast via videotext, you can switch these on manually as follows. -
Page 59: Zoom Picture
to simultaneously reproduce two programmes (1 programme in HD format and 1 programme in SD format or 2 programmes in SD format) even if these are received from differing fields of reception. to reproduce a programme of your choice and simultaneously reproduce a hard drive recording of your choice. -
Page 60: Downloading Epgplus Data
The EPGplus functions allow you to: display information on programme contents on the screen display preview pictures of individual programmes mark specific programmes that will then be automatically switched on when the programme begins programme timers search for and select programmes by type of programme (genre). 7.16.1 Downloading EPGplus data The programme information will be updated automatically by your receiver at the preselected updating time (Point 9.2.2), provided the receiver is in standby mode at the time. -
Page 61: Next
> Use the left/right arrow keys to move through the programme list one page at a time. The EPGplus functions (Point 7.16.7) are now available. > Pressing the yellow function key takes you to the “Next” EPGplus table (see Point 7.16.5) >... -
Page 62: Epgplus Timer Programming
corresponding programme. If there is a picture available, it is indicated by > Use the arrow keys or the function keys to mark the desired programme. > Press the EPG key to display information and/or the picture relating to the programme. -
Page 63: Epgplus Programme Overview
programme automatically from the EPGplus data. Both the starting and the ending time of the programme will be taken over correct to the nearest minute. However, it frequently happens that the selected programme starts a little earlier or a little later than scheduled. In this case the start or the end of the programme may be missing from the recording. -
Page 64: Ending Epgplus Mode
If you are interested in specific types of programmes, you can have the programme information displayed by various genres, e.g. movies, news, etc. > Press the EPG key to open the table “Now”. > Press the blue function key EPG Menu to open a selection window. >... -
Page 65: Hard Drive Operation
There is no provision for this drive to be exchanged other than by an authorised TechniSat retailer/technician. Due to the availability of the hard drive, you no longer require an external storage medium (e.g. a video recorder). The recording capacity is dependent on the size of the hard drive and on the volume of data of the broadcast material. -
Page 66: Instant Recording
Simultaneously record 2 programmes from the same reception band (1 programme in HD format and 1 programme in SD format or 2 programmes in SD format) and reproduce a pre-recorded programme 8.1.1 Instant recording Starting a recording manually Option 1 >... -
Page 67: Timer Recordings
> Use the arrow keys up/down to mark the line with the desired action. > Confirm by pressing OK. The receiver will record the whole programme and then go into standby mode. > If you switch the receiver on before the end of the programme, a query will be displayed, asking whether you wish to start the current programme at the Beginning, or if you wish to continue viewing Live or if you wish to switch to the Current programme. -
Page 68: Manual Programming Of Timer
8.1.2.1 Manual programming of timer > Use the Menu key to call up the Main menu. > Use the arrow keys up/down to mark the line Manage timer. > Confirm by pressing OK. The sub-menu Manage Timer will be displayed. >... -
Page 69: Timer Overview
Repeat only on weekdays > Use the arrow keys up/down to select the desired function. > Confirm and accept the setting by pressing OK. Saving data to memory > When you have completed the programming, press the green function key Accept, to transfer the data to memory. -
Page 70: How To Programme New Event Timer
> Press the green function key New to go to the entry window for programming a new timer event. Now make your settings here in accordance with Point 8.1.2.1. > Use the arrow keys up/down to mark the additional field Type displayed. >... -
Page 71: Timeshift-Funktion
> To go to a specific point in a currently running recording, you can use the functions Play, Pause as well as Fast Wind and the Jogshuttle, as described in Point 8.2. > Press the Info key to display the Infobox with a progress bar, showing the playing and recording time elapsed. -
Page 72: Pause/Freeze Frame
playback procedure by pressing OK. 8.2.1.2 Pause/Freeze frame > To stop the playback of a recording (freeze frame) press the yellow function key or the Freeze frame key while the playback is in progress. The message “Pause II” will be displayed. >... -
Page 73: Setting Markers
Display Playback mode Playback Fast forward 4 speed Fast forward 16 speed Fast forward 64 speed Rewind 4 speed Rewind 16 speed Rewind 64 speed Slow motion Pause > Press the right or the left arrow key while is displayed in order to skip forward or back by 10 minutes. -
Page 74: End Playback Session
8.2.2.1 On-screen controls Your receiver is capable of playing files in MP3 format that have been stored on the hard drive or on a storage medium attached to the USB port. The USB device should be formatted using the file system FAT 32.Consult Point 8.3.2 on how to copy files from a USB device onto the hard drive. - Page 75 An MP3file will be indicated on the display with its respective name, e.g. Sterne.mp3. A folder will be indicated by a display of square brackets, e.g. [Popmusic]. The hard drive will be displayed as hard drive and a USB device will be indicated as USB-device1, USB-device2 etc..
-
Page 76: Mp3 Playback Modes
The various modes are shown on screen resp. on the display panel as follows: Function Display Screen Repeat all titles Directory Normal playback of all titles of the Directory folder selected Random play of all titles of the Random playback folder selected Directory Repeat current title... -
Page 77: Viewing Pictures
A list of the MP3 files available on the hard drive or the USB device will appear. These are indicated by the symbol . Folders located on the hard drive resp. on the USB device will be indicated by the symbol . -
Page 78: Slide Show
> Use the up/down arrow keys to mark the line Pictures and confirm with OK. > Use the arrow keys up/down to select the source from which you wish to view the picture files, and confirm by pressing OK. A list showing the picture files available on the hard drive or on the USB device will be displayed. - Page 79 > Use the arrow keys up/down to select the source from which you wish to view the picture files, and confirm by pressing OK. A list showing the picture files available on the hard drive or on the USB device will be displayed.
-
Page 80: Managing The Hard Drive
green function key PLS -. To delete a playlist > While in normal operating mode, press the green function key to open the PVR navigator. > By pressing the blue function key NAV Menu a further window will be opened. >... - Page 81 as a standard feature. In addition, a yellow progress bar (3) will be displayed, showing the current playback position and the total duration of the recording. > To skip to a marked spot of the recording, use the arrow keys up/down to mark the desired marker, and confirm by pressing OK.
- Page 82 the line rename mark. > Confirm by pressing OK, to open the virtual keyboard, in order to enter a new name. > Use the yellow function key to alternate between upper and lower case letters. > Use the arrow keys to mark the first letter resp. the first symbol or figure if the name you wish to enter.
- Page 83 markers. > To do this, mark the beginning and the end of the section to be removed with one mark each as described under Setting a mark. > Now use the arrow keys up/down to set the marker indicating the beginning of the section to be copied.
-
Page 84: Managing Music/Pictures
> If you wish to give the recording a different, specific name, then use the arrow keys up/down to mark the line New. > If you press the OK key, the virtual keyboard will be displayed, and you can enter a new name as described under Renaming a mark. -
Page 85: Copying
8.3.2.1 Copying The Copy function will effect a copy of the marked file resp. folder to be stored on the hard drive, resp. the USB device. The original file resp. the original folder will remain unchanged. > Use the arrow keys up/down to mark the file resp, the folder you wish to copy on to the hard drive. -
Page 86: Deleting
> Use the arrow keys up/down to mark the file or folder you wish to delete. > Press the blue function key Functions to open a window showing the functions available. > Use the arrow keys up/down to mark the line Delete and confirm by pressing >... -
Page 87: Export
> Use the arrow keys up/down to mark the line Export and confirm by pressing OK. > To copy the marked file, you must now press the yellow function key Export. The marked file will now be copied to the USB device, and will then be displayed on the right half of the menu. -
Page 88: Hard Drive Information
8.3.5 Hard drive maintenance > Press the OK key to obtain an overview of the number of recordings as well as the degree to which the hard drive is filled with data. 8.3.5.1 Checking the hard drive > To perform a check of the hard drive, use the arrow keys left/right to mark the field Check. -
Page 89: Changing The Basic Programming
9 Changing the basic programming 9.1 Configuring the Favourites list This chapter describes how you may change the pre-programming of your digital receiver as well as the Favourites programme list in accordance with your preferences. This function is also required to sort new programmes into the list after a programme scan. To work with this function, you should know the following: your receiver features the Total list as well as four Favourites lists., provided the function enabling several Favourites lists has been switched on as per Point 6.6.1. -
Page 90: Adding Programmes To The Favourites List
> Using the up/down arrow keys select the desired programme lists (e.g. languages). > Confirm by pressing OK. An additional selection window will now be opened. > Now use the arrow keys up/down to mark the selection criterion you wish to apply in sorting the Total list. -
Page 91: Sorting Programmes
> To remove several programmes simultaneously, mark these as described in Point 9.1.4 (Marking blocks). > When you have completed marking the desired programmes in this manner, press the yellow function key Remove. The programmes removed in this manner remain included in the Total list, and can be transferred back to the Favourites list at any time. -
Page 92: Programming The Electronic Programme Guide
9.2 Programming the electronic programme guide Your receiver gives you the option of receiving a data channel with additional EPGplus data via ASTRA satellite systems (19.2° East). This data makes it possible to preview EPGplus information for up to a week. >... -
Page 93: Epg Channel
> If you select the start category Genres you can then also select the preferred genre (e.g. film, news, shows, etc.) as described above. 9.2.4 EPG channel > Press the OK key to call up the EPG channel submenu. If the parameters of the data channel required to load the EPGplus data have changed, you can correct them in this menu. -
Page 94: Selecting Radio Channels/Programmes
message Loading EPG and an indication of the EPGplus data already downloaded in the display panel. > The downloading procedure can be interrupted by switching the digital receiver on (On/Standby key). 9.2.6 Selecting radio channels/programmes Use the same procedure as described in Point 9.2.5 to include radio channels/stations in the programme guide. -
Page 95: Selecting A Tv Channel
> Now use the numeric keys to enter the current unit PIN code in the line Unit PIN (factory setting 0000). > In the line Enter new PIN use the numeric keys to enter the desired new unit PIN code. >... -
Page 96: Automatic Scan
1. Automatic Scan Select this type of search to scan all the satellites set in the menu Antenna settings (Point 6.4 and 10.4) for Programmes. 2. Satellite Scan Select this type of search to scan only a specific selected satellite for Programmes. 3. -
Page 97: Transponder Scan
> Use the arrow keys up/down to mark the line Search mode. > By pressing the OK key, decide whether you wish to scan only for free-to-air programmes (Free programmes), or whether you wish to include encrypted programmes in the search (All programmes). >... -
Page 98: Manual Search
9.4.4 Manual search Should a programme not be found in the course of an automatic search, a satellite search or a transponder search, it may be necessary to enter additional programme-specific PID numbers for this programme. You will need to obtain these numbers on the Internet, or possibly direct from the programme provider concerned. -
Page 99: Service Settings
Back The newly found programmes are not added to the Favourites list, and are retained only in the Total list. > Use the arrow keys left/right to select the desired procedure. > Confirm by pressing OK. Please note any messages displayed on screen. >... -
Page 100: Updating The Programme List (Isipro)
9.5.3 Updating the programme list (ISIPRO) The ISIPRO programme list updating function ensures that the programme list of your receiver will automatically be kept up to date. To do this, a current programme list is broadcast at regular intervals via satellite (ASTRA 19,2° East) and is available to your receiver for downloading. -
Page 101: Update Programme List Manually
> To update the new programme list automatically, press the green function key Automatic. The downloading of the programme list will be started, and the progress of the procedure can be followed on screen 9.5.3.4 Update programme list manually When the download of the programme list has been completed, your programme list will be updated. -
Page 102: Updating Software
Accept all programmes > To accept and transfer all new programmes without a further check, press the yellow function key Automatic. The programmes will be added to the Favourites list in accordance with predetermined criteria Reject programme (do not accept) >... -
Page 103: Copying Settings
software for your digital receiver is available. If a new version of the operating software is available, this will be indicated by a message displayed on screen. To start an update of the software, simply follow the instructions on screen. When the update of the software has been successfully completed, an appropriate message will be displayed on screen. -
Page 104: Use With A Rotating Antenna (Diseqc 1.2)
10 Use with a rotating antenna (DiSEqC 1.2) Your digital receiver is ready for use with a motorised rotating antenna. Using the DiSEqC control (DiSEqC level 1.2) you have the facility to control a suitable motor via the co-axial cable. >... -
Page 105: Setting The West Limit
10.1.3 Setting the West limit > To enter the West limit, first use the arrow keys to mark the field Save. > Now press the arrow key left to rotate the dish to the maximum West position possible, resp. desirable. >... -
Page 106: Setting A Satellite Position
Example: Co-ordinates of Daun/Germany Deg. latitude 50° 11‘ (45“) Deg. longitude 06° 50‘ (10‘‘) Converting the degrees latitude (DL): 11/60 (rounded) 50,2 In the menu used for entering the geographical latitude, enter the value rounded to one decimal place (50.2). The decimal value of the degrees longitude is calculated in the same way. -
Page 107: Adjusting The Satellite Antenna
> When you have completed setting the test transponder, press the Back key to return to the menu for setting the motorised antenna. > Use the arrow keys to mark the panel fort he entry of the orbital position of the User-Satellites. -
Page 108: Current Satellite List
> To open the window listing the available actions, press the blue function key Actions. > Now use the arrow keys up/down to mark the line Autofocus. > Confirm by pressing OK. Autofocus is started. Whilst the automatic alignment is being done the message Auto Focus appears 10.3.3 Saving a satellite position When you have completed the autofocus procedure, you must still save the satellite position... -
Page 109: Deleting A Satellite Position
> By pressing the yellow function key Turn to Sat the antenna will be turned to the selected satellite position. 10.5 Deleting a satellite position To delete a satellite position from the satellite list, proceed as follows: > Use the arrow keys to mark the field Current satellite list. >... -
Page 110: Technical Data
12 Technical data DBS-Tuner 1. SAT Front End (with DVB-S2) Input frequency range 950 ... 2150 MHz Demodulation DVB-S (QPSK); DVB-S2 ((8PSK,QPSK) Symbolrate DVB-S: 2 ... 45 Mbaud/s, SCPC/ MCPC DVB-S2: 10 – 31 Mbaud/s (8PSK) , 10 –30 Mbaud/s (QPSK) 2. - Page 111 Audio decoding Audio compression MPEG-1 & MPEG-2 Layer I and II, MP3 Audio Mode Dual (main/sub), Stereo Sampling frequencies 32 kHz, 44.1 kHz, 48 kHz Audio parameters Output analogue Output level L/R 0.5 V r.m.s. (nominal) Output impedance 600 Ohms >...
- Page 112 5000 radio programmes TV/radio Total list Total of 6000 programmes possible in Total list DiSEqC DiSEqC 1.0 and DiSEqC 1.2 EPG data (TechniSat EPG 2.0) EPG preview max. 7 days in advance Timer Events max. 30 events, one year in advance...
- Page 113 Remote control Remote control system RC-5 Subsystem address 8 (SAT 1), 10 (SAT 2) Modulation frequency 36 kHz Infrared wavelength 950 nm Power supply Power unit internal switching power supply Consumption: < 1 W* in standby mode (standby LED) < 3 W* in standby mode (standby clock) 24 W operation (without LNB supply, without hard drive)
-
Page 114: Troubleshooting Guide
13 Troubleshooting guide Problem Possible cause Solution Various programmes not shown in Wrong programme list selected Select different programme list (see the programme list Point 7.2.3.1) Sound OK, no TV picture Radio mode switched on Switch to TV mode Programmes such as DSF and Tele Interference from DECT cordless Increase distance between base 5 show occasional interference... - Page 115 Problem Possible cause Solution Time not shown in standby mode Time not acquired Set to major channel e.g. ZDF for approx.30 seconds Receiver cannot be operated Unit blocked > Press and hold On/standby key on unit or remote control for approx.
- Page 116 For everyday use Switching on and off > Switch the digital receiver on by pressing the on/standby key on either the unit itself or on the remote control. > Press the key again to switch the receiver off again. > The unit is now in standby mode;...
Need help?
Do you have a question about the EUROKLASSIK 1 and is the answer not in the manual?
Questions and answers