Table of Contents
Advertisement
Advertisement
Table of Contents

Related Manuals for Kaba EX3600


Summary of Contents for Kaba EX3600
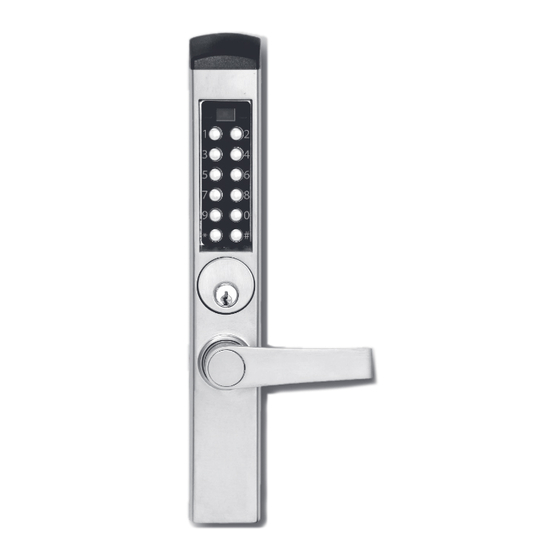
- Page 1 E-PlEx Card basEd ® 36xx/37xx/56 lOCk sEriEs Operations Manual...
-
Page 2: Table Of Contents
TABLE OF CONTENTS States of the E-Plex Lock . . . . . . . . . . . . . . . . . . . . . . . . . . . . . . . . . . . . . . . . 4 Factory Mode . - Page 3 Publisher. The information contained in this publication is accurate to the best of Kaba Access Control’s knowledge. Specifications are subject to change without notice. Legend • “E-Plex Lock” refers to E-Plex 57xx; 56xx and E-Plex 37xx; 36xx locks.
-
Page 4: States Of The E-Plex Lock
Definition of the Term “LearnLok ” The term “LearnLok” with Kaba designed card based E-Plex Series lock refers to being able to enroll users’ ID cards and PINs directly at the lock’s keypad without uploading any software data to the lock from a handheld PDA unit. Here you make the lock “learn” the credential enrolling process simply by programming the lock at its keypad with your finger tip. -
Page 5: Default Values Of The E-Plex Lock Programmable Parameters
• Program the Lock for the Duration of Passage Mode (if desired) • Program the Lock for Tamper Time Settings • Program the Lock for Buzzer Volume • Add Access Credentials as desired Note: A credential can be either Card only access or PIN followed by Card access for reg- ular Access users and Manager users. -
Page 6: Reset Procedures
For example • If the Master (or Manager) enters her/his credential of 87654321, the door will open. • If he enters #87654321#, the lock will enter into the LearnLok Programming Mode and wait for the next part of the command. •... - Page 7 User does not know the Master code: Insert mechanical override key, turn counterclockwise and hold so that lock is in open position (cylindrical latch is retracted). Within 5 seconds, press # and release the key (latch). You have up to 5 seconds to push ‘#’ and release the override key. If 5-second timeout is reached without pressing ‘#’, the lock continues its normal opera- tion.
- Page 8 User does not know the Master code: Insert mechanical override key, turn to 3 o’clock position, press # and then turn key back to 12 o’clock position within 5 seconds. You have up to 5 seconds to push ‘#’ and then turn key back to 12 o’clock posi- tion.
-
Page 9: Procedure 1A - Program The Access Pin Length
PROCEDURE 1A - PROGRAM THE (GLOBAL) ACCESS PIN LENGTH PINs are required for Access users and Manager users in PIN & Card access mode and also for all Service users since they have only PIN access. Setting the length of Access PIN must be the first lock programmable function you perform, because all of your other access PINs (except for the Master) must have the same length. -
Page 10: Procedure 2A - Modify The Master User Access Pin
PROCEDURE 2A - MODIFy THE MASTER USER ACCESS PIN Required User Level: Master 1. To change the factory default Master PIN, follow the next three steps: 2. Put lock into Pushbutton Programming Mode. 3. Use the command, 000, to change the Master PIN, followed by the new Master PIN itself. -
Page 11: Procedure 4A - Program The Unlock Time
PROCEDURE 4A - PROGRAM THE UNLOCk TIME Unlock time is the length of time the door will remain unlocked when a correct user cre- dential is used before the lock automatically re-locks itself. Required User Level: Master, Manager 1. Put the lock into Pushbutton Programming Mode. 7. -
Page 12: Procedure 6A - Program The Lock For Tamper Time Parameters
PROCEDURE 6A - PROGRAM THE LOCk FOR TAMPER TIME PARAMETERS You can set the Tamper Time Wrong Tries parameter referring to the number of times the wrong credential can be tried to access before the lock goes into a Tamper Shutdown Mode. -
Page 13: Users - General Information
USER - GENERAL INFORMATION 1. Master and Manager Credentials can do two different things: • Open the door by entering the Access Credential without # signs. • Put the lock into LearnLok Pushbutton Programming Mode by entering # before and after their Access Credential. 2. -
Page 14: Users - Credentials
M-Unit User - There can be also M-Unit (Maintenance Unit) users and Guest users in the lock, available only if the E-Plex Enterprise software is used - sold separately. Note: The total number of users enrolled into the lock at any given time cannot exceed 300, plus the Master user. -
Page 15: Procedure 1B - Add / Modify An Access User Credentials
Important: User PINs that will be used in PIN & card access mode must not have the exact same digits in the same position as the Master PIN. The Master Code 00004992 is used as an example in the table below. USER ACCESS CODES (PINS) - EXAMPLES Master Code User Code Length... -
Page 16: Procedure 2B - Add / Modify A Manager User Credentials
Required User Level: Master, Manager Put the lock into LearnLok Pushbutton Programming Mode. -> # Master PIN (or Manager credential) # 2. Enter command 100# to add / modify a User Access Credential. 3. Enter the User ID location NNN followed by # - NNN#, we use 023# for example (Range = 001 to 300). - Page 17 4b. Pin & Card Mode: Procedure is similar to step 4a above, but after enrolling the card you must not enter the # but continue with assigning the user’s PIN (4 to 8 digits as configured initially). Example of Complete Entry for Manager user ID=015 and PIN=9876: 101# 015# Present card (no # entry here) 9876# 9876# (to re-confirm) # .
-
Page 18: Procedure 3B - Add / Modify Service User Credentials
PROCEDURE 3B - ADD / MODIFy A SERVICE USER CREDENTIAL A Service User is any person who needs access to the lock for a limited time period in order to perform a service, such as painting or repairs to the room or area. A Service User’s access credential is always PIN only. -
Page 19: Procedure 5B - Delete Manager User Credentials
PROCEDURE 5B - DELETE MANAGER USER CREDENTIALS Manager User credentials should be deleted from the lock if no longer needed since there is no expiry. This frees this ID location to be assigned to another user. Credentials that may be needed again sometime in the future should be just de-activated rather than deleted (see Procedure 13). -
Page 20: Limited Warranty
® LIMITED WARRANTy Kaba Access Control warrants this product to be free from defects in material and workmanship under normal use and service for a period of three (3) years. Kaba Access Control will repair or replace, at our discretion, E-Plex 5x00 and 3x00 Series Locks found by Kaba Access Control analysis to be defective during this period. -
Page 23: Procedure 7B - Delete All User Credentials Except Master & Manager(S)
PROCEDURE 7B - DELETE ALL USER CREDENTIALS EXCEPT MASTER & MANAGER(S) All credentials may be deleted together if you are changing everything because of, for example, suspected theft of credentials. *Warning*: be sure that you want to do this, because manually re-enrolling hundreds of credentials for all the users again will be time consuming at the lock keypad. -
Page 24: Procedure 9B - Activate Manager User Credentials
PROCEDURE 9B - ACTIVATE MANAGER USER CREDENTIAL A Manager user’s credential should be re-activated if it had been de-activated earlier - the procedure is very similar to the above procedure of activating an Access user. Required User Level: Master 1. Put the lock into “LearnLok ”... -
Page 25: Procedure 12B - Activate / De-Activate Passage Mode
2. Enter Command 398# to re-activate all Access and Service users. Enter a last # to indicate the end of programming. Example of Complete Entry: 398# # . PROCEDURE 12B - ACTIVATE / DE-ACTIVATE PASSAGE MODE Let’s assume that you had already programmed a default duration for a door to remain in Passage Mode as per Procedure 5A, Program the Duration of the Passage Mode Period, on page 9. -
Page 26: Procedure 14B - De-Activate Manager User Credentials
PROCEDURE 14B - DE-ACTIVATE MANAGER USER CREDENTIALS A Manager user’s credential can be de-activated (rather than deleted) if required, for example during her/his vacation temporarily; on return, can then be easily reactivated as described in Procedure 9B. Required User Level: Master 1. -
Page 27: Procedure 17B - Activate/De-Activate Lockout Mode
1. Put the lock into “LearnLok ” Pushbutton Programming Mode -> # Master PIN (or Manager credential) # 2. Enter Command 498# to de-activate all Access and Service users. Enter a last # to indicate the end of programming. Example of Complete Entry: 498# #. -
Page 28: Procedure 18B - Perform Manual Diagnostics
8. Try the Diagnostics again as show in Step 5 above. Important: If you still see the red LED and/or hear the low beep, the lock has a problem. Contact Kaba’s technical support at 800-849-TECH(8324) Option 5 to help diagnose and fix the problem. -
Page 29: Battery Life And Replacement
Required User Level: Master, Manager, Access user & Service user 1. To Disengage (retract swingbolt): Enter/present a valid Credential to open and the lock will flash the green LED indicating that you are a valid user and you are allowed to disengage the swingbolt to unlock. -
Page 30: Summary Of Learnlok
Summary of LearnLok Pushbutton Programming Commands Name Command Description of Command Authorization 000 # ‘Modify Master User Access Credential (lock’s activation)’ Master Configure (Always 8 digits) MMMMMMMM# MMMMMMMM# 001 # ‘Date setup’ (MM = 01 to 12; DD = 01 to 31; YY = 00 to 99) Master MMDDYY# MMDDYY#... - Page 31 Summary of LearnLok Pushbutton Programming Commands Name Command Description of Command Authorization 100 # ‘Add/Modify User Access Credential’ Master, Mgr Add/Modify Users NNN # Card only: NNN=specific User ID location (001 to 300) Present Card & then # PIN & Card: UUUU(UUUU) = PIN length which can be 4 to 8 digits, Present Card (no # after) depending on global PIN length setting.
- Page 32 Summary of LearnLok Pushbutton Programming Commands Name Command Description of Command Authorization 300 # ‘Activate User Access Credential’ Master, Mgr Activate Users NNN# NNN = specific User ID location (001 to 300) 301 # ‘Activate Manager Access Credential’ Master NNN# NNN = specific User ID location (001 to 300) 302 # ‘Activate Service User Access Credential’...
-
Page 33: Visual Feedback Message Definitions
Visual Feedback Message Definitions Condition Parameters Green LED Red LED Duration Rate Valid pushbutton pressed 1/10 sec Once Timeout expired 1 sec Once Valid access credential entered/presented 1 sec Once Access granted 1/10 sec Once Access granted (battery low condition 1/10 sec 1 sec Access denied... -
Page 34: User Id List Sample Table
User ID List Sample Table User Type (A=Access, User ID # Access Credential User Name (PIN and/or Card #) S=Service, M=Manager) - Page 35 User ID List Sample Table User Type (A=Access, User ID # Access Credential User Name (PIN and/or Card #) S=Service, M=Manager)
- Page 36 User ID List Sample Table User Type (A=Access, User ID # Access Credential User Name (PIN and/or Card #) S=Service, M=Manager)
- Page 37 ” keypad programming functions to a less labor intensive way of programming and managing the locks & users by using Kaba’s optional PC based software kit: the “E-Plex Enterprise” software. For more information, please go to Kaba Access Control’s website at...
- Page 38 Notes Notes...
- Page 39 Notes Notes...
- Page 40 Kaba Acess & Data Systems Americas 2941 Indiana Avenue Winston-Salem, NC 27105 USA Tel: (800) 849-8324 (336) 725-1331 Fax: (800) 346-9640 (336) 725-3269 www .kaba-adsamericas .com PKG3271 0314...
Need help?
Do you have a question about the EX3600 and is the answer not in the manual?
Questions and answers