Table of Contents
Advertisement
Installation, Operation and Maintenance
Type ES37( )
3.7-Meter ESA
Andrew Corporation
10500 West 153rd Street
Orland Park, IL U.S.A. 60462
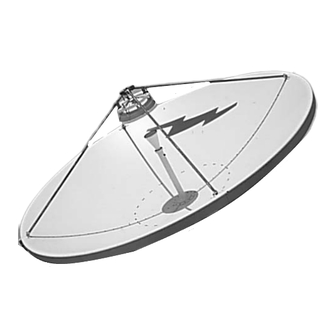
3.7-Meter Earth Station Antenna
Telephone: 708-349-3300
FAX (U.S.A.): 1-800-349-5444
Internet: http://www.andrew.com
Customer Service, 24 hours: U.S.A. • Canada • Mexico: 1-800-255-1479
U.K.: 0800 250055 • Republic of Ireland: 1 800 535358
Other Europe: +44 1592 782612
Bulletin OM37
Revision C
Printed in U.S.A. 9/00
Copyright © 2000 by Andrew Corporation
Advertisement
Table of Contents

Subscribe to Our Youtube Channel
Related Manuals for Andrew 3.7-Meter Earth Station Antenna


Summary of Contents for Andrew 3.7-Meter Earth Station Antenna
- Page 1 Orland Park, IL U.S.A. 60462 Customer Service, 24 hours: U.S.A. • Canada • Mexico: 1-800-255-1479 U.K.: 0800 250055 • Republic of Ireland: 1 800 535358 Other Europe: +44 1592 782612 Bulletin OM37 Revision C Printed in U.S.A. 9/00 Copyright © 2000 by Andrew Corporation...
-
Page 2: Table Of Contents
Introduction Introduction ................3 How to Use This Manual Overview . -
Page 3: Introduction
3.7-Meter Earth Station Antenna Introduction Like all Andrew earth station antennas, the 3.7-Meter Earth Station Antenna provides high gain and exceptional pattern characteristics. The electrical performance and excep- tional versatility provides the ability to configure the antenna with your choice of linearly- polarized 2-port or 4-port combining network. -
Page 4: Proprietary Data
The technical data contained herein is proprietary to Andrew Corporation. It is intended for use in operation and maintenance of Andrew supplied equipment. This data shall not be disclosed or duplicated in whole or in part without express written consent of Andrew Corporation. -
Page 5: How To Use This Manual
The tables and figures presented in this manual are used as communication aids for the installation, operation, and maintenance of the 3.7-Meter Earth Station Antenna. These tables and figures instantly convey messages, as well as make the procedures easier to understand. -
Page 6: Getting Started
Warnings When installing the 3.7-Meter Earth Station Antenna, be conscious of the warnings pre- sented below. For further information or clarification of this information, contact the Customer Service Center. The warnings are as follows: 1. -
Page 7: Recommended Tools
Tools Meter Earth Station Antenna. All tools necessary for the installation process should be provided by the installation crew. Andrew recommends the following tools to be used for a proper installation of the 3.7-Meter Earth Station Antenna. Open End or Combination Wrenches... -
Page 8: Reporting Equipment Loss Or Damage
After opening your shipment, an inventory of the parts should occur immediately. Check each item received in your shipment against the packing slip included with the shipment. If any items are missing, please notify Andrew Corporation immediately by contacting the Customer Service Center. -
Page 9: Returning Equipment
Returning Andrew Corporation tries to ensure that all items arrive safe and in working order. Equipment Occasionally, despite these efforts, equipment is received which is not in working condi- tion. When this occurs, and it is necessary to return the equipment to Andrew... -
Page 10: Installation Sequence Checklist
Installation The 3.7-Meter Earth Station Antenna requires the installation team to perform the Sequence assembly in the sequence presented below. Moreover, this sequence should be reviewed to ensure a smooth installation. Use the following checklist to verify and/or Checklist determine the installation sequence. -
Page 11: For Mpjk Types Only
For MPJK Types Only Main Reflector Assembly Mount azimuth pivot assembly to ground mount assembly Bolt one jack to azimuth pivot assembly Unscrew jack Tighten galvanized hardware using A-325 tensioning procedure Lubricate jackscrews Pull protective boot over jackscrew Bolt elevation pivot assembly brackets to ground mount assembly Bolt second jack to elevation pivot assembly Unscrew jack Tighten galvanized hardware using A-325 tensioning procedure... -
Page 12: Reflector-To-Mount Assembly
Enclosure Assembly Reflector-To- Mount Assembly Add reflector-mounting ring Mount front and back hub-mounting rings Apply sealant to outside of reflector-mounting ring Perform recommended string test Remove rear and side covers from enclosure assembly Attach enclosure to mounting ring Apply sealant backing rod around enclosure/mounting ring mating surfaces Apply RTV sealant Route sling through upper holes of torsion box assembly Route two rope tag lines through torsion box assembly to be used as guides... -
Page 13: Subreflector
Subreflector Feed System Preassemble subreflector weldment Attach subreflector-mounting ring to strut assembly Attach angle clips Attach subreflector to reflector Adjust subreflector Tighten adjustment hardware Refer to installation instructions packaged with the individual feed systems Getting Started... -
Page 14: Installation Procedures
Installation Procedures Overview Foundation Preparation This section provides installation procedures for the 3.7-Meter Andrew Earth Station Antenna. The installation procedures include instructions on the following antenna com- ponents: • Mount • Reflector • Enclosure • Reflector-to-Mount Assembly • Subreflector •... -
Page 15: A-325 Tensioning
A-325 Tensioning During the installation process, there are several references to the A-325 hardware ten- sioning procedure. The A-325 hardware must be properly tensioned to avoid slippage between bolted surfaces under high loads. Slippage can cause the corresponding assembly to move, causing antenna misalignment. When designated, the A-325 hard- ware should be tightened according to the following tensioning procedure. -
Page 16: Mount
The pedestal ground mount assembly arrives in a packaged wooden crate as shown in Figure 3-2 below. The mount can be positioned manually or by using a crane; however, Andrew recommends that this procedure be performed using a crane to ensure speed and ease of installation. - Page 17 Step 1 Carefully remove the ground mount assembly (P/N 208800 - motorizable or P/N 202680-2 manual) from the packing crate. Leave the steel strapping intact to avoid dis- engagement of the panning frame from the square-tube weldment during the ground mount installation.
- Page 18 Step 5 Attach the ground mount assembly to the eight corresponding anchor bolts using a 3/4 inch flat washer and 2-3/4 inch hex nuts as shown in Figure 3-4a. One 3/4 inch hex nut is supplied with the anchor bolt kit and the second 3/4 inch hex nut is supplied with the antenna.
- Page 19 Assembly As stated earlier, Andrew recommends the use of a crane during this installation (Without a Crane) process; however, we recognize that a crane may not always be available. If a crane is not available, the following steps provide the procedure for installing the ground mount assembly without a crane.
- Page 20 Step 3 Lift the ground mount assembly into an upright position. In the absence of a crane, it is recommended that a minimum of two people assist in the lifting of the mount assembly as shown in Figure 3-6a and Figure 3-6b. Figure 3-6a: Manual Lift Figure 3-6b: Manual Lift Installation Procedures...
- Page 21 NOTE: You may need to adjust the mount when lifting it to ensure that the anchor bolts are aligned directly underneath the base of the ground mount assembly as shown in Figure 3-7. Step 4 Attach the ground mount assembly to the eight corresponding anchor bolts using a 3/4 inch flat washer and 2-3/4 inch hex nuts as shown in Figure 3-3a.
-
Page 22: Motorizable Pedestal Ground Mount Assembly
Motorizable The ground mount assembly enables 180° positioning for selected azimuth viewing. Pedestal Ground Azimuth range coverage is ±90° divided into three 120° continuous ranges with 30° Mount Assembly overlap. Elevation adjustment is continuous from 0 to 90°. Step 1 Position and mount 204737 azimuth tiller arm weldment to ground mount assembly as shown using 0.75 x 1.75 in. - Page 23 Universal Terminal 5/16 x 3/4” Hex Head Screw and Lock Washer Grounding Cable Figure 3-8d: Ground Mount Assembly Tiller Arm Hardware Left Position Center Position -90° To +30° Figure 3-8e: Ground Mount Assembly Tiller Arm Hardware 1/2” Flat 1/2 x 1-3/4” Washer Bolt and Nut Right Position...
-
Page 24: Manual Pedestal Ground Mount Assembly
Manual Pedestal Ground Mount Assembly Step 1 Prepare the ground mount hardware in the mount hardware kit by sorting all bolts, nuts, and flat washers into separate sections as shown in Figure 3-9. Step 2 Wax two sides of each galvanized bolt with the stick wax provided. This allows a smooth installation of each galvanized bolt as shown in Figure 3-10. - Page 25 Step 3 Position and mount the azimuth tiller arm (P/N 203112) to the tiller-arm bracket on the left side (facing the satellite) of the ground mount assembly. This mounting position of the azimuth tiller arm is dependent upon pre-determined azimuth range requirements as shown in Figure 3-11.
- Page 26 An illustration of the final azimuth tiller arm is shown in Figure 3-12. Figure 3-12: Azimuth Tiller Arm - Final Assembly Step 5 Locate the elevation and azimuth struts (P/N 202951-2-manual) as shown in Figure 3-13. NOTE: The azimuth strut is the strut on the right and the elevation strut is on the left. Figure 3-13: Elevation and Azimuth Struts Installation Procedures...
- Page 27 Step 6 Insert pivot blocks (P/N 205876) onto the end of the azimuth strut using lubricated 1/2 inch bolt, flatwasher and hex nut as shown in Figure 3-14. A 3/4 inch flat washer should be inserted between the strut and the spacer block. Tighten hardware according to the A-325 tensioning procedure.
- Page 28 Figure 3-16: Azimuth Pivot Assembly Step 9 Mount the azimuth strut to each bracket on the ground mount assembly as shown in Figure 3-17a and Figure 3-17b. The front and rear brackets should be aligned as shown in Figure 3-18. Figure 3-17a: Azimuth Strut Assembly - Front Installation Procedures...
- Page 29 Figure 3-17b: Azimuth Strut Assembly - Rear Figure 3-18 illustrates a final azimuth strut assembly mounted to the ground mount assembly. Figure 3-18: Azimuth Strut Assembly - Final Assembly Installation Procedures...
- Page 30 Step 10 The next step is to install the elevation strut assembly. Begin by bolting the elevation strut tube assembly (P/N 205872) to the ground mount assembly as shown in Figure 3-19. Figure 3-19: Elevation Strut Pick Up Assembly (Top View) Step 11 Bolt the elevation bracket-support plates (P/N 205873) to the elevation strut tube assem- bly using 5/8 inch hardware (hex bolt, flatwasher and nut)as shown in Figure 3-20.
- Page 31 Step 12 The elevation strut tube assembly should now be bolted to the elevation strut bracket as shown in Figure 3-21a and Figure 3-21b. Figure 3-21a: Elevation Strut Bracket Figure 3-21b: Elevation Strut Bracket Installation Procedures...
-
Page 32: Manual Actuator Assembly
Manual Actuator The manual actuator assembly (P/N 207882) is used to adjust the elevation and Assembly azimuth angles of the 3.7 meter antenna. The following steps provide the procedure used to assemble and install the manual actuator assembly. Step 1 Loosely attach the manual actuator assembly (P/N 207882) to the elevation strut as shown in Figure 3-22 using clamp segments, 1/4 inch screw, lockwasher and hex nut in each of the 12 connections. -
Page 33: Motorizable Pedestal Ground Mount Assembly
Step 4 Step 5 Step 6 Step 7 Manual Actuator Assembly Removal Step 1 Step 2 Step 3 Motorizable Pedestal Ground Mount Assembly Step 1 Remove the two indicated strut-support setscrews, and attach the base angle to the cor- responding strut support using the supplied 1/2 inch clamping nuts and the previously removed strut-support setscrews as shown in Figure 3-22b. - Page 34 Step 2 Bolt one jack to the azimuth pivot assembly using 5/8 inch hardware (hex bolt, flatwash- er and hex nut) as shown in Figure 3-24. Step 3 Unscrew the jack using a spud wrench until it meets with the front azimuth strut weld- ment as shown in Figure 3-25a.
- Page 35 Step 4 Place pivot blocks (P/N 205876) on both sides of the jackscrew ends, bolting with lubri- cated 1/2 inch hex bolt, flatwasher and hex nut as shown in Figure 3-25b. Step 5 Tighten the hardware using the A-325 tensioning procedure. Step 6 Lubricate the jackscrews according to the maintenance instructions.
- Page 36 Step 8 Bolt the elevation pivot assembly brackets (P/N 208370 - left and P/N 208371 - right) to the inside of the ground mount assembly as shown in Figure 3-27. Step 9 Bolt the jack to the elevation pivot assembly using 5/8 inch hardware (hex bolts, flat- washers and nuts) as shown in Figures 3-28a and 3-28b.
- Page 37 Step 10 Loosen the clamp on the jack boot. Step 11 Unscrew the jack by using a spud wrench until the jack connects to the back of the enclosure as shown in Figure 3-28c. Step 12 Tighten the hardware using the A-325 tensioning procedure. Step 13 Lubricate the jackscrews using the maintenance procedures.
-
Page 38: Embedded Pipe Ground Mount Assembly
Embedded Pipe Refer to Figure 3-29a for an overall view of the assembled embedded pipe ground Ground Mount mount assembly, reflector and subreflector assemblies. Assembly Step 1 Attach the 104320 left side frame, to the 168 tube using four 104326 U-bolts, 100526-51 M16 nuts and 100522-51 lockwashers. -
Page 39: Elevation/Azimuth Strut Assembly
Step 2 Attach the 104319 front frame to the left side frame as shown in Figure 3-29c. Attach the 104325 braces to the left side by means of the U-bolts. Attach the right side frame and braces to the front frame and the right side frame to the left side frame, also shown. For all of these joints, use 100532-21 M16x40 long bolts, 100526-51 nuts and 100522- 51 lockwashers. - Page 40 Step 4 Attach the elevation strut to the top of the rear frame assembly as shown in Figure 3-29e using the 100537-15 M20 x 50 bolt, 100526-57 nut and 100521-57 flatwasher. Tighten bolts to 185 N•m. (136 lbs-ft). M20 x 50 Bolt, Flatwasher Lockwasher and Nut Attach 301917 elevation axis weldment to the front of the frame assembly in two places...
- Page 41 Step 5 Attach the azimuth strut to the bottom rear of the frame assembly as shown in Figure 3- 29g, using the 100537-15 M20 x 50 long bolt, 100526-57 nut, 100521-57 flatwasher and 100522-57 lockwasher. Attach the strut to the foundation anchor, as shown in Figure 3-29g. Step 6 Install 301931 pointer where shown in Figure 3-29g by removing the mount bolt at spec- ified location then reinstalling with 100521-51 flatwasher and pointer.
- Page 42 Step 7 Install fine az. adjustment, attach 40188-3 thread rod to 49712-3 bracket with 9999-167 .75-10 nuts and 9997-166 flatwasher. Slide threaded rod through welded tab and fasten using 9999-167 .75-10 nuts and 9997-166 flatwasher. Note: It will be necessary to tem- porarily remove one square head bolt for fine adjusting the threaded rod.
-
Page 43: Reflector
Step 7. Unpacking Upon receiving your 3.7-Meter Earth Station Antenna, notice that it is delivered in a wooden crate and covered with a white nylon sheath. The protective crate covering shields the product from being damaged during the shipment process. - Page 44 Step 3 Pry the short ends of the crate off by using a pry bar and hammer as shown in Figure 3-30c. NOTE: Notice that the parts of your order are boxed and banded to your crate. Remove these boxes by snipping the banding with tin snips. Step 4 Take the front, long side of the crate off.
-
Page 45: Assembly
Assembly Once the crate has been unpacked, you can begin assembling your Andrew earth sta- tion antenna. The reflector halves are placed next to each other to begin the assembly. The following steps provide the procedure for assembling the 3.7-Meter reflector. - Page 46 Step 3 Insert all of the joint-plate bolts, except for the socket-head shoulder bolts. All bolts should be inserted from the same direction using a 5/16 inch hardware—flat washer under a lock washer and nut. DO NOT TIGHTEN. Note: DO NOT force bolts—manipulate reflector halves to allow free insertion. Step 4 At both antenna seams, loosely install three location bolts and nuts (5/16 inch hardware) adjacent to the center hole as shown in Figure 3-32.
-
Page 47: Very Important
Step 5 Add the alignment hex bolts to the end holes of the joint plates as shown in Figure 3- 33a (outside and inside of plate) to ensure that it is evenly aligned; and use hex bolts to fill the rest of the joint plates as shown in Figure 3-33b. THESE MUST NOT BE DRI- VEN, BUT INSERTED BY HAND. - Page 48 Splice Strip Step 6 Tighten the hardware if the seam is correct starting from the center and working towards the outside of the reflector. Before tightening hardware, verify that the reflector seam gap is even along its length. Push from both directions of the seam if necessary. NOTE: The installer positioned inside the reflector must hold the bolt head with a wrench, while the nut on the outside is tightened.
- Page 49 Step 7 Add the reflector-mounting ring to the assembled reflector. Notice that the notches in the mounting ring fit over the reflector seam indicating where the mounting ring should be placed. There is also a red stripe placed on the mounting ring. This red stripe must be aligned with the red stripe on the reflector as shown in Figure 3-34a.
- Page 50 Step 8 Mount the front (P/N 202790) and back hub-mounting ring (P/N 49965) to the reflector with the appropriate hardware as shown in Figures 3-35a and b. NOTE: These components are included as part of P/N 206319 Feed Hardware Kit. For K-Band Antennas, these components are included as part of P/N 301544 Feed Hardware Kit (2-Port) or P/N 301515 Feed Hardware Kit (4-Port).
-
Page 51: Alignment Test
Alignment Test As a final test of proper reflector alignment, Andrew recommends that a string test be performed. The following steps provide the procedure for the string test. Step 1 Attach a string at the twelve o’clock position of the reflector stretching to the six o’clock position of the reflector. -
Page 52: Enclosure (Pedestal Mount Only)
Enclosure The enclosure (P/N 202934A) assembly attaches to the rear of the reflector. The enclo- (Pedestal Mount sure provides weather protection for RF equipment and can accommodate up to a 4- Only) port combiner network. An example of the assembled enclosure is presented in Figure 3-38a and Figure 3-38b. - Page 53 Step 2 Raise the enclosure assembly, and attach to the mounting ring on the reflector using the appropriate hardware as shown in Figure 3-39a and Figure 3-39b. VERY IMPORTANT Figure 3-39a: Enclosure Hardware Figure 3-39b: Enclosure Hardware Installation Procedures...
- Page 54 Step 3 Install the supplied sealant backing rod material around entire circumference of the mounting ring/enclosure mating surfaces as shown in Figure 3-40. Step 4 Securely tighten the enclosure mounting hardware using the A-325 tensioning proce- dure. Step 5 Apply the supplied RTV sealant around the outer perimeter of the reflector-mounting ring/enclosure assembly junction as shown in Figure 3-41.
-
Page 55: Reflector-To-Mount Assembly
The reflector can be installed on the mount manually or by using a crane. However, Assembly Andrew recommends that this procedure be performed using a crane. Using a Crane The following steps provide the procedure for installing the reflector to the mount using a crane. - Page 56 Step 3 Verify that all hoist assembly hardware is fully in tact before lifting the reflector to avoid personal injury or damage to the reflector. Step 4 Route the crane’s cable and hook from the hoist over the slings, and attach the shack- le’s hook to the crane’s hook for raising the reflector.
-
Page 57: Without A Crane
Without a Crane The following steps provide the procedure for installing the reflector to the mount with- out the use of a crane. Step 1 Route one rope tag line through two consecutive holes at the top of the reflector in the torsion box assembly. - Page 58 Step 3 Position three people at the top of the reflector to lift the reflector on its end, facing for- ward as shown in Figure 3-45. Figure 3-45: Manual Lift of the Reflector to the Mount Step 4 Position one person (of the three) on the mount to guide the reflector to the mount. Refer to Figure 3-46.
- Page 59 Step 5 Align the enclosure bracket to the ground mount assembly. The left bolt should be inserted to hold reflector in place using 3/4” A-325 hardware (hex bolt, flatwasher and nuts as shown in Figure 3-47 and Figure 3-48. Step 6 Have the two people on the ground rotate the reflector to connect with the right bolt of the enclosure bracket against the ground mount angle bracket.
- Page 60 Step 7 Extend the elevation strut or elevation jackscrew, and attach it to the top rear of the enclosure assembly as shown in Figure 3-49. Step 8 Tighten the hardware using the A-325 tensioning procedure. Step 9 Carefully raise the reflector/enclosure assembly to the zenith (elevation = 90 degrees) position, and securely tighten the strut-support setscrews to 40 foot-pounds.
- Page 61 The Reflector-to-Mount components can be verified and/or clarified in the following diagram. Figure 3-50a: Reflector to Mount Installation Procedures...
-
Page 62: Reflector-To-Mount Assembly Embedded Pipe Ground Mount
Reflector-to-Mount Assembly Embedded Pipe Ground Mount Step 1 Lift the reflector carefully onto the mount as shown in Figure 3-50b. Secure the reflector to the mount using 100537-15 M20 x 50 long bolts, 100526-57 nuts and 100522-57 lockwashers in three places. Tighten these three to 38 N•m. You have now completed the attachment of the reflector to the ground mount assembly. -
Page 63: Subreflector
Subreflector Once the reflector has been assembled to the mount, the subreflector must be installed. Figure 3-51 presents a final subreflector assembly. Figure 3-51: Installed Subreflector The following steps provide the procedure for assembling the subreflector. Step 1 Loosely preassemble the subreflector strut weldment (P/N 202775) using the supplied strut angles (P/N 202776) and the 3/8 inch by 2-1/4 inch bolts, lock washers, and nuts as shown Figures 3-52a and 3-52b. - Page 64 Figure 3-52b: Subreflector Strut Assembly Step 2 Position and attach the subreflector-mounting ring (part of 205929 subreflector assem- bly) to the corresponding mounting holes in the strut-support plates using 3/8 inch by 1 inch bolts, oversized flat washers, lock washers, and nuts as shown in Figure 3-53a and Figure 3-53b.
- Page 65 Figure 3-53b: Subreflector Assembly Step 3 Attach the angle clips (P/N 49187) around the reflector perimeter at the indicated posi- tions using the appropriate hardware as noted in Figure 3-53c. Figure 3-53c: Subreflector Assembly Installation Procedures...
- Page 66 Step 4 Raise and attach the preassembled subreflector strut assemblies between the corre- sponding angle clips using a tag line as shown in Figure 3-54a. The angle clips should correspond with the holes in the reflector. NOTE: Ensure that one subreflector adjustment stud is located at the six o’clock position. Figure 3-54a: Subreflector Attachment Installation Procedures...
-
Page 67: Subreflector Struts, Embedded Pipe Ground Mount
Subreflector Struts Embedded Pipe Ground Mount Assembly Step 1 Loosely preassemble the 300056 Subreflector Struts using supplied 222888 strut sup- ports and the 9963-127 3/8 inch by 2 1/4 inch bolts, 9974-63 lockwashers, and 9999-60 nuts as shown in Figure 3-54b, View A. Note: At this time it is recommended (but not necessary) to install the Subreflector, for K- &... -
Page 68: Subreflector Adjustment
Subreflector After the subreflector assembly has been attached to the reflector, the subreflector must Adjustment be adjusted to ensure correct alignment. The following steps provide the procedure for adjusting the subreflector. Step 1 Position the supplied setting bar (P/N 203896 Ku-band, P/N 203896-3 C-band) ) on the outer edge of the subreflector as well as on the outer edge of the front ring (P/N 202790) at the twelve o’clock (top) position. - Page 69 Step 6 Repeat the entire procedure until all four noted positions indicate that the subreflector aperture is set parallel to the ring (P/N 202790) as shown in Figure 3-56. Step 7 Temporarily tighten the adjustment hardware until after step 10 has been completed. Step 8 Measure and note the distance between either outermost angle clip bolt head and the subreflector rim.
-
Page 70: Feed System
You have now completed the subreflector assembly. By now, you can see that your installation of the 3.7-Meter Earth Station Antenna is almost complete. The feed system is the last phase of the base installation. NOTE: All antenna options (such as feed sys- tems, motors, anti-icing, etc) possess installation instructions within the individual kits contained in the shipment. -
Page 71: Operation Overview
Move the antenna to the desired azimuth angle by adjusting the manual actuator until the satellite signal has been spotted. There are several procedures that may be used to properly acquire the satellite. Andrew recommends that a spectrum analyzer be used. The following procedures provide explanation as to how to use the spectrum analyzer. - Page 72 Figure 4-1: Pure Noise Signal on Spectrum Analyzer Figure 4-2: Minimum transponder Signal on Spectrum Analyzer Operation...
- Page 73 The following steps provide the procedure for acquiring a satellite. Step 1 Manually move the antenna in the azimuth (scanning back-and-forth) to achieve the maximum (greatest amplitude) transponder signals. • Scan in one direction until the amplitude continues to diminish and then scan in the opposite direction until the same condition occurs.
- Page 74 Step 5 If the signal amplitude diminishes and does not increase (position B) to the level noted when the antenna was peaked on the side lobe, the antenna is moving away from the main beam; reverse the direction of the antenna movement. From the original side lobe position (position A), the signal amplitude should now dimin- ish to a null point at position C (minimum amplitude showing only signal noise) and then symmetrically increase again to the same level at position D as noted at position A.
- Page 75 Step 9 With all 24 transponder signals of approximately equal amplitude appearing on the spectrum analyzer screen determine the specific antenna system and satellite parame- ters. Rotate the feed assembly as required until the appropriate (odd or even) transpon- der signals are maximized. Figure 4-5: Maximizing Odd Transponders Figure 4-6: Optimum Polarization Setting Operation...
-
Page 76: Embedded Pipe Ground Mount Elevation Adjustment
Manual Actuator Assembly Removal Step 1 Step 2 Step 3 Embedded Pipe Ground Mount Elevation Adjustment Step 1 Step 2 Azimuth Adjustment Step 1 Conclusion After you have successfully acquired the satellite and all adjustments have been made, the manual actuator should be removed. The following steps provide the procedure for the prop- er removal of the manual actuator assembly. -
Page 77: Subreflector Adjustment
Subreflector After the satellite has been acquired and testing has taken place with the spectrum analyzer, Adjustment the subreflector may need to be adjusted to maximize optimum performance of your anten- na. The following procedures should be followed if a subreflector adjustment is required to maximize optimum performance. -
Page 78: Preventive Maintenance
Preventive Maintenance Overview General Cleaning Electrical Parts This section contains periodic preventive maintenance instructions for the 3.7-Meter Earth Station Antenna. Included in this section are inspection and preventive mainte- nance procedures including cleaning and lubrication, painting, and an operational volt- age/current checkout procedure deemed within the capabilities of the average station technician. -
Page 79: Local Control/Motor Drive Controller
Mechanical Parts Clean mechanical parts by first removing dust, dirt, and other loose contaminants with a scraper, stiff brush (bristle or wire in the case of rust or other corrosion), or cloth or com- pressed air at 25 to 40 psi. Any accumulated imbedded dirt, corrosion, grease, or oil deposits that require further cleaning may be removed with a bristle or wire brush and a cleaning solvent such as trichlorethylene or equal. -
Page 80: Preventive Maintenance
• Check transformer for an excessive wax deposit on the surface, discoloration, or a pungent odor indicative of burning vanish denoting overheating or a total breakdown. • Check all terminal boards for broken or missing terminals and stripped threads. Check tightness of lead attaching hardware. - Page 81 • Operate the azimuth and elevation drives as well as the feed rotation in both the plus and minus direction from the local control/motor drive controller at least once every three months during antenna down time. Check the mechanical limit switches provided at the end points stop antenna and feed movement, and limit travel to prevent structural interference and damage.
-
Page 82: Drive System Voltage And Current Checks
Voltage and if installed by Andrew crew. Part of this check off included voltage readings retaken to Current Checks determine if proper voltage was available. Current readings were also taken as a refer- ence for future comparison to serve as a troubleshooting aid in determining possible equipment degradation and shortened life. -
Page 83: Pedestal Mount Bearing Pad Adjustment
Step 4 Repeat preceding step (3) with the FEED CCW/OFF/CW switch in the alternate operat- ing position. Step 5 Turn the AZIMUTH EAST/WEST switch to either position and while the antenna is rotat- ing, carefully use a clamp on ammeter in accordance with the ammeter manufacturer’s instructions to take current readings off each of the three conductors (phases) connect- ed to the load side of the azimuth drive motor circuit breaker. -
Page 84: Aluminum Parts
Preservation of When preserving the component parts, refer to the following paragraphs in this section. Component Parts Aluminum Parts Remove all loose paint and corrosion by scraping, wire brushing, or using steel wool. If using steel wool near the feed window, make sure that none remains on the feed horn window. -
Page 85: Jackscrews/Motors
Jackscrews/Motors Gear Motor/Housing Fill Drain Requirements remove any old lubricant to prevent an excessive build-up. Remove indicated access plugs from square tube weldment and apply lubricant to panning frame tube assembly and corresponding thrust pads. Securely replace access plugs in square tube weldment. Be certain to remove any protective caps and clean off each lubrication fitting prior to injecting fresh grease. - Page 86 Periodic inspection procedures can be less frequent after first or second scheduled inspections. Initial oil change requirements include flushing gear boxes with a standard cleaning agent. Service Lube Quantity Andrew Frequency Type Type /Points Pressure...
Need help?
Do you have a question about the 3.7-Meter Earth Station Antenna and is the answer not in the manual?
Questions and answers