Table of Contents
Advertisement
Quick Links
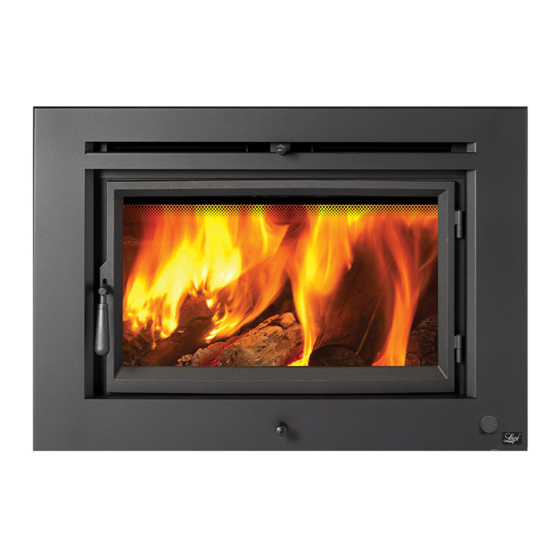
Large Flush Wood Insert
with Hybrid-Fyre™ Technology
SAFETY NOTICE:
If this appliance is not properly installed, a house fire may result.
For your safety, follow the installation directions. Contact local
building or fire officials about restrictions and installation
inspection requirements in your area.
Dragon Wholesaling Pty. Ltd.
Unit 2, 16 Lexington Drive
Bella Vista NSW
Australia 2153
(Rectangular)
• Masonry Fireplace Insert
• Zero-Clearance (Metal) Fireplace Insert
Save these instructions for future reference
© Copyright 2012, T.I.
$10.00
100-01291
4111118
Owner's Manual
Tested by:
HRL Technology
Tramway Road, Morwell 3840
Victoria
Tested to: AS/NZS 4012/4013: 1999
Report Number: HCMG/12/022
Advertisement
Table of Contents

Subscribe to Our Youtube Channel
Related Manuals for Travis Industries Large Flush


Summary of Contents for Travis Industries Large Flush
- Page 1 Large Flush Wood Insert (Rectangular) with Hybrid-Fyre™ Technology Owner's Manual • Masonry Fireplace Insert • Zero-Clearance (Metal) Fireplace Insert Save these instructions for future reference SAFETY NOTICE: If this appliance is not properly installed, a house fire may result. For your safety, follow the installation directions. Contact local building or fire officials about restrictions and installation inspection requirements in your area.
-
Page 2: Introduction
Introduction Introduction We welcome you as a new owner of a Large Flush Wood Insert. In purchasing a Large Flush Wood Insert you have joined the growing ranks of concerned individuals whose selection of an energy system reflects both a concern for the environment and aesthetics. This insert is one of the finest appliances the world over. -
Page 3: Table Of Contents
GreenStart Igniter – Firebrick and Housing Starting a Fire ..........18 Installation ............32 Adjusting the Burn Rate ........ 19 Listing Label ............36 Approximate Air Control Settings: ....... 19 © Travis Industries 100-01291 4060512... - Page 4 (UL 103 HT) Clay cause a house fire. residential type chimney or an Liner Do not connect this appliance to approved masonry chimney with any chimney serving another a standard clay tile, or stainless appliance. steel liner. © Travis Industries 100-01291 4060512...
- Page 5 Always follow the instructions in this manual. Travis Industries, Inc. grants no warranty, implied or stated, for the installation or maintenance of your appliance, and assumes no responsibility of any consequential damage(s).
-
Page 6: Installation Options
Dimensions 6" (153mm) Dia. 530 Lbs. (236 Kg) 31" 788mm 6.25" 159 mm 20.75" 528mm 22" 559mm 23.5" 597mm 9.75" 248mm 19" 483mm Figure 1 (a) Measure clearances from base of insert (b) Fireplace Opening © Travis Industries 100-01291 4060512... -
Page 7: Installation Warnings
Planning the Installation We suggest that you have an authorized Travis Industries dealer install your fireplace insert. If you install the fireplace insert yourself, your authorized dealer should review your installation plans. -
Page 8: Fireplace Requirements
Attach the "This fireplace has been altered..." plate to the fireplace (use two screws or other suitable method). You may wish to place it in a location where it will be covered by the surround panels. © Travis Industries 100-01291... -
Page 9: Insert Placement Requirements
Mantel Breastplate (max. 1-1/8” 30mm thick) 47.75” 1210mm s Mantel Column (max. 3.375” 80mm deep) 5.875” 150mm x Extension Onto Hearth (from front edge of insert) 0” 00mm Side Wall Max. 1" 26mm Figure 3 © Travis Industries 100-01291 4060512... -
Page 10: Mantel Requirements
This appliance relies upon natural draft to operate. External forces, such as wind, barometric pressure, topography, or factors of the home (negative pressure from exhaust fans, chimneys, air infiltration, etc.), may adversely affect draft. Travis Industries cannot be responsible for external forces leading to less than optimal performance. -
Page 11: Leveling Bolt Installation
The fettle is designed to prevent ash from spilling out of the firebox opening. It is held in place with two tabs and slots at the front of the firebox (see pictures below). The fettle is optional and may be removed if desired. © Travis Industries 100-01291... -
Page 12: Flue Installation
See the section "Insert We recommend using non-combustible Placement Requirements" for fiberglass insulation to seal the fireplace minimum clearances and enclosure (chimney top and bottom, and hearth required. surround panels) Seal the flue connection to the insert © Travis Industries 100-01291 4060512... -
Page 13: Surround Panel Installation
When installing the panel, route the wires through the notch on the bottom of the panel (either side). Face Installation There are several face options available for this fireplace insert. Refer to the instructions included with your face. © Travis Industries 100-01291 4060512... -
Page 14: Re-Routing The Electrical Cord To The Left Side
Cord Re-attach the strain relief to the left side (use pliers to compress the strain relief from the top and bottom while pushing it into the hole). Remove the button plug from the left side. © Travis Industries 100-01291 4060512... -
Page 15: Safety Notice
Shut the air control down to low and allow the stove to cool before proceeding. Over-firing may lead to damage of plated surfaces. If any portion of the heater glows red, it is considered over-firing and will void the warranty. © Travis Industries 100-01291 4060512... -
Page 16: Opening The Door
To prevent smoke from entering the room, open the bypass before opening the door (see following page for directions). You can also open the door a small amount and let air enter the firebox. Opening the Door Closing the Door © Travis Industries 100-01291 4060512... -
Page 17: Bypass Operation
When starting or re-loading, pull the bypass out, if necessary. • During normal operation, push the bypass in. Bypass Pulled Out Used for starting and re-loading Use the included pull tool to operate the bypass rod Bypass Pushed In Used for normal operation © Travis Industries 100-01291 4060512... -
Page 18: Starting A Fire
When you light the newspaper this “top-down” fire will burn its way to the center, igniting the larger pieces. With some practice, this method should work for you. © Travis Industries 100-01291 4060512... -
Page 19: Adjusting The Burn Rate
If the ashes are disposed of by burial in soil or otherwise locally dispersed, ASHES they should be retained in the closed container until all cinders have thoroughly cooled. © Travis Industries 100-01291 4060512... -
Page 20: Blower Operation
Normal Operating Sounds The steel may creak or click when the stove heats up and cools down - this is normal. Blower Sounds: The blower will make a slight "humm" as it pushes air through the stove. © Travis Industries 100-01291 4060512... -
Page 21: Hints For Burning
Wood Cutting and Storage Cut wood to length and Store the wood off the ground in a chop into quarters. covered area. Allow for airflow Air Flow around the wood to dry the wood. Air Flow Air Flow © Travis Industries 100-01291 4060512... -
Page 22: Troubleshooting
See the section "Door and Glass Inspection" on page 24 for details. • Check the ash bed for coals. Often, coals are still glowing under a slight bed of flyash. By raking these into a pile you can re-start your stove quickly. © Travis Industries 100-01291 4060512... -
Page 23: Daily Maintenance (While Stove Is In Use)
For stubborn creosote, dip a moist paper towel or newspaper in cold ash before cleaning. The ash acts as a mild abrasive. The glass will develop a very slight haze over time. This is normal and will not affect viewing of the fire. © Travis Industries 100-01291 4060512... -
Page 24: Monthly Maintenance (While Appliance Is In Use)
Excess creosote buildup may cause a chimney fire that may result in property damage, injury, or death. Operating this appliance continually at a low burn rate (air starvation) or using green (un-seasoned) wood will increase the formation of creosote. © Travis Industries 100-01291 4060512... -
Page 25: Yearly Maintenance
Slight scaling or rusting of the metal is normal. Make sure the air tubes are secured correctly. Floor and Wall Firebricks - replace any severely damaged firebrick along the side or floor of the firebox. © Travis Industries 100-01291 4060512... -
Page 26: Cleaning The Catalytic Combustor
1. With the stove fully cooled, insert the ash vacuum nozzle into the area directly above the door opening. 2. Carefully place the brush surface of the nozzle over the catalytic combustor openings and remove any ash or debris. Take care to prevent damage to the catalytic combustor (the surface is fragile). © Travis Industries 100-01291 4060512... -
Page 27: Door Parts
You may need to open and close the door repeatedly to get the gasket to seat fully. Blower and Electrical Parts ID # Description Qty. Part # ID # Description Qty. Part # Left Blower Right Blower (4) Blower Grommets w Spacers Rheostat Rheostat Knob w Nut Power Cord Thermodisk © Travis Industries 100-01291 4060512... -
Page 28: Firebox Parts
If the combustor is pushed at a side angle it will not come out. © Travis Industries 100-01291 4060512... -
Page 29: Air Tube Removal & Replacement
(you may wish to rotate the tube slightly). Front Tube = 27-7/8" 709mm Middle Tube = 26" 661mm Back Tube = 21-1/4" 540mm Pivot the air tube downwards and slide it out of the air channel on the opposite side. © Travis Industries 100-01291 4060512... -
Page 30: Brick Removal & Replacement
Remove the floor bricks first. The side bricks are pinned in place by the floor firebrick. Clean the firebox prior to replacing the brick. Refer to the section "Baffle Removal" on page 28 for details on removing the baffle bricks. © Travis Industries 100-01291 4060512... -
Page 31: Catalytic Combustor Temperature Probe Installation Instructions
3. Drill a hole through the convection top. Make sure to use the correct drill bit size to allow for an air- tight seal. 4. Insert the temperature probe to location near the combustor as shown below. © Travis Industries 100-01291 4060512... -
Page 32: Tm Igniter - Firebrick And Housing Installation
HINT: If you are not using the igniter, store these components inside the fireplace cavity in case the homeowner later decides to install them. 1. Remove the two firebricks from the front left corner of the firebox. 2. Place the igniter firebrick as shown below. © Travis Industries 100-01291 4060512... - Page 33 4. Remove the cover and gasket using a 5/16” nutdriver. See the photos below. 5. Install the housing as shown below. NOTE: The gasket’s hole patterns are unique. The housing must be re-installed in the same configuration. If the holes are not aligned, rotate the gasket 90°. © Travis Industries 100-01291 4060512...
- Page 34 Dragon Wholesaling Pty. Ltd., Unit 2, 16 Lexington Drive, Bella Vista NSW, Australia 2153. TRAVIS INDUSTRIES, INC. warrants this appliance (appliance is defined as the equipment manufactured by Travis Industries, Inc.) to be defect-free in material and workmanship to the original purchaser from the date of purchase as follows: Check with your dealer in advance for any costs to you when arranging a warranty call.
-
Page 35: If Warranty Service Is Needed
22. This 5 year warranty is the only warranty supplied by Travis Industries, Inc., the manufacturer of the appliance. All other warranties, whether express or implied, are hereby expressly disclaimed and purchaser’s recourse is expressly limited to the warranties set forth herein. -
Page 36: Listing Label
APPLIANCE EMISSION FACTOR BURNING HARDWOOD = 0.9 g/Kg TESTED TO: AS/NZS 4012/4013: 1999 REPORT NUMBER: HCMG/12/022 Manufactured Exclusively for: DRAGON WHOLESALING PTY. LTD., INC. TRAVIS INDUSTRIES, INC. UNIT 2, 16 Lexington Drive Mukilteo, WA USA Bella Vista NSW 2153 Australia U.S. - Page 37 Listing Information © Travis Industries 100-01291 4060512...
- Page 38 Fireplace Altered Tag ......... 8 Troubleshooting ..........22 Fireplace Requirements ........8 Verify the Installation ........15 Flue Installation ..........12 Wood Cutting and Storage ......21 GreenStart Igniter – Firebrick Installation ..32 Yearly Maintenance ......... 25 © Travis Industries 100-01291 4060512...
Need help?
Do you have a question about the Large Flush and is the answer not in the manual?
Questions and answers