
Related Manuals for Cisco WAP2000


Summary of Contents for Cisco WAP2000
- Page 1 ADMINISTRATION GUIDE Cisco Small Business WAP2000 Wireless-G Access Point with Power Over Ethernet...
- Page 2 Cisco TelePresence, Cisco Unified Computing System, Cisco WebEx, DCE, Flip Channels, Flip for Good, Flip Mino, Flip Video, Flip Video (Design), Flipshare (Design), Flip Ultra, and Welcome to the Human Network are trademarks; Changing the Way We Work, Live, Play, and Learn, Cisco Store, and Flip Gift Card are service marks; and Access Registrar,...
-
Page 3: Table Of Contents
Using a Standard Router or Switch to Connect the WAP2000 Verifying the Hardware Installation Chapter 5: Getting Started Accessing the Web-Based Utility Navigating the Web-Based Utility Setup Wireless AP Mode Administration Status About Cisco WAP2000 Wireless-G Access Point with Power Over Ethernet Administration Guide... - Page 4 Configuring Management Settings Configuring the Administration Log Restoring Factory Default Settings Upgrading the Firmware Rebooting the Access Point Managing the Access Point’s Configuration Verifying Access Point Status Checking Local Network Status Cisco WAP2000 Wireless-G Access Point with Power Over Ethernet Administration Guide...
- Page 5 Enable Encryption General Network Security Guidelines Additional Security Tips Appendix C: Specifications Specifications Setup/Configuration Management Operating Modes Wireless Security Quality of Service Environmental Appendix D: Where to Go From Here Cisco WAP2000 Wireless-G Access Point with Power Over Ethernet Administration Guide...
-
Page 6: Chapter 1: Introduction
Introduction Thank you for choosing the WAP2000 Wireless-G Access Point with Power Over Ethernet. The Wireless-G Access Point with Power Over Ethernet is ideal for small businesses that want to expand their existing wired networks or create new wireless networks for the workforce or guests. The access point features RangeBooster technology that is compatible with standard 802. -
Page 7: Chapter 2: Planning Your Wireless Network
Cisco wireless adapters also provide access to a wired network when using an access point or wireless router. An integrated wireless and wired network is called an infrastructure network. -
Page 8: Roaming
Network Layout The WAP2000 access point has been designed for use with 802. 1 1g and 802. 1 1b products, such as the notebook adapters for your laptop computers, PCI adapters for your desktop computers, and USB adapters for either a laptop or desktop. -
Page 9: Example Of A Simple Wireless Network
This network provides connectivity among wireless network devices and computers that have a wired connection to the switch. The switch connects to a router that connects to an ISP for Internet access. Cisco WAP2000 Wireless-G Access Point with Power Over Ethernet Administration Guide... -
Page 10: Chapter 3: Product Overview
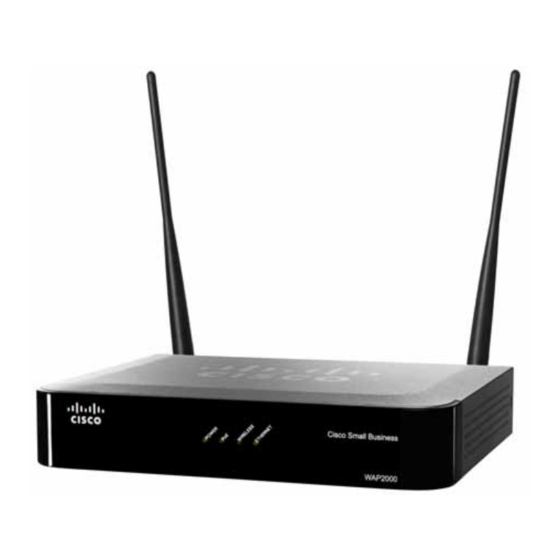
Product Overview This chapter describes the physical features of the Cisco WAP2000 Wireless-G Access Point with Power Over Ethernet and includes the following sections: • Front Panel, page 5 • Back Panel, page 6 • Side Panel, page 7 Front Panel The LEDs on the front panel of the access point display information about network activity. -
Page 11: Back Panel
The access point can be powered using Power over Ethernet. POWER Port—Connects the access point to power using the supplied power adapter. Use this option if your switch or router doesn’t support Power over Ethernet. Cisco WAP2000 Wireless-G Access Point with Power Over Ethernet Administration Guide... -
Page 12: Side Panel
Product Overview Side Panel Side Panel Security Slots—The security slots can be utilized to attach a lock to the access point. Cisco WAP2000 Wireless-G Access Point with Power Over Ethernet Administration Guide... -
Page 13: Chapter 4: Installing The Wap2000 Access Point
• PC with Microsoft Internet Explorer (6.0 or later) or Mozilla Firefox for using the web-based system management tools • A Cisco Small Business Power over Ethernet (PoE) switch or a switch and a 802.3af compliant power injector Recommended •... -
Page 14: Placement Tips
Installing the WAP2000 Access Point Placement Tips Placement Tips You can place your WAP2000 on a desktop or mount it on a wall. • Ambient Temperature—To prevent the WAP2000 from overheating, do not operate it in an area that exceeds an ambient temperature of 131°F (55°C). -
Page 15: Connecting The Equipment
Wall mount slots Line up the WAP2000 so that the wall-mount slots on the bottom of the access STEP 2 point line up with the two screws. Place the wall-mount slots over the screws and slide the access point down until STEP 3 the screws fit snugly into the wall-mount slots. -
Page 16: Using A Poe Router Or Switch To Connect The Wap2000
Using a PoE Router or Switch to Connect the WAP2000 To connect the WAP2000 to your network using a PoE router or switch, use the supplied Ethernet cable to connect the Ethernet port of the access point to a PoE port on the PoE router or switch. -
Page 17: Verifying The Hardware Installation
Installing the WAP2000 Access Point Verifying the Hardware Installation The LEDs on the front panel light up as soon as the WAP2000 powers on. Verifying the Hardware Installation To verify the hardware installation, complete the following tasks: • Check the cable connections. -
Page 18: Chapter 5: Getting Started
IP addresses from the DHCP server. If the WAP2000 access point does not receive a DHCP response after 60 seconds, it falls back to the following default static IP address: 192. 1 68. 1 .245 and a default mask of 255.255.255.0. -
Page 19: Navigating The Web-Based Utility
Wireless—To change the default SSID, click Wireless > Basic Settings and make the necessary changes. To change the level of security, click Wireless > Security and make the necessary changes. Cisco WAP2000 Wireless-G Access Point with Power Over Ethernet Administration Guide... -
Page 20: Setup
Management—Configures the password and Simple Network Management Protocol (SNMP) settings. • Log—Configures the log settings for the access point. • Factory Default—Resets the access point to its factory default settings. Cisco WAP2000 Wireless-G Access Point with Power Over Ethernet Administration Guide... -
Page 21: Status
To view a Help page, click the Help link in the top right corner of the window. A new window appears with information about the task that you are currently viewing. Cisco WAP2000 Wireless-G Access Point with Power Over Ethernet Administration Guide... -
Page 22: Chapter 6: Configuring The Wap2000 Access Point
Configuring the Access Point’s Modes of Operation, page 48 • Configuring Administration Settings, page 51 • Verifying Access Point Status, page 61 • Using Windows Help Menus, page 66 Cisco WAP2000 Wireless-G Access Point with Power Over Ethernet Administration Guide... -
Page 23: Setting Up Your Access Point
The Setup > Basic Setup window displays the general settings of the access point. You can configure the following basic setup settings: • Configuring Basic Setup Settings, page 19 • Configuring Network Setup Settings, page 20 Cisco WAP2000 Wireless-G Access Point with Power Over Ethernet Administration Guide... -
Page 24: Configuring Basic Setup Settings
This name helps you identify the access point after you log in. • Contact—Specify the contact string for your SNMP agent. • Location—Specify the location string for your SNMP agent. The default name is WAP2000. Click Save. STEP 3 Cisco WAP2000 Wireless-G Access Point with Power Over Ethernet Administration Guide... -
Page 25: Configuring Network Setup Settings
Primary DNS—Enter the IP address of the Domain Name System (DNS) server. This address is typically provided by your Internet Service Provider (ISP). • Secondary DNS—(Optional) Enter a second DNS server. Click Save. STEP 4 Cisco WAP2000 Wireless-G Access Point with Power Over Ethernet Administration Guide... -
Page 26: Configuring Time Settings
To manually configure the time settings: STEP 2 a. Click Manually. b. In the Date field, enter the current date. c. In the Time field, enter the current time. Cisco WAP2000 Wireless-G Access Point with Power Over Ethernet Administration Guide... -
Page 27: Configuring Wireless Settings
Configuring Basic Settings, page 23 • Configuring Security, page 25 • Configuring Connection Control, page 41 • Configuring Advanced Settings, page 43 • Configuring VLAN & QoS, page 46 Cisco WAP2000 Wireless-G Access Point with Power Over Ethernet Administration Guide... -
Page 28: Configuring Basic Settings
Disable—Disables wireless connectivity completely. This mode can be useful during system maintenance. • B-Only—Connects all the wireless client devices to the access point at Wireless-B data rates with maximum speed at 11 Mbps. Cisco WAP2000 Wireless-G Access Point with Power Over Ethernet Administration Guide... - Page 29 Enabled to broadcast the SSID to all wireless devices in range. Select Disabled to increase network security by preventing the SSID from being seen on networked computers. The default is Enabled to make network configuration easier. Click Save. STEP 5 Cisco WAP2000 Wireless-G Access Point with Power Over Ethernet Administration Guide...
-
Page 30: Configuring Security
(between SSID) drop-down menu, select Enabled. Otherwise, select Disabled. Wireless isolation between SSIDs prevents eavesdropping on the network. When it is enabled, wireless frames received on this access point are not forwarded to other wireless networks (SSIDs). Cisco WAP2000 Wireless-G Access Point with Power Over Ethernet Administration Guide... - Page 31 (within SSID) drop-down menu, select Enabled. The default is Disabled which allows visibility and the exchanging of files between wireless computers associated with the same SSID. Click Save. STEP 6 Cisco WAP2000 Wireless-G Access Point with Power Over Ethernet Administration Guide...
-
Page 32: Configuring Wpa-Personal
To enable wireless isolation across SSIDs, select Enabled from the drop-down STEP 3 menu. Otherwise, select Disabled. To enable wireless isolation within SSID, select Enabled from the drop-down STEP 4 menu. Otherwise, select Disabled. Cisco WAP2000 Wireless-G Access Point with Power Over Ethernet Administration Guide... -
Page 33: Configuring Wpa2-Personal
To configure the WPA2-Personal wireless security settings for the access point, follow these steps: Click Wireless > Security. STEP 1 From the Security Mode drop-down menu, select WPA2-Personal. STEP 2 Cisco WAP2000 Wireless-G Access Point with Power Over Ethernet Administration Guide... -
Page 34: Configuring Wpa2-Personal Mixed
3600 seconds. Click Save. STEP 6 Configuring WPA2-Personal Mixed This security mode supports the transition from WPA-Personal to WPA2-Personal. You can have client devices that use either WPA-Personal or WPA2-Personal. Cisco WAP2000 Wireless-G Access Point with Power Over Ethernet Administration Guide... - Page 35 Key Renewal Timeout—Enter a key renewal timeout period, which instructs the access point how often it should change the encryption keys. The default is 3600 seconds. Click Save. STEP 6 Cisco WAP2000 Wireless-G Access Point with Power Over Ethernet Administration Guide...
-
Page 36: Configuring Wpa-Enterprise
STEP 1 From the Security Mode drop-down menu, select WPA-Enterprise. STEP 2 To enable wireless isolation across SSIDs, select Enabled from the drop-down STEP 3 menu. Otherwise, select Disabled. Cisco WAP2000 Wireless-G Access Point with Power Over Ethernet Administration Guide... - Page 37 Key Renewal Timeout—Enter a key renewal timeout period, which instructs the access point how often it should change the encryption keys. The default is 3600 seconds. Click Save. STEP 6 Cisco WAP2000 Wireless-G Access Point with Power Over Ethernet Administration Guide...
-
Page 38: Configuring Wpa2-Enterprise
To enable wireless isolation across SSIDs select Enabled from the drop-down STEP 3 menu. Otherwise select Disabled. To enable wireless isolation within SSID, select Enabled from the drop-down STEP 4 menu. Otherwise select Disabled. Cisco WAP2000 Wireless-G Access Point with Power Over Ethernet Administration Guide... - Page 39 Key Renewal Timeout—Enter a key renewal timeout period, which instructs the access point how often it should change the encryption keys. The default is 3600 seconds. Click Save. STEP 6 Cisco WAP2000 Wireless-G Access Point with Power Over Ethernet Administration Guide...
-
Page 40: Configuring Wpa2-Enterprise Mixed
To enable wireless isolation across SSIDs, select Enabled from the drop-down STEP 3 menu. Otherwise, select Disabled. To enable wireless isolation within SSID, select Enabled from the drop-down STEP 4 menu. Otherwise, select Disabled. Cisco WAP2000 Wireless-G Access Point with Power Over Ethernet Administration Guide... - Page 41 Key Renewal Timeout—Enter a key renewal timeout period, which instructs the access point how often it should change the encryption keys. The default is 3600 seconds. Click Save. STEP 6 Cisco WAP2000 Wireless-G Access Point with Power Over Ethernet Administration Guide...
-
Page 42: Configuring Radius
To enable wireless isolation across SSIDs, select Enabled from the drop-down STEP 3 menu. Otherwise, select Disabled. To enable wireless isolation within SSID, select Enabled from the drop-down STEP 4 menu. Otherwise, select Disabled. Cisco WAP2000 Wireless-G Access Point with Power Over Ethernet Administration Guide... - Page 43 RADIUS Server Port—Enter the port number used by the RADIUS server. The default is 1812. • Shared Secret—Enter the shared secret key used by the access point and RADIUS server. Click Save. STEP 6 Cisco WAP2000 Wireless-G Access Point with Power Over Ethernet Administration Guide...
-
Page 44: Configuring Wep
To configure the WEP wireless security settings for the access point, follow these steps: Click Wireless > Security. STEP 1 From the Security Mode drop-down menu, select WEP. STEP 2 Cisco WAP2000 Wireless-G Access Point with Power Over Ethernet Administration Guide... - Page 45 Each WEP key can consist of the letters “A” through “F” and the numbers “0” through “9”. A WEP key should be 10 characters long for 64-bit encryption or 26 characters long for 128-bit encryption. Click Save. STEP 6 Cisco WAP2000 Wireless-G Access Point with Power Over Ethernet Administration Guide...
-
Page 46: Configuring Connection Control
From the Select SSID drop-down menu, select the SSID of the wireless network STEP 2 that you want to disable. In the connection control section, click Disabled (default). STEP 3 Cisco WAP2000 Wireless-G Access Point with Power Over Ethernet Administration Guide... -
Page 47: Allowing Specified Mac Addresses To Connect To The Wireless Network
In the Select SSID drop-down menu, select the SSID of the wireless network on STEP 2 which you want to block the specified MAC addresses. In the connection control section, click Enabled (default). STEP 3 Cisco WAP2000 Wireless-G Access Point with Power Over Ethernet Administration Guide... -
Page 48: Configuring Advanced Settings
This Wireless > Advanced Settings window allows you to configure the advanced settings for the access point. We recommend letting your access point automatically adjust the parameters for maximum data throughput. Cisco WAP2000 Wireless-G Access Point with Power Over Ethernet Administration Guide... - Page 49 DTIM Interval—This value indicates how often the access point sends out a Delivery Traffic Indication Message (DTIM). Lower settings result in more efficient networking, while preventing your computer from dropping into Cisco WAP2000 Wireless-G Access Point with Power Over Ethernet Administration Guide...
- Page 50 If you experience high packet error rates, you can decrease this value, but it likely decreases overall network performance. Only minor modifications of this value are recommended. Click Save. STEP 3 Cisco WAP2000 Wireless-G Access Point with Power Over Ethernet Administration Guide...
-
Page 51: Configuring Vlan & Qos
Default VLAN ID—Enter the default VLAN ID number (1–4094), the default value is 1. The default VLAN number should match with your switch’s settings. For example, the Cisco SRW2024 switch has the Trunk port mode, which sets the default VLAN (PVID) to 1 untagged, while the General port mode can set PVID to any VLAN either tagged or untagged. - Page 52 QoS settings (in the IP or layer 2 header). WMM provides the capability to prioritize wireless traffic in your environment. The default is Disabled (unchecked). Cisco WAP2000 Wireless-G Access Point with Power Over Ethernet Administration Guide...
-
Page 53: Configuring The Access Point's Modes Of Operation
The access point’s mode is set to Access Point by default. This connects your wireless devices to a wired network. In most cases, no change is necessary. Cisco WAP2000 Wireless-G Access Point with Power Over Ethernet Administration Guide... - Page 54 For the Wireless Repeater and Wireless Bridge modes, the Wireless Network mode, Channel, and Security settings must be the same for other remote wireless access points and devices. Cisco WAP2000 Wireless-G Access Point with Power Over Ethernet Administration Guide...
- Page 55 Bridge and fill in the following information: • Remote Wireless Bridge’s MAC Addresses—Enter the MAC addresses of the access points that bridge to this access point in the fields below. Click Save. STEP 5 Cisco WAP2000 Wireless-G Access Point with Power Over Ethernet Administration Guide...
-
Page 56: Configuring Administration Settings
Configuring the Administration Log, page 55 • Restoring Factory Default Settings, page 57 • Upgrading the Firmware, page 58 • Rebooting the Access Point, page 59 • Managing the Access Point’s Configuration, page 60 Cisco WAP2000 Wireless-G Access Point with Power Over Ethernet Administration Guide... -
Page 57: Configuring Management Settings
The Administration > Management window allows you to configure the password, web access, and Simple Network Management Protocol (SNMP) settings. You should frequently change the username/password that controls access to the access point’s web-based utility to prevent unauthorized access. Cisco WAP2000 Wireless-G Access Point with Power Over Ethernet Administration Guide... - Page 58 SNMP V3 administrator account. Minimum password length is 8 characters. (SNMP v3 only) Privacy Password—Enter the privacy password for the SNMP V3 administrator account. Minimum password length is 8 characters. Cisco WAP2000 Wireless-G Access Point with Power Over Ethernet Administration Guide...
- Page 59 SNMP information. If this field is set to 0.0.0.0, then access point will response to SNMP message from every host within the LAN. Click Save. STEP 3 Cisco WAP2000 Wireless-G Access Point with Power Over Ethernet Administration Guide...
-
Page 60: Configuring The Administration Log
Log Queue Length—Enter the length of the log that is e-mailed to you. The default is 20 entries. Log Time Threshold—Specify how often the log is emailed to you. The default is 600 seconds (10 minutes). Cisco WAP2000 Wireless-G Access Point with Power Over Ethernet Administration Guide... - Page 61 System Error Messages—If you want to log system error messages, click this check box. Configuration Changes—If you want to log any configuration changes, click this check box. Click Save. STEP 3 Cisco WAP2000 Wireless-G Access Point with Power Over Ethernet Administration Guide...
-
Page 62: Restoring Factory Default Settings
Click Administration > Factory Default. STEP 1 Click Restore Factory Default. STEP 2 Your access point reboots and comes back up with the factory default settings in a few seconds. Cisco WAP2000 Wireless-G Access Point with Power Over Ethernet Administration Guide... -
Page 63: Upgrading The Firmware
Extract the firmware upgrade file and save it on your computer. c. Click Administration > Firmware Upgrade. d. Enter the location of the firmware upgrade file in the field provided or click Browse to locate the file. Cisco WAP2000 Wireless-G Access Point with Power Over Ethernet Administration Guide... -
Page 64: Rebooting The Access Point
To reboot the access point, follow these steps: Click Administration > Reboot. STEP 1 This feature is useful when you need to remotely reboot the access point. Click Reboot. STEP 2 Cisco WAP2000 Wireless-G Access Point with Power Over Ethernet Administration Guide... -
Page 65: Managing The Access Point's Configuration
To restore (upload) the access point’s configuration settings: STEP 3 a. Enter the location of the configuration file or click Browse button to locate the file. b. Click Load. Cisco WAP2000 Wireless-G Access Point with Power Over Ethernet Administration Guide... -
Page 66: Verifying Access Point Status
Checking Wireless Status, page 63 • Checking System Performance, page 64 Checking Local Network Status The Status > Local Network window displays the access point’s current status information for the local network. Cisco WAP2000 Wireless-G Access Point with Power Over Ethernet Administration Guide... - Page 67 Default Gateway—The access point’s default gateway information. Primary DNS—The access point’s primary DNS information. Secondary DNS—The access point’s secondary DNS information. To update the status information, click Refresh. STEP 2 Cisco WAP2000 Wireless-G Access Point with Power Over Ethernet Administration Guide...
-
Page 68: Checking Wireless Status
Bandwidth Utilization—The percentage of the bandwidth being used. • VLAN Trunk—The VLAN Trunk status. • Priority Setting—The priority setting status. • SSID 1–4—Information about the access point’s configured SSIDs. Cisco WAP2000 Wireless-G Access Point with Power Over Ethernet Administration Guide... -
Page 69: Checking System Performance
This page displays the access point’s system performance values: • Wired The statistics for the wired network, the LAN. Name—The network to which the statistics refer, i.e. the LAN. IP Address—The access point’s local IP address. Cisco WAP2000 Wireless-G Access Point with Power Over Ethernet Administration Guide... - Page 70 Error Packets Received—The number of error packets received for each wireless network. Drop Received Packets—The number of packets being dropped after they were received. To update the status information, click Refresh. STEP 2 Cisco WAP2000 Wireless-G Access Point with Power Over Ethernet Administration Guide...
-
Page 71: Using Windows Help Menus
Other computers on your network will appear under Network Neighborhood or My Network Places, depending upon the version of Windows you're running. Windows Help provides complete instructions about adding computers to your network. Cisco WAP2000 Wireless-G Access Point with Power Over Ethernet Administration Guide... -
Page 72: Appendix A: Troubleshooting
If you can’t find an answer here, check the Cisco website at www.cisco.com. Can the WAP2000 Access Point act as my DHCP Server? No. The WAP2000 Access Point is nothing more than a wireless hub, and as such cannot be configured to handle DHCP capabilities. - Page 73 An integrated wireless and wired LAN is called an Infrastructure configuration. Infrastructure is applicable to enterprise scale for wireless access to a central database, or wireless application for mobile workers. Cisco WAP2000 Wireless-G Access Point with Power Over Ethernet Administration Guide...
- Page 74 Spread Spectrum technology is a wideband radio frequency technique developed by the military for use in reliable, secure, mission-critical communications systems. It is designed to trade off bandwidth efficiency for reliability, integrity, and security. Cisco WAP2000 Wireless-G Access Point with Power Over Ethernet Administration Guide...
- Page 75 Can Cisco wireless products support file and printer sharing? Cisco wireless products perform the same function as LAN products. Therefore, Cisco wireless products can work with NetWare, Windows NT/2000, or other LAN operating systems to support printer or file sharing.
- Page 76 What is the maximum number of users the access point can handle? No more than 45, but this depends on the volume of data and may be fewer if many users create a large amount of network traffic. Cisco WAP2000 Wireless-G Access Point with Power Over Ethernet Administration Guide...
-
Page 77: Appendix B: Wireless Security Checklist
Enable MAC Address Filtering, page 74.) 6. Change the SSID periodically. (See Change the SSID Periodically, page 74.) 7. Use the highest encryption algorithm possible. (See Enable Encryption, page 74.) Cisco WAP2000 Wireless-G Access Point with Power Over Ethernet Administration Guide... -
Page 78: Change The Default Wireless Network Name Or Ssid
(SSID) set by the factory. This is the name of your wireless network and can be up to 32 characters in length. Cisco wireless products use “ciscosb” as the default wireless network name. You should change the wireless network name to... -
Page 79: Enable Mac Address Filtering
Security Checklist Enable MAC Address Filtering Cisco routers give you the ability to enable Media Access Control (MAC) address filtering. The MAC address is a unique series of numbers and letters assigned to every networking device. With MAC address filtering enabled, wireless network access is provided solely for wireless devices with specific MAC addresses. - Page 80 Implementing encryption may have a negative impact on your network’s performance, but if you are transmitting sensitive data over your network, you should enable encryption to protect your data. Cisco WAP2000 Wireless-G Access Point with Power Over Ethernet Administration Guide...
-
Page 81: General Network Security Guidelines
(at night, during vacations). • Use strong passphrases that are at least eight characters in length. Combine letters and numbers to avoid using standard words that can be found in the dictionary. Cisco WAP2000 Wireless-G Access Point with Power Over Ethernet Administration Guide... -
Page 82: Appendix C: Specifications
Specifications This appendix lists the specifications of the Cisco WAP2000 Wireless-G Access Point with Power Over Ethernet. Specifications Model WAP2000 Standards IEEE802. 1 1g, IEEE802. 1 1b, IEEE802.3, IEEE802.3u, IEEE802.3af (Power Over Ethernet),802. 1 p (QoS priority), 802. 1 q (VLAN), 802. 1 X (Security Authentication), 802. 1 1i - Ready (Security WPA2), 802. -
Page 83: Management
# of Internal Ant. None # of External Ant. 2 (Omni-Directional) 3 dBi SMA detachable Transmit Power Transmit Power (Adjustable) @ Normal Temp Range: 11b - 18 dBm 11g - 16 dBm Cisco WAP2000 Wireless-G Access Point with Power Over Ethernet Administration Guide... -
Page 84: Security
Wireless Client devices can be isolated from each other Isolation either within an SSID or between two SSIDs. Quality of Service 4 queues WMM wireless priority General Wireless roaming based on IAPP Auto-channel selection Cisco WAP2000 Wireless-G Access Point with Power Over Ethernet Administration Guide... -
Page 85: Environmental
F (-10 to 55 ° ° Storage Temp. -22 to 158 F (-30 to 70 ° ° Operating Humidity 10 to 90% Noncondensing Storage Humidity 5% to 95% Noncondensing Cisco WAP2000 Wireless-G Access Point with Power Over Ethernet Administration Guide... -
Page 86: Appendix D: Where To Go From Here
Where to Go From Here Cisco provides resources to help you and your customer obtain the full benefits of the WAP2000 Wireless-G Access Point with Power Over Ethernet. Product Resources Support Cisco Small Business www.cisco.com/go/smallbizsupport Support Community Online Technical Support www.cisco.com/support...
Need help?
Do you have a question about the WAP2000 and is the answer not in the manual?
Questions and answers