Panasonic KX-P7105 Operating Instructions Manual
Hide thumbs
Also See for KX-P7105:
- Operating instructions manual (312 pages) ,
- Operating instructions (4 pages) ,
- Setup manual (2 pages)
Table of Contents
Advertisement
Quick Links
KX-P7110 comes standard with the network device. The Operating Instructions consist of the
following 3 files.
• Print.pdf
• Mainte.pdf
• Network.pdf
These files can be opened by clicking on their names below. The printer's features are described on
the following pages of this file.
Settings and Printing (Print.pdf)
This section contains information on printer panel, printer driver and printing a
document.
Maintenance and Specifications (Mainte.pdf)
This section contains information on cleaning the printer, replacing supplies,
clearing jams, troubleshooting, error messages, repacking and specifications of
the printer, media to be used and interface.
Network (Network.pdf)
This section contains the information to configure the printer in the network.
Please carefully read the Operating Instructions before operating.
Keep the printer CD-ROM in a safe place for future reference.
Do not expose the CD-ROM to direct sunlight or extreme heat and do not scratch or smudge the
surface of the CD-ROM.
Operating Instructions
KX-P7105 / KX-P7110
Model No.
Laser Printer
Advertisement
Chapters
Table of Contents

Related Manuals for Panasonic KX-P7105


Summary of Contents for Panasonic KX-P7105
-
Page 1: Laser Printer
Laser Printer Operating Instructions KX-P7105 / KX-P7110 Model No. KX-P7110 comes standard with the network device. The Operating Instructions consist of the following 3 files. • Print.pdf • Mainte.pdf • Network.pdf These files can be opened by clicking on their names below. The printer’s features are described on the following pages of this file. -
Page 2: Paper Handling
Features Features Congratulations on your purchase of the KX-P7105 or KX-P7110. We are sure it will meet your printing needs and give you many years of productive and efficient use. Printing in PCL and PostScript [with the optional Upgrade Kit (for PostScript) installed] In addition to printing in PCL or PostScript for Microsoft®... - Page 3 Enables to print a data through the network. Support 10 Base-T and 100 Base-TX (KX-P7110 is only available). TAR ® As an E Partner, Panasonic has determined that this NERGY TAR ® product meets the E guidelines for energy efficiency.
- Page 4 Features • Netscape and Netscape Navigator are registered trademarks of Netscape Communications Corporation in the United States and other countries. • Pentium is a trademark of Intel. • Dutch and Swiss are trademarks of Bitstream Inc. • ITC Avant Garde Gothic, ITC Zapf Chancery and ITC Zapf Dingbats are trademarks of International Typeface Corporation.
-
Page 5: Table Of Contents
Settings and Printing Maintenance and Spec. Network Settings and Printing Parts ......... 2 Cautions . -
Page 6: Parts
• Media for ink jet • Insert a stack of media into • Any toner other than genuine (paper, transparency, etc.) or Panasonic toner; it may the manual feed. (Insert a transparency for color laser media one by one.) damage the printer. - Page 7 Parts Windows Macintosh Parts Cautions Static Electricity Damage To prevent static electricity damage to any of the following components, touch a grounded metal surface, such as the printer’s bare metal frame prior to touching the component. • Interface connectors : parallel, USB, connector for 2nd feeder and network (KX-P7110 only) •...
-
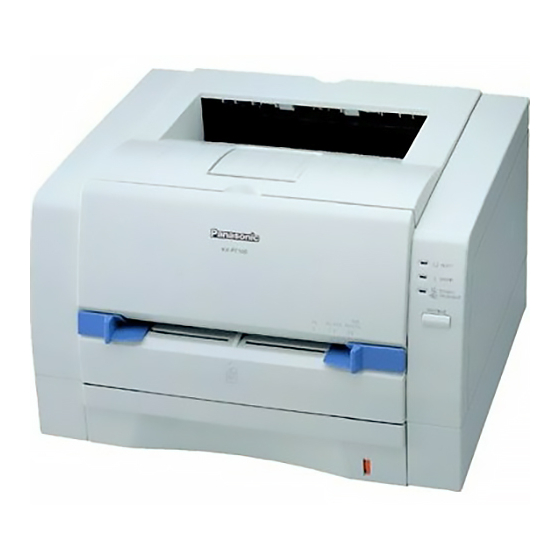
Page 8: Part Names
Parts Windows Macintosh Parts Part Names Part Names Front Side View Paper support (see pages 17, 19, 97, 101) Output tray Front cover Manual feed (see pages 9 , Printer panel 101) (see page Media tray (see pages 9, Paper level indicator (see pages 15, 95) Rear Side View... -
Page 9: Printer Panel
Parts Windows Macintosh Parts Printer Panel Printer Panel READY Indicators ERROR TONER/ DRUM UNIT PRINT / RESET PRINT / RESET button Indicators Three indicators show the following printer’s status. Printer Status TONER/ READY ERROR DRUM UNIT Printer is warming up (three indicators light one after another). Printer is ready for printing or in the sleep mode. - Page 10 Parts Windows Macintosh Parts Printer Panel PRINT / RESET Button The printer executes the following action depending on the printer status by pressing this button. Printer Status TONER/ READY ERROR DRUM UNIT To recover from the error status (overrun or memory overflow), press the PRINT / RESET button less than 5 seconds.
-
Page 11: Windows
Parts Windows Macintosh Windows Contents of Windows Section Windows Contents of Windows Section Contents of Windows Section ......7 About Media . - Page 12 Parts Windows Macintosh Windows Contents of Windows Section Device Settings Tab (Windows NT 4.0 / Windows 2000) ..66 Using the Special Print Features ......68 Duplex Printing.
-
Page 13: About Media
Parts Windows Macintosh Windows About Media About Media See the tables below for available media. For the notes and detailed media specification, refer see “Media” on page 51 in “Maintenance and Specifications”. Available Media and Media Size Media Duplex 2nd feeder Media Media tray Manual feed... -
Page 14: Available Paper Weights And Capacity
Parts Windows Macintosh Windows About Media Available Paper Weights and Capacity 2nd feeder Media Media tray Manual feed (option) 60 - 105 g/m 60 - 105 g/m 60 - 105g/m Plain paper (16 - 28 lbs.) (16 - 28 lbs.) (16 - 28 lbs.) 106 - 165 g/m Paper weights... -
Page 15: Loading Media And Printing
Parts Windows Macintosh Windows Loading Media and Printing Loading Media and Printing See the setup guide(s) for the following instructions. • Installing the toner cartridge and drum unit • Connecting cables • Installing the printer software The media is printed out to the output tray (top of the printer). When using thick paper [106 - 165 g/m (29-44 lbs.)] or when an envelope is printed, it may be curled. -
Page 16: Margins And Print Area
Parts Windows Macintosh Windows Loading Media and Printing Margins and Print Area The image (print area) is printed a bit smaller than the media size. 4.2 mm (0.17″) is required from the top, bottom and sides margins. You may need to adjust the page margins in the application software to match the print area. -
Page 17: Using The Media Tray
Parts Windows Macintosh Windows Loading Media and Printing Using the Media Tray Pull the media tray out of the printer. Pinch the media guides and slide them to the approximate width ( # ) and length ( $ ) of the media. - Page 18 Parts Windows Macintosh Windows Loading Media and Printing NOTE • When loading legal paper, slide the length guide unit ( $ ) to extend while pressing the stop- per ( # ). • If the media guide is removed, slide it back in. Media guide •...
- Page 19 Parts Windows Macintosh Windows Loading Media and Printing Tap the media stack on a level surface to avoid media jams or skewed printing. NOTE • Be careful not to leave fingerprints on the media, which can result in a smudged print. •...
- Page 20 Parts Windows Macintosh Windows Loading Media and Printing Transparency Print side down Max. 20 sheets Print side down Envelope Flap Max. 30 sheets Flap (International C5) NOTE • Most media has instructions recommending the side to be printed first. • Do not mix different types or thicknesses of media in the media tray at one time; this may cause a jam.
- Page 21 Before printing a document, specify the paper size, media type and paper source from the printer driver following the steps below. Display the print window in the application software. Select Panasonic KX-P7105 PCL6 or Panasonic KX-P7110 PCL6 printer and click Properties. The printer properties window is displayed.
- Page 22 Parts Windows Macintosh Windows Loading Media and Printing Select the AutoSelect Tray (%) from Paper Source and specify the paper size (#) and media type ($). •When the optional 2nd feeder is installed in your printer, Media Tray is changed to Upper and Lower selection is added to Paper Source.
-
Page 23: Using The Manual Feed
Parts Windows Macintosh Windows Loading Media and Printing Using the Manual Feed The manual feed serves as an additional tray for loading any type of media that ranges in size from 76.2 mm x 127 mm to 216 mm x 356 mm (3″ x 5″ to 8.5″ x 14″). When using thick paper [106 –... - Page 24 Parts Windows Macintosh Windows Loading Media and Printing Insert media with the printing side up into the manual feed while adjusting the media guides to the media width. The inserted media is slightly fed into the manual feed automatically. • Be sure to insert a media into the manual feed one at a time. Paper / Label / Transparency Printing side up Envelope...
- Page 25 Windows Loading Media and Printing Display the print window in the application software. Select Panasonic KX-P7105 PCL6 or Panasonic KX-P7110 PCL6 printer and click Properties. The printer properties window is displayed. Select the Manual Feed (%) for Paper Source and specify the paper size (#) and media type ($).
- Page 26 Parts Windows Macintosh Windows Loading Media and Printing After the media has been fed from the manual feed, insert media into the manual feed for the next printing. • If you delay inserting media into the manual feed when doing a multiple print job, a media empty error may occur.
-
Page 27: Remote Control Panel
Parts Windows Macintosh Windows Remote Control Panel Remote Control Panel The Remote Control Panel can be used for the following. 1. Used to display the option information installed in the printer (see “Information” on page 37). 2. Used to change the printer’s setting (see “Changing the Settings”... -
Page 28: Displaying The Remote Control Panel Window
, move the pointer to Programs, Panasonic and Start Panasonic KX-P7105 and KX-P7110, then click Remote Control Panel. •If more than one printer is connected to your computer, the screen prompts to select the printer. Click the desired, then click... -
Page 29: Displaying The Firmware Version And Installed Options
Others (see page Information (see page If your printer is KX-P7105, the Network menu is not displayed. Displaying the Firmware Version and Installed Options Display the Remote Control Panel window ( see “Displaying the Remote Control Panel Window” on page 24 Click the button on the Information menu from the tree menu. -
Page 30: Changing The Settings
Parts Windows Macintosh Windows Remote Control Panel Changing the Settings Display the Remote Control Panel window ( see page 24 Click the button on the main menu from the tree menu. Double click the main menu. Click the 2nd menu. Click the button and click the desired selection. -
Page 31: Tool Menus (Tool Bar Icons)
Parts Windows Macintosh Windows Remote Control Panel Tool Menus (Tool Bar Icons) File menu Refresh ( Updates the Remote Control Panel setting by loading the printer settings. Exit Exits the Remote Control Panel. Tool menu Send ( Transfers the changed settings to the printer. Factory Default ( Resets the printer’s settings to the factory default settings. -
Page 32: Option Menu
Parts Windows Macintosh Windows Remote Control Panel Option menu Interface If more than one printer are connected to the computer, this menu is activated. You can select the printer to use with Remote Control Panel. Help menu About Displays the version of the Remote Control Panel software. Help ( Displays the help menu how to use the Remote Control Panel. -
Page 33: Tree Menus
Parts Windows Macintosh Windows Remote Control Panel Tree Menus Before you attempt to change any settings, check the factory default settings in the following table. For the information of each menu, see “Outline for Menus” on page *Indicates the default setting. Optional 2nd feeder is installed on the printer, Media tray is changed to Upper and Lower selection is added. - Page 34 Parts Windows Macintosh Windows Remote Control Panel Menu Selection 1 / Information Selection 2 Orientation Portrait* Landscape Duplex None* Flip on long edge Flip on short edge Front Top Calibration 60* (0 – 120) Front Left Calibration 60* (0 – 120) Back Top Calibration 60* (0 –...
- Page 35 Parts Windows Macintosh Windows Remote Control Panel Menu Selection 1 / Information Selection 2 Cotton paper 0* (-3 – +3) Transparency 0* (-3 – +3) Label 0* (-3 – +3) Envelope #10 0* (-3 – +3) Envelope C5 0* (-3 – +3) Others Power save mode Auto continues...
-
Page 36: Outline For Menus
Parts Windows Macintosh Windows Remote Control Panel Outline for Menus Paper Paper Source Selects the source feeding media. If the optional 2nd feeder is installed, Media tray will be changed to Upper and Lower selection is added. Media type Selects the type of media loaded in the media tray, manual feed and 2nd feeder (option). Media size Selects the different media sizes. - Page 37 Parts Windows Macintosh Windows Remote Control Panel Quality Density Adjusts the density of printing. Font Font number Selects a font to print by selecting the font number. Font pitch Selects the font pitch. Font height Selects the font height. Symbol set Selects a symbol set used for the selected font.
- Page 38 Parts Windows Macintosh Windows Remote Control Panel Network (KX-P7110 only) The network menu is displayed for the KX-P7110 only. MAC address Displays the MAC address. MAC address is a private number assigned to each network device. Printer name Displays the printer name. Protocol (TCP/IP) Enables TCP/IP by selecting On.
- Page 39 Parts Windows Macintosh Windows Remote Control Panel Adjustment to Media Print quality may vary do to moisture in the media. It enables adjustment to the printer’s setting corresponding to the condition of media. To get better print quality, If media has high moisture, set it for + value (+1, +2 or +3). If media has low moisture, set it for –...
- Page 40 Parts Windows Macintosh Windows Remote Control Panel Others Power save mode To conserve energy and operating cost, this printer is provided with a programmable power save feature. The printer is factory set with the power save feature turned on to TAR ®...
- Page 41 Parts Windows Macintosh Windows Remote Control Panel Information Controller FW Displays the controller firmware version. Engine FW Displays the engine firmware version. Page Styler2 Displays the software version if the optional Upgrade Kit for PostScript is installed in the printer. Memory Size Displays the total memory size installed in the printer.
-
Page 42: Setting The Printer Driver
Click , move the pointer to Settings, then click Printers. Start The Printers window is displayed. Click the Panasonic KX-P7105 PCL6 or Panasonic KX-P7110 PCL6 icon. Click the File menu, then click the following menu depending on the operating system. - Page 43 Parts Windows Macintosh Windows Setting the Printer Driver Click a tab to view the features. Details Tab (see page [For Windows 95, Windows 98, Windows Me] Sharing Tab (see page [For Windows 95, Windows 98, Windows Me] Page Setup Tab (see page For Windows 95, Windows 98, Windows Me, Profiles Tab...
- Page 44 Start The WordPad window is displayed. Click the File menu, then click Print..The Print window is displayed. Select Panasonic KX-P7105 PCL or Panasonic KX-P7110 PCL in the Name : box. Click Properties. The printer properties window is displayed. Click a tab to view the features.
-
Page 45: Details Tab (Windows 95 / Windows 98 / Windows Me)
Parts Windows Macintosh Windows Setting the Printer Driver Details Tab (Windows 95 / Windows 98 / Windows Me) NOTE • This option is available only in Windows 95, Windows 98 and Windows Me. Print to the following port Enables the port where the interface cable (Parallel or USB) is connected. Parallel interface: LPT1 USB interface: USBXXX... -
Page 46: Sharing Tab (Windows 95 / Windows 98 / Windows Me)
Parts Windows Macintosh Windows Setting the Printer Driver Sharing Tab (Windows 95 / Windows 98 / Windows Me) Shared As Enables you to share the printer over the network. For detailed information, refer to the Help menu in Windows. When shared, for other PCs to print the printer driver must be loaded. -
Page 47: Page Setup Tab
Parts Windows Macintosh Windows Setting the Printer Driver Page Setup Tab & Paper Size Enables selecting a different paper size Letter, Legal, Executive, A4, A5, Envelope #9, Envelope #10, Envelope Monarch, B5, A6, International DL or International C5. - Page 48 Parts Windows Macintosh Windows Setting the Printer Driver Media Type Enables selecting the type of media loaded in the media tray, manual feed or 2nd feeder (option). When Labels or Thick Paper is selected, Manual Feed must be set for Paper Source.
- Page 49 Parts Windows Macintosh Windows Setting the Printer Driver Duplex Selects either to Flip on long edge or to Flip on short edge when you want to print on both sides of paper. To perform duplex printing, the following media and paper source must be set to perform duplex printing, see “Duplex Printing”...
-
Page 50: Paper Tab (In Advanced)
Parts Windows Macintosh Windows Setting the Printer Driver Paper Tab (in Advanced) Copies Selects the number of copies of the document will be printed. NOTE • The number of copies can also be determined using some application software. However, it is recommended to set the number of copies using one method, either from this driver or from an application software to avoid having a printing problem. -
Page 51: Setup Tab (In Advanced)
Parts Windows Macintosh Windows Setting the Printer Driver Setup Tab (in Advanced) & Duplex “Page Setup Tab” on page Pages Per Sheet Specifies how many pages of a document to print on one piece of paper. The page border will be printed by clicking on the Print Page Border check box when selecting 2up or 4up. - Page 52 Parts Windows Macintosh Windows Setting the Printer Driver Page Protection • Auto The printer first analyzes each page. If a page is complex, Page Protection is turned on automatically. • On The printer does not begin printing until the processor has finished imaging the entire page.
-
Page 53: Quality Tab (In Advanced)
Parts Windows Macintosh Windows Setting the Printer Driver Quality Tab (in Advanced) & Toner Save Mode Enables to reduce the amount of toner used to print. Off:The toner save feature is turned off. This is the default setting and is recommended for the high print quality. - Page 54 Parts Windows Macintosh Windows Setting the Printer Driver Quality Selects a resolution. Fast (300 x 300 dpi), Standard (600 x 600 dpi) or Fine (1200 x 600 dpi) can be selected. A higher resolution provides better print quality. However, the throughput speed is diminished.
-
Page 55: Overlay Tab (In Advanced)
Parts Windows Macintosh Windows Setting the Printer Driver Overlay Tab (in Advanced) Overlay feature enables overlaying a file (images or characters) over a document (see “Overlay Printing” on page 71). & Make Overlay / Cover / Trailer Page File Enables you to save a file for graphics and/or characters that you wish to overlay on/ before/after a document. - Page 56 Parts Windows Macintosh Windows Setting the Printer Driver Print With Overlay Enables you to select a file that you wish to overlay on a document when it is printed. The following are examples to use overlay feature: • Overlay 1st Page: Enables to incorporate your letterhead on the first page of a business letter.
-
Page 57: Watermarks Tab (In Advanced)
Parts Windows Macintosh Windows Setting the Printer Driver Watermarks Tab (in Advanced) Preview box & Watermark Enables the selected watermark in the box. The selected watermark is printed over a document. Click the Watermark box and select the desired one. TOP SECRET, CONFIDENTIAL, DRAFT, ORIGINAL and COPY are registered by default. - Page 58 Parts Windows Macintosh Windows Setting the Printer Driver • Add Enables to create a new watermark. To add a new watermark. (1) Enter a watermark text in the Text box. The text is displayed in the preview box. (2) Click The entered text is registered in the Watermark box.
- Page 59 Parts Windows Macintosh Windows Setting the Printer Driver Edit • Text: Enables to create/edit a watermark text by entering/editing the text in the Text box. • Size: Enables to set the font size of the watermark. Drag each slider left or right or click •...
- Page 60 Parts Windows Macintosh Windows Setting the Printer Driver Profiles Tab You can save the settings of the driver (for example, printing on a label or envelope etc.) using the Profile tab and retrieve it when necessary. & Profile Name Displays the saved profile names. Profiles (DEFAULT and DRAFT) are registered by default and cannot be changed or deleted.
- Page 61 Parts Windows Macintosh Windows Setting the Printer Driver Save as… Enables to register a new profile or change the saved profile. Change the driver settings. Click the Profiles tab. Click Save as... Enter a profile name and comment. • If you enter the same profile name that existed in the Profiles Name box, the profile is changed.
-
Page 62: Device Tab (Windows 95 / Windows 98 / Windows Me)
Parts Windows Macintosh Windows Setting the Printer Driver Device Tab (Windows 95 / Windows 98 / Windows Me) Install Options This tab defines whether an option is installed or not. The printer driver installed on the computer cannot automatically detect that an option has been installed in the printer. After installing an option in the printer, you must define it using this tab. - Page 63 Parts Windows Macintosh Windows Setting the Printer Driver Restore Defaults Resets the Device tab’s settings to the default settings. About Displays the program version and copyright information.
-
Page 64: Windows Nt 4.0 / Windows 2000
Windows NT 4.0 / Windows 2000 Click , move the pointer to Settings, then click Printers. Start The Printers window is displayed. Click the Panasonic KX-P7105 PCL6 or Panasonic KX-P7110 PCL6 icon. Click the File menu, then click Properties. The printer properties window is displayed. - Page 65 Parts Windows Macintosh Windows Setting the Printer Driver Click a tab to view the features. Ports tab (see page Sharing tab (see page Device Settings tab (see page (tab in Windows NT 4.0) •Tabs are different in Windows 2000. NOTE •...
-
Page 66: Ports Tab (Windows Nt 4.0 / Windows 2000)
Parts Windows Macintosh Windows Setting the Printer Driver Ports Tab (Windows NT 4.0 / Windows 2000) (tab in Windows NT 4.0) Checked port Documents will be printed to the selected port. Parallel interface: LPT1, LPT2, LPT3 USB interface: USBXXX (only Windows 2000) -
Page 67: Sharing Tab (Windows Nt 4.0 / Windows 2000)
Parts Windows Macintosh Windows Setting the Printer Driver Sharing Tab (Windows NT 4.0 / Windows 2000) (tab in Windows NT 4.0) Shared (Windows NT 4.0) / Shared as (Windows 2000) It enables you to share the printer over the network. For the setup operation, refer to “Sharing the printer with a client computer”... - Page 68 Parts Windows Macintosh Windows Setting the Printer Driver Sharing the printer with a client computer: Click on the Shared (Windows NT 4.0) check button or Shared as check button (Windows 2000). Type the printer name (for example: KX-P7110) in the Share Name or Shared as box.
- Page 69 Click Cancel The Locate File window is displayed. Insert the supplied Printer CD-ROM into the CD-ROM drive. Select CD-ROM drive. Open Win9x, then select Kx-p7105 or Kx-p7110 file. Click Open The Printer Drivers for Window 95 window is displayed. Click...
-
Page 70: Device Settings Tab (Windows Nt 4.0 / Windows 2000)
Parts Windows Macintosh Windows Setting the Printer Driver Device Settings Tab (Windows NT 4.0 / Windows 2000) (tab in Windows NT 4.0) Form To Tray Assignment Used to assign the paper size to the media tray or manual feed. If the Hold mismatched documents check box is checked on in the Scheduling tab (Windows NT 4.0) or Advanced tab (Windows 2000), it will be displayed that paper size is different in the spooler window on Windows when you print a document on the different size paper with the Form To Tray Assignment. - Page 71 Parts Windows Macintosh Windows Setting the Printer Driver Install Options The printer driver cannot automatically detect that an option has been installed in the printer. After installing an option in the printer, you must define it whether an option is installed or not.
-
Page 72: Using The Special Print Features
•Lay the paper straight if the paper is curled. Open a document to perform duplex printing and display the print window in your application. Select Panasonic KX-P7105 PCL or Panasonic KX-P7110 PCL printer and click Properties. The printer properties window appears. - Page 73 Parts Windows Macintosh Windows Using the Special Print Features Click on the Flip on long edge or Flip on short edge check button for Duplex menu. : Flip on long edge : Flip on short edge Click Print the document.
-
Page 74: Watermark Printing
The following is the example to print the watermark COPY on all pages. Open a document to print with the overlay file and display the print window. Select the Panasonic KX-P7105 PCL or Panasonic KX-P7110 PCL printer. Click Properties to display the printer properties window. -
Page 75: Overlay Printing
Parts Windows Macintosh Windows Using the Special Print Features Overlay Printing You can use the Overlay feature to: • Incorporate your letterhead on the first page of a business letter. • Print your logo at the bottom of each page of a set of presentation slides. •... - Page 76 file that you want to overlap on a document. Verify the overlay data by printing it. Display the print window and select the Panasonic KX-P7105 PCL6 or Panasonic KX-P7110 PCL6 printer. Click Properties or to display the printer properties window.
- Page 77 Minimize or close the application. Open a document to print with the overlay file and display the print window. Select the Panasonic KX-P7105 PCL6 or Panasonic KX-P7110 PCL6 printer. Click Properties to display the printer properties window. Click in the Page Setup tab, then click the Overlay tab Advanced...
- Page 78 Parts Windows Macintosh Windows Using the Special Print Features Click on the check box of your desired selection. Print With Overlay: The overlay file is overlapped only on the first page (Overlay 1st Page) or all pages (Overlay All Pages) of a document. Print Cover Page: The overlay file is printed as the cover page before the document.
-
Page 79: Status Display
Parts Windows Macintosh Windows Status Display Status Display The Status Display will show the following informations. When using the KX-P7110 and the printer is directly connected to the network with the network interface, the Status Display shows the network setting information. •... -
Page 80: Displaying The Status Display Window
Displaying the Status Display Window Turn the printer on. Click , move the pointer to Programs, Panasonic and Panasonic Start KX-P7105 and KX-P7110, then click Status Display. When staring the Status Display program for the first time, the Search Device window is displayed. -
Page 81: Function Of The Status Display
Parts Windows Macintosh Windows Status Display Function of the Status Display & This box shows the printer status. This box shows the printer is connected to local or network. If the printer is connected to the network, the printer’s IP address or server name will be displayed. The loaded media, printer’s information, error recovery and network information (KX- P7110 only) are displayed by clicking on the More Information check box (see “More... -
Page 82: More Information Window
Parts Windows Macintosh Windows Status Display More Information Window To display the More Information window, click on the More Information check box in the Status Display window. More Information window consists of two tabs: Information and Recovery Information. Information tab Shows the media information that set with the Remote Control Panel (see “Remote Control... - Page 83 Parts Windows Macintosh Windows Status Display Printer Information Tab Shows the firmware version and the information of the installed options Serial Number Displays the printer’s serial number. Controller FW Version Displays firmware version of the printer’s controller board. Engine ROM Version Displays version of the engine ROM.
- Page 84 Parts Windows Macintosh Windows Status Display Network tab (KX-P7110 only) Shows the network information of the printer: IP address, MAC address, etc. Option menus appear by clicking the button of the Network Information in the left pane. The information appears in the right pane by clicking the option menu. General MAC Address Mac address of the network card...
- Page 85 Parts Windows Macintosh Windows Status Display AppleTalk Protocol AppleTalk protocol is enabled or disabled Printer Name Printer name (KX-P7110-######) on the AppleTalk. ###### indicates the last 3 byte of MAC address of the printer. Zone Name Zone name of the AppleTalk SMB Information Protocol NetBEUI protocol is enabled or disabled.
- Page 86 Parts Windows Macintosh Windows Status Display Recovery Information tab & Shows corrective action for the printer error with animation. Shows corrective instructions or status. Clicking this button starts the animation. When the animation is started, the start button is changed to button.
-
Page 87: Setup For Status Display Window
Parts Windows Macintosh Windows Status Display Setup for Status Display Window & Status Display Type Stay: Clicking on the Stay check button runs the Status Display program and places the icon on the task bar when starting Windows. The icon is blinking on the task bar when a printer error has occurred. - Page 88 Parts Windows Macintosh Windows Status Display Printer Interface Enables the printer status by clicking Select... (see “Selecting the Printer to Get the Status” on page 85). If the printer is connected with the network interface cable, the printer’s IP address or computer name is entered in the Server Name box. NOTE If the printer is not selected to get the printer status by using the Setup for Status Display window, the Search Device window will be displayed to select the printer when the status...
-
Page 89: Selecting The Printer To Get The Status
Parts Windows Macintosh Windows Status Display Selecting the Printer to Get the Status Click in the Setup for Status Display window. Select... Search Device window appears. - Page 90 Parts Windows Macintosh Windows Status Display Specify the destination for searching by clicking on the check button. ALL: Searches all KX-P7110 printers, local and network Local: Searches the local printers connected to you computer. Server name: Searches the name of the server computer sharing a printer. (1) Click on the Server name check button and type the computer name in the box.
-
Page 91: Index
Parts Windows Macintosh Windows Index Index AC inlet ......4 Font ......30, 33 Additional Drivers . - Page 92 Parts Windows Macintosh Windows Index Manual feed ..4, 9, 10, 19, 29, 44 Power source ..... . .3 Margin .
- Page 93 Parts Windows Macintosh Windows Index Send data ......27 Sharing tab ....42, 63 Sharing the printer .
-
Page 94: Macintosh
Parts Windows Macintosh Macintosh Contents of Macintosh Section Macintosh Contents of Macintosh Section Contents of Macintosh Section ......90 Loading Media and Printing . -
Page 95: Loading Media And Printing
Parts Windows Macintosh Macintosh Loading Media and Printing Loading Media and Printing See the setup guides for the following instructions. • Installing the toner cartridge and drum unit • Connecting cables • Intalling the printer software The media is printed out on the output tray (top of the printer). When thick paper [106-165 g/ (29-44 lbs.)] or an envelope is printed, it may be curled. - Page 96 Parts Windows Macintosh Macintosh Loading Media and Printing Margins and Print Area The image (print area) is printed a bit smaller than the media size. 4.2 mm (0.17″) is required for the top, bottom and sides margins. You may need to adjust the page margins in the application software to match the print area.
- Page 97 Parts Windows Macintosh Macintosh Loading Media and Printing Using the Media Tray Pull the media tray out of the printer. Pinch the media guides and slide them to the approximate width ( # ) and length ( $ ) of the media.
- Page 98 Parts Windows Macintosh Macintosh Loading Media and Printing NOTE • When loading legal paper, slide the length guide unit ( $ ) to extend while pressing the stop- per ( # ). • If the media guide is removed, slide it back in. Media guide •...
- Page 99 Parts Windows Macintosh Macintosh Loading Media and Printing Tap the media stack on a level surface to avoid media jams or skewed printing. NOTE • Be careful not to leave fingerprints on the media, which can result in smudged print. •...
- Page 100 Parts Windows Macintosh Macintosh Loading Media and Printing Transparency Print side down Max. 20 sheets Envelope Print side down Flap Max. 30 sheets Flap (International C5) NOTE • Most media has instructions recommending the side to be printed first. • Do not mix different types or thicknesses of media in the media tray at one time; this may cause a jam.
- Page 101 Parts Windows Macintosh Macintosh Loading Media and Printing CAUTION •Be sure to hold the media tray not to drop it with both hands when it is especially fully loaded. Raise the paper support so that the media is not dropped from the output tray.
- Page 102 Parts Windows Macintosh Macintosh Loading Media and Printing Open the file you want to print from the application. Select Page Setup… from the application’s File menu. Select your printer from the Printer menu. Select the media size loaded in the tray from the Paper and click •...
- Page 103 Parts Windows Macintosh Macintosh Loading Media and Printing Select Auto or Media Tray from the All pages from of Paper Source in the General menu. • When selecting the Auto, be sure that the media is not inserted in the manual feed. Otherwise, the media may be fed from the manual feed.
- Page 104 Parts Windows Macintosh Macintosh Loading Media and Printing Click General menu and select Printer Specific Options menu. Select the media type from the Media Type. •You cannot feed Thick Paper or Label from the Media Tray. •You can only feed Plain Paper from the Option Cassette (option). Cotton paper cannot be fed from the Option Cassette.
- Page 105 Parts Windows Macintosh Macintosh Loading Media and Printing Using the Manual Feed The manual feed serves as an additional tray for loading any type of media that ranges in size from 76.2 mm x 127 mm to 216 mm x 356 mm (3″ x 5″ to 8.5″ x 14″). When using thick paper [106 –...
- Page 106 Parts Windows Macintosh Macintosh Loading Media and Printing Insert a media with the printing side up into the manual feed while adjusting the media guides to the media width. The inserted media is slightly fed into the manual feed automatically. •...
- Page 107 Parts Windows Macintosh Macintosh Loading Media and Printing Open the file you want to print from the application. Select Page Setup… from the application’s File menu. Select your printer from the Printer menu. Select the media size loaded in the tray from the Paper and click For the detailed information, see “Setting the Page Setup Window”...
- Page 108 Parts Windows Macintosh Macintosh Loading Media and Printing Select Manual Feed from the All pages from of Paper Source in the General menu. For the detailed information, see “Setting the General Menu” on page 110.
- Page 109 Parts Windows Macintosh Macintosh Loading Media and Printing Click General menu and select Printer Specific Options menu. Select the media type from the Media Type. For the detailed information, see “Setting the Printer Specific Options” on page 114. Click to print the document. Print •If you opened the rear cover at step 1, be sure to remove the media every time the media is printed out.
-
Page 110: Setting The Printer Driver For Postscript
•If an icon is not displayed on the left of the printer name you selected, follow the instructions below: (1) Click Create (2) Select Panasonic KX-P7110 and click Select (3) Specify the installed options. (4) Click (5) Confirm an icon appears to the left of the printer name. -
Page 111: Selecting The Printer Connected With Usb [B
Macintosh Setting the Printer Driver for PostScript Selecting the Printer Connected with USB [B] After the setting for USB is completed, KX-P7105 or KX-P7110 icon is created on your desktop screen. To select the printer connected with USB, Click the KX-P7105 or KX-P7110 icon. - Page 112 Parts Windows Macintosh Macintosh Setting the Printer Driver for PostScript Select your printer from the Format for. & Format for Select the printer to specify the printer driver. Paper Selects a different paper size Letter, Legal, A4, B5 (ISO), Executive, A5, A6, Com9 (Envelope #9), Com10 (Envelope #10), Monarch, DL (International DL) or C5 (International C5).
-
Page 113: Displaying The Print Window
Displaying the Print Window Open the file you want to print from within the application. Select Print... from the application’s File menu. Select the KX-P7105 or KX-P7110 printer from the Printer menu. Click General menu and select the desired menu. General menu... -
Page 114: Setting The General Menu
Parts Windows Macintosh Macintosh Setting the Printer Driver for PostScript Setting the General Menu & Copies Determines the number of copies of the document will be printed. Collated Clicking on this check box prints the copies of the entire document a number of times, from 1st page to the last page. - Page 115 Parts Windows Macintosh Macintosh Setting the Printer Driver for PostScript & Paper Source All pages from Enables to select the tray feeding media. If the optional 2nd feeder is installed in your printer and defined it in the Installable Options menu (see “Setting the Installable Options”...
-
Page 116: Setting The Layout Menu
Parts Windows Macintosh Macintosh Setting the Printer Driver for PostScript Setting the Layout Menu & Pages per sheet Specifies number of pages of your document to print on one piece of paper. Layout direction Specifies the layout of the pages per sheet. Border Sets the type of line to appear around the page. - Page 117 Parts Windows Macintosh Macintosh Setting the Printer Driver for PostScript & Print on Both Sides Enables to print on both sides of paper by clicking on the check box and selecting the binding style. To perform the duplex printing, the following media and paper source must be set.
- Page 118 Parts Windows Macintosh Macintosh Setting the Printer Driver for PostScript Setting the Printer Specific Options & Resolution Selects a quality setting. 300x300 dpi, 600x600 dpi or 1200x600 dpi can be selected. A higher resolution provides better print quality. However, the throughput speed is diminished.
- Page 119 Parts Windows Macintosh Macintosh Setting the Printer Driver for PostScript Media Type Enables to select the type of media loaded in the media tray, manual feed or 2nd feeder (Option Cassette). When the Label or Thick Paper is selected, Manual Feed must be set for Paper Source.
-
Page 120: Setting The Installable Options
Parts Windows Macintosh Macintosh Setting the Printer Driver for PostScript Setting the Installable Options The printer driver installed on the computer cannot automatically detect that an option has been installed in the printer. After installing an option in the printer, you must define whether an option is installed or not with Chooser or printer icon for USB. - Page 121 Parts Windows Macintosh Macintosh Setting the Printer Driver for PostScript Click the option installed in your printer and select Installed or total installed memory. Click Click...
- Page 122 Parts Windows Macintosh Macintosh Setting the Printer Driver for PostScript Setting the options with printer icon for USB Click the printer icon for USB on the desk top screen. Click the Printing menu and select Change Setup..•If Change Setup... menu does not appear, see the note below. Select the installed option from Change Select Installed or installed memory from To.
-
Page 123: Using The Special Print Feature
Parts Windows Macintosh Macintosh Using the Special Print Feature Using the Special Print Feature Duplex Printing When performing automatic duplex printing, paper must be fed from the media tray / upper tray or lower tray (option). Manual feed cannot be used for automatic duplex printing. NOTE •... - Page 124 Parts Windows Macintosh Macintosh Using the Special Print Feature Select Plain Paper from Media Type. Click Printer Specific Options menu and select Layout menu. Click on the Print on Both Sides check box and click your desired binding style icon. Click Print The document will be automatically printed on both sides of paper.
-
Page 125: Index
Parts Windows Macintosh Macintosh Index Index AC inlet ......4 Jam release pan ....4 All pages from . - Page 126 Parts Windows Macintosh Macintosh Index Parallel interface ....4 Part names ......4 Portrait .
- Page 127 Settings and Printing Maintenance and Spec. Network Maintenance and Spec. Replaceable Components....... 2 Upgrade Options .
- Page 128 Settings and Printing Maintenance and Spec. Network Maintenance and Spec. Replaceable Components Replaceable Components Supplies When print is faded or indicators show the following status, the replacement of a supply is needed. Indicators Printer Message of printer Average life components status display TONER/ ERROR...
-
Page 129: Replaceable Components
Settings and Printing Maintenance and Spec. Network Maintenance and Spec. Replaceable Components Average life is based on an average of 5% coverage of the printable area and standard density when the recommended media is used (refer to Example: 5% coverage). The life of a toner cartridge is varied depending on the coverage, temperature, humidity or media etc. -
Page 130: Installing The Upgrade Kit (For Postscript) Or Ram Board
Settings and Printing Maintenance and Spec. Network Maintenance and Spec. Upgrade Options Upgrade Options The following upgrade options can be installed in the printer. 2nd Feeder (KX-PMF3) Additional cassette can be used by installing this option. Refer to the installation manual included in the option’s carton to install it. - Page 131 Settings and Printing Maintenance and Spec. Network Maintenance and Spec. Upgrade Options Slide the option cover and remove it. Remove the two screws, then remove the metal plate.
- Page 132 Settings and Printing Maintenance and Spec. Network Maintenance and Spec. Upgrade Options Connect the optional board to the following connector as illustrated below. RAM board Upgrade kit Install the metal plate in the printer. Fasten the metal plate with the two screws removed earlier.
- Page 133 Settings and Printing Maintenance and Spec. Network Maintenance and Spec. Upgrade Options Install the option cover. Plug in the power cord and reconnect any cables to the back of the printer.
-
Page 134: Setting The Printer Driver
Settings and Printing Maintenance and Spec. Network Maintenance and Spec. Upgrade Options Setting the Printer Driver If you install the RAM board, set the printer driver for the printer’s installed memory (see “Setting the Device Options” below). If you install the Upgrade Kit (for PostScript), install the printer driver for PostScript and set it. To install the printer driver for PostScript in Windows or Macintosh, refer to the Setup Guide. - Page 135 It is possible to set the printer by using the printer properties window. It can be displayed from Windows (see below) or from an application. To display the printer properties window from an application, select the Panasonic KX-P7105 PS or Panasonic KX-P7110 PS printer in the print window and click Properties.
- Page 136 Settings and Printing Maintenance and Spec. Network Maintenance and Spec. Cleaning the Printer Cleaning the Printer Periodic cleaning of the printer is recommended. The frequency of cleaning is dependent upon the environment in which the printer is used. You should clean the printer: •...
- Page 137 Settings and Printing Maintenance and Spec. Network Maintenance and Spec. Cleaning the Printer While rotating the pick up roller, wipe it with a soft cloth that has been moistened with a mild commercial cleaner. Pick up roller Open the front cover. Lift the drum unit up ( # ) and slide it out of the printer ( $ ).
- Page 138 Settings and Printing Maintenance and Spec. Network Maintenance and Spec. Cleaning the Printer SAFETY CAUTION • It is very hot inside the printer; to avoid personal injury, do not touch the components illustrated below. CAUTION: HOT SURFACE CAUTION • To prevent any damage to the drum unit, observe the following precautions. —...
- Page 139 Settings and Printing Maintenance and Spec. Network Maintenance and Spec. Cleaning the Printer Wipe rollers (A) and (B), and paper chute with a soft cloth that has been moistened with a mild commercial cleaner. •Be sure to remove the paper dust. Paper chute Sheet: Not to damage NOTE...
- Page 140 Settings and Printing Maintenance and Spec. Network Maintenance and Spec. Cleaning the Printer Carefully wipe the corona wire of the drum unit by sliding a dry cotton swab from end to end a few times. corona wire Firmly insert the drum unit in the slot of the printer ( # ) [insert the side )].
- Page 141 Settings and Printing Maintenance and Spec. Network Maintenance and Spec. Clearing a Jam Clearing a Jam If the printer has frequent media jams, make sure that you follow these guidelines: • Always use high-quality paper and transparencies (see “Media” on page 51).
-
Page 142: Jam At Std / Jam At Op
Settings and Printing Maintenance and Spec. Network Maintenance and Spec. Clearing a Jam Jam at STD / Jam at OP When a media feed error has occurred, clear the media feed error as follows: Pull the media tray out of the printer or 2nd feeder (option). Tap the media stack on a level surface to avoid media jams or skewed printing. - Page 143 Settings and Printing Maintenance and Spec. Network Maintenance and Spec. Clearing a Jam Place the media with the print side down. •Be sure that the media does not exceed the limit mark. Print side down Paper feeds in direction of arrow. NOTE •...
- Page 144 Settings and Printing Maintenance and Spec. Network Maintenance and Spec. Clearing a Jam Open and close the front cover to clear the error indication.
-
Page 145: Jam At A
Settings and Printing Maintenance and Spec. Network Maintenance and Spec. Clearing a Jam Jam at A Open the front cover. Lift the drum unit up. - Page 146 Settings and Printing Maintenance and Spec. Network Maintenance and Spec. Clearing a Jam Grasp both sides of the jammed media and slowly pull it out of the printer. Push the drum unit down. Close the front cover.
-
Page 147: Jam At B
Settings and Printing Maintenance and Spec. Network Maintenance and Spec. Clearing a Jam Jam at B Open the front cover. Lift the drum unit up. - Page 148 Settings and Printing Maintenance and Spec. Network Maintenance and Spec. Clearing a Jam Remove the jammed media from the output tray. - Or - Open the rear cover of the printer ( #) and remove the jammed media ( $). CAUTION HOT SURFACE...
- Page 149 Settings and Printing Maintenance and Spec. Network Maintenance and Spec. Clearing a Jam Push the drum unit down. Close the front cover.
-
Page 150: Jam At C
Settings and Printing Maintenance and Spec. Network Maintenance and Spec. Clearing a Jam Jam at C Perform the jam recovery steps for Jam at A ( see page 19 - Or - Pull the media tray out of the printer. Slowly pull the jammed media ($) out of the printer while pushing the center tab (#) of the jam release pan down. - Page 151 Settings and Printing Maintenance and Spec. Network Maintenance and Spec. Clearing a Jam Replace the media tray into the printer. Open and close the front cover to clear the error indication.
-
Page 152: Jam At D
Settings and Printing Maintenance and Spec. Network Maintenance and Spec. Clearing a Jam Jam at D Open the rear cover of the printer ( # ) and grasp both sides of the jammed media and slowly pull it out of the printer ( $ ). CAUTION HOT SURFACE Open and close the front cover to clear the error indication. -
Page 153: Jam At E
Settings and Printing Maintenance and Spec. Network Maintenance and Spec. Clearing a Jam Jam at E Perform the jam recovery steps for Jam at D ( see page 26 - Or - Pull the media tray out of the printer. Slowly pull the jammed media ($) out of the printer while pushing the center tab (#) of the jam release pan down. - Page 154 Settings and Printing Maintenance and Spec. Network Maintenance and Spec. Clearing a Jam Replace the media tray into the printer. Open and close the front cover to clear the error indication.
- Page 155 Settings and Printing Maintenance and Spec. Network Maintenance and Spec. Troubleshooting Troubleshooting Trouble Possible Cause Corrective Action The background of the The toner cartridge has reached Replace the toner cartridge. images is printed in gray. the end of useful life. The drum unit has reached the Replace the drum unit.
- Page 156 Settings and Printing Maintenance and Spec. Network Maintenance and Spec. Troubleshooting Trouble Possible Cause Corrective Action Small dots are printed Media is wet or dry. Set the Adjustment to media at the different position setting for – value (–1, –2 or from the original –3) (see “Adjustment to Media”...
- Page 157 Settings and Printing Maintenance and Spec. Network Maintenance and Spec. Troubleshooting Trouble Possible Cause Corrective Action A white or black spots Paste/Glue of a label or dust is Wipe the photosensitive drum of appear in intervals of 94 attached to the photosensitive see “Cleaning the the drum unit ( mm (3.7″).
- Page 158 Settings and Printing Maintenance and Spec. Network Maintenance and Spec. Troubleshooting Trouble Possible Cause Corrective Action A black and vertical line Corona wire of the drum unit is Clean the corona wire in the drum appears on the page. dirty. see “Cleaning the Printer”...
- Page 159 Settings and Printing Maintenance and Spec. Network Maintenance and Spec. Troubleshooting Trouble Possible Cause Corrective Action The print out media is The media is not installed Install media correctly in the wrinkled. correctly. media tray. Adjust media guides correctly. The media is moist. Use fresh paper.
- Page 160 Settings and Printing Maintenance and Spec. Network Maintenance and Spec. Troubleshooting Trouble Possible Cause Corrective Action Frequent media-picking The length media guide of the Check the length media guide is errors occur. media tray is not set correctly. set to the groove indicating the media size.
-
Page 161: If You Can't Make A Print
Settings and Printing Maintenance and Spec. Network Maintenance and Spec. Troubleshooting If you can’t make a print Trouble Possible Corrective Action Printer not operating. The printer may not be plugged Make sure that you plugged in the into an AC outlet or turned on. printer and turned it on. - Page 162 Settings and Printing Maintenance and Spec. Network Maintenance and Spec. Troubleshooting Trouble Possible Corrective Action Memory Overflow Printer’s memory is insufficient Change the resolution for lower setting occurs. in high resolution setting. see “Quality Tab (in Advanced)” on page 49 see “Setting the Printer Specific Options”...
-
Page 163: Cleaning The Photosensitive Drum
Settings and Printing Maintenance and Spec. Network Maintenance and Spec. Troubleshooting Cleaning the Photosensitive Drum If the paste or glue of a label is attached to the photosensitive drum of the drum unit, clean it following the steps below. Open the front cover of the printer. Lift the drum unit up ( # ) and slide it out of the printer ( $ ). - Page 164 Settings and Printing Maintenance and Spec. Network Maintenance and Spec. Troubleshooting Remove the toner cartridge from the drum unit. If a paste/glue of a label is attached, find the portion that it is attached while rotating the gear of the photosensitive drum in the direction of the arrow.
- Page 165 Settings and Printing Maintenance and Spec. Network Maintenance and Spec. Troubleshooting Wipe the photosensitive drum with a dry cotton swab. Dust CAUTION • Do not use a sharp-pointed something like a ball-point pen to prevent the damage to the drum unit when removing the paste. Insert the side pins of the toner cartridge into the slots of the drum unit (#).
- Page 166 Settings and Printing Maintenance and Spec. Network Maintenance and Spec. Troubleshooting Firmly insert the drum unit in the slot of the printer ( # ) [insert the side )]. Push down ( $ ). pins of the drum unit into the groove (label Side pin Close the front cover.
- Page 167 Settings and Printing Maintenance and Spec. Network Maintenance and Spec. Error Indication Error Indication Recovery Indicators Possible Cause Front cover is open. Close the front cover. READY Media tray is empty. Load media in the media tray. ERROR Remove the jammed media, then Media jam has occurred.
- Page 168 The printer weighs about 10 kg {22 lbs.}. NOTE • Should you need to send your printer for service, consult your reseller first or Panasonic. • Please use the original carton and all of the original packing materials. • Do not ship printer with drum unit installed.
- Page 169 Settings and Printing Maintenance and Spec. Network Maintenance and Spec. Repacking Instructions Lift the drum unit up ( # ) and slide it out of the printer ( $ ). •To avoid possible toner spillage, it is recommended to place the drum unit on a news- paper, drop cloth or best to place back in original (Black) shipping bag.
- Page 170 Settings and Printing Maintenance and Spec. Network Maintenance and Spec. Repacking Instructions While pushing the drum unit as illustrated below ( # ), lift the toner cartridge up ( $ ). Replace the shipping cover on the toner cartridge.
- Page 171 Settings and Printing Maintenance and Spec. Network Maintenance and Spec. Repacking Instructions Insert the toner cartridge into a plastic bag and certainly seal the end of the bag tightly. Wrap the drum unit with the protective sheet to protect the drum surface. Insert the drum unit into a plastic bag and seal the end of the bag tightly.
- Page 172 Settings and Printing Maintenance and Spec. Network Maintenance and Spec. Repacking Instructions Wipe off any loose toner in and around the printer. NOTE • If a toner vacuum is available, it is the best tool for cleaning spilled toner. Do not use a standard office vacuum;...
- Page 173 Settings and Printing Maintenance and Spec. Network Maintenance and Spec. Specifications Specifications Printer Printing Method: Semiconductor Laser Print Speed: 14 ppm (pages per minute) maximum (A4 size plain paper, simplex printing, 5% image area) ppm maximum (Letter size plain paper, simplex printing, 5% image area) 1 Maximum print speed is 14.6 ppm.
- Page 174 Settings and Printing Maintenance and Spec. Network Maintenance and Spec. Specifications Warm Up Time Less than 25 seconds [at 22°C (71.6°F), 50% RH] Operating Environment: 10 to 32.5°C (50 to 90.5°F), 20 to 80% RH Storage Environment: 0 to 35°C (32 to 95°F), 10 to 80% RH Dimensions: 399 (W) X 390.5 (D) X 254 (H) mm (15.7″...
- Page 175 Settings and Printing Maintenance and Spec. Network Maintenance and Spec. Specifications Fonts The following fonts can be used as the printer’s resident fonts by installing the optional Upgrade Kit (for PostScript) in the printer (see “Installing the Upgrade Kit (for PostScript) or RAM Board”...
- Page 176 Settings and Printing Maintenance and Spec. Network Maintenance and Spec. Specifications Fonts for PostScript The following 35 fonts can be available. • Dutch 801 SWA, Dutch 801 Bold SWA, Dutch 801 Italic SWA, Dutch 801 Bold Italic SWA • Swiss 721 SWA, Swiss 721 Bold SWA, Swiss 721 Oblique SWA, Swiss 721 Bold Oblique •...
- Page 177 Settings and Printing Maintenance and Spec. Network Maintenance and Spec. Specifications Media Paper Specifications This printer is designed to work well with most types of paper. However, differences in paper may have significant effects on the quality of the print or the reliability of paper handling. It is strongly recommended that you always test paper before purchasing it to make sure it provides desirable performance.
- Page 178 Settings and Printing Maintenance and Spec. Network Maintenance and Spec. Specifications NOTE • Please store your paper according to the recommendations of the manufacturer. Paper and Envelope Sizes The following paper and envelope sizes are supported by the printer. Medium Name Dimension Paper...
-
Page 179: Transparencies And Labels
• Ink jet media (paper, transparency, etc.) (It may transfer onto the fuser unit’s roller and cause damage.) Transparencies and Labels You may also print on labels and transparencies that are made for the printer. Panasonic has tested and found that the following work satisfactorily. OHP transparencies... - Page 180 Settings and Printing Maintenance and Spec. Network Maintenance and Spec. Specifications NOTE • With any label stock, the labels must completely cover the backing material (see figure below). Labels cover the entire The backing material is exposed. backing material Envelope Specifications It is recommended that you purchase only high quality envelopes with diagonal seams, as shown in the diagram below: High quality envelopes have the following characteristics:...
- Page 181 Settings and Printing Maintenance and Spec. Network Maintenance and Spec. Specifications It is not recommended that you use envelopes with any of the following characteristics (using these may result in paper jams): • Irregularly shaped envelopes • Envelopes with curls, wrinkles, nicks, twists, dog-ears or other damage •...
- Page 182 Settings and Printing Maintenance and Spec. Network Maintenance and Spec. Specifications Do not attempt to print on any of the following types of envelopes. These may cause damage to your printer. • Envelopes with clasps, snaps or tie strings (see Figure 1) •...
-
Page 183: Parallel (Ieee1284) Interface
Settings and Printing Maintenance and Spec. Network Maintenance and Spec. Specifications Parallel (IEEE1284) Interface Connector type:36PIN Anphenole connector Cable: use a shielded cable 2 meters (6.6 feet) or less in length Pin configuration Signal Signal nStrobe Data 1 Data 2 Data 3 Data 4 Data 5... - Page 184 Settings and Printing Maintenance and Spec. Network Maintenance and Spec. Specifications CAUTION • If the cable is connected to PC via printer buffer or selector, the printer may not print. • A print server cannot be used for printing. NOTE •...
-
Page 185: Usb (Universal Serial Bus) Interface
Settings and Printing Maintenance and Spec. Network Maintenance and Spec. Specifications USB (Universal Serial Bus) Interface Cable: use a shielded cable 5 m (16.4 feet) or less in length. Pin configuration Signal pin Signal -Data + Data Ground USB Interface connector (printer side) NOTE •... - Page 186 Settings and Printing Maintenance and Spec. Network Network Features ..........3 Setup in Windows .
- Page 187 Settings and Printing Maintenance and Spec. Network Network Setting the Printer ........115 Setting the Password .
-
Page 188: Features
Settings and Printing Maintenance and Spec. Network Network Features Features This chapter explains how to configure the KX-P7110 printer on a supported network environment. The KX-P7110 printer provides Ethernet connectivity by functioning as a network print server. The KX-P7110 network function has the following features: Supports 100Base-TX and 10Base-T Supports the following network operating systems •... - Page 189 Settings and Printing Maintenance and Spec. Network Network Setup in Windows Setup in Windows This chapter explains how to set up printing in Windows* (Windows 95, Windows 98, Windows Me, Windows NT 4.0 and Windows 2000 environment). First select an Operating System and a network protocol which you are using or want to use, then select a network printing method ( “Selecting the Printing Method”...
-
Page 190: Setup In Windows
Settings and Printing Maintenance and Spec. Network Network Setup in Windows Selecting the Printing Method There are two methods of network printing. • Printing directly from a computer • Printing through the shared computer (server) You may need to consult with your network administrator which to select. Printing directly from a computer The print data from a computer is transferred directly to the printer. -
Page 191: Contents Of The Printer Software
Settings and Printing Maintenance and Spec. Network Network Setup in Windows Contents of the Printer Software The following software is included in the printer CD-ROM. You can selectively install it using the installer on the CD-ROM. Printer Driver and Manual When installing the printer driver and manual, you can selectively install the following software. - Page 192 Settings and Printing Maintenance and Spec. Network Network Setup in Windows Web Administrative Tool Manages the device by showing the status of the device connected to the network and changing its configuration, therefore, an administrator can manage a printer using this tool. Before installing or for using this tool, see the help menu of Web Administrative Tool.
-
Page 193: Windows Me
Settings and Printing Maintenance and Spec. Network Network Setup in Windows LPR Port printing using TCP/IP in Windows 95 / Windows 98 / Windows Me The following is the outline of the steps how to set up LPR Port printing using TCP/IP in Windows 95 / Windows 98 / Windows Me. - Page 194 Settings and Printing Maintenance and Spec. Network Network Setup in Windows Step 2: Setting up TCP/IP for the printer You need to set the IP address, Subnet Mask and Default Gateway for the printer. Set them by using one of the following three methods. You may need to contact your network administrator to select the best way.
- Page 195 If the Network Setup Tool is already installed, click , move the pointer to Programs, Start Panasonic and Panasonic KX-P7105 and KX-P7110 , then click Network Setup Tool. Proceed to the step 6. Insert the printer CD-ROM into the CD-ROM drive.
- Page 196 Settings and Printing Maintenance and Spec. Network Network Setup in Windows Click Install Network Utilites. Follow the instructions until the screen below is displayed.
- Page 197 Settings and Printing Maintenance and Spec. Network Network Setup in Windows Click on the check button, and then Finish The list of KX-7110 printers residing on the network is displayed. • If you want to search printers in the network again, click the Device menu and select Search.
- Page 198 Settings and Printing Maintenance and Spec. Network Network Setup in Windows Remove the check of the Use DHCP/BOOTP check box, then enter IP Setup address, Subnet Mask and Default Gateway. Click Confirm the setting and click You will see the message “Update is completed. Do you wish to reset the printer?”. Click...
- Page 199 Settings and Printing Maintenance and Spec. Network Network Setup in Windows NOTE • You cannot search for the printer while the printer is restarted. • To confirm that the IP address is set correctly, (1) On your computer, click , select Programs, then click Start —...
- Page 200 Settings and Printing Maintenance and Spec. Network Network Setup in Windows Step 3: Installing LPR Port on the computer This step explains how to install LPR port monitor for KX-P7110 network printer port. Before installation, confirm that the printer is connected to the network correctly and is ready status.
- Page 201 Settings and Printing Maintenance and Spec. Network Network Setup in Windows Follow the instructions until the screen below is displayed. Click on the Yes check button, and then Finish Click on the Print by using LPR check button and click Next>...
- Page 202 Settings and Printing Maintenance and Spec. Network Network Setup in Windows Enter the IP address or host name of the printer. •If you click Search, you will see the list of printers on the network. Click Next> Change the print port name if needed. •...
- Page 203 Settings and Printing Maintenance and Spec. Network Network Setup in Windows Click Next> Click Finish...
- Page 204 Settings and Printing Maintenance and Spec. Network Network Setup in Windows Step 4: Setting up the printer driver and the printer port on the computer If the printer driver is already installed on your computer, see page If the printer driver is not installed, First install the printer driver and set up the printer port as follows: Insert the printer CD-ROM into the CD-ROM drive.
- Page 205 Settings and Printing Maintenance and Spec. Network Network Setup in Windows Follow the instructions on the screen until the screen below is displayed. Click on the check box of the installed options in your printer. Click Next> Click the LPR port (ex. KX-P7110 No.1) you created at the previous step from the Select the current port list, then click Next>...
- Page 206 Settings and Printing Maintenance and Spec. Network Network Setup in Windows Click Finish NOTE • Change the spool setting to disable bi-directional support in the printer driver as follows: (1)Display the Printers folder (Start-Settings-Printers). (2)Click the printer using the right mouse button and select Properties. Spool Settings...
- Page 207 Settings and Printing Maintenance and Spec. Network Network Setup in Windows Click the Details tab. Select the LPR port (ex. KX-P7110 No.1) you created at the previous step from the Print to the following port list. Click NOTE • Change the spool setting to disable bi-directional support in the printer driver as follows: Spool Settings...
- Page 208 Settings and Printing Maintenance and Spec. Network Network Setup in Windows Step 5: Sharing the printer port on the server computer Click Start , select Settings and then click Printers. Click your printer with the right mouse button. Click Properties. The printer properties window is displayed.
- Page 209 Settings and Printing Maintenance and Spec. Network Network Setup in Windows Click on the Shared As check button, then enter the printer name in the Share Name box. If needed, enter a comment and password. Click to close the window. •...
- Page 210 Settings and Printing Maintenance and Spec. Network Network Setup in Windows Step 6: Setting up the printer driver and the printer port on the client computer If the printer driver is already installed on your computer, see page If the printer driver is not installed, First install the printer driver and set up the printer port as follows: Insert the printer CD-ROM into the CD-ROM drive.
- Page 211 Settings and Printing Maintenance and Spec. Network Network Setup in Windows Follow the instructions on the screen until the screen below is displayed. Click on the check box of the installed options in your printer. Click Next> Click on the Add new port or connect to shared printer check button and then Next>...
- Page 212 Settings and Printing Maintenance and Spec. Network Network Setup in Windows Click on the Print through another Windows or NetWare check button. Click Browse... and select the printer which is connected to the server. Click Click Next> Click Finish If the printer driver is already installed: For Windows NT 4.0 / Windows 2000, see page For Windows 95 / Windows 98 / Windows Me...
- Page 213 Settings and Printing Maintenance and Spec. Network Network Setup in Windows Click on the Network check button. Click Browse... Click the printer that is connected to the server. Click The screen returns to the Add Port window and the selected printer is displayed in the Specify the network path to the printer box in the following form.
- Page 214 Settings and Printing Maintenance and Spec. Network Network Setup in Windows For Windows NT 4.0 / Windows 2000 Click , select Settings and then click Printers. Start Click the printer with the right mouse button. Click Properties. Click the Ports tab. Click Add Port...
-
Page 215: Windows Me
Settings and Printing Maintenance and Spec. Network Network Setup in Windows IPP Port Printing using TCP/IP in Windows 95 / Windows 98 / Windows Me IPP printing allows you to print a document via the Internet. The following is the outline of the steps how to set up LPR port printing using the TCP/IP protocol in Windows NT4.0. - Page 216 Settings and Printing Maintenance and Spec. Network Network Setup in Windows Step 3: Installing IPP Port on the computer This step explains how to install IPP Port monitor for KX-P7110 Network Printer Port. Before installation, confirm that the printer is connected to the network correctly and is ready status.
- Page 217 Settings and Printing Maintenance and Spec. Network Network Setup in Windows Follow the instructions on the screen until the screen below is displayed. Click on the Yes check button, and then Finish Click on the Print by using IPP check button and then Next>...
- Page 218 Settings and Printing Maintenance and Spec. Network Network Setup in Windows Click either the Connect using a media and telephone line or Connect using a local area network check button. Click Next> •If you select Connect using a media and telephone line, proceed to step 9. Click either the Do not print using a proxy server check button or the Print using a proxy server check button.
- Page 219 Settings and Printing Maintenance and Spec. Network Network Setup in Windows Click Next> Click Finish...
- Page 220 Settings and Printing Maintenance and Spec. Network Network Setup in Windows Step 4: Setting up the printer driver and the printer port on the computer If the printer driver is already installed on your computer, see page If the printer driver is not installed, First install the printer driver, then set up the printer port as follows: Insert the printer CD-ROM into the CD-ROM drive.
- Page 221 Settings and Printing Maintenance and Spec. Network Network Setup in Windows Follow the instructions on the screen until the screen below is displayed. Click on the check box of the installed options in your printer. Click Next> Click the IPP port (ex. KX-P7110 No.1) you created at the previous step from the Select the current port list, then click Next>...
- Page 222 Settings and Printing Maintenance and Spec. Network Network Setup in Windows If the printer driver is already installed, Set up the printer port as follows: Click Start , select Settings and then click Printers. Click your printer with the right mouse button. Click Properties.
-
Page 223: Hp Jetdirect Port Printing Using Tcp/Ip Or Ipx/Spx In Windows 95 / Windows 98 / Windows Me
Settings and Printing Maintenance and Spec. Network Network Setup in Windows Step 5: Sharing the printer port on the server computer Refer to “Step 5: Sharing the printer port on the server computer” on page 23 in “LPR Port printing using TCP/IP in Windows 95 / Windows 98 / Windows Me. Step 6: Setting up the printer driver and the printer port on the client computer Refer to... -
Page 224: Using Netbeui In Windows 95 / Windows 98 / Windows Me
Settings and Printing Maintenance and Spec. Network Network Setup in Windows Using NetBEUI in Windows 95 / Windows 98 / Windows Me This section explains how to print using the NetBEUI protocol in Windows 95 / Windows 98 / Windows Me environment. NOTE •... - Page 225 Settings and Printing Maintenance and Spec. Network Network Setup in Windows Step 2: Setting up NetBEUI on the printer First install the Network Setup Tool and then set up NetBEUI on the printer. Insert the printer CD-ROM into the CD-ROM drive. The CD-ROM launches automatically.
- Page 226 Settings and Printing Maintenance and Spec. Network Network Setup in Windows Follow the instructions until the screen below is displayed. Click on the Yes check button, and then Finish The list of KX-P7110 printers residing on the network is displayed. If you want to search printers in the network again, click the Device menu and select Search.
- Page 227 Settings and Printing Maintenance and Spec. Network Network Setup in Windows NOTE • When several printers are listed in the Network Setup Tool window, select the printer using the Ethernet address (MAC address). You can obtain it (hexadecimal six digits number) from the label on the back of the printer or configuration page (press PRINT/ RESET button less than 5 seconds).
- Page 228 Settings and Printing Maintenance and Spec. Network Network Setup in Windows Confirm the setting and click If you change the setting, you will see the message “Update is completed. Do you wish to reset the printer?” Click NOTE • You cannot search for the printer while the printer is restarted.
- Page 229 Settings and Printing Maintenance and Spec. Network Network Setup in Windows Step 3: Setting up the printer driver and the printer port on the computer If the printer driver is already installed on you computer, see page If the printer driver is not installed, First install the printer driver and then set up the printer port as follows: Insert the printer CD-ROM into the CD-ROM drive.
- Page 230 Settings and Printing Maintenance and Spec. Network Network Setup in Windows Follow the instructions on the screen until the screen below is displayed. Click on the check box of the installed options in your printer. Click Next> Click Add new port or connect to shared printer and then click Next>...
- Page 231 Settings and Printing Maintenance and Spec. Network Network Setup in Windows Click on the Print through another Windows or NetWare check button. Click Browse... and select the printer which is connected to the server. Click Click Next> Click Finish...
- Page 232 Settings and Printing Maintenance and Spec. Network Network Setup in Windows If the printer driver is already installed, Set up the printer port as follows: Click Start , select Settings and then click Printers. Click your printer icon with the right mouse button. Click Properties.
- Page 233 Settings and Printing Maintenance and Spec. Network Network Setup in Windows Click Click Apply Click Step 4: Sharing the printer port on the server computer Refer to “Step 5: Sharing the printer port on the server computer” on page 23 in “LPR Port printing using TCP/IP in Windows 95 / Windows 98 / Windows Me”.
-
Page 234: Lpr Port Printing Using Tcp/Ip In Windows Nt 4.0
Settings and Printing Maintenance and Spec. Network Network Setup in Windows LPR Port printing using TCP/IP in Windows NT 4.0 The following is the outline of the steps how to set up LPR port printing using the TCP/IP protocol in Windows NT4.0. Step 1: Setting up TCP/IP on the computer Step 2: Setting up TCP/IP for the printer Select a network printing method before proceeding the step 3. - Page 235 Settings and Printing Maintenance and Spec. Network Network Setup in Windows Step 3: Installing the LPR port on the computer You must login to the server computer as a supervisor to perform the following steps. Click , select Settings, then click Control Panel. Start Double click the Network icon.
- Page 236 Settings and Printing Maintenance and Spec. Network Network Setup in Windows Select the Microsoft TCP/IP Printing in Network Service list, then click Insert the CD-ROM for Window NT 4.0 into the CD-ROM drive, type the path name and then click Continue .
- Page 237 Settings and Printing Maintenance and Spec. Network Network Setup in Windows Step 4: Setting up the printer driver and the printer port on the computer You must login to the server computer as a supervisor to perform the following steps. If the printer driver is already installed on your computer, see page If the printer driver is not installed,...
- Page 238 Settings and Printing Maintenance and Spec. Network Network Setup in Windows Follow the instructions on the screen until the screen below is displayed. Click on the check box of the installed options in your printer. Click Next> Click on the Add new port or connect to shared printer check button and then click Next>...
- Page 239 Settings and Printing Maintenance and Spec. Network Network Setup in Windows Click LPR Port from Directly print to KX-P7110 list. Then click Next> NOTE • If the LPR Port is not appeared, install the Microsoft TCP/IP Printing service in the Network property (see “Step 3: Installing the LPR port on the computer”...
- Page 240 Settings and Printing Maintenance and Spec. Network Network Setup in Windows If the printer driver is already installed, Set up the printer port as follows: Click Start , select Settings and then click Printers. Click your printer with the right mouse button. Click Properties.
- Page 241 Settings and Printing Maintenance and Spec. Network Network Setup in Windows Enter the IP address or host name of the printer in the Name or address of server providing lpd box. Enter lp in the Name of printer or print queue on that server box. Then click Click Close...
- Page 242 Settings and Printing Maintenance and Spec. Network Network Setup in Windows Click on the Shared check button [Shared as (Windows 2000)], then enter the printer name in the Share Name box. If you want to use the separator page, proceed to the following steps. Otherwise, click to close the printer properties window.
-
Page 243: Hp Jetdirect Port Printing Using Tcp/Ip Or Ipx/Spx In Windows Nt 4.0
Settings and Printing Maintenance and Spec. Network Network Setup in Windows Step 6: Setting up the printer driver and printer port on the client computer Refer to “Step 6: Setting up the printer driver and the printer port on the client computer” on page 25 of “LPR Port printing using TCP/IP in Windows 95 / Windows 98 / Windows Me”. -
Page 244: Using Netbeui In Windows Nt 4.0
Settings and Printing Maintenance and Spec. Network Network Setup in Windows Using NetBEUI in Windows NT 4.0 The following is the outline of the steps how to print using the NetBEUI protocol in Windows NT 4.0. NOTE • When printing a document using NetBEUI, the error message is displayed and the printing is halted if the printer cannot receive the print data. - Page 245 Settings and Printing Maintenance and Spec. Network Network Setup in Windows Step 3: Setting up the printer driver and the printer port on the computer If the printer driver is already installed on your computer, see below. If the printer driver is not installed, Refer to “Step 3: Setting up the printer driver and the printer port on the computer”...
- Page 246 Settings and Printing Maintenance and Spec. Network Network Setup in Windows Enter the network path of the printer according to the following form, then click \\server name\printer name Click Close Click Close to close the printer properties window. Step 4: Sharing the printer port on the server computer Refer to “Step 5: Sharing the printer port on the server computer”...
-
Page 247: Lpr Port Printing Using Tcp/Ip In Windows 2000
Settings and Printing Maintenance and Spec. Network Network Setup in Windows LPR Port printing using TCP/IP in Windows 2000 The following is the outline of the steps how to print using the TCP/IP protocol in Windows 2000. Step 1: Setting up TCP/IP on the computer Step 2: Setting up TCP/IP on the printer Select a network printing method before proceeding the step 3. - Page 248 Settings and Printing Maintenance and Spec. Network Network Setup in Windows Step 4: Sharing the printer port on the server computer Refer to “Step 5: Sharing the printer port on the server computer” on page 56 in LPR Port printing using TCP/IP in Windows NT 4.0”. Step 5: Setting up the printer driver and the printer port on the client computer Refer to...
-
Page 249: Standard Tcp/Ip Port Printing In Windows 2000
Settings and Printing Maintenance and Spec. Network Network Setup in Windows Standard TCP/IP Port printing in Windows 2000 The following is the outline of steps how to print using the standard TCP/IP protocol in Windows 2000. Step 1: Setting up TCP/IP on the computer Step 2: Setting up TCP/IP on the printer Select a network printing method before proceeding the step 3. - Page 250 Settings and Printing Maintenance and Spec. Network Network Setup in Windows Step 3: Setting up the printer driver and the printer port on the computer If the printer driver is already installed on your computer, see page If the printer driver is not installed First install the printer driver and then set up the printer port.
- Page 251 Settings and Printing Maintenance and Spec. Network Network Setup in Windows Follow the instructions on the screen until the screen below is displayed. Click on the check box of the installed options in your printer. Click Next> Click on the Add new port or connect to shared printer check button and then Next>...
- Page 252 Settings and Printing Maintenance and Spec. Network Network Setup in Windows Click Standard TCP/IP Port from Directly print to KX-P7110 list. Then click Next> The Add Standard TCP/IP Port Wizard window is displayed. Click Next> Enter the IP address or host name of the printer in the Printer Name or IP Address box, then click Next>...
- Page 253 Settings and Printing Maintenance and Spec. Network Network Setup in Windows If the printer driver is already installed, Set up the printer port as follows: Click Start , select Settings and then click Printers. Click your printer with the right mouse button. Click Properties.
- Page 254 Settings and Printing Maintenance and Spec. Network Network Setup in Windows Step 4: Sharing the printer port on the server computer Refer to “Step 5: Sharing the printer port on the server computer” on page 56 in “LPR Port printing using TCP/IP in Windows NT 4.0”. Step 5: Setting up the printer driver and the printer port on the client computer Refer to...
-
Page 255: Ipp Port Printing Using Tcp/Ip In Windows 2000
Settings and Printing Maintenance and Spec. Network Network Setup in Windows IPP Port Printing Using TCP/IP in Windows 2000 The following the outline of the steps how to print using the TCP/IP protocol in Windows 2000. NOTE • If the firewall, etc. intercepts the communication between the printer and your computer, it will be unable to use this printing method. - Page 256 Settings and Printing Maintenance and Spec. Network Network Setup in Windows Click Network printer and then Next> Click Connect to a printer on the internet or on your intranet. Enter the URL for the printer in the URL box as follows: http://IP address/ipp or http://host name/ipp Click Next>...
-
Page 257: Hp Jetdirect Port Printing Using Tcp/Ip Or Ipx/Spx In Windows 2000
Settings and Printing Maintenance and Spec. Network Network Setup in Windows Click Next> Finish Click HP JetDirect Port printing using TCP/IP or IPX/SPX in Windows 2000 Refer to “HP JetDirect Port Printing using TCP/IP or IPX/SPX in Windows 95 / Windows 98 / Windows Me”... -
Page 258: Using Netbeui In Windows 2000
Settings and Printing Maintenance and Spec. Network Network Setup in Windows Using NetBEUI in Windows 2000 The following is the outline of the steps how to print using the NetBEUI protocol in Windows 2000 environment. Step 1: Setting up NetBEUI on the computer Step2: Setting up NetBEUI for the printer Select a network printing method before proceeding to the step 3. - Page 259 Settings and Printing Maintenance and Spec. Network Network Setup in Windows Step 3: Setting up the printer driver and the printer port on the computer If the printer driver is not installed, First install the printer driver and then set up the printer port. Refer to “Step 3: Setting up the printer driver and the printer port on the computer”...
-
Page 260: Setup In Macintosh
Settings and Printing Maintenance and Spec. Network Network Setup in Macintosh Setup in Macintosh KX-P7110 Setup Utility uses TCP/IP. You need to set up AppleTalk and TCP/IP for your computer and printer. The printer does not work with AppleTalk Phase1. The following the outline of the steps how to set up in a Macintosh environment using the AppleTalk protocol. - Page 261 Installer icon. Click Continue if you agree the software license agreement and click Install Quit Click Double click KX-Printer Network Setup Tool (it will be located in Panasonic / KX-P7105 and KX-P7110 folder). KX-P7110 printers in the network are displayed.
- Page 262 Settings and Printing Maintenance and Spec. Network Network Setup in Macintosh Click the KX-P7110 printer you want to set up, click Setup and then select Network Setup..NOTE •When several printers are listed, select the printer using the Ethernet address (MAC address).
- Page 263 Settings and Printing Maintenance and Spec. Network Network Setup in Macintosh Click Setup and select Network Setup..NOTE • If a password is set, you must enter the password and click Click the AppleTalk icon. Click on the Use AppleTalk Protocol check box to enable it and enter the zone name and the printer name.
-
Page 264: Setup In Netware
Settings and Printing Maintenance and Spec. Network Network Setup in NetWare Setup in NetWare This chapter explains how to set to print from a client computer via the NetWare server. In NetWare 4.x / NetWare 5 Perform the following steps to set up. Step 1: Setting up the printer and the server (see page Step 2: Setting up the client (for Windows 95 / Windows 98 / Windows... - Page 265 •If the Network Setup Tool is already installed, click , move the pointer to Start Programs, Panasonic and Panasonic KX-P7105 and KX-P7110, then click Network Setup Tool. Proceed to step 7. Insert the printer CD-ROM into the CD-ROM drive. The CD-ROM launches automatically.
- Page 266 Settings and Printing Maintenance and Spec. Network Network Setup in NetWare Click Install Network Utilities. Follow the instructions until the screen below is displayed.
- Page 267 Settings and Printing Maintenance and Spec. Network Network Setup in NetWare Click on the Yes check button, and then Finish The list of KX-7110 printers residing on the network is displayed. • If you want to search the network for printers again, click the Device menu and select Search.
- Page 268 Settings and Printing Maintenance and Spec. Network Network Setup in NetWare Click the NetWare tab. NOTE • You can change the Print Server Name and Printer Name. It is recommended that the Setup name is less than 8 characters. After changing, click .
- Page 269 Settings and Printing Maintenance and Spec. Network Network Setup in NetWare Click the Setup menu and select Create NetWare Queue. Follow the instructions on the screen. • When asked to select NDS mode or Bindery mode, select NDS Mode and click Next>...
- Page 270 Settings and Printing Maintenance and Spec. Network Network Setup in NetWare Click on the Print Server Mode check button and click Next> Change the queue name if needed, then click Next> Follow the instructions on the screen. NOTE • Turn the printer off and on before printing.
- Page 271 • If the Network Setup Tool is already installed, click Start , move the pointer to Programs, Panasonic and Panasonic KX-P7105 and KX-P7110, then click Network Setup Tool. Proceed to step 7. Insert the printer CD-ROM into the CD-ROM drive.
- Page 272 Settings and Printing Maintenance and Spec. Network Network Setup in NetWare Click Install Network Utilities. Follow the instructions until the screen below is displayed.
- Page 273 Settings and Printing Maintenance and Spec. Network Network Setup in NetWare Click on the Yes check button, and then Finish The list of KX-P7110 printers residing in the network. • If you want to search the network for printers again, click the Device menu and select Search.
- Page 274 Settings and Printing Maintenance and Spec. Network Network Setup in NetWare Click the NetWare tab. NOTE • You can change the Print Server Name and Printer name. It is recommended that the Setup name is less than 8 characters. After changing, click .
- Page 275 Settings and Printing Maintenance and Spec. Network Network Setup in NetWare Select the context to add the queue from the tree and click Next> Click on the Remote Printer Mode check button and click Next>...
- Page 276 Settings and Printing Maintenance and Spec. Network Network Setup in NetWare Select the print server name in the list or enter the print server name you want to use for printing. Click Next> Change the queue name if needed. Click Next>...
- Page 277 Settings and Printing Maintenance and Spec. Network Network Setup in NetWare Follow the instructions on the screen. NOTE • If you did not start the print server on the server, start the print server. Type “LOAD PSERVER xxxxxxxx”, then press the Enter key. (xxxxxxxx : print server name) •...
- Page 278 • If the Adminmamanager is already installed, click , move the pointer to Start Programs, Panasonic and Panasonic KX-P7105 and KX-P7110, then click Network Setup Tool. Proceed to step 7. Insert the printer CD-ROM into the CD-ROM drive. The CD-ROM launches automatically.
- Page 279 Settings and Printing Maintenance and Spec. Network Network Setup in NetWare Click Install Network Utilities. Follow the instructions until the screen below is displayed.
- Page 280 Settings and Printing Maintenance and Spec. Network Network Setup in NetWare Click on the Yes check button, and then Finish The list of KX-7110 printers residing on the network is displayed. • If you want to search the network for printers again, click the Device menu and select Search.
- Page 281 Settings and Printing Maintenance and Spec. Network Network Setup in NetWare Click the NetWare tab. NOTE • You can change the Print Server Name and Printer Name. It is recommended that the Setup name is less than 8 characters. After changing, click .
- Page 282 Settings and Printing Maintenance and Spec. Network Network Setup in NetWare If you are satisfied with the contents, click Setup Click Select the printer you want to configure from the list. Click Setup menu and select Create NetWare Queue. Follow the instructions on the screen. •...
- Page 283 Settings and Printing Maintenance and Spec. Network Network Setup in NetWare Select the file server name and then click Next> Click Next> NOTE • In Bindery mode, you can not select Remote Printer mode. Change the queue name if needed. Then click Next>...
- Page 284 Settings and Printing Maintenance and Spec. Network Network Setup in NetWare Follows the instructions on the screen. NOTE • Turn off and on the printer before printing. Step 2: Setting up the client (for Windows 95 / Windows 98 / Windows Me) Refer to “Step 6: Setting up the printer driver and the printer port on the client computer”...
-
Page 285: In Netware 3.X
Settings and Printing Maintenance and Spec. Network Network Setup in NetWare In NetWare 3.x Perform the following steps to set up. Step 1: Setting up the printer Step 2: Setting up the Server Step 3: Setting up the client (for Windows 95 / Windows 98 / Windows Me) There are two printing modes. - Page 286 Settings and Printing Maintenance and Spec. Network Network Setup in NetWare Start the client system. • Be sure to login to the network from a client computer with supervisor privilege. If you have a password, enter password. Type PCONSOLE and press the Enter key to start PCONSOLE. Available Options menu is displayed.
- Page 287 Settings and Printing Maintenance and Spec. Network Network Setup in NetWare Configure the print server (1) Select the print server name you added from the Print Servers list, then press the Enter key. The Print Server Information menu is displayed. (2) Select Print Server Configuration, then press the Enter key.
- Page 288 Settings and Printing Maintenance and Spec. Network Network Setup in NetWare When using the Remote Printer (RPRINTER) mode Start the server system. Start the client system. • Be sure to login to the network from a client computer with supervisor privilege. If you have a password, enter password.
- Page 289 Settings and Printing Maintenance and Spec. Network Network Setup in NetWare Configure the print server (1) Select the print server name you added from the Print Servers list, then press the Enter key. The Print Server Information menu is displayed. (2) Select Print Server Configuration, then press the Enter key.
- Page 290 Settings and Printing Maintenance and Spec. Network Network Setup in NetWare Start the print server and perform the following procedure on the server computer. Type “LOAD PSERVER xxxxxxxx”, then press the Enter key. (xxxxxxxx : print server name) Turn the printer off and on again. Step 3: Setting up the client (for Windows 95 / Windows 98 / Windows Me) Refer to...
-
Page 291: Setup In Unix
Settings and Printing Maintenance and Spec. Network Network Setup in UNIX Setup in UNIX This chapter explains how to set up printing in various UNIX environments. Supported UNIX variants are as follows: • Solaris 2.6 • Solaris 2.3x – 2.5x •... - Page 292 Settings and Printing Maintenance and Spec. Network Network Setup in UNIX Login as root. # login root Edit your /etc/hosts file to add the printer as a network printer to your system. (Example) The printer’s IP address is “172.16.xxx.xxx” and the host name is “kxp7110”. 172.16.xxx.xxx kxp7110 #print server...
- Page 293 Settings and Printing Maintenance and Spec. Network Network Setup in UNIX For Solaris 2.3x – 2.5x Create Print Queue. (1) Login as root # login root (2) Stop print scheduler. # /usr/sbin/lpshut (3) Add print server. Example: Add host name “kxp7110” # /usr/sbin/lpsystem -RO -t bsd kxp7110 If you use csh, use “\!”.
- Page 294 Settings and Printing Maintenance and Spec. Network Network Setup in UNIX Create print queue. (1) Login as root # login root (2) Create print queue “kxp7110lp” Example: Create print queue “kxp7110lp”. # /usr/lib/lpadmin –pkxp7110lp -mrmodel –ormkxp7110 -orplp -ocmrcmodel -osmrsmodel -ob3 -v/dev/null The “lp”...
- Page 295 Settings and Printing Maintenance and Spec. Network Network Setup in UNIX Select a remote printer name. Type “text” for ASCII or “raw” for Postscript, PCL or HP/GL/2. Type “Y” to check for a remote printer on a BSD system. Click OK at the bottom of the menu. If the configuration is successful, the program prints the message: The printer has been added and is ready to accept print request.
- Page 296 Settings and Printing Maintenance and Spec. Network Network Setup in UNIX Add print queue with smit command (1) Perform smit. Move to “Add print queues”. # smit mkrque (2) From the list, select “remote” (printer connected to remote host). (3) From the list, select “Standard processing from the list”. (4) Set up the following item at “Add a Standard Remote Print Queue”.
- Page 297 Settings and Printing Maintenance and Spec. Network Network Setup in UNIX For BSD UNIX The following is an example for Sun OS4.1.3. The command and paths may differ depending on the OS version. Please refer to the workstation manual. Create printer queue. (1) Login as root.
-
Page 298: Printing Using Ftp
Settings and Printing Maintenance and Spec. Network Network Setup in UNIX Printing using FTP FTP (File Transfer Protocol) is a protocol for transferring files installed on TCP/IP systems. Perform the following steps. Log into the printer. Example: # ftp PANA (or ftp 172.16.xxx.xxx) Connected to PANA. - Page 299 Settings and Printing Maintenance and Spec. Network Network Setup in UNIX Log out. ftp>quit...
-
Page 300: Using The Web Server
Settings and Printing Maintenance and Spec. Network Network Using the Web Server Using the Web Server If an IP address have been assigned to a printer, you can access the printer’s Web Server. It allows monitoring or setting the printer. Displaying the Web Server Screen Open the browser (Internet Explorer or Netscape). -
Page 301: Setting The Password
Settings and Printing Maintenance and Spec. Network Network Using the Web Server Click Submit Query Click Click Restart the Printer in the left pane. Click Restart Setting the Password Perform step 1 - 3 of “Setting the Printer” on page 115 Click General in the right pane. -
Page 302: Appendix
Settings and Printing Maintenance and Spec. Network Network Appendix Appendix Setting Password with Network Setup Tool Entering the password is needed to change the printer’s setting if a password is set for a printer. Display the Network Setup Tool Window •To display the Network Setup Tool window, refer to “Step 1: Setting up TCP/IP on the computer”... - Page 303 Settings and Printing Maintenance and Spec. Network Network Appendix Enter the same password (Max. 7 characters) in the New password box and Confirm new password box. •If the password is already set, the current password must be entered in the Old password box.
-
Page 304: Printing A Configuration Page
Settings and Printing Maintenance and Spec. Network Network Appendix Printing a Configuration Page Press PRINT/RESET button on the printer panel less than 5 seconds to print the configuration page. Resetting the Printer Settings to Factory Default It enables to reset the printer’s network settings to the factory default settings. Display the Network Setup Tool. -
Page 305: Troubleshooting
Settings and Printing Maintenance and Spec. Network Network Appendix Troubleshooting This section explains how to resolve the common problems you may have with the KX-P7110. If KX-P7110 does not operate properly or you are unable to set up with Network Setup Tool, we recommend that you print the diagnostic/configuration pages first. - Page 306 Settings and Printing Maintenance and Spec. Network Network Appendix Trouble in Windows Environment (TCP/IP) Unables to search KX-P7110 printer using Network Setup Tool. *Make sure that the printer is connected to the network correctly. *In Option of the menu bar in Network Setup Tool, make sure Use TCP/IP Protocol is selected.
- Page 307 Settings and Printing Maintenance and Spec. Network Network Appendix Unables to connect to NetWare Server in Print Server mode. • Make sure the frame type is set correctly. • KX-P7110 can switch to PSERVER and RPRINTER automatically, but it may take extra time depending on the environment.
-
Page 308: Configuration Parameters
Settings and Printing Maintenance and Spec. Network Network Appendix Configuration Parameters General Name Factory Default Description Change root password NULL Password for Administartor. It is used for authentication when enterring Network Setup Tool. Use HP JetAdmin ENABLE Enables or disables to use HP’s utility JetAdmin/Web Jetadmin. - Page 309 Settings and Printing Maintenance and Spec. Network Network Appendix Name Factory Default Description Primary Server 0.0.0.0 Sets WINS server (primary) address. The Computer Name of the NetBEUI/NetBIOS is used for NETBIOS name Secondary Server 0.0.0.0 Sets WINS server (secondary) address. The Computer Name of the NetBEUI/ NetBIOS is used for NETBIOS name Scope ID...
- Page 310 Settings and Printing Maintenance and Spec. Network Network Appendix name Factory Default Description Job Polling Time 4 seconds Sets the interval to login to the file server. Bindery Mode ENABLE Enables or disables Bindery mode. File server to be NULL You may set the name of the file server.
- Page 311 Sets Computer name. This name is shown as the computer in Windows Explorer. Workgroup KXP-Printer Sets the workgroup to which KX-P7110 belongs. Comment Panasonic This comment is shown as the computer KX-P7110 in Windows Explorer. SNMP name Factory Default Description...
- Page 312 Settings and Printing Maintenance and Spec. Network Network Appendix Printer Port name Factory Default Description lp Port BOJ String NULL Sets the string that will be sent before sending a print job to the direct output port(lp). EOJ String NULL Sets the string that will be sent at the end of a print job to the direct output port(lp).
Need help?
Do you have a question about the KX-P7105 and is the answer not in the manual?
Questions and answers