
Subscribe to Our Youtube Channel
Related Manuals for Platinum 5500 R3-S2B


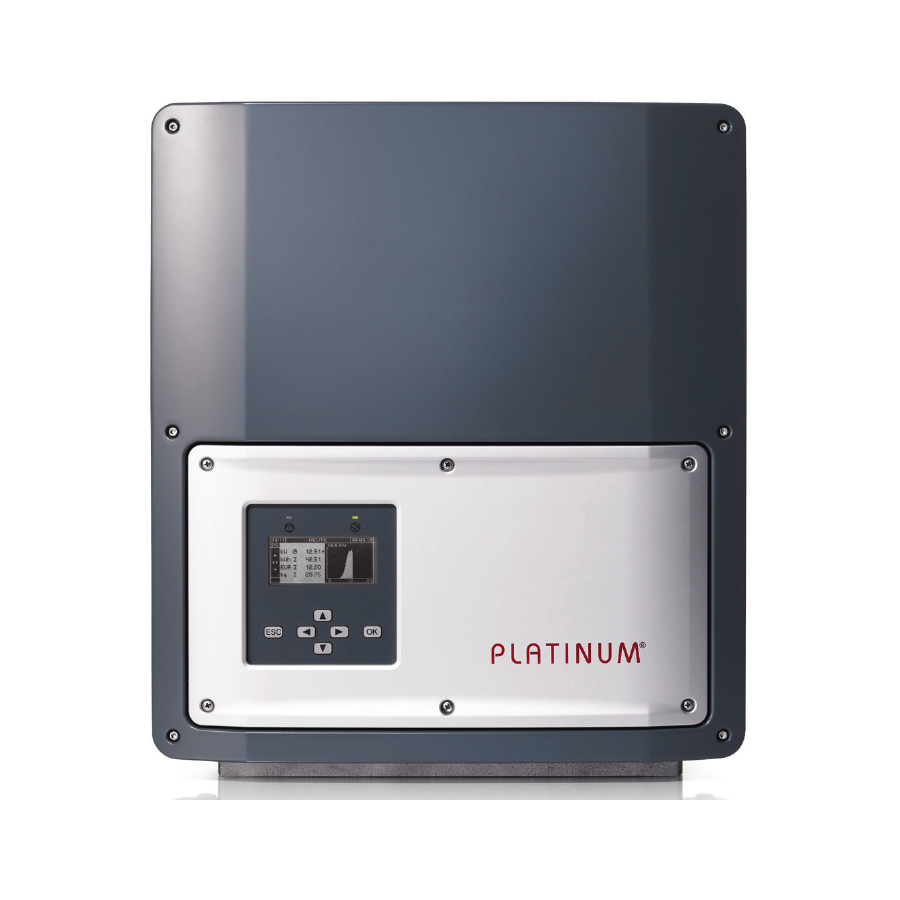
Summary of Contents for Platinum 5500 R3-S2B
- Page 1 Installation and user guide Inverter 5500 R3-S2B, 7000 R3-S2B, 8000 R3-S2B, 9000 R3-S2B As at 09/2013, Mat. no.764 657-AA...
- Page 2 Installation and user guide PLATINUM® inverter 5500 R3-S2, 7000 R3-S2, 8000 R3-S2, 9000 R3-S2...
-
Page 3: Table Of Contents
Initial operation Initial operation menu Operation Display Operation display 5.3 Isolate from generator field (DC isolator) Menu Operate and navigate in the menu Menu tree Settings menu Information menu Service menu Installation and user guide PLATINUM® inverter 5500 R3-S2, 7000 R3-S2, 8000 R3-S2, 9000 R3-S2... - Page 4 Contents Maintenance and cleaning Maintenance Cleaning Errors and troubleshooting Error display Event list Technical data Taking out of operation Disposal Installation and user guide PLATINUM® inverter 5500 R3-S2, 7000 R3-S2, 8000 R3-S2, 9000 R3-S2...
-
Page 5: Introduction
▪ Manufacturer's warranty of PLATINUM GmbH 1.3 Symbols used 1.3.1 Structure of warnings SIGNAL WORD Type, source and consequence of the hazard! f Measures to avoid the hazard. Installation and user guide PLATINUM® inverter 5500 R3-S2, 7000 R3-S2, 8000 R3-S2, 9000 R3-S2... -
Page 6: Symbols On Product And Packaging
Damage to property 1.3.3 Notes Notes give tips on how to work easily and safely or contain further information. 1.4 Symbols on product and packaging The following label is affixed to the inverter. Installation and user guide PLATINUM® inverter 5500 R3-S2, 7000 R3-S2, 8000 R3-S2, 9000 R3-S2... -
Page 7: Safety
– National and international regulations and provisions ▪ Ensure that all protection devices are working correctly. ▪ Observe conditions of use; see "Technical data" on page 44. Installation and user guide PLATINUM® inverter 5500 R3-S2, 7000 R3-S2, 8000 R3-S2, 9000 R3-S2... -
Page 8: Installation
Wear safety shoes when unpacking. f Ensure that you have firm and secure footing. 1. Open the box. 2. Pull out the brief guide (1) and wall bracket (2) at the side. 3. Remove t he i nverter ( with p adding) f rom the box. Installation and user guide PLATINUM® inverter 5500 R3-S2, 7000 R3-S2, 8000 R3-S2, 9000 R3-S2... -
Page 9: Assembly
Get a second person to help with assembly and disassembly. f Wear safety shoes during assembly and disassembly. f Ensure that you have firm and secure footing. 3.3.2 Assembly PLATINUM® recommends that the inverter not be installed in living quarters. Installation and user guide PLATINUM® inverter 5500 R3-S2, 7000 R3-S2, 8000 R3-S2, 9000 R3-S2... - Page 10 – The inverter must be suspended so that it is not exposed to vibrations. – Dimensions and distances – The display should be at eye level (approx. 1.60 m off the floor). – The inverter must be easily accessible without additional tools or equipment. 2. Fix the wall bracket to the assembly wall with suitable fixing materials. Installation and user guide PLATINUM® inverter 5500 R3-S2, 7000 R3-S2, 8000 R3-S2, 9000 R3-S2...
- Page 11 5. Ensure t hat t he i nverter i s fi tted c orrectly on the wall bracket. 6. Secure the inverter by tightening the safety screws on the sides. Installation and user guide PLATINUM® inverter 5500 R3-S2, 7000 R3-S2, 8000 R3-S2, 9000 R3-S2...
-
Page 12: Connection
1. Move the switch knob of the DC isolator to position 0. 2. Loosen 6 screws on service cover. 3. To remove the service cover, push the nose (5) forwards on the side of the handle recess. Installation and user guide PLATINUM® inverter 5500 R3-S2, 7000 R3-S2, 8000 R3-S2, 9000 R3-S2... - Page 13 1. Secure the three-phase AC voltage connection lines accordingly; see „Technical data“ on page 44. 2. Strip 18 mm of insulation from the AC voltage connection lines and add wire-end sleeves. Installation and user guide PLATINUM® inverter 5500 R3-S2, 7000 R3-S2, 8000 R3-S2, 9000 R3-S2...
- Page 14 To do so, insert the prepared wires in the terminal board. Terminal Assignment phase 1 phase 2 phase 3 neutral conductor protective conductor Installation and user guide PLATINUM® inverter 5500 R3-S2, 7000 R3-S2, 8000 R3-S2, 9000 R3-S2...
- Page 15 If national provisions require an external disconnect device, one disconnect must be installed for TA and one for TB. Connection C is not used. Installation and user guide PLATINUM® inverter 5500 R3-S2, 7000 R3-S2, 8000 R3-S2, 9000 R3-S2...
- Page 16 Connection example The power can be distributed asymmetri- cally to the two trackers. The two MPP trackers TA and TB must not be connected in parallel. Installation and user guide PLATINUM® inverter 5500 R3-S2, 7000 R3-S2, 8000 R3-S2, 9000 R3-S2...
- Page 17 ▪ CAT-5 cable with twisted wires and shielding, with prefabricated RJ45 plugs (Pin 3 = B and Pin 6 = A) – or – ▪ Twisted wire pair of a CAT-5 cable Connection 1. Unfasten the network screw connec- tions (7) and (8) with seal from the underside of the inverter. Installation and user guide PLATINUM® inverter 5500 R3-S2, 7000 R3-S2, 8000 R3-S2, 9000 R3-S2...
- Page 18 ▪ Outgoing cables: 1 2 3 4 5 6 Cable A: Terminal 4 Cable B: Terminal 3 A BA t Ensure that signal lines A and B are not connected incorrectly. PLATINUM Network EIA 485 Installation and user guide PLATINUM® inverter 5500 R3-S2, 7000 R3-S2, 8000 R3-S2, 9000 R3-S2...
- Page 19 2. Activate termination. To do so, connect the terminating connector to socket 1 on the first and last participant in the network. 3.4.5 Final tasks t Secure the service cover on the inverter with six screws. Installation and user guide PLATINUM® inverter 5500 R3-S2, 7000 R3-S2, 8000 R3-S2, 9000 R3-S2...
-
Page 20: Initial Operation
If data cannot be entered, the inverter displays the start screen. ▪ During initial operation, all inverters connected to the PLATINUM® network are blocked. Installation and user guide PLATINUM® inverter 5500 R3-S2, 7000 R3-S2, 8000 R3-S2, 9000 R3-S2... -
Page 21: Initial Operation Menu
Changing the date and time can cause saved data to be overwritten or lead to gaps in data logging. During initial operation, the date and time must be entered correctly once. Installation and user guide PLATINUM® inverter 5500 R3-S2, 7000 R3-S2, 8000 R3-S2, 9000 R3-S2... - Page 22 / reassign numbers ▪ If the numbers set automatically are to be retained, confirm with NO and continue to the next menu option. The automatic num- bers for all inverters in the network are transferred. Installation and user guide PLATINUM® inverter 5500 R3-S2, 7000 R3-S2, 8000 R3-S2, 9000 R3-S2...
- Page 23 ▪ If different numbering is required, choose NO using the / buttons and choose OK to open the menu for changing device numbers. Installation and user guide PLATINUM® inverter 5500 R3-S2, 7000 R3-S2, 8000 R3-S2, 9000 R3-S2...
- Page 24 The date and time must be confirmed with OK, otherwise initial opera- tion cannot be completed. Once the date and time have been entered, the TIME SETTINGS screen appears; see „Settings menu“ in page 31. Installation and user guide PLATINUM® inverter 5500 R3-S2, 7000 R3-S2, 8000 R3-S2, 9000 R3-S2...
-
Page 25: Operation
LED flashes ▪ Inverter not in feed-in mode LED off Both LEDs flash at same time The inverter is running a network scan or making parameter settings. Installation and user guide PLATINUM® inverter 5500 R3-S2, 7000 R3-S2, 8000 R3-S2, 9000 R3-S2... -
Page 26: Operation Display
Screen 2: Standardised power data (if configured) (6) Standardised yield generated for the period displayed; in the example: yield generated today (7) Maximum standardised power achieved today Installation and user guide PLATINUM® inverter 5500 R3-S2, 7000 R3-S2, 8000 R3-S2, 9000 R3-S2... - Page 27 ▪ Feed-in rebate >999,000 is displayed exponentially. – Example: EUR 1,234,567 is displayed as 1.234E6 (=1.234 x 10 ▪ The progress of the power feed-in is only displayed for the TODAY and YESTERDAY periods. In all other periods, the energy fed in is displayed for each time interval. – Each day is represented by one bar in the weekly display (Mon. – Sun.). – Each day is represented by one bar in the monthly display (1st – 31st). – Each month is represented by one bar in the yearly display (Jan. – Dec.). Installation and user guide PLATINUM® inverter 5500 R3-S2, 7000 R3-S2, 8000 R3-S2, 9000 R3-S2...
-
Page 28: Isolate From Generator Field (Dc Isolator)
▪ PLATINUM® recommends activating the DC isolator once a year to prevent the contacts from fusing together. ▪ PLATINUM® recommends switching off the mains voltage (AC) be- fore switching off the DC isolator to minimise wear to the contacts. Installation and user guide PLATINUM® inverter 5500 R3-S2, 7000 R3-S2, 8000 R3-S2, 9000 R3-S2... -
Page 29: Menu
▪ If entering information: to the next/previous digit ▪ Back to the main menu without making changes ▪ Select setting and back to the main menu ▪ Open selected submenu Installation and user guide PLATINUM® inverter 5500 R3-S2, 7000 R3-S2, 8000 R3-S2, 9000 R3-S2... -
Page 30: Menu Tree
0 ... 9 Rebate System Plant size Standardisation Meter 2 Information Operating data System data Inverter type Inverter version The menu options are described in tables below. Installation and user guide PLATINUM® inverter 5500 R3-S2, 7000 R3-S2, 8000 R3-S2, 9000 R3-S2... -
Page 31: Settings Menu
Español Nederlands Français Volume ▪ Set the alarm volume for the built-in buzzer on this inverter. 0 ... 3 Possible values: 0 ... 3 Factory setting: 0 (alarm off) Installation and user guide PLATINUM® inverter 5500 R3-S2, 7000 R3-S2, 8000 R3-S2, 9000 R3-S2... - Page 32 Meter 2 Meter 2 counts the energy fed in since the last reset. ▪ Do not reset meter 2. Back ▪ Reset meter 2. Reset Installation and user guide PLATINUM® inverter 5500 R3-S2, 7000 R3-S2, 8000 R3-S2, 9000 R3-S2...
-
Page 33: Information Menu
(4) Number of participants and inverters in the PLATINUM® network (5) Type information (6) ENS version * (7) Serial number (8) Configured standard (9) Firmware version (10) PLATINUM® Network version * ENS = Device for monitoring the network with allocated control elements Installation and user guide PLATINUM® inverter 5500 R3-S2, 7000 R3-S2, 8000 R3-S2, 9000 R3-S2... -
Page 34: Service Menu
For more information, contact the PLATINUM® service. The Parameters service menu shows the parameters set, the country code and the valid guidelines. The parameters are structured in several levels, with the specific value displayed on the lowest level. Parameters can only be modified by certified persons with the PLATINUM® service tool. Installation and user guide PLATINUM® inverter 5500 R3-S2, 7000 R3-S2, 8000 R3-S2, 9000 R3-S2... - Page 35 MAL. ▪ In the MPP SHADOW mode, the ideal yield may not be achieved because only a low level is fed in during the MPP search. Installation and user guide PLATINUM® inverter 5500 R3-S2, 7000 R3-S2, 8000 R3-S2, 9000 R3-S2...
- Page 36 Power reduction Maximum Enter the maximum power for this inverter according to the specifi- power cations of the network operator. This menu can only be changed for a period of 4 hours after initial con- figuration. Installation and user guide PLATINUM® inverter 5500 R3-S2, 7000 R3-S2, 8000 R3-S2, 9000 R3-S2...
-
Page 37: Maintenance And Cleaning
The inverters must not be cleaned with a steam cleaner. To ensure cooling, clean the ventilation slots regularly with ▪ a vacuum cleaner ▪ soft brush ▪ pressured air Installation and user guide PLATINUM® inverter 5500 R3-S2, 7000 R3-S2, 8000 R3-S2, 9000 R3-S2... -
Page 38: Errors And Troubleshooting
1. Follow the instructions on the inverter. 2. To exit the error display, press the button. The event list is displayed. 3. Exit the event list by pressing the ESC button. Installation and user guide PLATINUM® inverter 5500 R3-S2, 7000 R3-S2, 8000 R3-S2, 9000 R3-S2... - Page 39 Stop alarm 1. To exit the error display, press the button. The event list is displayed. 2. Exit the event list by pressing the ESC button. Installation and user guide PLATINUM® inverter 5500 R3-S2, 7000 R3-S2, 8000 R3-S2, 9000 R3-S2...
-
Page 40: Event List
▪ Set DC isolator to 0 DC connection has incorrect ▪ Check DC connection polarity ▪ Check isolation of PV modules Isolation error between ▪ Check isolation of PV cables PV+ and earth / PV– and earth Installation and user guide PLATINUM® inverter 5500 R3-S2, 7000 R3-S2, 8000 R3-S2, 9000 R3-S2... - Page 41 Measure 2100 Mains frequency limit exceeded If the inverter is supplied with emergency 2110 or undershot power from a different mains frequency: ▪ No measures required Installation and user guide PLATINUM® inverter 5500 R3-S2, 7000 R3-S2, 8000 R3-S2, 9000 R3-S2...
- Page 42 Information ▪ Inform service of error code if required 4000 Diagnosis support in service situation 4990 The inverter stores the warning in the event list Installation and user guide PLATINUM® inverter 5500 R3-S2, 7000 R3-S2, 8000 R3-S2, 9000 R3-S2...
- Page 43 Errors and troubleshooting Installation and user guide PLATINUM® inverter 5500 R3-S2, 7000 R3-S2, 8000 R3-S2, 9000 R3-S2...
-
Page 44: Technical Data
Power factor (cos ϕ) 0.7 ind ... 0.7 cap Max. short circuit current (max. duration: 5 ms) 120 A Inrush current 4 A Ground fault monitoring Efficiency 5500 R3 -S2 Max. efficiency 98.5% EU efficiency rate 98.1% Type name 5500 R3-S2B Installation and user guide PLATINUM® inverter 5500 R3-S2, 7000 R3-S2, 8000 R3-S2, 9000 R3-S2... - Page 45 – – 402 mW 0.7 ind ... 0.7 cap 120 A 7000 R3 -S2 8000 R3 -S2 9000 R3 -S2 98.5% 98.2% 7000 R3-S2B 8000 R3-S2B 9000 R3-S2B Installation and user guide PLATINUM® inverter 5500 R3-S2, 7000 R3-S2, 8000 R3-S2, 9000 R3-S2...
- Page 46 I / Type 3 protection Overvoltage category DC-side: II; AC-side: III Optical display Full graphic LCD, 170 x 76 pixels Data logger storage capacity Sufficient for operating time of 30 years The technical data is valid for a maximum height of 2,000 m above sea level. Installation and user guide PLATINUM® inverter 5500 R3-S2, 7000 R3-S2, 8000 R3-S2, 9000 R3-S2...
-
Page 47: Taking Out Of Operation
▪ Do not dispose of PLATINUM® inverters in household waste. ▪ PLATINUM® takes back complete PLATINUM® inverters. ▪ PLATINUM® inverters can be disposed of via municipal waste man- agement for electrical devices. Installation and user guide PLATINUM® inverter 5500 R3-S2, 7000 R3-S2, 8000 R3-S2, 9000 R3-S2... - Page 48 PLATINUM GmbH PLATINUM® Service Pfannerstraße 75 Tel.: +49 7522 9738-400 88239 Wangen im Allgäu, Germany Fax: +49 7522-9738 -410 Tel.: +49 7522 9738-0 service@platinum-nes.com Fax: +49 7522 9738-100 info@platinum-nes.com www.platinum-nes.com...
Need help?
Do you have a question about the 5500 R3-S2B and is the answer not in the manual?
Questions and answers