Blackmagicdesign ATEM Camera Converter Installation And Operation Manual
Hide thumbs
Also See for ATEM Camera Converter:
- Installation and operation manual (225 pages) ,
- Nstallation and operations manual (21 pages) ,
- Installation and operation manual (20 pages)

Related Manuals for Blackmagicdesign ATEM Camera Converter


Summary of Contents for Blackmagicdesign ATEM Camera Converter
- Page 1 Installation and Operation Manual ATEM Camera Converter ATEM Studio Converter Mac OS X ™ Windows ™ August 2013...
- Page 2 SDI and consumer HDMI cameras using low cost optical fiber! Imagine connecting to cameras at remote locations on racing tracks, live sporting venues or even massive golf courses! With ATEM Camera Converter you can have more cameras closer to the action for the most amazing shots in live production! ATEM...
-
Page 3: Table Of Contents
ATEM Converters Getting Started Using ATEM Studio Converter Introducing ATEM Converters Using ATEM Studio Converter Getting Started with ATEM Camera Converter Using Blackmagic Converter Utility Plugging in your Power Blackmagic Converter Utility Plugging in your Camera Installing Blackmagic Converter Utility on Mac OS X... -
Page 4: Getting Started
ATEM Camera Converter ATEM Camera Converter connects to any camera with HDMI or SDI output in SD, HD and 3Gb/s HD-SDI ATEM Camera Converter formats. It is used to send video, audio, tally and talkback signals via optical fiber between the camera unit and a remote unit, for connection to a switcher. -
Page 5: Getting Started With Atem Camera Converter
OPTICAL VIDEO The first thing you’ll want to do is power your ATEM Camera Converter, plug in your camera, headset and a monitor. You can also plug in an external audio source, such as a mixing desk or microphone. Plugging in your Power... -
Page 6: Plugging In Your Audio
Step 1. Plug one end of the patch cord to your ATEM Camera Converter’s SFP module. Step 2. Plug the other end of your patch cord to the SFP module on the second ATEM Camera Converter. If you are connecting multiple cameras to an ATEM Studio Converter, choose an SFP module appropriate for each camera. -
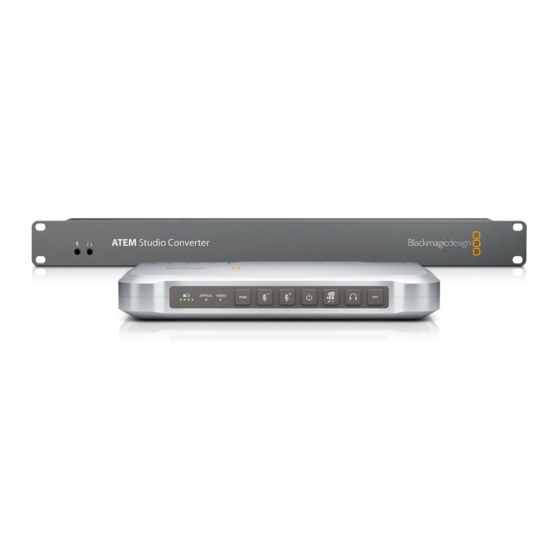
Page 7: Getting Started With Atem Studio Converter
PRESS TO TALK PUSH LOCK TO TALK Getting Started Getting Started with ATEM Studio Converter AES/EBU TALKBACK LOOPS The first thing to do is supply power to your ATEM Studio Converter, plug in a headset, and connect to a SDI OUT SDI OUT SDI OUT SDI OUT... -
Page 8: Connecting To A Switcher
PGM SDI H/PHONE and Multi View labels to match the camera numbers set on each ATEM Camera Converter. For details, Connect your ATEM Studio Converter to a switcher by plugging refer to the 'Changing Switcher Settings' and 'Button Mapping' sections of the ATEM Production Switchers the camera SDI outputs to the SDI camera inputs on the switcher. -
Page 9: Confirming Your Atem Converter Set Up
ATEM Camera Converter can show a red tally border on an You can also check your tally indicators for each ATEM Camera Converter by having the switcher operator attached monitor when its camera is on-air. switch each camera to the program output. If their tally indicators are not working as they should, reset the camera number on each ATEM Camera Converter. -
Page 10: Using Atem Camera Converter
These lights illuminate when a tally signal is received from the program output of an ATEM switcher. By watching the two red tally lights on opposite sides of ATEM Camera Converter, your talent and camera operator can see when they are on air. -
Page 11: Control Panel Buttons
The buttons will illuminate when pressed or activated. Camera Number This button is used to set the camera number on your ATEM Camera Converter so your tally lights function correctly. Refer to the section "Setting the Camera Number" on the next page for a detailed description. -
Page 12: Setting The Camera Number
ATEM Camera Converter. This ensures the switcher sends the tally signal to the correct ATEM Camera Converter. The camera number can be set to a value of 99, and up to 99 cameras can be connected to a series of looped ATEM Studio Converters. -
Page 13: Using Atem Studio Converter
Using ATEM Studio Converter Using ATEM Studio Converter Using ATEM Studio Converter PRESS TO TALK ATEM Studio Converter's control panel features two rows of talkback buttons, including Press to Talk (PTT) and Lock to Talk (LTT) for each of the four camera inputs. Next to the talkback buttons are PGM Mute buttons. -
Page 14: Using Blackmagic Converter Utility
Using Blackmagic Converter Utility Using Blackmagic Converter Utility Blackmagic Converter Utility Blackmagic Converter Utility is used to configure settings and update the internal software in your ATEM Camera and Studio Converters. Installing Blackmagic Converter Utility on Mac OS X After downloading the Converter Utility software and unzipping the downloaded file, open the resulting disk image to reveal its contents. -
Page 15: Setting Tally Border And Camera Number Using Blackmagic Converter Utility
ATEM Camera Converter. Quit from Blackmagic Converter Utility. If you chose not to display a tally border, the tally lights on the ATEM Camera Converter will still illuminate when your camera is live on the program output of the ATEM switcher. -
Page 16: Connecting Up To 4 Cameras To A Switcher
OPTICAL OUT/IN ANALOG AUDIO OUT OPTICAL OUT/IN ANALOG AUDIO OUT OPTICAL OUT/IN ANALOG AUDIO OUT PGM SDI H/PHONE SDI In HDMI HD-SDI Camera ATEM Camera Converter HDMI Camera 3.5mm TRS OPTICAL VIDEO OPTICAL VIDEO SDI In HD-SDI Camera HDMI Camera... -
Page 17: Connecting More Than 4 Cameras To A Switcher
Connecting to an ATEM Switcher PRESS TO TALK LOCK TO TALK Connecting More than 4 Cameras to a Switcher If you have over four cameras that need to be connected to your switcher, you can expand the number of camera connections by linking ATEM Studio Converters together. This example shows three ATEM Studio Converters connected together so up to 12 cameras can be used. -
Page 18: Help
After checking the version of Converter Utility software installed on your computer, please visit the Blackmagic Support Center at www.blackmagicdesign.com/support to check for the latest updates. While it is usually a good idea to run the latest updates, it is a wise practice to avoid updating any software if you... - Page 19 Warnings Warnings Caution: Risk of Electric Shock On the ATEM Studio Converter enclosure you will see a yellow warning label marked ‘Caution: Risk of Electric Shock’. This is intended to warn users that there may be the presence of uninsulated “dangerous” voltage within the ATEM Studio Converter enclosure which may be of sufficient magnitude to constitute a risk of electric shock to the user.
-
Page 20: Warranty
Warranty Warranty 12 Month Limited Warranty Blackmagic Design warrants that this product will be free from defects in materials and workmanship for a period of 12 months from the date of purchase. If a product proves to be defective during this warranty period, Blackmagic Design, at its option, either will repair the defective product without charge for parts and labor, or will provide a replacement in exchange for the defective product.
Need help?
Do you have a question about the ATEM Camera Converter and is the answer not in the manual?
Questions and answers