Blackmagicdesign ATEM Converter Series Installation And Operation Manual
Hide thumbs
Also See for ATEM Converter Series:
- Installation and operation manual (289 pages) ,
- Installation and operation manual (2267 pages)
Table of Contents
Advertisement
Advertisement
Table of Contents

Related Manuals for Blackmagicdesign ATEM Converter Series


Summary of Contents for Blackmagicdesign ATEM Converter Series
- Page 1 Installation and Operation Manual ATEM Converters November 2018...
- Page 2 Blackmagic Converters Setup is used to change settings and update the internal software in your ATEM converter. The latest version of Blackmagic Converters Setup can always be downloaded from our website at www.blackmagicdesign.com/support. We think it should take you approximately 5 minutes to complete installation. Before you install Blackmagic Converters Setup, please...
-
Page 3: Table Of Contents
Contents ATEM Converters Getting Started Introducing ATEM Converters Connecting ATEM Camera Converter Connecting ATEM Studio Converter Connecting ATEM Talkback Converter 4K Confirming your ATEM Converter Set Up Using ATEM Camera Converter Front Control Panel Status Indicators Control Panel Buttons Setting the Camera Number Mounting ATEM Camera Converter Using ATEM Studio Converter Front Control Panel... -
Page 4: Getting Started
Getting Started Introducing ATEM Converters ATEM Camera Converter, ATEM Studio Converter and ATEM Talkback Converter 4K connect to switchers, such as ATEM and provide a complete studio talkback and tally solution, including the option of connecting over long distances using low cost fiber optic cable. ATEM Camera Converter ATEM Camera Converter is a portable converter that connects to any SDI or HDMI camera. -
Page 5: Connecting Atem Camera Converter
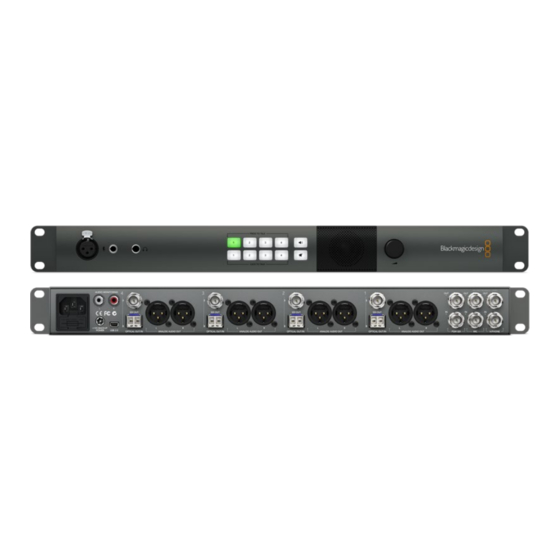
ATEM Talkback Converter 4K ATEM Talkback Converter 4K is used to connect up to 8 cameras to a switcher via coaxial cable up to 12G-SDI. When connected to an ATEM switcher you also get tally, plus you can also connect to ATEM Camera Converters via optical fiber to add talkback. Blackmagic Studio Camera can connect to your ATEM Talkback Converter 4K via BNC or optional optical fiber modules. - Page 6 PTICAL VIDEO Plugging in your Headset Plug your talkback headset into ATEM Camera Converter’s standard 3.5mm stereo analog microphone and headphone inputs. An iPhone or Android compatible headset can be connected using only the headphone jack. However, if you have an external microphone connected at the same time, only the external microphone will be used.
-
Page 7: Connecting Atem Studio Converter
For example, when connecting camera 1, connect to the camera 1 SFP module. Optical fiber patch cord with two LC connectors. Plugging in your Audio ATEM Camera Converter supports 2 channels of camera audio, which are carried on audio channels 1 & 2 of the optical fiber SDI connection. By default, ATEM Camera Converter uses the OPTICAL VIDEO embedded audio from your camera’s microphone. - Page 8 Plugging in Power Plug in your power via your ATEM Converter’s mains power input using a standard IEC cable. You can also connect a power adaptor or external camera battery to the 12V to 31V power input. PRESS TO TALK PUSH 2 power inputs give you the option of a redundant power connection in case one supply fails or is accidentally disconnected.
- Page 9 AES/EBU TALKBACK LOOPS PRESS TO TALK LOCK TO TALK SDI OUT UDIO OUT OPTICAL OUT/IN ANALOG AUDIO OUT PGM SDI H/PHONE AES/EBU TALKBACK LOOPS SDI OUT SDI OUT SDI OUT SDI OUT USB 2.0 OPTICAL OUT/IN ANALOG AUDIO OUT OPTICAL OUT/IN ANALOG AUDIO OUT OPTICAL OUT/IN ANALOG AUDIO OUT...
-
Page 10: Connecting Atem Talkback Converter 4K
Connecting ATEM Talkback Converter 4K The first thing to do is plug in power, your cameras, a headset and connect to a switcher. You can also plug in an external microphone, such as a gooseneck microphone if you want to use talkback without using a headset. -
Page 11: Confirming Your Atem Converter Set Up
Plugging in the Program Feed from your Switcher SDI 7 OUT CAM SDI SDI 8 OUT CAM SDI Connect the program output from your switcher to your ATEM Talkback Converter 4K’s ‘PGM SDI in’ connector. When connecting the program output from an ATEM switcher, tally is also embedded in the SDI signal. - Page 12 ATEM Camera Converter/Setting the Camera number’ section of this manual. If you experience any trouble setting up your ATEM Converters, please visit the Blackmagic Design support center at www.blackmagicdesign.com/support where you can often find answers quickly by browsing the Blackmagic Forum. Here you can read information and comments from other experienced users and Blackmagic Design staff.
-
Page 13: Using Atem Camera Converter
Using ATEM Camera Converter Front Control Panel ATEM Camera Converter’s control panel features buttons for adjusting headset and microphone volume, activating talkback, program/camera monitoring, powering on and off, and setting the camera number. There are also 5 status indicators for battery level, optical signal, SDI or HDMI signal, and tally. - Page 14 Control Panel Buttons Pressing the PGM button toggles between the program video signal and the camera input signal. The program input is the signal connected via optical fiber. OPTICAL VIDEO OPTICAL VIDEO PGM button and microphone volume level buttons. The buttons will illuminate when pressed or activated. Microphone Volume Down/Up The microphone volume buttons provide a quick way to adjust external audio levels.
-
Page 15: Setting The Camera Number
Setting the Camera Number If you want your ATEM Camera Converter to receive tally signals from an ATEM switcher, you’ll need to set the camera number on your ATEM Camera Converter. This ensures the switcher sends the tally signal to the correct ATEM Camera Converter. The camera number can be set from 1 to 99. -
Page 16: Using Atem Studio Converter
Using ATEM Studio Converter Front Control Panel Your ATEM Studio Converter’s control panel features two rows of talkback buttons, including ‘PTT’ and ‘LTT’, or, ‘press to talk’ and ‘lock to talk’, for each of the camera inputs. Next to the talkback buttons are PGM and Mute buttons. -
Page 17: Using Atem Talkback Converter 4K
Using ATEM Talkback Converter 4K Front Control Panel Your ATEM Talkback Converter 4K’s control panel features two rows of talkback buttons, including ‘PTT’ and ‘LTT’, or, ‘press to talk’ and ‘lock to talk’, for each of the camera inputs. Next to the talkback buttons are PGM and Mute buttons. -
Page 18: Using Blackmagic Converters Setup
Installation on Mac OS X Download the Blackmagic Converters Setup software from www.blackmagicdesign.com Unzip the downloaded file and open the resulting disk image to reveal its contents. Double click the installer and follow the prompts to complete the installation. -
Page 19: Removing Blackmagic Converters Setup
Removing Blackmagic Converters Setup To remove the Blackmagic Converters software on Mac OS X, launch the Blackmagic Converters.dmg installation file, double click on ‘Uninstall Converters’ and simply follow the prompts. To remove the Blackmagic Converters software on Windows, open the Windows control panel and click on ‘Programs and Features’. -
Page 20: Connection Diagrams
COL 1 BARS AUX 1 COL 2 AUX 2 CLEAN ME 2 AUX 3 MASK FEED 1 Connection Diagrams CLEAN ME 2 AUX 4 FEED 2 ME 1 MP 1 MP 1K AUX 5 Connecting to an ATEM Switcher via ATEM Talkback ME 1 MP 2 MP 2K... -
Page 21: Connecting To An Atem Switcher Via Atem Camera And Studio Converters
COL 1 BARS AUX 1 COL 1 BARS AUX 1 COL 2 AUX 2 COL 2 AUX 2 Connecting to an ATEM Switcher via CLEAN ME 2 AUX 3 MASK FEED 1 CLEAN ME 2 AUX 3 MASK FEED 1 ATEM Camera and Studio Converters CLEAN ME 2... -
Page 22: Looping Multiple Atem Converters
Looping Multiple ATEM Converters If you have more cameras than a single ATEM Talkback Converter 4K or ATEM Studio Converter can support, you can expand the number of camera connections by linking ATEM Converters together. This example shows two ATEM Talkback Converter 4K’s and an ATEM Studio Converter connected together so up to 20 cameras can be used. -
Page 23: Help
After checking the version of Blackmagic Converters Setup software installed on your computer, please visit the Blackmagic Support Center at www.blackmagicdesign.com/support to check for the latest updates. While it is usually a good idea to run the latest updates, it is a wise practice to avoid updating any software if you are in the middle of an important project. -
Page 24: Regulatory Notices
Regulatory Notices Disposal of waste of electrical and electronic equipment within the European union. The symbol on the product indicates that this equipment must not be disposed of with other waste materials. In order to dispose of your waste equipment, it must be handed over to a designated collection point for recycling. -
Page 25: Safety Information
Safety Information The following safety information applies to mains powered products. This equipment must be connected to a mains socket outlet with a protective earth connection. To reduce the risk of electric shock, do not expose this equipment to dripping or splashing. This equipment is suitable for use in tropical locations with an ambient temperature of up to 40ºC. -
Page 26: Warranty
Warranty 12 Month Limited Warranty Blackmagic Design warrants that this product will be free from defects in materials and workmanship for a period of 12 months from the date of purchase. If a product proves to be defective during this warranty period, Blackmagic Design, at its option, either will repair the defective product without charge for parts and labor, or will provide a replacement in exchange for the defective product.
Need help?
Do you have a question about the ATEM Converter Series and is the answer not in the manual?
Questions and answers