Table of Contents
Advertisement
Advertisement
Table of Contents

Related Manuals for Blackmagicdesign Teranex Mini


Summary of Contents for Blackmagicdesign Teranex Mini
- Page 1 Installation and Operation Manual Teranex Mini Converters August 2019...
- Page 2 Please check the support page on our website at www.blackmagicdesign.com the latest version of this manual and for updates to your Teranex Mini converter’s software. Keeping your software up to date will ensure you get all the latest features as well as support for any new SDI formats that might be invented in the future!
-
Page 3: Table Of Contents
Changing Network Settings Teranex Mini – Audio to Optical 12G using Teranex Mini Smart Panel Help Teranex Mini Rack Shelf Regulatory Notices Teranex Mini Models Safety Information Teranex Mini – SDI to HDMI 8K HDR Teranex Mini – IP Video 12G Warranty Contents... -
Page 4: Getting Started
To supply power, plug in a standard IEC power cable to your Teranex Mini converter’s power input on the rear panel. You can also power your Teranex Mini via Ethernet by plugging into a compatible Ethernet switch that supports PoE+, or ‘power over Ethernet plus’. -
Page 5: Installing Administration Software
Installing Administration Software Installing Blackmagic Teranex Setup The Teranex setup software is used to update your Teranex Mini and to change video, audio and network settings. Blackmagic Teranex Setup can be installed on Mac and Windows computers. Installation on Mac Download the Blackmagic Teranex Setup software from www.blackmagicdesign.com... -
Page 6: Installing Teranex Mini Smart Panel
Updating the Internal Software It is important to ensure that power is connected to the Teranex Mini before connecting a USB cable between the computer and converter. Power your converter. Attach a USB cable from the computer to the converter or connect via Ethernet launch the Teranex setup utility. -
Page 7: Smart Panel Features
Teranex Mini Smart Panel. The original basic panel is very strong, so if you need to mount your Teranex Mini in the back of a rack system or in areas where there are lots of cables or activity, you can always reinstall the original basic panel. - Page 8 XLR connector. VIDEO Control Buttons and Rotary Knob Your Teranex Mini Smart Panel has a set of buttons and a rotary knob that are used to navigate your Teranex Mini Converter’s settings menu. 1 and 2 buttons AUDIO Press these buttons to increase or decrease numeric setting values, or to move up or down through menu settings.
-
Page 9: Changing Settings
Changing Settings There are three ways to change settings on your Teranex Mini. You can use the switches on the front panel, the Blackmagic Teranex Setup utility, or by mounting a Teranex Mini Smart Panel which lets you change settings using control buttons, a rotary knob and LCD. - Page 10 The ‘configure’ tab is the same for all Teranex Minis and contains your converter’s network settings. Here you can toggle your converter between dynamic and static network addresses, as well as set up the IP address, subnet mask, and gateway for your Teranex Mini. See the ‘changing network settings’ section for more detail.
-
Page 11: Changing Settings Using Teranex Mini Smart Panel
You can also change settings using the optional Teranex Mini Smart Panel. This control panel mounts to the front of your Teranex Mini and replaces the original basic front panel that shipped with the converter. You get fast access to your settings using buttons and a rotary knob and you can see the input on the built in LCD. -
Page 12: Changing Network Settings
To change network settings via USB, connect your Teranex Mini to a computer running the Teranex setup utility with a USB cable. You can find your Teranex Mini’s USB connector on its front panel, regardless of whether you are using the original basic panel or the Smart Panel. -
Page 13: Teranex Mini Rack Shelf
Teranex Mini – SDI to HDMI 8K HDR Teranex Mini SDI to HDMI 8K HDR converts 8K SDI signals to HDMI for connecting to 8K HDMI monitors, televisions and projectors. Two on screen scopes can be overlaid on the HDMI output so you monitor the waveform, vectorscope, histogram or parade. - Page 14 Connectors USB-C Port Connects to the Blackmagic Teranex Setup software via a Mac or Windows computer for adjusting settings and updating your Teranex Mini’s internal software. Plug your monitor calibration probe into the USB-C port. Front Panel The LCD display shows important information, and you can use the control buttons and rotary knob to navigate settings menus.
- Page 15 33 Point 3D LUT Your Teranex Mini SDI to HDMI 8K HDR supports .cube 3D LUT files that can be created in any color correction software such as DaVinci Resolve. DaVinci Resolve can save color grades as 3D LUTs.
- Page 16 Scopes Menu Configure Scope Overlays Teranex Mini SDI to HDMI 8K can show up to two scopes as overlays on the footage on the HDMI outputs. In the ‘scopes’ menu, select the ‘use large scope’ option to make a scope occupy 1/16 of the screen area, or deselect the option to set the scope size to 1/64 of the screen.
- Page 17 VU -18dBFS, VU -20dBFS, PPM -18dBFS or PPM -20dBFS reference levels. Monitor Calibration Procedure If you have a monitor calibration probe, you can use your Teranex Mini SDI to HDMI 8K HDR to generate a calibration 3D LUT for your HDMI monitor. Teranex Mini SDI to HDMI 8K supports Klein Instruments K10-A, SpectraCal C6 and X-Rite i1Display Pro.
- Page 18 Connecting the Calibration Probe Now that your monitor or television has its settings optimized for calibration, connect the calibration probe to your Teranex Mini SDI to HDMI 8K HDR’s USB-C port. Lift the rubber dust cover to access the USB-C port.
- Page 19 Increase the brightness level so all the dark squares become visible. Decrease the brightness level so the indicated square just blends into the background. Press ‘next’ on your Teranex Mini SDI to HDMI 8K HDR. Brightness level calibration instructions on the LCD Test pattern on your HDMI monitor for calibrating shadow detail.
- Page 20 It’s important to note that these two steps are repeated to verify your monitor’s settings for brightness and contrast and make further fine adjustments if necessary. The LCD on your Teranex Mini SDI to HDMI 8K HDR should say ‘calibration probe detected’. Select ‘choose’ and press ‘set’. The LCD shows a list of preconfigured spectral profiles of supported display types.
- Page 21 100 nits for SDR or 400 nits for HDR. Select ‘next’ and press ‘set’. When your Teranex Mini SDI to HDMI 8K HDR says ‘calibration probe ready’, select 3.14 ‘Calibrate’...
- Page 22 When you select the types of scopes, you can choose waveform, vectorscope 100%, vectorscope 75%, histogram, RGB parade or YUV parade. Teranex Mini – SDI to HDMI 8K HDR...
- Page 23 Blackmagic Teranex Setup utility. Network Menu The ‘network’ menu configures Teranex Mini SDI to HDMI 8K to connect and communicate on your LAN. For more information, see the ‘Changing Network Settings using Teranex Mini Smart Panel’ section.
-
Page 24: Teranex Mini - Ip Video 12G
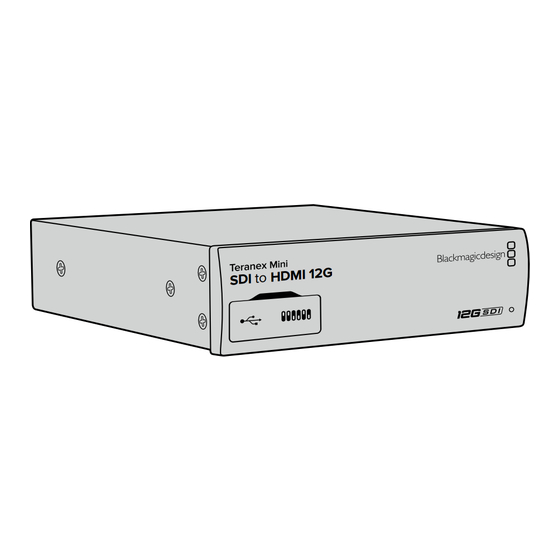
Teranex Mini – SDI to HDMI 12G Your Teranex Mini - SDI to HDMI 12G model can be used to connect a huge range of HDMI displays and video projectors to SDI video equipment. Your converter automatically switches between SD SDI, HD-SDI, 3G-SDI, 6G-SDI and 12G-SDI input sources and converts to HDMI with embedded audio, plus balanced AES/EBU or analog audio out. - Page 25 Can also be configured for timecode output. Switches Teranex Mini - SDI to HDMI 12G’s switches provide the following settings: Switch 8 - Analog Audio, AES/EBU Audio Set switch 8 to ‘off’ to output balanced analog audio. Set to ‘on’ for digital AES/EBU audio.
- Page 26 SDI Audio Selection Table By using the following combinations of switch settings, you can select which SDI audio channels to embed into your Teranex Mini - SDI to HDMI 12G’s output signal. Analog Audio Channels Switch 4...
- Page 27 33 Point 3D LUT Your Blackmagic Teranex Mini - SDI to HDMI 12G supports .cube LUT files that can be created using DaVinci Resolve software, or other color correction software that can export .cube files. You can load 2 separate LUTs by clicking on the ‘load’ button for each LUT slot, selecting the desired .cube file from your computer, and clicking ‘OK’.
- Page 28 DaVinci Resolve even allows you to convert a color grade setting to a 3D LUT that you can then upload to your Teranex Mini - SDI to HDMI 12G. You can output the 3D LUT on the SDI video loop output so you could even use your Teranex Mini as a dedicated 3D LUT color processor even if you don’t use the HDMI output!
-
Page 29: Teranex Mini - Hdmi To Sdi 12G
Teranex Mini Smart Panel Settings If you have installed the optional Teranex Mini Smart Panel on your SDI to HDMI 12G converter, the following menus will be available - ‘video,’ ‘audio,’ and ‘network.’ The settings available in these menus are identical to those detailed in the ‘Blackmagic Teranex Setup settings’ section above. - Page 30 AES/EBU AES/EBU - T/C Mini-B USB Port Connects to Blackmagic Teranex Setup via a Mac or Windows computer for changing settings and updating your Teranex Mini’s internal software. Switches Adjustable switches for changing settings. LED Status Indicator Glows white when the converter is receiving power and green when a valid video input signal is detected.
- Page 31 Switches Teranex Mini - HDMI to SDI 12G’s switches provide the following settings: Switch 8 - Analog Audio, AES/EBU Audio Set switch 8 to ‘off’ to embed balanced analog audio. Set to ‘on’ for digital AES/EBU audio. To use these inputs switch 7 must also be set to ‘on’.
- Page 32 You can access these settings by moving between the ‘video,’ ‘audio,’ ‘configure,’ and ‘about’ tabs. The ‘about’ and ‘configure’ tabs are detailed in the ‘changing settings’ section in this manual. The ‘video’ tab for Teranex Mini - HDMI to SDI 12G contains the following settings. Video Processing Menu Conversion Click on the ‘conversion’...
- Page 33 Adjust your analog audio levels and AES/ EBU levels using the ‘audio’ settings. Your Teranex Mini will retain its last settings whether applied via switch, Smart Panel or Teranex setup utility. If reverting to switch control after removing the Smart Panel or updating your converter’s settings via software, you may need to toggle individual switches for new settings...
-
Page 34: Teranex Mini - Sdi To Analog 12G
Teranex Mini Smart Panel Settings If you have installed the optional Teranex Mini Smart Panel on your HDMI to SDI 12G converter, the following menus will be available - ‘video,’ ‘audio,’ and ‘network.’ The settings available in these menus are identical to those detailed in the section above. - Page 35 AES/EBU - T/C Connectors Mini-B USB Port Connects to the Blackmagic Teranex Setup software via a Mac or Windows computer for adjusting settings and updating your Teranex Mini’s internal software. Switches Adjustable switches for changing settings. LED Status Indicator Glows white when the converter is receiving power and green when a valid video input signal is detected.
- Page 36 Can also be configured for timecode output. Switches Teranex Mini - SDI to Analog 12G’s switches provide the following settings: Switch 8 - Analog Audio, AES/EBU Audio Set switch 8 to ‘off’ to select balanced analog audio, or to ‘on’ for digital AES/EBU audio output.
- Page 37 SDI Audio Selection Table By using the following combinations of switch settings, you can select which SDI audio channels to output as analog or digital AES/EBU audio with your Teranex Mini - SDI to Analog 12G. Analog Audio Channels Switch 4...
- Page 38 SDI audio input you wish to de-embed. You can also adjust the gain on the audio output. Your Teranex Mini will retain its last settings whether applied via switch, Smart Panel or Teranex setup utility. If reverting to switch control after removing the Smart Panel or updating your converter’s settings via software, you may need to toggle individual switches for new settings to...
- Page 39 Adjust your analog audio levels and AES/EBU levels using the ‘audio’ settings page. Teranex Mini Smart Panel Settings If you have installed the optional Teranex Mini Smart Panel on your SDI to Analog 12G converter, the following menus will be available - ‘video,’ ‘audio,’ and ‘network.’ The settings available in these menus are identical to those detailed in the ‘Blackmagic Teranex Setup settings’...
-
Page 40: Teranex Mini - Analog To Sdi 12G
Teranex Mini – Analog to SDI 12G Your Teranex Mini Analog to SDI 12G lets you convert video and audio from analog equipment such as Betacam SP decks, HDV cameras and game consoles to SD-HDI, HD-SDI and 12G-SDI video. A choice of analog input formats is supported, including component SD/HD, S-Video, or composite NTSC and PAL. - Page 41 Can also be configured for timecode input. Switches Teranex Mini Analog to SDI 12G’s switches provide the following settings: Switch 8 - Analog Audio, AES/EBU Audio Set switch 8 to OFF to select balanced analog audio, or to ON for digital AES/EBU audio input.
- Page 42 ‘about’ tabs. The ‘about’ and ‘configure’ tabs are detailed in the ‘changing settings’ section in this manual. The ‘video’ tab for Teranex Mini Analog to SDI 12G contains the following settings. Video Input Menu This lets you pick between component, s-video, and composite video input as well as setting the luminance and chroma levels, and the B-Y and R-Y component levels independently.
- Page 43 The ‘audio’ tab for Teranex Mini Analog to SDI 12G contains the following settings. Adjust your video luminance and chroma levels and component chroma levels using the ‘video’ settings page in Blackmagic Teranex Setup. Adjust your analog audio levels and AES/ EBU levels using the ‘audio’...
- Page 44 Teranex Mini Smart Panel Settings If you have installed the optional Teranex Mini Smart Panel on your Analog to SDI 12G to converter, the following menus will be available - ‘video,’ ‘audio,’ and ‘network.’ The settings available in these menus are identical to those detailed in the ‘Blackmagic Teranex Setup settings’...
-
Page 45: Teranex Mini - Sdi To Audio 12G
Teranex Mini – SDI to Audio 12G With Teranex Mini SDI to Audio 12G you can de-embed audio from any SDI video connection and output to two channels of analog audio or four channels of AES/EBU digital. Output to audio equipment such as audio mixers, analog decks and reference monitors. - Page 46 Can also be configured for timecode output. Switches Teranex Mini SDI to Audio 12G’s switches provide the following settings: Switch 8 - Analog Audio, AES/EBU Audio Set switch 8 to OFF to select balanced analog audio, or to ON for digital AES/EBU audio output.
- Page 47 SDI audio input you wish to de-embed. You can also adjust the gain on the audio output. Your Teranex Mini will retain its last settings whether applied via switch, Smart Panel or Teranex setup utility. If reverting to switch control after removing the Smart Panel or updating your converter’s settings via software, you may need to toggle individual switches for new settings to...
- Page 48 ‘audio’ settings page in Blackmagic Teranex Setup. Teranex Mini Smart Panel Settings If you have installed the optional Teranex Mini Smart Panel on your SDI to Audio 12G converter, the following menus will be available - ‘audio,’ and ‘network.’ The settings available in these menus are identical to those detailed in the ‘Blackmagic Teranex Setup settings’...
-
Page 49: Teranex Mini - Audio To Sdi 12G
Teranex Mini – Audio to SDI 12G With Teranex Mini Audio to SDI 12G, you can embed two channels of analog audio, or four channels of AES/EBU digital audio into any SDI video connection. You can use this Teranex Mini to embed audio from equipment, such as audio mixers and analog decks, into SDI video connections for use with SDI routers and decks. - Page 50 Can also be configured for timecode input. Switches Teranex Mini Audio to SDI 12G’s switches provide the following settings: Switch 8, 7 - Input Audio Selection Bit 1, 0 Switches 8 and 7 are represented as bits 1 and 0, respectively. This simply means that by setting various on/off combinations for switches 8 and 7 you can select from four input audio options.
- Page 51 Input Audio Source Switch 8 Switch 7 Switch Diagram XLR Analog XLR AES/EBU Rca Analog Optical SDI Channel Tables Analog Audio Channels Switch 6 Switch 5 Switch 4 Switch Diagram 9-10 11-12 13-14 15-16 Teranex Mini – Audio to SDI 12G...
- Page 52 ‘configure,’ and ‘about’ tabs in Blackmagic Teranex Setup. The ‘about’ and ‘configure’ tabs are detailed in the ‘changing settings’ section in this manual. The ‘audio’ tab for Teranex Mini Audio to SDI 12G contains the following settings. Audio Input Menu This menu allows you to select between RCA, XLR, and optical inputs.
- Page 53 Teranex Mini Smart Panel Settings If you have installed the optional Teranex Mini Smart Panel on your Audio to SDI 12G converter, the following menus will be available - ‘audio,’ and ‘network.’ The settings available in these menus are identical to those detailed in the ‘Blackmagic Teranex Setup settings’...
-
Page 54: Teranex Mini - 12G-Sdi To Quad Sdi
Teranex Mini – 12G–SDI to Quad SDI Teranex Mini 12G-SDI to Quad SDI lets you convert a 12G-SDI signal to quad link SDI so you can connect to Ultra HD equipment that use four separate BNC connectors. This conversion is perfect if you need to connect 12G-SDI Ultra HD signals to four separate HD monitors, for example large video wall displays. - Page 55 12G-SDI equipment. Quad HD split Your Teranex Mini 12G SDI to Quad SDI converter has multiple ways of sending high bandwidth image data over relatively low bandwidth connections. This diagram represents the difference between quad link SDI, where image information is split between four 3G-SDI cables to form a single Ultra HD image, and quadrant HD split, where each of four HD screens receives one quarter of a complete image as part of a video wall.
- Page 56 Switches Teranex Mini - 12G-SDI to Quad SDI’s switches provide the following settings: Switches 8 & 7 - Quad SDI Output Switches 8 and 7 are represented as bits 1 and 0, respectively. This simply means that by setting various on off combinations of switches 8 and 7, you can choose how an 12G-SDI Ultra HD signal is split among your Teranex Mini converter’s four outputs.
- Page 57 You can access these settings by moving between the ‘video,’ ‘configure,’ and ‘about’ tabs. The ‘about’ and ‘configure’ tabs are detailed in the ‘changing settings’ section in this manual. The ‘video’ tab for Teranex Mini 12G-SDI to Quad SDI contains the following settings. Video Processing Menu SDI Output Use this menu to select between SDI output options.
-
Page 58: Teranex Mini - Quad Sdi To 12G-Sdi
Power Teranex Mini – Quad SDI to 12G-SDI Teranex Mini Quad SDI to 12G-SDI lets you connect quad link Ultra HD equipment to the latest 12G-SDI equipment. This means you can convert Ultra HD outputs that use four separate BNC cables into a single 12G-SDI BNC cable so you can plug into the latest 12G-SDI routers, switchers, projectors and more! Supports both Level A and Level B 3G-SDI. - Page 59 The LED glows white when the converter is receiving power and green when a valid video input signal is detected. When more than one Teranex Mini is connected to your computer, you can identify your converter using the ‘identify’ checkbox in Blackmagic Teranex Setup.
- Page 60 ‘configure,’ and ‘about’ tabs. The ‘about’ and ‘configure’ tabs are detailed in the ‘changing settings’ section in this manual. The ‘video’ tab for Teranex Mini - SDI to Analog 12G contains the following settings. Teranex Mini – Quad SDI to 12G-SDI...
- Page 61 The ‘video’ and ‘network’ settings can be changed from the front panel if you have the optional Teranex Mini Smart Panel installed. The settings available in these menus are identical to those detailed in the ‘Blackmagic Teranex Setup settings’ section above. For more information on changing settings using the Teranex Mini Smart Panel, refer to the ‘changing settings’...
-
Page 62: Teranex Mini - Sdi Distribution 12G
Power Teranex Mini – SDI Distribution 12G With Teranex Mini - SDI Distribution 12G you can distribute a single SDI video input to up to eight SDI outputs. Your Teranex Mini features the latest multi rate 12G-SDI connections with full SDI re-clocking allowing the converter to automatically switch between all SD, HD and Ultra HD formats up to 2160p60. - Page 63 The LED glows white when the converter is receiving power and green when a valid video input signal is detected. When more than one Teranex Mini is connected to your computer, you can identify your converter using the ‘identify’ checkbox in Blackmagic Teranex Setup.
-
Page 64: Teranex Mini - Optical To Hdmi 12G
Teranex Mini – Optical to HDMI 12G Your Teranex Mini - Optical to HDMI 12G model can be used to connect a huge range of HDMI displays and video projectors to equipment that supports SDI video via optical fiber. Your... - Page 65 Can also be configured for timecode output. Switches Teranex Mini - Optical to HDMI 12G’s switches provide the following settings: Switches 8 - Analog Audio, AES/EBU Audio Set switch 8 to ‘off’ to output balanced analog audio. Set to ‘on’ for digital AES/EBU audio.
- Page 66 SDI Audio Selection Table By using the following combinations of switch settings, you can select which SDI or Optical audio channels to embed into your Teranex Mini - Optical to HDMI 12G’s output signal. Analog Audio Channels Switch 4 Switch 3...
- Page 67 DaVinci Resolve even allows you to convert a color grade setting to a 3D LUT that you can then upload to your Teranex Mini - Optical to HDMI 12G. You can output the 3D LUT on the optical video loop output so you could even use your Teranex Mini as a dedicated 3D LUT color processor even if you don’t use the HDMI output!
- Page 68 XLR connector will output one channel of analog audio. Your Teranex Mini will retain its last settings whether applied via switch, Smart Panel or Teranex setup utility. If reverting to switch control after removing the Smart Panel or updating your converter’s settings via software, you may need to toggle individual switches for new settings to...
-
Page 69: Teranex Mini - Hdmi To Optical 12G
Power Teranex Mini – HDMI to Optical 12G Your Teranex Mini - HDMI to Optical 12G converts HDMI devices such as HDV cameras, Ultra HD cameras and game consoles to 12G-SDI BNC or optical fiber up to 2160p60, with the choice to embed audio from HDMI, AES/EBU or balanced analog audio inputs. - Page 70 Can also be configured for timecode output. Switches Teranex Mini - HDMI to Optical 12G’s switches provide the following settings: Switches 8 - Analog Audio, AES/EBU Audio Set switch 8 to ‘off’ to embed balanced analog audio. Set to ‘on’ for digital AES/EBU audio. To use these inputs switch 7 must also be set to ‘on’.
- Page 71 You can access these settings by moving between the ‘video,’ ‘audio,’ ‘configure,’ and ‘about’ tabs. The ‘about’ and ‘configure’ tabs are detailed in the ‘changing settings’ section in this manual. The ‘video’ tab for Teranex Mini - HDMI to Optical 12G contains the following settings. Video Processing Menu Conversion Click on the ‘conversion’...
- Page 72 Dolby audio conversion. Your Teranex Mini will retain its last settings whether applied via switch, Smart Panel or Teranex setup utility. If reverting to switch control after removing the Smart Panel or updating your converter’s settings via software, you may need to toggle individual switches for new settings to...
- Page 73 ‘audio’ settings page in Blackmagic Teran5ex Setup. Teranex Mini Smart Panel Settings If you have installed the optional Teranex Mini Smart Panel on your HDMI to Optical 12G converter, the following menus will be available - ‘video,’ ‘audio,’ and ‘network.’ The settings available in these menus are identical to those detailed in the section above.
-
Page 74: Teranex Mini - Optical To Analog 12G
Power Teranex Mini – Optical to Analog 12G Your Teranex Mini - Optical to Analog 12G lets you convert from SD SDI, HD-SDI, 3G-SDI, 6G-SDI and 12G-SDI and Optical fiber input sources to analog component, NTSC and PAL video out, plus balanced AES/EBU and analog audio out. - Page 75 Can also be configured for timecode output. Switches Teranex Mini - Optical to Analog 12G’s switches provide the following settings: Switch 8 - Analog Audio, AES/EBU Audio Set switch 8 to ‘off’ to select balanced analog audio, or to ‘on’ for digital AES/EBU audio output.
- Page 76 However, component video can support a HD signal, so when you are converting video from an SD source to a component output, setting switch 1 to ‘off’ will output a widescreen HD analog signal, with no aspect ratio conversion. Teranex Mini – Optical to Analog 12G...
- Page 77 SDI Audio Selection Table By using the following combinations of switch settings, you can select which SDI audio channels to output as analog or digital AES/EBU audio with your Teranex Mini - Optical to Analog 12G. Analog Audio Channels Switch 4...
- Page 78 This menu allows you to set the aspect ratio of down converted video. The options are letterbox, anamorphic, center cut or no processing. The ‘audio’ tab for Teranex Mini - Optical to Analog 12G contains the following settings. Adjust your video luminance and chroma levels and component chroma levels using the ‘video’...
- Page 79 SDI audio input you wish to de-embed. You can also adjust the gain on the audio output. Your Teranex Mini will retain its last settings whether applied via switch, Smart Panel or Teranex setup utility. If reverting to switch control after removing the Smart Panel or updating your converter’s settings via software, you may need to toggle individual switches for new settings to...
-
Page 80: Teranex Mini - Analog To Optical 12G
Teranex Mini – Analog to Optical 12G Your Teranex Mini Analog to Optical 12G lets you convert video and audio from analog equipment such as Betacam SP decks, HDV cameras and game consoles to 12G-SDI via BNC or optical fiber outputs. A choice of analog input formats is supported, including component SD/ HD, S-Video, or composite NTSC and PAL. - Page 81 Can also be configured for timecode input. Switches Teranex Mini - Analog to Optical 12G’s switches provide the following settings: Switch 8 - Analog Audio, AES/EBU Audio Set switch 8 to OFF to select balanced analog audio, or to ON for digital AES/EBU audio input.
- Page 82 ‘about’ tabs. The ‘about’ and ‘configure’ tabs are detailed in the ‘changing settings’ section in this manual. The ‘video’ tab for Teranex Mini Analog to Optical 12G contains the following settings. Video Input Menu This lets you pick between component, s-video, and composite video input as well as setting the luminance and chroma levels, and the B-Y and R-Y component levels independently.
- Page 83 SDI or optical audio output will be up or down converted to 24-bit, 48kHz. Your Teranex Mini will retain its last settings whether applied via switch, Smart Panel or Teranex setup utility. If reverting to switch control after removing the Smart Panel or updating your converter’s settings via software, you may need to toggle individual switches for new settings to...
-
Page 84: Teranex Mini - Optical To Audio 12G
Teranex Mini – Optical to Audio 12G With Teranex Mini Optical to Audio 12G you can de-embed audio from any SD, HD or Ultra HD Optical fiber or 12G-SDI video connection and output to two channels of analog audio or four channels of AES/EBU digital. - Page 85 OUT / IN Connectors Mini-B USB Port Connects to the Blackmagic Teranex Setup software via a Mac or Windows computer for adjusting settings and updating your Teranex Mini’s internal software. Switches Adjustable switches for changing settings. LED Status Indicator Glows white when the converter is receiving power and green when a valid video input signal is detected.
- Page 86 Can also be configured for timecode output. Switches Teranex Mini Optical to Audio 12G’s switches provide the following settings: Switch 8 - Analog Audio, AES/EBU Audio Set switch 8 to OFF to select balanced analog audio, or to ON for digital AES/EBU audio output.
- Page 87 SDI or optical audio input you wish to de-embed. You can also adjust the gain on the audio output. Your Teranex Mini will retain its last settings whether applied via switch, Smart Panel or Teranex setup utility. If reverting to switch control after removing the Smart Panel or updating your converter’s settings via software, you may need to toggle individual switches for new settings to...
- Page 88 ‘audio’ settings page in Blackmagic Teranex Setup. Teranex Mini Smart Panel Settings If you have installed the optional Teranex Mini Smart Panel on your Optical to Audio 12G converter, the following menus will be available - ‘audio,’ and ‘network.’ The settings available in these menus are identical to those detailed in the ‘Blackmagic Teranex Setup settings’...
-
Page 89: Teranex Mini - Audio To Optical 12G
Teranex Mini – Audio to Optical 12G With Teranex Mini Audio to Optical 12G, you can embed two channels of analog audio, or four channels of AES/EBU digital audio into any SD, HD, Ultra HD or DCI 4K SDI video connection. - Page 90 Can also be configured for timecode input. Switches Teranex Mini Audio to Optical 12G’s switches provide the following settings: Switch 8, 7 - Input Audio Selection Bit 1, 0 Switches 8 and 7 are represented as bits 1 and 0, respectively. This simply means that by setting various on/off combinations for switches 8 and 7 you can select from four input audio options.
- Page 91 Audio Selection Tables Input Audio Channels Switch 8 Switch 7 Switch Diagram XLR Analog XLR AES/EBU RCA Analog Optical SDI Channel Tables Analog Audio Channels Switch 6 Switch 5 Switch 4 Switch Diagram Teranex Mini – Audio to Optical 12G...
- Page 92 ‘configure,’ and ‘about’ tabs in Blackmagic Teranex Setup. The ‘about’ and ‘configure’ tabs are detailed in the ‘changing settings’ section in this manual. The ‘audio’ tab for Teranex Mini Audio to Optical 12G contains the following settings. Audio Input Menu This menu allows you to select between RCA, XLR, and optical inputs.
- Page 93 ‘audio’ settings page in Blackmagic Teranex Setup. Teranex Mini Smart Panel Settings If you have installed the optional Teranex Mini Smart Panel on your Audio to Optical 12G converter, the following menus will be available - ‘audio,’ and ‘network.’ The settings available in these menus are identical to those detailed in the ‘Blackmagic Teranex Setup settings’...
- Page 94 Teranex Mini Audio to Optical 12G Block Diagram Optical Out/In Serializer and Analog or AES/EBU SDI Cable Driver Ch 1 Analog or Ch 1&2 AES/EBU Analog or AES/EBU Ch 2 Analog or Input automatically Ch 3&4 AES/EBU detects between AES/EBU...
-
Page 95: Help
Getting Help The fastest way to obtain help is to go to the Blackmagic Design online support pages and check the latest support material available for your Teranex Mini. Blackmagic Design Online Support Pages The latest manual, software and support notes can be found at the Blackmagic Design support center at www.blackmagicdesign.com/support. -
Page 96: Regulatory Notices
Regulatory Notices Disposal of waste of electrical and electronic equipment within the European union. The symbol on the product indicates that this equipment must not be disposed of with other waste materials. In order to dispose of your waste equipment, it must be handed over to a designated collection point for recycling. -
Page 97: Safety Information
Safety Information This equipment must be connected to a mains socket outlet with a protective earth connection. To reduce the risk of electric shock, do not expose this equipment to dripping or splashing. This equipment is suitable for use in tropical locations with an ambient temperature of up to 40ºC. -
Page 98: Warranty
Warranty 36 Month Limited Warranty Blackmagic Design warrants that Teranex Minis will be free from defects in materials and workmanship for a period of 36 months from the date of purchase excluding connectors, cables, fiber optic modules, fuses and batteries which will be free from defects in materials and workmanship for a period of 12 months from the date of purchase.
Need help?
Do you have a question about the Teranex Mini and is the answer not in the manual?
Questions and answers