
Subscribe to Our Youtube Channel
Related Manuals for Blackmagicdesign Micro Converter SDI to HDMI 3G


Summary of Contents for Blackmagicdesign Micro Converter SDI to HDMI 3G
- Page 1 Installation and Operation Manual Blackmagic Converters September 2020 日本語 English, , Français, Deutsch, Español, 中文 한국어 , Русский, Italiano, Português and Türkçe...
- Page 2 Languages To go directly to your preferred language, simply click on the hyperlinks listed in the contents below. English 日本語 Français Deutsch Español 中文 한국어 Русский Italiano Português Türkçe...
- Page 3 This instruction manual contains all the information you need to start using your Blackmagic Converters. Please check the support page on our web site at www.blackmagicdesign.com for the latest version of this manual and for updates if your Blackmagic Converter has internal software.
-
Page 4: Table Of Contents
Teranex Mini Converters Mini Converter Quad SDI to HDMI 4K Blackmagic Micro Converters Mini Converter SDI Distribution Micro Converter SDI to HDMI 3G Mini Converter SDI Distribution 4K Micro Converter HDMI to SDI 3G Mini Converter SDI Multiplex 4K Micro Converter BiDirectional... -
Page 5: Getting Started
Getting Started Getting started with your Blackmagic Converter is as simple as plugging in power, plugging your source video into your converter’s video input, and plugging the video output into your destination equipment. Plugging in Power Plug in the included 12 volt power supply using the socket adapter for your country. If your converter has a built in cable tie point, you can easily secure the power connection to your converter. - Page 6 Optical Fiber Connectors Some Blackmagic Converter models include an SFP socket to accept a compatible SFP optical fiber module that supports up to 3G, 6G or 12G-SDI video. The module is an optical transmitter and receiver with sockets for optical fiber cables. Examine the Optical Out/In socket to make Remove the protective cover from the SFP optical sure it is free of dust.
-
Page 7: Plugging In Audio
Plugging in Audio Jack Audio Connectors Some Blackmagic Converters have built in 1/4" jacks, so you can easily plug in balanced external analog or digital AES/EBU audio. The 1/4" jacks are balanced TRS connectors. TRS stands for Tip, Ring, Sleeve which refers to the three contacts of the jack connector. If your Blackmagic Converter has jack audio connectors, you can plug in balanced analog or AES/EBU audio. -
Page 8: Installing Administration Software
Mac OS and Windows computers. Installation on Mac Download the Blackmagic Converters Setup software from www.blackmagicdesign.com Unzip the downloaded file and open the resulting disk image to reveal its contents. Double click the installer and follow the prompts to complete the installation. -
Page 9: Updating The Internal Software
The latest software can be downloaded from the Blackmagic Design support center at www.blackmagicdesign.com/support. When updating Blackmagic Micro Converters, power is already supplied via the USB port, so you don’t have to worry about connecting power. -
Page 10: Updating Mini Converter Sdi Distribution 4K
Updating Mini Converter SDI Distribution 4K Blackmagic Mini Converter SDI Distribution 4K has an internal USB connector. This mini converter has no user adjustable settings, so you will never need to connect setup software. Very occasionally, though, internal software updates will be released to improve compatibility. For example, Blackmagic Converters Software version 7.0.9 improves this mini converter’s compatibility with level A 3G SDI signals. -
Page 11: Changing Settings
SD I OU T SD I OU T SD I OU T SD I OU T SD I OU T Plug in your Mini Converter SDI Distribution 4K’s Repeat steps 1 - 4 in reverse to reassemble power supply and connect it to a computer using Mini Converter SDI Distribution 4K. -
Page 12: Changing Settings Using Blackmagic Converters Setup
You can download the latest version from the Blackmagic Design support center at www.blackmagicdesign.com/support. Changing Settings using Blackmagic Converters Setup Once Blackmagic Converters Setup is installed on your computer, connect the setup utility to your Blackmagic Converter via USB. -
Page 13: About Tab
About Tab The ‘about’ tab in Blackmagic Converters Setup is common across many converter models. You can use the settings in this tab to name your Blackmagic Converter. Simply click in the ‘name’ text box and type your desired converter name. Click ‘save’ to confirm the change. The 'about' tab in Blackmagic Converters Setup displays information about the current software version. -
Page 14: Blackmagic Converter Models
LCD, buttons and a rotary knob, and can be powered via Ethernet. If you are looking for information about these converters, including controlling them via the Blackmagic Teranex Setup utility, refer to the Teranex Mini Converters manual which you can download from the Blackmagic Design support center at www.blackmagicdesign.com/support Teranex Mini Converters... -
Page 15: Blackmagic Micro Converters
Blackmagic Micro Converters Micro Converter SDI to HDMI 3G With Micro Converter SDI to HDMI 3G you can connect a huge range of HDMI displays and video projectors to SDI based equipment. Your Micro Converter SDI to HDMI 3G automatically detects between SD/HD/3G-SDI and converts to HDMI with embedded audio. - Page 16 HDMI Output To stay within HDMI legal broadcast levels, select ‘normal levels’. To allow video levels to conform to the SDI input, select ‘illegal levels’. We recommend using normal levels. Audio Mapping For 5.1 surround, select your desired audio mapping from either SMPTE or consumer standard. Reset You can also reset your converter to factory settings by clicking the ‘factory reset’...
-
Page 17: Micro Converter Hdmi To Sdi 3G
Micro Converter SDI to HDMI 3G Block Diagram Automatic SD/HD/3G-SDI Cable Input automatically Driver and Re-clocker detects between Loop SDI SD/HD/3G-SDI Equalizer and Customizable HDMI Video and 10-bit De-serializer Video Processor Audio Formatter HDMI Out SDI In Central Processor and Firmware... - Page 18 Blackmagic Converters Setup Settings The Blackmagic Converters Setup utility can be used to change settings and update your Micro Converter’s software. You can access these settings by moving between the ‘setup,’ and ‘about’ tabs. The ‘setup’ tab contains the software information and name for your converter. SDI Output The 3G SDI Output lets you select between Level A or Level B 3G-SDI.
-
Page 19: Micro Converter Bidirectional Sdi/Hdmi 3G
Micro Converter HDMI to SDI 3G Block Diagram Input automatically detects between SD/HD/3G-SDI SDI Out Automatic HDMI Video Customizable SD/HD/3G-SDI Cable and audio decoder Video Processor Driver and Re-clocker SDI Out HDMI In Central Processor and Firmware USB-C Micro Converter BiDirectional SDI/HDMI 3G Micro Converter BiDirectional SDI/HDMI 3G lets you convert HDMI to SDI and back again while maintaining tally and camera control in both signal formats. - Page 20 USB-C / POWER Connect 5V power using a standard USB to USB-C cable. Also connects to Blackmagic Converters Setup software via your Mac OS or Windows Computer. A small white LED light next to the USB-C port will light up when connected to a power source. SDI OUT SDI video output BNC connector.
-
Page 21: Camera Control And Tally Between Sdi And Hdmi
Camera Control and Tally between SDI and HDMI Using Blackmagic Pocket Cinema Camera with ATEM Constellation 8K In this scenario, the micro converter is used to connect the camera’s HDMI output to the ATEM’s SDI input. The bidirectional converter allows the camera control and tally data to be fed back through the converter and into the camera via the Consumer Electronics Control CEC data in the HDMI signal. -
Page 22: Micro Converter Sdi To Hdmi
ATEM Mini HDMI CEC Data HDMI CEC Data Blackmagic Pocket HDMI OUT HDMI OUT Cinema Camera 6K MicroConverter MicroConverter SDI OUT SDI OUT BiDirectional SDI/HDMI 3G BiDirectional SDI/HDMI 3G HDMI IN HDMI IN SDI IN SDI IN Micro Converter Micro Converter BiDirectional BiDirectional SDI to HDMI 3G... - Page 23 SDI IN MicroConverter SDI to HDMI SDI LOOP OUT HDMI OUT Connectors SDI IN Primary SDI input BNC connector. SDI LOOP Loop through output of your SDI input BNC connector. Micro USB / POWER Provides power from the included adapter or any equipment capable of providing 5V via a standard USB to Micro USB cable, such as a laptop or television.
-
Page 24: Micro Converter Hdmi To Sdi
Processing menu The ‘clip video output to legal levels’ checkbox controls clipping of your SDI input to ensure that it stays within HDMI legal levels and should be kept on by default. Micro Converter SDI to HDMI Block Diagram Automatic SD/HD/3G-SDI Cable Input automatically Driver and Re-clocker... - Page 25 Blackmagic Converters Setup Settings The Blackmagic Converters Setup utility can be used to change settings and update your Micro Converter’s software. You can access these settings by moving between the ‘video’, and ‘about’ tabs. The ‘about’ tab is detailed in the ‘changing settings’ section in this manual. The ‘video’...
-
Page 26: Micro Converter Bidirectional Sdi/Hdmi
Micro Converter BiDirectional SDI/HDMI Micro Converter BiDirectional SDI/HDMI converts SD and HD video from HDMI to SDI, and SDI to HDMI with embedded audio simultaneously. For example, you can convert the HDMI output from an HDV camera to SDI for longer cable lengths, while also converting an SDI return feed to HDMI so you can connect to an HDMI TV. - Page 27 Blackmagic Converters Setup Settings The Blackmagic Converters Setup utility can be used to change settings and update your Micro Converter’s software. You can access these settings by moving between the ‘video’, and ‘about’ tabs. The ‘About’ tab is described in the ‘Changing Settings’ section in this manual. The ‘Video’...
-
Page 28: Blackmagic Mini Converters
Blackmagic Mini Converters Mini Converter SDI to HDMI Mini Converter SDI to HDMI can connect a huge range of HDMI displays and video projectors to SDI based equipment. Your Mini Converter SDI to HDMI automatically detects between SD/HD/3G-SDI and converts to HDMI with embedded audio, plus balanced AES/EBU or analog audio out. - Page 29 Switches Switch 8 - Analog Audio, AES/EBU Audio Set switch 8 to OFF to select balanced analog audio, or to ON for digital AES/EBU audio output. Switch 4 - SDI Audio De-Embed Bit 2 Switches 4, 3 and 2 are grouped together to provide 8 ON/OFF combinations. Having eight different combinations allows eight independent pairs of audio channels to be de-embedded from your SDI input and output to HDMI, analog or AES/EBU audio.
- Page 30 SDI Audio Selection Table Audio Channels Switch 4 Switch 3 Switch 2 Switch Diagram 1 and 2 3 and 4 5 and 6 7 and 8 9 and 10 11 and 12 13 and 14 15 and 16 Blackmagic Converters Setup Settings The Converters Setup utility can be used to change settings and update your Mini Converter’s software.
-
Page 31: Mini Converter Sdi To Hdmi 4K
Output Levels menu This menu allows you to adjust the gain on the audio output. You can adjust audio levels independently per channel, or together by clicking the ‘link’ icon next to their sliders. To reset all audio levels back to 0 dB click the ‘reset’ button at the top of the ‘output levels’ menu. Use the ‘audio’... - Page 32 SDI to HDMI 4K Connectors HDMI HDMI type A video output. L - ANALOG or AES/EBU Balanced left channel analog audio, or AES/EBU digital audio output 1/4" jack connector. R - ANALOG Balanced right channel analog audio output 1/4" jack connector. Mini-B USB Port Connects to the Converters Setup software via your Mac OS or Windows computer.
- Page 33 Switch 2 - SDI Audio De-Embed Bit 0 See switch 4 description. Switch 1 - Processing Off - Processing On This switch is not used. The switch legend on the base of your converter gives you all the information you need to change conversion settings. Mini Switch Settings Example Experiment with the switches by setting your Blackmagic Mini Converter to de-embed SDI audio channels 1 and 2 and output to analog by setting switches 8, 4, 3 and 2 to the...
- Page 34 Blackmagic Converters Setup Settings The Converters Setup utility can be used to change settings and update your Mini Converter’s software. You can access these settings by moving between the ‘video,’ ‘audio,’ and ‘about’ tabs. The ‘about’ tab is detailed in the ‘changing settings’ section in this manual. The ‘video’...
-
Page 35: Mini Converter Sdi To Hdmi 6G
Use the ‘audio’ tab in Converters Setup to adjust audio levels. Mini Converter SDI to HDMI 4K Block Diagram Automatic SD/HD/Ultra HD Cable Driver Loop SDI Analog or AES/EBU Audio Out Switch AES/EBU Input automatically Audio Formatter detects between SDI In SD, HD and Ultra HD Left Analog Out or AES/EBU Out... - Page 36 You can also load 3D LUTs for adding looks, grades, and color profiles to your converted output. The 3D LUT is a full 33 point hardware lookup table for greater accuracy with color manipulation and can even be used to accurately color calibrate consumer televisions so they can be used for critical color correction work.
- Page 37 Switch 6 - LUT 1, LUT2 Set Switch 6 to OFF to select LUT 1, or to ON to select LUT 2. Switch 5 - LUT On Loop Off, LUT On Loop On Set Switch 5 to OFF to select LUT On Loop Off, or to ON to select LUT On Loop On. Switch 4 - SDI Audio De-Embed Bit 2 Switches 4, 3 and 2 are grouped together to provide 8 ON/OFF combinations.
- Page 38 Mini Switch Settings Example Experiment with the switches by setting your Blackmagic Mini Converter to de-embed SDI audio channels 1 and 2 and output to analog by setting switches 8, 4, 3 and 2 to the OFF position. SDI Audio Selection Table Audio Channels Switch 4 Switch 3...
- Page 39 For more information on how to create a 3D LUT .cube file, refer to the DaVinci Resolve manual which you can download from the Blackmagic Design website at www.blackmagicdesign.com/support. ‚ Clip Video Output to Legal Levels This checkbox controls clipping of your SDI input to ensure that it stays within HDMI legal levels and should be kept on by default.
-
Page 40: Mini Converter Hdmi To Sdi
Use the ‘audio’ tab in Converters Setup to adjust audio levels Mini Converter SDI to HDMI 6G Block Diagram Automatic SD/HD/Ultra HD Cable Driver Loop SDI Analog or AES/EBU Audio Out Switch AES/EBU Input automatically Audio Formatter detects between SDI In SD, HD and Ultra HD Left Analog Out or AES/EBU Out... - Page 41 HDMI to SDI Connectors HDMI HDMI type A video input. L - ANALOG or AES/EBU Balanced left channel analog audio or AES/EBU digital audio input on a 1/4" jack connector. R - ANALOG Balanced right channel analog audio input 1/4" jack connector. Mini-B USB Port Connects to the Converters Setup software via your Mac OS or Windows computer.
- Page 42 The switch legend on the base of your converter gives you all the information you need to change conversion settings. Blackmagic Converters Setup Settings The Converters Setup utility can be used to change settings and update your Mini Converter’s software. You can access these settings by moving between the ‘video,’ ‘audio,’ and ‘about’ tabs. The ‘about’...
-
Page 43: Mini Converter Hdmi To Sdi 4K
The ‘audio’ tab for Mini Converter HDMI to SDI contains the following settings. Input Levels menu This menu allows you to adjust the gain on the audio input. You can adjust audio levels independently per channel, or together by clicking the ‘link’ icon next to their sliders. To reset all audio levels back to 0 dB click the ‘reset’... - Page 44 HDMI to SDI 4K HDMI to SDI 4K Connectors HDMI HDMI type A video input. L - ANALOG or AES/EBU Balanced left channel analog audio or AES/EBU digital audio input 1/4" jack connector. R - ANALOG Balanced right channel analog audio input 1/4" jack connector. Mini-B USB Port Connects to the Converters Setup software via your Mac OS or Windows computer.
- Page 45 To force your source video to HD, Ultra HD, or to let your converter automatically negotiate the optimum resolution with your source equipment, simply use combinations of switches 1 and 2. The combination settings are shown below. AUTO - switch 1 to OFF, switch 2 to OFF. Your converter will negotiate an optimum HD or Ultra HD resolution with your source equipment based on its output capabilities.
-
Page 46: Mini Converter Hdmi To Sdi 6G
Use the ‘audio’ tab in Converters Setup to adjust audio levels. Mini Converter HDMI to SDI 4K Block Diagram Analog or AES/EBU Audio Switch AES/EBU Sample Rate Converter Left Analog In or AES/EBU Audio Analog to Digital with Balanced Input SDI Out Right Analog In Automatic... - Page 47 HDMI to SDI 6G HDMI to SDI 6G Connectors HDMI HDMI type A video input. L - ANALOG or AES/EBU Balanced left channel analog audio or AES/EBU digital audio input 1/4" jack connector. R - ANALOG Balanced right channel analog audio input 1/4" jack connector. Mini-B USB Port Connects to the Converters Setup software via your Mac OS or Windows computer.
- Page 48 While it may appear like it’s an up or down conversion setting, what your converter is actually doing is telling your source equipment to output Ultra HD or HD video so that your converter can then output the source video’s native HD or Ultra HD resolution without up or down conversion. To force your source video to HD, Ultra HD, or to let your converter automatically negotiate the optimum resolution with your source equipment, simply use combinations of switches 1 and 2.
-
Page 49: Mini Converter Sdi To Analog
Use the ‘audio’ tab in Converters Setup to adjust audio levels. Mini Converter HDMI to SDI 6G Block Diagram Analog or AES/EBU Audio Switch AES/EBU Sample Rate Converter Left Analog In or AES/EBU Audio Analog to Digital with Balanced Input SDI Out Right Analog In Automatic... - Page 50 Y or NTSC/PAL SDI LOCK B-Y or S-VIDEO Y SDI OUT R-Y or S-VIDEO C SDI to Analog ALT SDI IN ANALOG or AES/EBU SDI IN R - ANALOG POWER +12V Connectors Y or NTSC/PAL Analog component Y, or composite NTSC/PAL output on a BNC connector. B-Y or S-VIDEO Y Analog component B-Y, or S-Video Y output BNC connector.
- Page 51 Switch 6 - SMPTE Levels - Betacam Levels Set switch 6 to OFF for SMPTE levels, or ON for Betacam levels. SMPTE levels are more common and even Betacam SP decks can use SMPTE levels, so only switch this to Betacam if you are sure that Betacam levels are being used.
- Page 52 Mini Switch Settings Example Experiment with the switches by setting your Blackmagic Mini Converter to output high definition component video and analog audio channels 1 and 2 by setting switches 8, 5, 4, 3 and 2 to the OFF position. SDI Audio Selection Table Audio Channels Switch 4...
- Page 53 Processing menu This menu allows you to set the aspect ratio of down converted video. The options are letterbox, anamorphic, center cut or no processing. The ‘clip video output to legal levels’ checkbox controls clipping of your SDI input to ensure that it stays within HDMI legal levels and should be kept on by default.
-
Page 54: Mini Converter Sdi To Analog 4K
Mini Converter SDI to Analog 4K Your Mini Converter SDI to Analog 4K can convert from SD/HD/3G/6G-SDI to analog component, NTSC and PAL video out, plus balanced AES/EBU and analog audio out. This down converter lets you connect up to 6G-SDI video to SD or HD analog equipment and easily connects to video monitors and decks such as Betacam SP and VHS. - Page 55 Switches Mini Converter SDI to Analog 4K’s switches provide the following settings: Switch 8 - Analog Audio, AES/EBU Audio Set switch 8 to OFF to select balanced analog audio, or to ON for digital AES/EBU audio output. Switch 7 - 7.5 IRE - 0.0 IRE The USA and countries using NTSC with 7.5 setup should set switch 7 to OFF.
- Page 56 The switch legend on the base of your converter gives you all the information you need to change conversion settings. Mini Switch Settings Example: Experiment with the switches by setting your Blackmagic Mini Converter to output high definition component video and analog audio channels 1 and 2 by setting switches 8, 5, 4, 3 and 2 to the OFF position.
- Page 57 Blackmagic Converters Setup Settings The Converters Setup utility can be used to change settings and update your Mini Converter’s software. You can access these settings by moving between the ‘video,’ ‘audio,’ and ‘about’ tabs. The ‘about’ tab is detailed in the ‘changing settings’ section in this manual. The ‘video’...
-
Page 58: Mini Converter Analog To Sdi
Output Levels menu This menu allows you to adjust the gain on the audio input. You can adjust audio levels independently per channel, or together by clicking the ‘link’ icon next to their sliders. To reset all audio levels back to 0 dB click the ‘reset’ button at the top of the ‘output levels’ menu. Use the ‘audio’... - Page 59 Connectors Y or NTSC/PAL Analog component Y, or composite NTSC/PAL input BNC connector. B-Y or S-VIDEO Y Analog component B-Y, or S-Video Y input BNC connector. R-Y or S-VIDEO C Analog component R-Y, or S-Video C input BNC connector. L - ANALOG or AES/EBU Balanced left channel analog audio, or AES/EBU digital audio input 1/4"...
- Page 60 Switch 6 - SMPTE Levels - Betacam Levels This setting selects between SMPTE or Betacam video levels. Set switch 6 to OFF for SMPTE levels, or to ON for Betacam levels. SMPTE levels are more common and even Betacam SP decks can use SMPTE levels so only switch this to Betacam if you are sure that Betacam levels are being used.
- Page 61 The ‘audio’ tab for Mini Converter Analog to SDI contains the following settings. Use the ‘video’ tab in Converters Setup to adjust video levels. Input Levels menu This menu allows you to adjust the gain on the audio input. You can adjust audio levels independently per channel, or together by clicking the ‘link’...
-
Page 62: Mini Converter Sdi To Audio
Mini Converter Analog to SDI Block Diagram Analog or AES/EBU Audio Switch AES/EBU Sample Rate Converter Left Analog In or AES/EBU Audio Analog to Digital from SDI Out Balanced Input Right Analog In 12 bit Analog Automatic Customizable SDI Audio to Digital SD/HD SD/HD/1.5G-SDI Video Processor... - Page 63 Mini-B USB Port Connects to the Converters Setup software via your Mac OS or Windows computer. The Mini Converter’s internal software is also updated using the USB port. SDI OUT Loop through SDI video output BNC connector. ALT SDI IN Redundant SDI input provided as an optional back up. When using both the SDI IN and ALT SDI IN, the ALT SDI IN will take over should the SDI IN signal fail.
- Page 64 Audio Selection Tables Analog Audio Channels Switch 6 Switch 5 Switch Diagram 1 to 4 5 to 8 9 to 12 13 to 16 AES/EBU Channels Switch 6 Switch 5 Switch Diagram 1 to 8 9 to 16 Blackmagic Converters Setup Settings The Converters Setup utility can be used to change settings and update your Mini Converter’s software.
-
Page 65: Mini Converter Sdi To Audio 4K
Mini Converter SDI to Audio Block Diagram Automatic SD/HD/3G-SDI Loop SDI Out Cable Driver Analog or AES/EBU Ch 1 Analog or AES/EBU Ch 1&2 AES/EBU Audio Formatter Input automatically detects between Audio Digital to Analog or AES/EBU SDI In SD, HD and 3G-SDI Ch 2 Analog or Analog with Ch 3&4 AES/EBU... - Page 66 Mini-B USB Port Connects to the Converters Setup software via your Mac OS or Windows computer. The Mini Converter’s internal software is also updated using the USB port. SDI OUT Loop through SDI video output BNC connector. ALT SDI IN Redundant SDI input provided as an optional back up. When using both the SDI IN and ALT SDI IN, the ALT SDI IN will take over should the SDI IN signal fail.
- Page 67 Audio Selection Tables Analog Audio Channels Switch 6 Switch 5 Switch Diagram 1 to 4 5 to 8 9 to 12 13 to 16 AES/EBU Channels Switch 6 Switch 5 Switch Diagram 1 to 8 9 to 16 Blackmagic Converters Setup Settings The Converters Setup utility can be used to change settings and update your Mini Converter’s software.
-
Page 68: Mini Converter Audio To Sdi
Mini Converter SDI to Audio 4K Block Diagram Automatic SD/HD/Ultra HD Loop SDI Out Cable Driver Analog or AES/EBU Ch 1 Analog or AES/EBU Ch 1&2 AES/EBU Audio Formatter Input automatically detects between Audio Digital to Analog or AES/EBU SDI In SD, HD and Ultra HD Ch 2 Analog or Analog with... - Page 69 Mini-B USB Port Connects to the Converters Setup software via your Mac OS or Windows computer. The Mini Converter’s internal software is also updated using the USB port. SDI OUT Loop through SDI video output BNC connector. ALT SDI IN Redundant SDI input provided as an optional back up. When using both the SDI IN and ALT SDI IN, the ALT SDI IN will take over should the SDI IN signal fail.
- Page 70 AES/EBU Channels Switch 6 Switch 5 Switch Diagram 1 to 8 9 to 16 Embedding or Disabling Channels Once you have selected your audio channels, use switches 4, 3, 2 and 1 to select which channels to embed or disable. The disable setting lets you avoid overwriting audio channels you wish to keep in the SDI signal.
- Page 71 Mini Switch Settings Example: Try experimenting with the switches. Select analog audio channels 1 to 4 by setting switches 8, 6 and 5 to the OFF position. Blackmagic Converters Setup Settings The Converters Setup utility can be used to change settings and update your Mini Converter’s software.
-
Page 72: Mini Converter Audio To Sdi 4K
Mini Converter Audio to SDI 4K Your Mini Converter Audio to SDI 4K can embed four channels of analog audio, or eight channels of AES/EBU digital audio into any SDI video connection. You can use this Mini Converter to embed audio from equipment, such as audio mixers and analog decks, into SDI video connections for use with SDI routers and decks. - Page 73 Switches Mini Converter Audio to SDI 4K switches provide the following settings: Switch 8 - Analog Audio, AES/EBU Audio Set switch 8 to OFF to select balanced analog audio, or to ON for digital AES/EBU audio input. Switch 7 - Sample Rate Conversion, No Sample Rate Conversion Set switch 7 to OFF to enable sample rate conversion, or ON to disable sample rate conversion.
- Page 74 Audio Channel De-Embed or Disable Settings Switch Setting Audio Channels Disable analog CH 4, AES/EBU CH 7 and 8 Embed analog CH 4, AES/EBU CH 7 and 8 Disable analog CH 3, AES/EBU CH 5 and 6 Embed analog CH 3, AES/EBU CH 5 and 6 Disable analog CH 2, AES/EBU CH 3 and 4 Embed analog CH 2, AES/EBU CH 3 and 4 Disable analog CH 1, AES/EBU CH 1 and 2...
- Page 75 Input Levels menu This menu allows you to adjust the gain on the audio input. You can adjust audio levels independently per channel, or together as channel pairs by clicking the ‘link’ icon next to their sliders. To reset all audio levels back to 0 dB click the ‘reset’ button at the top of the ‘output levels’...
-
Page 76: Mini Converter Optical Fiber
Mini Converter Optical Fiber With Mini Converter Optical Fiber you can convert SDI to Optical Fiber and Optical Fiber to SDI simultaneously. Mini Converter Optical Fiber automatically switches between SD/HD/3G-SDI video standards and both directions are completely independent. Use this converter if you need to send and receive SDI signals over longer distances than traditional SDI cables will support. -
Page 77: Mini Converter Optical Fiber 4K
Mini Converter Optical Fiber 4K Convert SD/HD and single link 6G-SDI to Optical Fiber and Optical Fiber to SD/HD and single link 6G-SDI simultaneously. Mini Converter Optical Fiber 4K automatically switches between SD/HD/3G/6G-SDI video standards and both directions are completely independent. Use this converter if you need to send and receive SDI signals over longer distances than traditional SDI cables will support. -
Page 78: Mini Converter Optical Fiber 12G
Mini Converter Optical Fiber 12G This converter converts SD and HD video up to 12G-SDI to optical fiber and the other way around simultaneously. The socket for the SFP type optical fiber module can be fitted with a compatible SFP optical fiber module that supports up to 3G, 6G or 12G-SDI video. -
Page 79: Mini Converter Quad Sdi To Hdmi 4K
Mini Converter Quad SDI to HDMI 4K Your Mini Converter Quad SDI to HDMI 4K can connect single link, dual link and quad link SDI Ultra HD to the latest Ultra HD projectors and televisions that support Ultra HD over a single HDMI link. -
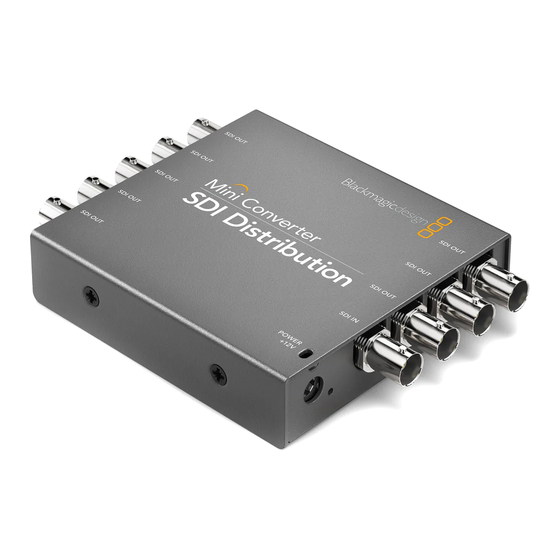
Page 80: Mini Converter Sdi Distribution
Mini-B USB port Connects to the Converters Setup software via your Mac OS or Windows computer. The Mini Converter’s internal software is also updated using the USB port. HDMI HDMI type A video output. POWER +12V 12 volt power supply input. Mini Converter Quad SDI to HDMI 4K Block Diagram SDI In 1 SDI In 2... -
Page 81: Mini Converter Sdi Distribution 4K
Mini Converter SDI Distribution Block Diagram SDI Out SDI Out SDI Out SDI In 8 Output SDI Out Re-clocking Distribution SDI Out Amplifier SDI Out SDI Out SDI Out Mini Converter SDI Distribution 4K Your Mini Converter SDI Distribution 4K outputs your SDI signal to eight SDI destinations simultaneously, such as decks, monitor walls and switchers. -
Page 82: Mini Converter Sdi Multiplex 4K
Mini Converter SDI Multiplex 4K Your Mini Converter SDI Multiplex 4K can perform the following conversions: ͽ Distribute an SD/HD and 6G-SDI signal to all four outputs. ͽ Distribute a dual link HD-SDI signal to all four 3G-SDI outputs. ͽ Single link 3G-SDI to dual link HD-SDI. The dual link output is distributed on both pairs of outputs. - Page 83 SDI IN 4 ͽ Quad link HD-SDI Ultra HD channel D Mini-B USB Port Connects to the Converters Setup software via your Mac OS or Windows computer. The Mini Converter’s internal software can also be updated using the USB port. Supported formats are listed under each SDI output: SDI OUT 1 ͽ...
- Page 84 The switch legend on the base of your converter gives you all the information you need to change conversion settings. Mini Switch Settings Example Convert quad link Ultra HD to dual link Ultra HD by setting switch 8 to ON, and switch 7 to OFF. SDI Connection Table Conversion Switch 8...
-
Page 85: Mini Converter Sync Generator
Mini Converter SDI Multiplex 4K Block Diagram Cable Cable SDI IN 1 SDI OUT 1 Driver Cable Cable SDI IN 2 SDI OUT 2 Driver Central Processor and Firmware Cable Cable SDI IN 3 SDI OUT 3 Driver Cable Cable SDI IN 4 SDI OUT 4 Driver... - Page 86 Switches Mini Converter Sync Generator’s switches provide the following settings: Switch 4, 3, 2 and 1 - SYNC REF FORMAT BIT 3, 2, 1 and 0 Switches 4, 3, 2 and 1 are grouped together to select from many reference video formats, including: The switch legend on the base of your converter gives you all the information you need to change conversion settings.
-
Page 87: Mini Converter Updowncross
Video Format Switch 4 Switch 3 Switch 2 Switch 1 Switch Diagram 1080p23.98 1080p24 1080p25 1080p29.97 1080p30 Mini Converter Sync Generator Block Diagram Ref Out Ref Out Crystal Locked Central Ref Out Black Burst and Processor and HD Tri-Sync Firmware Ref Out Generator Ref Out... - Page 88 Connectors SDI OUT SDI video outputs BNC connectors. Mini-B USB port Connects to the Converters Setup software via your Mac OS or Windows computer. The Mini Converter’s internal software is also updated using the USB port. SDI LOOP Direct output of your input video. SDI IN SDI Input.
- Page 89 conversion Switch 8 Switch 7 Switch Diagram Pillarbox 4:3 Ratio Image 16:9 Ratio Display 14:9 Pillarbox 4:3 Ratio Image 16:9 Ratio Display 16:9 De-Squeeze 16:9 Ratio Image 4:3 Ratio Display You’ve probably noticed switches 8 and 7 share settings for up and down conversions. This is because aspect ratio settings are determined by the output settings.
- Page 90 Mini Switch Settings Example: Set the converter to up convert 4:3 625i50 video to 1080i50 with the 4:3 Pillarbox aspect ratio by setting switches 8 and 7 to the OFF position and switches 3, 2 and 1 to the ON position. The switch legend on the base of your converter gives you all the information you need to change conversion settings.
-
Page 91: Mini Converter Updowncross Hd
NTSC 720p 1080 Switches Switch Switches Switches Input Video 1 and 2 ON 1 ON 1 and 3 ON 1, 2 and 3 ON 1080p30 525i59.94 625i50 720p60 1080p30 1080i50 525i59.94 625i50 720p50 1080i50 1080i59.94 525i59.94 625i50 720p59.94 1080i59.94 1080i60 525i59.94 625i50 720p60... - Page 92 When conversion processing is set to OFF the HDMI and SDI outputs become loop outputs so you can feed the input signal to other HDMI and SDI equipment. SDI IN SDI OUT SDI LOOP UpDownCross HD SDI OUT HDMI IN HDMI OUT REF IN POWER...
- Page 93 Switches Mini Converter UpDownCross HD’s switches provide the following settings : Switch 1 - Processing Off - Processing On When switch 1 is set to OFF all conversions are bypassed and the converter can be used to distribute your video via both SDI and HDMI outputs. With switch 1 set to OFF the SDI and HDMI outputs match their corresponding inputs.
- Page 94 Video Format Selection Table Video Format Switch 8 Switch 7 Switch 6 Switch 5 Switch 4 Switch Diagram 525i59.94 NTSC 625i50 PAL 720p50 720p59.94 720p60 1080i50 1080i59.94 1080i60 1080PsF23.98 OFF` 1080PsF24 1080PsF25 1080PsF29.97 1080PsF30 1080p23.98 1080p24 1080p25 1080p29.97 1080p30 1080p50 1080p59.94 1080p60 Blackmagic Mini Converters...
-
Page 95: Converter Setup Utility
Converter Setup Utility The Blackmagic Converters Setup utility can be used to change settings such as aspect ratio, and update your Mini Converter’s software. All utility settings are maintained, even when the Mini Converter is switched off. You can access these settings by moving between the ‘video,’ ‘audio,’... -
Page 96: Help
Blackmagic Design Online Support Pages The latest manual, software and support notes can be found at the Blackmagic Design support center at www.blackmagicdesign.com/support. Blackmagic Design Forum The Blackmagic Design forum on our website is a helpful resource you can visit for more information and creative ideas. -
Page 97: Regulatory Notices
Regulatory Notices Disposal of Waste of Electrical and Electronic Equipment Within the European Union. The symbol on the product indicates that this equipment must not be disposed of with other waste materials. In order to dispose of your waste equipment, it must be handed over to a designated collection point for recycling. -
Page 98: Safety Information
Safety Information No operator serviceable parts inside product. Refer servicing to your local Blackmagic Design service center. Some products have the facility to connect small form-factor transceiver (SFP) optical fiber modules. Only use Laser class 1 optical SFP modules. Recommended Blackmagic Design SFP modules: ‚... -
Page 99: Warranty
Warranty Limited Warranty Blackmagic Design warrants that Blackmagic Converters will be free from defects in materials and workmanship for a period of 36 months from the date of purchase excluding connectors, cables, fiber optic modules and fuses which will be free from defects in materials and workmanship for a period of 12 months from the date of purchase.
Need help?
Do you have a question about the Micro Converter SDI to HDMI 3G and is the answer not in the manual?
Questions and answers