Table of Contents
Advertisement
Quick Links
Download this manual
See also:
User Manual
Advertisement
Table of Contents

Related Manuals for Patton electronics SL4020


Summary of Contents for Patton electronics SL4020
- Page 1 SL4020 SmartLink Analog VoIP SoHo Router Getting Started Guide Sales Office: +1 (301) 975-1000 Technical Support: +1 (301) 975-1007 E-mail: support@patton.com åWWW: www.patton.com Document Number: 09402U1-001 Rev. A Part Number: 07MSL4020-GS Revised: June 24, 2005...
- Page 2 Patton Electronics Company, Inc. 7622 Rickenbacker Drive Gaithersburg, MD 20879 USA Tel: +1 (301) 975-1000 Fax: +1 (301) 869-9293 Support: +1 (301) 975-1007 Web: www.patton.com E-mail: support@patton.com Trademark Statement The terms SmartLink, SmartLink, SmartWare, and SmartView are trademarks of Patton Electronics Company.
-
Page 3: Summary Table Of Contents
Summary Table of Contents General information............................20 SmartLink installation........................... 22 3 Home................................26 4 Network—WAN............................29 Network—LAN ............................. 41 Telephony ..............................48 System ................................64 Documentation ............................. 79 Logout ................................81 Contacting Patton for assistance ........................83 Compliance information ..........................86 Specifications .............................. -
Page 4: Table Of Contents
Table of Contents Summary Table of Contents ........................... 3 Table of Contents ............................4 List of Figures ............................... 13 List of Tables ..............................15 About this guide ............................16 Audience................................16 Structure................................16 Precautions ................................17 Safety when working with electricity .......................17 General observations ............................18... - Page 5 SmartLink 4020 Getting Started Guide Table of Contents Enabled ..............................31 Service ...............................31 Protocol ..............................31 Interface Status ............................31 Network Settings ............................31 Dynamic IP Assignment ..........................31 IP address ..............................31 MAC address ............................31 Subnet Mask .............................32 Default Gateway ............................32 Domain name ............................32 DNS address .............................32 VLAN ...............................32...
- Page 6 SmartLink 4020 Getting Started Guide Table of Contents Select Tunnel to view/modify .........................38 Enable tunnel 1 ...............................38 Remote IP Address range ..........................38 Remote security gateway ..........................38 Security Mode ..............................38 Outbound AH SPI (DEC) ..........................38 Outbound AH Authentication Algorithm .......................39 Outbound AH Authentication Key (HEX) .....................39 Outbound ESP SPI (DEC) ..........................39...
- Page 7 SmartLink 4020 Getting Started Guide Table of Contents De-Militarized Zone ............................45 Saving your work ............................45 IP Filtering ................................46 Filter IP Range ..............................46 Saving your work ............................46 Service Access ................................46 HTTP ................................46 Ping Reply ..............................47 Saving your work ............................47 Telephony ..............................48 VoIP Status ................................51 VoIP Server Registration Status...
- Page 8 SmartLink 4020 Getting Started Guide Table of Contents Saving your work ............................55 Audio/CODEC Configuration..........................56 CODECS ...............................56 Packetization ..............................56 Jitter Buffer ..............................56 Saving your work ............................56 Phone 1 & Phone 2...............................57 User Information ............................57 Phone Number ............................57 User Name ..............................57 Port ................................58 CallerID Name ............................58...
- Page 9 SmartLink 4020 Getting Started Guide Table of Contents Ring #1–8 Caller ............................61 HTTP Digest Setting ............................61 Saving your work ............................62 Speed Dial ................................62 Line 1 Speed Dial Settings ..........................62 Speed Dial Serv ............................62 Speed Dial 1–8 Phone Number/IP Dialing ....................62 Line 2 Speed Dial Settings ..........................63 Speed Dial Serv...
- Page 10 SmartLink 4020 Getting Started Guide Table of Contents Cfwd All Serv Act Keys ..........................72 Cfwd Busy Act Keys ..........................72 Cfwd Sel Act Keys .............................72 Call Waiting Act Keys ..........................72 Incoming Call Block Act Keys ........................72 Block ANC Act Keys ..........................72 Dist Ring Act Keys ............................73 Warm Line Act Keys...
- Page 11 SmartLink 4020 Getting Started Guide Table of Contents Caller Conn Polarity ..........................76 Saving your work ............................76 SNMP Configuration............................76 SNMP Trap Configuration ..........................76 IP address ..............................76 Trap Community ............................76 SNMP Community Configuration .........................77 Read Community ............................77 Write Community ............................77 SNMP System Configuration .........................77 System Description ...........................77...
- Page 12 SmartLink 4020 Getting Started Guide Table of Contents Fax and Modem Support............................89 Voice Services/Features............................90 IP Services ................................90 Management .................................90 Operating Environment ............................90 System ...................................90 Dial plans ..............................91 Introduction ................................92 Sample Dial Plans..............................92 Simple Dial Plan .............................92 Non-dialed Line Dial Plan ..........................92 Complex Dial Plan ............................92...
-
Page 13: List Of Figures
List of Figures SmartLink 4020 ............... . 21 SmartLink 4020 installation diagram . - Page 14 SmartLink 4020 Getting Started Guide List of Figures Miscellaneous section of Localization window ..........75 FXS Port Polarity section of Localization window .
-
Page 15: List Of Tables
List of Tables General conventions ..............18 Calling features . -
Page 16: About This Guide
About this guide This guide describes using the SmartLink 4020 router. Audience This guide is intended for the following users: • Operators • Installers • Maintenance technicians Structure This guide contains the following chapters and appendices: • Chapter 1 on page 20 provides information about router features and capabilities •... -
Page 17: Precautions
SmartLink 4020 Getting Started Guide About this guide Precautions Notes, cautions, and warnings, which have the following meanings, are used throughout this guide to help you become aware of potential problems. Warnings are intended to prevent safety hazards that could result in per- sonal injury. -
Page 18: General Observations
SmartLink 4020 Getting Started Guide About this guide The SmartLink is not shipped with power cables. For AC powered units, ensure that the power cable used meets all applicable standards for the coun- try in which it is to be installed, and that it is connected to a wall outlet which WARNING has earth ground. - Page 19 SmartLink 4020 Getting Started Guide About this guide Table 1. General conventions Convention Meaning < > Angle brackets indicate function and keyboard keys, such as <SHIFT>, <CTRL>, <C>, and so on.
-
Page 20: General Information
Chapter 1 General information Chapter contents SmartLink 4020 overview............................20... -
Page 21: Smartlink 4020 Overview
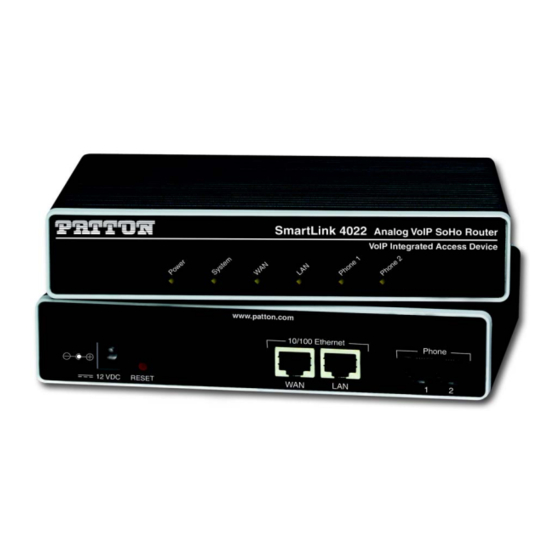
SmartLink 4020 Getting Started Guide 1 • General information SmartLink 4020 overview The SmartLink VoIP SoHo Router (see figure 1) provides transparent connectivity for analog phones and faxes to the world of Internet voice. Connecting to any analog phone, fax or PBX, the SmartLink product is an effective and flexible solution for small offices and telecommuters to access Internet-based telephone services and corporate intranet systems across established LAN and Internet connections like xDSL and cable modems. -
Page 22: Smartlink Installation
Chapter 2 SmartLink installation Chapter contents Installing the router ...............................22 Connecting the SmartLink to the network ......................24... -
Page 23: Installing The Router
SmartLink 4020 Getting Started Guide 2 • SmartLink installation Installing the router Do the following: Power adapter Internet Service Provider PC or Phone --or-- Hub/Switch www.patton.com 10/100 Ethernet Phone Power 12V, 1A Power jack Reset button WAN port LAN port Phone jack 1 Phone jack 2 Figure 2. -
Page 24: Router Front Panel Leds
SmartLink 4020 Getting Started Guide 2 • SmartLink installation Note The SmartLink has automatic MDX (auto-crossover) detection and configu- ration on all Ethernet ports. Any of the ports can be connected to a host or hub/switch with a straight-through wired cable. Connect to the Internet service provider. -
Page 25: Connecting The Smartlink To The Network
SmartLink 4020 Getting Started Guide 2 • SmartLink installation Connecting the SmartLink to the network You can check the connection with the ping command from the SmartLink to another host on the network. 172.16.1.99(if-ip)[eth0]#ping <IP Address of the host> Respectively from the host: ping 172.16.1.99 Connecting the SmartLink to the network... -
Page 26: Home
Chapter 3 Home Chapter contents System information ...............................26 System Uptime ...............................26 LAN IP Address ..............................26 MAC address ..............................26 Application Version ............................26 Config Date ..............................26 Security ................................26 Application Code Version ..........................26 Download Code Version ..........................26 System Status.................................27 SIP Messages Sent ............................27 SIP Messages Received ............................27 SIP Bytes Sent... -
Page 27: System Information
SmartLink 4020 Getting Started Guide 3 • Home System information Figure 4. SmartLink VoIP download and configuration Home page System Uptime Shows how long the SmartLink has been operating since the last time it was reset. LAN IP Address The IP address of your LAN. MAC address The media access control (MAC) address of the LAN Ethernet interface in the SmartLink. -
Page 28: System Status
SmartLink 4020 Getting Started Guide 3 • Home System Status SIP Messages Sent Total number of VoIP SIP messages sent (including retransmissions) SIP Messages Received Total number of VoIP SIP messages received (including retransmissions) SIP Bytes Sent Total number of bytes of VoIP SIP messages sent (including retransmissions) SIP Bytes Received Total number of bytes of VoIP SIP messages received (including retransmissions) RTP Packets Sent... -
Page 29: Network-Wan
Chapter 4 Network—WAN Chapter contents Status..................................30 Interface Status ...............................30 Enabled ..............................30 Service ...............................30 Protocol ..............................30 Interface Status ............................30 Network Settings ............................30 Dynamic IP Assignment ..........................30 IP address ..............................30 MAC address ............................30 Subnet Mask .............................31 Default Gateway ............................31 Domain name ............................31 DNS address .............................31 VLAN... - Page 30 SmartLink 4020 Getting Started Guide 4 • Network—WAN Enable Voice QoS ............................35 Assured Bandwidth for Voice ..........................35 Maximum Uplink Bandwidth Allowed ......................35 Saving your work ............................35 ToS/DiffServ .................................36 Saving your work ............................36 IPSec Configuration ..............................37 Select Tunnel to view/modify .........................37 Enable tunnel 1 ...............................37 Remote IP Address range...
-
Page 31: Status
SmartLink 4020 Getting Started Guide 4 • Network—WAN Status Interface Status Figure 5. Internet Status window Enabled Yes indicates the WAN interface is enabled and ready to be used. Service Either Routed or Bridged, displays the level of your WAN interface’s connection. Protocol Indicates that the Ethernet protocol is being used to transfer data. -
Page 32: Subnet Mask
SmartLink 4020 Getting Started Guide 4 • Network—WAN Subnet Mask The subnet mask is 32-bit number that filters a destination IP address to determine to which subnet it belongs. For example, a subnet mask of 255.255.0.0 for a network ID of 192.5.0.0 tells the switch to accept traffic des- tined for IP addresses that begin with 192.5—all other packets are ignored. -
Page 33: Internet Configuration
SmartLink 4020 Getting Started Guide 4 • Network—WAN Internet Configuration Figure 6. Internet Configuration section of the Settings window Device Operating Mode Choose Router or Bridged depending on your operation. Obtain WAN configuration dynamically Select this option if appropriate. If you choose Obtain WAN configuration dynamically, the information is detected automatically through DHCP. -
Page 34: Wan Pppoe Configuration
SmartLink 4020 Getting Started Guide 4 • Network—WAN WAN PPPoE Configuration Figure 7. WAN PPPoE Configuration section of the Settings window Enable PPPoE Select Yes to enable PPPoE or No to disable PPPoE. Authentication Enter the username and password provided by your ISP. Settings Idle Timeout. -
Page 35: Mac Spoofing Configuration
SmartLink 4020 Getting Started Guide 4 • Network—WAN MAC Spoofing Configuration Figure 8. MAC Spoofing Configuration section of the Settings window WAN MAC Address (Spoofed) Only available when the unit is under the router mode. The spoofed MAC address to be used by the device’s WAN interfaces, the Ethernet address of the outgoing packets from the WAN interface would be replaced with this address. -
Page 36: Saving Your Work
SmartLink 4020 Getting Started Guide 4 • Network—WAN Saving your work When you are finished configuring the VLAN settings, click the button (see figure 8 Save Internet Settings page 35) to save all changes. QoS (Quality of Service) Figure 11. QoS window Enable Voice QoS Enable or disable the voice quality of service function. -
Page 37: Tos/Diffserv
SmartLink 4020 Getting Started Guide 4 • Network—WAN ToS/DiffServ This sub-page is used to configure the Type-of-Service/Diffserv byte values which are to be used in the IP header of all transmitted SIP signaling packets and RTP packets. The ToS/DiffServ byte values are entered as two-digit hexadecimal values. -
Page 38: Ipsec Configuration
SmartLink 4020 Getting Started Guide 4 • Network—WAN IPSec Configuration This page allows configuration of the device’s IPSec (IP security) settings. Figure 13. IPSec Configuration window Select Tunnel to view/modify Select the desired tunnel from the pop-up menu. The following sections and examples assume Tunnel 1 was selected. -
Page 39: Outbound Ah Authentication Algorithm
SmartLink 4020 Getting Started Guide 4 • Network—WAN Outbound AH Authentication Algorithm HMAC-MD5 or HMAC-SHA1 Outbound AH Authentication Key (HEX) Hex number up to 40 nibbles Outbound ESP SPI (DEC) Outbound ESP security parameter index number Outbound ESP Encryption Algorithm 3DES-CBC or DES-CBC Outbound ESP Authentication Algorithm HMAC-MD5 or HMAC-SHA1... -
Page 40: Inbound Esp Authentication Key (Hex)
SmartLink 4020 Getting Started Guide 4 • Network—WAN Inbound ESP Authentication Key (HEX) Hex number up to 40 nibbles Saving your work When you are finished configuring tunnel settings, click the button to save the changes. Save Tunnel Settings IPSec Configuration... -
Page 41: Network-Lan
Chapter 5 Network—LAN Chapter contents Settings..................................41 Network Settings ............................41 Saving your work ............................41 DHCP...................................41 Server Settings ..............................42 Client IP Address Range ..........................42 Client Network Information ...........................42 Domain Name ............................42 DNS Server ...............................42 Static Address Assignment ..........................42 Viewing the DCHP Client Table ........................42 Saving your work ............................42... -
Page 42: Settings
SmartLink 4020 Getting Started Guide 5 • Network—LAN Settings Figure 14. Network Settings window Network Settings Enter the IP address and subnet mask of your LAN network. Saving your work When you are finished, click the button to save the changes. Save Settings DHCP These configuration parameters are for the internal DHCP server that will provide IP network information to... -
Page 43: Server Settings
SmartLink 4020 Getting Started Guide 5 • Network—LAN Server Settings Select Yes to enable or No disable DHCP. Client IP Address Range Minimum and Maximum limit on the DHCP IP address pool Client Network Information Domain Name LAN domain name provided to DHCP clients during the DHCP OFFER process. DNS Server This statically assigned DNS server IP address will be provided to clients during the DHCP OFFER process. -
Page 44: Routing
SmartLink 4020 Getting Started Guide 5 • Network—LAN Routing These configuration parameters are for the internal router. Figure 17. Router Configuration window Dynamic Routing Whether or not dynamic routing on the interfaces is enabled/disabled. Static Routing Under Static Routing, you can specify the routing paths of your internal network. Viewing the Routing Table Click the button to display the Routing Table (see... -
Page 45: Port Forwarding
SmartLink 4020 Getting Started Guide 5 • Network—LAN Port Forwarding Figure 19. Port Forwarding Configuration window Reserved Ports Specifies reserved ports that cannot be forwarded to the LAN. Port Forwarding to LAN In this section, you enter the specifications, which you will be forwarding to the LAN, including port range, protocol (Both, TCP or UDP), and destination IP address. -
Page 46: Ip Filtering
SmartLink 4020 Getting Started Guide 5 • Network—LAN IP Filtering Figure 20. IP Filtering window Filter IP Range A computer having an IP address that falls within the specified IP address range will not be allowed to access the Internet. Saving your work When you are finished configuring settings, click the button to save the changes. -
Page 47: Ping Reply
SmartLink 4020 Getting Started Guide 5 • Network—LAN Ping Reply Enable/disable PING echo. Saving your work When you are finished configuring settings, click the button to save the changes. Save Service Access Settings Service Access... -
Page 48: Telephony
Chapter 6 Telephony Chapter contents VoIP Status ................................50 VoIP Server Registration Status ........................50 Current Server ............................50 Domain ..............................50 Base RTP Port ............................50 Phone Line Status ............................50 ..................................50 SIP Configuration ............................51 SIP Server Settings ............................51 Gateway Settings ............................51 Dial Plan ............................. 51 SIP Extensions ..............................52 Support PRACK method... - Page 49 SmartLink 4020 Getting Started Guide 6 • Telephony Phone 1 & Phone 2...............................56 User Information ............................56 Phone Number ............................56 User Name ..............................56 Port ................................57 CallerID Name ............................57 Password ..............................57 Supplementary Service Settings ........................57 Cfwd All Serv ............................57 Cfwd No Ans Serv ............................57 Three Way Conf Serv ..........................57...
- Page 50 SmartLink 4020 Getting Started Guide 6 • Telephony Speed Dial 1–8 Phone Number/IP Dialing ....................61 Line 2 Speed Dial Settings ..........................62 Speed Dial Serv ............................62 Speed Dial 1–8 Phone Number/IP Dialing ....................62 Saving your work ............................62...
-
Page 51: Voip Status
SmartLink 4020 Getting Started Guide 6 • Telephony VoIP Status Figure 22. VoIP Status window VoIP Server Registration Status Current Server Shows the current VoIP server. Domain The VoIP domain name is the domain name that is hosting the VoIP server.. Base RTP Port Displays the base RTP port number for the RTP-RTCP port pair. -
Page 52: Sip Configuration
SmartLink 4020 Getting Started Guide 6 • Telephony Note After configuring the sections, click the button (see Save SIP Settings figure 28 on page 55) to save the new configuration. SIP Configuration Figure 23. SIP Configuration section of the SIP window SIP Server Settings The SmartLink 4020 will automatically attempt to locate the VoIP server by using the domain name specified in the WAN interface or the server will be discovered via DHCP on the WAN interface. -
Page 53: Sip Extensions
SmartLink 4020 Getting Started Guide 6 • Telephony SIP Extensions Figure 24. SIP Extensions section of the SIP window Support PRACK method Select to enable SIP PRACK support. Encode SIP URI with user parameter Select to encode user=phone parameter in SIP URI. Send INVITE with Timer header Select to encode Timer header in all INVITE requests for ringing timeout. -
Page 54: Voip Vlan Configuration
SmartLink 4020 Getting Started Guide 6 • Telephony VoIP VLAN Configuration This sub-page allows configuration of specific VLAN tags that are to be applied to all SIP signalling and RTP packets used for VoIP calls. These VLAN settings will override any general VLAN settings applied to the interface. -
Page 55: Nat Traversal
SmartLink 4020 Getting Started Guide 6 • Telephony NAT Traversal Figure 28. NAT Traversal section of the SIP window Outbound Proxy IP Type the outbound proxy IP address provided by your service provider. Outbound Proxy Port Type the outbound proxy IP port number provided by your service provider. Stun Server IP Type the stun server IP IP address provided by your service provider. -
Page 56: Audio/Codec Configuration
SmartLink 4020 Getting Started Guide 6 • Telephony Audio/CODEC Configuration Figure 29. Audio/CODEC Configuration window CODECS • Selected column: Check the codecs that are acceptable to use • Silence Suppression column: Configure as appropriate • Preferred-Codec column: Select the codec to be used as the first choice when encoding voice Packetization Configure the packet sending increments. -
Page 57: Phone 1 & Phone 2
SmartLink 4020 Getting Started Guide 6 • Telephony Phone 1 & Phone 2 The Phone 1 and Phone 2 windows contains the following sections: • User Information (see figure • Supplementary Service Settings (see figure 31 on page 58) • Dial Out Type (see figure 32 on page 60) -
Page 58: Port
SmartLink 4020 Getting Started Guide 6 • Telephony Port Specify the signaling port. CallerID Name Input the caller ID name. Password Input the password. Supplementary Service Settings These settings enable or disable each of following calling features. Most features can also be enabled or disabled by using the telephone handset (see section “Supplementary Service Keys”... -
Page 59: Call Transfer Serv
SmartLink 4020 Getting Started Guide 6 • Telephony Call Transfer Serv Enable call transfer service—This service allows you to transfer calls to another number. IP Dialing Serv Enable IP dialing service—This service allows user addresses formatted as aliases or e-mail addresses to be used to make calls. -
Page 60: Dial Out Type
SmartLink 4020 Getting Started Guide 6 • Telephony Dial Out Type Figure 32. Dial Out Type section of Phone 1 or Phone 2 window Dial Out Type This syntax allows for the implementation of Hot-Line and Warm-Line services. To achieve this, one sequence in the plan must start with a pause, with a 0 delay for a Hot Line, and a non-zero delay for a Warm Line. -
Page 61: Selective Call Forward Settings
SmartLink 4020 Getting Started Guide 6 • Telephony Selective Call Forward Settings Figure 34. Selective Call Forward Settings section of Phone 1 or Phone 2 window Incoming caller #1–8 Up to 8 incoming calls can be selected for call forwarding. Forward destination #1–8 Up to 8 destinations to which incoming calls can be forwarded. -
Page 62: Saving Your Work
SmartLink 4020 Getting Started Guide 6 • Telephony Figure 37. HTTP Digest Setting section of Phone 1 or Phone 2 window Saving your work When you are finished configuring settings, click the button (see figure 37) to save the changes. Save Speed Dial Figure 38. -
Page 63: Line 2 Speed Dial Settings
SmartLink 4020 Getting Started Guide 6 • Telephony Line 2 Speed Dial Settings Speed Dial Serv Enable Speed Dial Service. Speed Dial 1–8 Phone Number/IP Dialing Target 1–8 phone number (or URL) assigned to speed dial. Saving your work When you are finished configuring settings, click the button (see figure 38) to save the changes. -
Page 64: System
Chapter 7 System Chapter contents Set Security Password ............................66 Web Page Protect ............................66 New Root Password ............................66 New User Password ............................66 Confirm new password ...........................66 Saving your work ............................66 Configuration................................67 Logging ................................67 Enable Syslog ............................67 Syslog Server .............................67 Enable Debug ............................67 Debug Server .............................67... - Page 65 SmartLink 4020 Getting Started Guide 7 • System DND Act Keys ............................72 IP Dialing Act Keys ...........................72 Speed Dialing Act Keys ..........................72 Income CID Act Keys ..........................72 Self CID Block Keys ..........................72 Deact Keys ..............................72 Call Return Keys ............................72 W–L Num Keys ............................72 SP–D Num Keys ............................72...
- Page 66 SmartLink 4020 Getting Started Guide 7 • System Write Community ............................76 SNMP System Configuration .........................76 System Description ...........................76 System Object Id ............................76 Saving your work ............................76 Reload ...................................77...
-
Page 67: Set Security Password
SmartLink 4020 Getting Started Guide 7 • System Set Security Password Figure 39. Set Security Password window Web Page Protect Enable or disable web access protection. New Root Password Type the password for administrator. New User Password Type the password for User. Confirm new password Re-enter the password for confirmation. -
Page 68: Configuration
SmartLink 4020 Getting Started Guide 7 • System Configuration Figure 40. Configuration window Logging Enable Syslog Enable or disable system logging. Syslog Server Specify the syslog server IP address. This feature specifies the server for logging IAD system information and critical events. -
Page 69: Manual Upgrade
SmartLink 4020 Getting Started Guide 7 • System Manual Upgrade For both HTTP and TFTP methods, the device will reboot itself into the downloader mode if the main appli- cation is executing, and proceed with the ROM file download and permanent write of the application to the device’s flash memory. -
Page 70: Auto Upgrade Protocol
SmartLink 4020 Getting Started Guide 7 • System Auto Upgrade Protocol Select the protocol for auto upgrade Upgrade Server Specify the auto upgrade server IP address Auto Upgrade URL Specify the auto upgrade server by URL. This field is dependent on the auto upgrade service package installa- tion. -
Page 71: Dial Tone
SmartLink 4020 Getting Started Guide 7 • System Dial Tone Played when prompting the user to enter a phone number. Prompt Tone Played when prompting the user to enter a call forward phone number. Confirm Tone This should be a brief tone to notify the user that the last input value has been accepted. Holding Tone Indicate to the local user that the far end has placed the call on hold. -
Page 72: Supplementary Service Keys
SmartLink 4020 Getting Started Guide 7 • System Supplementary Service Keys Note Following function key must be start by ‘*’,’#’ character, or f(flash hook) and follow a 1 or 2 numeric digit(s). Figure 45. Supplementary Service Keys section of Localization Window Cfwd All Serv Act Keys Forward all calls to the target specified after the activation key. -
Page 73: Dist Ring Act Keys
SmartLink 4020 Getting Started Guide 7 • System Dist Ring Act Keys Dist Ring specified after the activation key. Warm Line Act Keys Warm Line specified after the activation key. DND Act Keys DND Act specified after the activation key. IP Dialing Act Keys IP Dialing specified after the activation key. -
Page 74: Conference Keys
SmartLink 4020 Getting Started Guide 7 • System Conference Keys Conference function key. Conference Drop Keys Drop conference call function key. Transfer Keys Call Transfer function key. Control Timer Values Figure 46. Control Timer Values section of Localization window Hook Flash Timer Maximum on-hook time before off-hook to qualify as hookflash. -
Page 75: Ring Setting
SmartLink 4020 Getting Started Guide 7 • System Ring Setting Figure 47. Ring Setting section of Localization window Ring Waveform Specify the ring tone waveform. Ring Frequency Specify the ring tone frequency. Ring Voltage Specify the ring tone voltage. Miscellaneous Choose the correct country for a proper impedance match, as well as the NTP Server, and Time Zone. -
Page 76: Fxs Port Polarity Configuration
SmartLink 4020 Getting Started Guide 7 • System FXS Port Polarity Configuration Figure 49. FXS Port Polarity section of Localization window Idle Polarity Polarity before call connected. Caller Conn Polarity Polarity after outbound call connected. Saving your work When you are finished configuring settings, click the button (see figure 49) to save the changes. -
Page 77: Snmp Community Configuration
SmartLink 4020 Getting Started Guide 7 • System SNMP Community Configuration Read Community The community name used by the SNMP manager when reading SNMP data items from a client MIB. The default value is public. Write Community The community name used by the SNMP manager when setting SNMP data items in a client’s MIB. The default value is public. -
Page 78: Reload
SmartLink 4020 Getting Started Guide 7 • System Reload Figure 51. Reset window Resetting the system will terminate all network connections and reset your browser connection. Chose the Reset and execute Main Application option, for execution of the main application which you have configure, once you reset the system. -
Page 79: Documentation
Chapter 8 Documentation Chapter contents Introduction ................................79... -
Page 80: Introduction
SmartLink 4020 Getting Started Guide 8 • Documentation Introduction Clicking the link (see figure 52) connects to the Patton website to display the most current ver- Documentation sion of the SmartLink 4020 Getting Started Guide in portable document format (PDF). Figure 52. -
Page 81: Logout
Chapter 9 Logout Chapter contents Introduction ................................81... -
Page 82: Introduction
SmartLink 4020 Getting Started Guide 9 • Logout Introduction Clicking the button (see figure 53) exits you from the SmartLink management utility and returns you Logout to the password verification page (see figure 54). Figure 53. Logout window Figure 54. Password verification page Introduction... -
Page 83: Contacting Patton For Assistance
Chapter 10 Contacting Patton for assistance Chapter contents Introduction ................................83 Contact information..............................83 Patton support headquarters in the USA ......................83 Alternate Patton support for Europe, Middle East, and Africa (EMEA) ............83 Warranty Service and Returned Merchandise Authorizations (RMAs)..............83 Warranty coverage ............................83 Out-of-warranty service ..........................84 Returns for credit... -
Page 84: Introduction
SmartLink 4020 Getting Started Guide 10 • Contacting Patton for assistance Introduction This chapter contains the following information: • “Contact information”—describes how to contact Patton technical support for assistance. • “Warranty Service and Returned Merchandise Authorizations (RMAs)”—contains information about the RAS warranty and obtaining a return merchandise authorization (RMA). -
Page 85: Out-Of-Warranty Service
SmartLink 4020 Getting Started Guide 10 • Contacting Patton for assistance Out-of-warranty service Patton services what we sell, no matter how you acquired it, including malfunctioning products that are no longer under warranty. Our products have a flat fee for repairs. Units damaged by lightning or other catastro- phes may require replacement. -
Page 86: A Compliance Information
Appendix A Compliance information Chapter contents FCC Warning ...............................86 CE-Mark Warning ..............................86 Radio and TV Interference ............................86 CE notice ................................86 ISDN compliance ............................87... -
Page 87: Compliance
SmartLink 4020 Getting Started Guide A • Compliance information Compliance EMC Compliance: FCC Part 15, Class B EN55022, Class B EN55024 Safety Compliance EN60950-1 FCC Warning This equipment has been tested and found to comply with the limits for a Class B digital device, pursuant to Part 15 of the FCC Rules. - Page 88 Appendix B Specifications Chapter contents Voice Connectivity ..............................89 Connectivity................................89 Voice Processing (signalling dependent) ........................89 Fax and Modem Support............................89 Voice Services/Features............................90 IP Services ................................90 Management .................................90 Operating Environment ............................90 System ...................................90 Compliance ................................91...
-
Page 89: B Specifications
SmartLink 4020 Getting Started Guide B • Specifications Voice Connectivity 2-wire Loopstart, RJ-11/12 Short haul loop 1.1 km @3REN Caller-ID Type-1/2 FSK and ITU V.23/Bell 202 generation Connectivity 2 10/100 Full Duplex/Autosensing Ethernet RJ-45 Voice Processing (signalling dependent) MGCP • Packet Cable NCS 1.0 •... -
Page 90: Voice Services/Features
SmartLink 4020 Getting Started Guide B • Specifications Voice Services/Features Call forwarding Call transfer Call hold Call waiting 3-way calling IP Services IPv4 router; RIPv1, v2 (RFC 1058 and 2453) IP filtering NAPT DHCP client & server PPPoE IPSEC VPN Programmable static routes ICMP redirect (RFC 792);... -
Page 91: C Dial Plans
Appendix C Dial plans Chapter contents Introduction ................................93 Sample Dial Plans..............................93 Simple Dial Plan .............................93 Non-dialed Line Dial Plan ..........................93 Complex Dial Plan ............................93... -
Page 92: Introduction
SmartLink 4020 Getting Started Guide C • Dial plans Introduction The H.323 and SIP code will allow provisioning (via web browser) of the dial plan. A dial plan gives the unit a map to determine when a complete number has been entered and should be passed to the gatekeeper for reso- lution into an IP address. - Page 93 SmartLink 4020 Getting Started Guide C • Dial plans • 2-digit star services (e.g. 69) • 10-digit long distance prefixed by 91 • International numbers starting with 9011+variable number of digits. Dial plan for this is: (0T|00T|[3-5]xxx|8xxxxxxx|*xx|91xxxxxxxxxx|9011x.T) Sample Dial Plans...
-
Page 94: Calling Features
Appendix D Calling Features Chapter contents Introduction ................................96... -
Page 95: Introduction
SmartLink 4020 Getting Started Guide D • Calling Features Introduction The SL4020 family supports advanced calling features that can be turned on and off from phones attached to the SL4020 (see table Note Your telephony service provider must enable your service for these calling features to work. -
Page 96: Ring Cadence Configuration
Appendix E Ring Cadence Configuration Chapter contents Introduction ................................96... -
Page 97: Introduction
SmartLink 4020 Getting Started Guide E • Ring Cadence Configuration Introduction The following is a sample ring cadence patter configuration: Timeval ::= time in milliseconds Repeatval ::= # of cycles to repeat Tonename ::= "RING_0" | "RING_1" | "RING_2" | "RING_3" | "RING_4" | "RING_5"...
Need help?
Do you have a question about the SL4020 and is the answer not in the manual?
Questions and answers