
Related Manuals for HP A9834-9001B


Summary of Contents for HP A9834-9001B
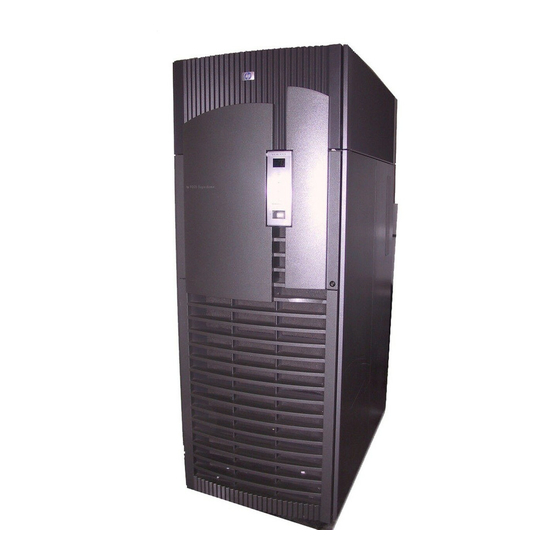
- Page 1 User Service Guide HP Integrity Superdome/sx2000 Server Second Edition Manufacturing Part Number : A9834-9001B September 2006...
-
Page 2: Legal Notices
The information contained herein is subject to change without notice. The only warranties for HP products and services are set forth in the express warranty statements accompanying such products and services. Nothing herein should be construed as constituting an additional warranty. -
Page 3: Table Of Contents
Server History and Specifications ........ - Page 4 Contents Hardware Corrected Errors ............56 Global Shared Memory Errrors .
- Page 5 Booting the HP Integrity Superdome/sx2000 to a EFI Shell .......
- Page 6 Booting SuSE Linux Enterprise Server ........
- Page 7 Powering Off the System Using the pe Command ........219 Turning On Housekeeping Power .
- Page 8 Contents...
- Page 9 Table 2-1. Server Component Dimensions ........
- Page 10 Tables...
- Page 11 Figures Figure 1-1. Superdome Cabinet............25 Figure 1-2.
- Page 12 Figure 3-46. MP Console Option ........... 126 Figure 3-47. HP Integrity Superdome/sx2000 EFI Boot Manager ......127 Figure 3-48.
- Page 13 Figures Figure C-16. Power Status First Window ..........226 Figure C-17.
- Page 14 Figures...
-
Page 15: About This Document
About This Document This document contains a system overview, system specific parameters, how to install the system, and operating system specifics for the system. -
Page 16: Intended Audience
Intended Audience This document is intended for HP trained Customer Support Consultants. Document Organization This document is organized as follows: Chapter 1 This chapter presents an historical view of the Superdome server family, describes the various server components, and describes how the server components function together. -
Page 17: Typographic Conventions
IMPORTANT Provides essential information to explain a concept or to complete a task. NOTE A note highlights useful information such as restrictions, recommendations, or important details about HP product features. • Commands and options are represented using this font. •... -
Page 18: Related Information
HP products available for free. Server Hardware Information: http://docs.hp.com/hpux/hw/ This Web site is the systems hardware portion of the docs.hp.com site. It provides HP nPartition server hardware management details, including site preparation, installation, and more. Diagnostics and Event Monitoring: Hardware Support Tools: http://docs.hp.com/hpux/diag... -
Page 19: Publishing History
Publishing History The publishing history of this document includes the following editions. Updates are made to this document on an unscheduled as needed basis. The updates consist of a complete replacement manual and pertinent Web-based or CD documentation. First Edition . -
Page 20: Hp Encourages Your Comments
HP Encourages Your Comments HP welcomes your feedback on this publication. Address your comments to edit@presskit.rsn.hp.com and note that you will not receive an immediate reply. All comments are appreciated. -
Page 21: Overview
Overview The HP superscalable sx2000 processor chipset is the new chipset for the Superdome high-end platform. It supports up to 128 PA-RISC or Intel Itanium 2 processors and provides an enterprise server upgrade path for the Superdome line of systems. The sx2000 provides the final major hardware upgrade to the Superdome platform. - Page 22 Overview - A new cell board - A new system backplane and it’s power board - A new I/O backplanes and it’s power board - New I/O - backplane cables - And the addition of a redundant, hot swappable clock source. Chapter 1...
-
Page 23: Server History And Specifications
A second release was still based upon the sx1000 CEC and included Integrity cell boards, but also added PA firmware and a dual-core PA processor. The release also included a 2GB DIMM and a new HP-UX version. The processors, processor power pods, memory, firmware, and operating system all changed for this release. -
Page 24: Server Components
They also house most (usually all) of the system's PCI cards. Systems can include both left and right cabinet assemblies containing a left or right backplane (SD64) respectively. One or more HP Rack System/E cabinets. These rack cabinets are used to hold the system peripheral devices such as disk drives. -
Page 25: Figure 1-1 Superdome Cabinet
Figure 1-1 Superdome Cabinet Blowers Cell Backplane I/O Fans I/O Chassis Power Supplies Leveling Feet Chapter 1 cell boards. Up to 128 processors can be supported. Overview Server Components Blowers Backplane Power Cables Utilities I/O Chassis PDCA Cable Groomer... -
Page 26: Power System
Overview Power System Power System The power subsystem consists of the following components: - 1 or 2 Power Distribution Component Assembly (PDCA) - 1 Front End Power Supply (FEPS) - Up to 6 Bulk Power Supplies (BPS) - 1 power board per cell - An HIOB power system - Backplane power bricks - Power monitor (PM) on the Universal Glob of Utilities (UGUY) -
Page 27: Dc Power
Overview Power System - Inline connector: Mennekes ME532C6-16, 3-phase, 5-wire, 32 Amps, 450/475 V, VDE certified, color red,IEC309-1, IEC309-2, grounded at 6:00 o'clock. - Panel-mount receptacle: Mennekes ME532R6-1276, 3-phase, 5-wire, 32 Amp, 450/475 V, VDE certified, color red, IEC309-1, IEC309-2, grounded at 6:00 o'clock. - FUSE per phase: 25 Amp (valid for Germany). -
Page 28: Cooling System
Overview Cooling System Cooling System The Superdome has four blowers and five I/O fans per cabinet. These components are all hot-swap devices. All have LEDs indicating the current status. These LEDs are self-enplanation. Temperature monitoring occurs for the following: - Inlet air for temperature increases above normal - BPS for temperature increases above normal - The I/O power board over temperature signal is monitored. - Page 29 If the failure causes a transition to N- I/O or main fans in a CPU cabinet, the cabinet is immediately powered off. If the failure causes a transition to N- I/O fans in an IOX cabinet, the I/O backplanes contained in the I/O Chassis Enclosure (ICE) containing that fan group are immediately powered off.
-
Page 30: Utilities Subsystem
The SBCH board provides USB hubs into the cabinet from an upstream HUB or the MP. No changes are planned for the sx2000. IPF Firmware - The firmware supports four different operating systems (HP-UX, Linux, Windows, OpenVMS) - The firmware is compliant with IPF industry standards (SAL, PAL, ACPI, EFI) - Provides an IPMI (intelligent platform management interface) - Supports architecture that extends across product line and next generation systems - Supports a new interface for user (mfg./diag/), etc. -
Page 31: Uguy
Overview Utilities Subsystem - Supports USB for keyboard and mouse at boot - Supports VGA during boot - Enables global shared memory (GSM) - Supports PCI 2.3, PCI-X 1.0, and PCI-X 2.0 UGUY Every cabinet contains one UGUY. Refer to Figure 1-2. The UGUY plugs into the HUCB. It is not hot swappable. -
Page 32: Pm3 Functionality
Overview Utilities Subsystem - Status LEDs for the SBA cable OL*, the cell OL*, and the I/O backplane OL* PM3 Functionality The PM3 performs the following functions: 1) FEPS control and monitoring. For each of the BPSs in the FEPS. Superdome has six BPS and the UGUY sends 5 V to the BPS for use by the fault collection circuitry. -
Page 33: Compact Flash
Overview Utilities Subsystem -The ability to process and store log entries (chassis codes) - Console functions to every partition - OL* functions - Virtual front panel and system alert notification - The ability to connect to the MP for maintenance, either locally or remotely - The ability to run diagnostics (ODE and scan) Figure 1-3 Management Processor... -
Page 34: Hucb
Overview Utilities Subsystem HUCB The HUCB, shown in Figure 1-4, is the backplane of the utility subsystem. It provides cable distribution for all the utility signals except the clocks. It also provides the customer LAN interface and serial ports. The SMS connects to the HUCB. -
Page 35: Backplane (Fabric)
Overview Backplane (Fabric) Backplane (Fabric) The system backplane assembly provides the following functionality in an sx2000 system: - Interfaces the CLU subsystem to the system backplane and cell modules - Houses the system crossbar switch fabrics and cell modules - Provides switch fabric interconnect between multiple cabinets - Generates system clock sources - Performs redundant system clock source switching - Distributes the system clock to crossbar chips and cell modules... -
Page 36: Backplane Monitor And Control
Overview Backplane (Fabric) an additional crossbar in a second backplane for a dual backplane configuration. The connection is through a high-speed cable interface to the second backplane. This 12-cable high-speed interface replaces the flex cable interface previously used on the Superdome system. Backplane Monitor and Control The backplane implements the following monitor and control functions. -
Page 37: Table 1-1. Hso Led Status Indicator Meaning
System Clock Distribution The following system components receive the system clock are the eight cell boards that plug into to the backplane, the six XBC crossbar switch chips on the system backplane. Two backplane clock power detectors – one for each 8-way sine clock power splitter are on the RCS. The backplane power detector sits at the end of the clock tree and measures the amplitude of the clock from the RCS to determine if it is providing a signal of the correct amplitude to the cell boards and XBCs. -
Page 38: Figure 1-5 Locations Of Hso And Rcs
Overview Backplane (Fabric) The HSO connects to the system backplane through an HMZD2X10 right-angle receptacle. sx2000 RCS Module The sx2000 RCS module supplies clocks to the Superdome sx2000 backplane, communicates clock alarm to the RPM, and accepts control input from the RPM. It has an I2C EEPROM on the module so that the the firmware can inventory the module on system power up. -
Page 39: Cabinet Id
Overview Backplane (Fabric) If one of the HSOs outputs does not have the correct amplitude then the RCS uses the other one as the source of clocks and sends an alarm signal to the RPM indicating which oscillator failed. The green LED is lit on the good HSO and the yellow LED is lit on the failed HSO. -
Page 40: Figure 1-6 Backplane Power Supply Module
Overview Backplane (Fabric) The backplane has two slots for power supply modules. The power supply connector for each slot has a 1-bit slot address to identify the slot. The address bit for power supply slot 0 is grounded. The address bit for slot 1 is floating on the backplane. -
Page 41: Cpus And Memories
Overview CPUs and Memories CPUs and Memories The cell provides the processing and memory resources required by each sx2000 system configuration. Each cell is comprises the following components: four processor module sockets, a single cell (or coherency) controller ASIC, a high-speed crossbar interface, a high-speed I/O interface, eight memory controller ASICs, capacity for up to 32 double-data rate (DDR) DIMMs, high-speed clock distribution circuitry, a management subsystem interface, scan (JTAG) circuitry for manufacturing test, and a low-voltage DC power interface. -
Page 42: Processor Interface
Overview CPUs and Memories The remote I/O link provides a self-correcting, high-speed communication pathway between the cell and the I/O subsystem through a pair of cables. Sustained I/O bandwidth is 5.5 GBs for a 50 percent inbound and outbound mix, and roughly 4.2 GBs for a range of mixes. The CC interfaces to the cell's memory system. The memory interface is capable of providing a sustained bandwidth of 14 to 16 GBs at 266.67 MH to the cell controller. -
Page 43: Figure 1-9 Cell Memory
Overview CPUs and Memories platforms may support DIMMs based on non monolithic (or stacked) DRAMs, which are incompatible with the sx2000. There is no support for the use of the older SDRAM DIMMs designed for Superdome. Cell memory is illustrated in Figure 1-9. Figure 1-9 Cell Memory DIMMs are named according to both physical location and loading order. - Page 44 Overview CPUs and Memories industry-standard DIMM. This increase in height allows the DIMM to accommodate twice as many DRAMs as an industry-standard DIMM and to provide redundant address and control signal contacts not available on industry-standard DDR2 DIMMs. Memory Interconnect MID bus data is transmitted via the four 72-bit, ECC-protected MID buses, each with a clock frequency equal to the CC s core frequency.
- Page 45 Overview CPUs and Memories - Cellmap (across cells) - Link (across fabrics) Memory Bank Attribute Table The MBAT interleaving is done on a per-cell basis before the partition is rendezvoused. The cell map and fabric interleaving are done after the partition has rendezvoused. SDRAM on the cell board is installed in physical units called echelons.
-
Page 46: Pdc Functional Changes
Double chip kill is an extension to memory chip kill that enables the system to correct multiple ECC errors in an ECC code word. HP labs developed the ECC algorithm and the first implementation of this technology is in platforms using the sx2000 chipset. Double chip kill is also known as DRAM erasure. -
Page 47: Platform Dependant Hardware
Overview CPUs and Memories Platform Dependant Hardware The platform dependent hardware's (PDH) includes functionality that is required by both system and management firmware. Features provided by the PDH provide the following features: - An interface that is capable of passing multiple forms of information between system firmware and the management processor (MP, on the SBC) by the platform dependant hardware controller (PDHC, on the PDH daughter card) - Flash EPROM for PDHC boot code storage. -
Page 48: I/O Subsystem
Overview I/O Subsystem I/O Subsystem The sx2000 I/O backplane (SIOBP) is an update of the sx1000 I/O backplane, with a new set of chips that increase the board’s internal bandwidth and support the newer PCI-X 2.0 protocol. The sx2000 I/O backplane uses most of the same mechanical parts as the sx1000 I/O backplane. -
Page 49: Figure 1-10 I/O Rope Mapping
SBA Chip: CC-to-Ropes The SBA chip communicates with the CC on the cell board via a pair of high-speed serial unidirectional links known as HSS or E-links. Each unidirectional E-link consists of 20 serial 8b/10b encoded differential data bits operating at 2.36 GT/s. This yields a peak total bidirectional HSS link bandwidth of 8.5 GB/s. Internally, SBA routes this high-speed data to/from one of two rope units. - Page 50 Overview I/O Subsystem PCI Slots For maximum performance and availability, each PCI slot is sourced by its own LBA chip and is supported by its own portion of a hot-plug controller. All slots are designed to Revision 2.2 of the PCI specification and Revision 2.0a of the PCI-X specification and can support full size.
- Page 51 Overview I/O Subsystem together 5.V +3.3 V auxilary will be on whenever AC is applied. The SIOBP FPGA is responsible for ensuring that each voltage is stable before enabling the next voltage. The power-down sequence is the opposite of the power-up sequence, turning off the 3.3 V voltage first and finally turning off the two 12 V supplies.
-
Page 52: New Server Cabling
Overview New Server Cabling New Server Cabling Most of the Superdome cables remain unchanged except three cables designed for the sx2000 to improve data rate and electrical performance: nn M-link cable, two types (lengths) of L-link cable, and a clock cable. -
Page 53: Figure 1-11 Backplane Cables
Overview New Server Cabling Figure 1-11 Backplane Cables Chapter 1... -
Page 54: Firmware
OS software, thereby allowing each to evolve independently of the other. The firmware supports HP-UX 11i version 2, Linux, Windows, and OpenVMS through the Itanium® processor family standards and extensions. It includes no operating systems specific functionality. Every OS is presented the same interface to system firmware, and all features are available to the OS. -
Page 55: Server Configurations
Overview Server Configurations Server Configurations Refer to the HP System Partitions Guide (5990-8170A) for extensive details on the topic of proper configurations. Also, an interactive program found on the PC SMS, titled “Superdome Partitions Revisited,” can be very useful. Basic Configuration Rules... -
Page 56: Server Errors
Overview Server Errors Server Errors To support high availability (HA), the new chipset has included functionality to do error correction, detection and recovery. Errors in the new chipset are divided into the following categories: - Protection domain access - Hardware correctable... -
Page 57: Hardware Uncorrectable Errors
After the sx2000 chipset is reset, all GSM sharing regions are disabled, thus providing error containment and preventing any corruption from spreading to other PDs. Error Logging Hardware error handling can be broken into four phases: detection, transaction handling, logging, and state behavior. Chapter 1 Overview Server Errors... - Page 58 Overview Server Errors 1. Detection is the hardware checks that realize an error has occurred. 2. Transaction handling modifies how the hardware treats the tmansaction with the detected error. 3. Logging is storing the error indication in the primary error mode register, which sets the error state for the block.
-
Page 59: System Specifications
See also Site Preparation Guide: HP High-End and Mid-Range Servers, First Edition, part number A7025-96015, at the http://docs.hp.com Web site. -
Page 60: Dimensions And Weights
System Specifications Dimensions and Weights Dimensions and Weights This section contains server component dimensions and weights for the system. Component Dimensions Table 2-1 lists the dimensions for the cabinet and components. Table 2-2 list the dimensions for optional I/O expansion (IOX) cabinets. -
Page 61: Component Weights
Component Weights Table 2-3 lists the server and component weights. Table 2-4 lists the weights for optional I/O expansion (IOX) cabinets. NOTE Refer to the appropriate documents to determine the weight of the Support Management Station (SMS) and any console that will be used with this server. -
Page 62: Shipping Dimensions And Weights
System Specifications Dimensions and Weights Shipping Dimensions and Weights Table 2-5 lists the dimensions and weights of the Support Management Station and a single cabinet with shipping pallet. Table 2-5 Miscellaneous Dimensions and Weights Width Equipment (in / cm) System on shipping 39.00 / 99.06 a b c pallet... -
Page 63: Electrical Specifications
Electrical Specifications The following specifications are based on ASHRAE Class 1. Class 1 is a controlled computer room environment, in which products are subject to controlled temperature and humidity extremes. Throughout this chapter each specification is defined as thoroughly as possible to ensure that all data is considered to ensure a successful site preparation and system installation. -
Page 64: Table 2-7. Option 6 And 7 Specifics
System Specifications Electrical Specifications Table 2-6 Available Power Options (Continued) Source Source Voltage Option Type (Nominal) 3-phase Voltage range 200 to 240 V ac, phase-to-neutral, 50 Hz / 60 Hz a. A dedicated branch circuit is required for each PDCA installed. Table 2-7 Option 6 and 7 Specifics PDCA... -
Page 65: System Power Requirements
PDCA Locations System Power Requirements Table 2-8 and Table 2-9 list the ac power requirements for an HP Integrity Superdome/sx2000 system. These tables provide information to help determine the amount of ac power needed for your computer room. Table 2-8... -
Page 66: Component Power Requirements
Component Power Requirements Table 2-8 and Table 2-9 list the ac power requirements for an HP Integrity Superdome/sx2000 system. These tables provide information to help determine the amount of ac power needed for the computer room. -
Page 67: I/O Expansion Cabinet Power Cords
Table 2-10 I/O Expansion Cabinet Power Requirements (Without Support Management Station) Requirement Nominal input voltage Input voltage range (minimum to maximum) Frequency range (minimum to maximum) Number of phases Marked electrical input current Maximum inrush current Power factor correction Table 2-11 I/O Expansion Cabinet Component Power Requirements Component Fully configured cabinet... -
Page 68: Environmental Requirements
Table 2-15 lists the power requirements by configuration (number of cell boards, amount of memory per cell, and number of I/O chassis) for the HP Integrity Superdome/sx2000. The table contains two columns of power numbers expressed in watts. The Breaker Power column lists the power used to size the wall breaker at the installation site. -
Page 69: Table 2-15. Typical Hp Integrity Superdome/Sx2000 For Dual-Core Cpu Configurations
Do not connect a 380 to 415 V ac supply to a 4-wire PDCA. This is a safety hazard and will result in damage to the product. Line-to-line or phase-to-phase voltage measured at 380 to 415 V ac must always be connected using a 5-wire PDCA. Table 2-15 Typical HP Integrity Superdome/sx2000 for Dual-core CPU Configurations Typical Cell... -
Page 70: Table 2-16. Typical Hp Integrity Superdome/Sx2000 For Single-Core Cpu Configurations
A 5-wire source utilizes a 4-pole breaker, and a 4-wire source utilizes a 3-pole breaker. The protective earth (PE) ground wire is not switched. Table 2-16 Typical HP Integrity Superdome/sx2000 for Single-core CPU Configurations Typical Cell Memory... - Page 71 System Specifications Environmental Requirements b. These numbers are valid only for the specific configurations shown. Any upgrades may require a change to the breaker size. A 5-wire source utilizes a 4-pole breaker, and a 4-wire source utilizes a 3-pole breaker. The protective earth (PE) ground wire is not switched.
-
Page 72: Acoustic Noise Specification
These levels are appropriate for dedicated computer room environments, not office environments. You must understand the acoustic noise specifications relative to operator positions within the computer room when adding HP Integrity Superdome/sx2000 systems to computer rooms with existing noise sources. Chapter 2... -
Page 73: Airflow
Figure 2-2 Airflow Diagram Airflow exit (300 CFM) A thermal report for the HP Integrity Superdome/sx2000 server is provided in Table 2-17 on page 74. Chapter 2 Environmental Requirements Airflow exit (2600 CFM) Air flows front to rear (2750 CFM) System Specifications ο... -
Page 74: Table 2-17. Physical Environmental Specifications
System Specifications Environmental Requirements Table 2-17 Physical Environmental Specifications Voltage 200–240 Vac Typical Heat Release Description Watts Minimum Configuration 3423 Maximum Configuration 9130 Typical Configuration 6968 ASHRAE Class a. Derate maximum dry bulb temperature 1oC/300 m above 900 m. b. The system deviates slightly from front to top and rear airflow protocol. Approximately 5 percent of the system airflow is drawn in from the rear of the system. -
Page 75: Installing The System
Installing the System This chapter describes installation of an HP Integrity Superdome/sx2000 system. Installers must have received adequate training, be knowledgeable about the product, and have a good overall background in electronics and customer hardware installation. Chapter 3... -
Page 76: Introduction
Installing and using the system in strict accordance with instructions provided by HP minimizes the chances that the system will cause radio or television interference. However, HP does not guarantee that the system will not interfere with radio and television reception. -
Page 77: Unpacking And Inspecting The System
Checking the Inventory The sales order packing slip lists all equipment shipped from HP. Use this packing slip to verify that all equipment has arrived at the customer site. -
Page 78: Inspecting The Shipping Containers For Damage
Unpacking and Inspecting the System Inspecting the Shipping Containers for Damage HP shipping containers are designed to protect their contents under normal shipping conditions. After the equipment arrives at the customer site, carefully inspect each carton for signs of shipping damage. -
Page 79: Figure 3-1 Normal Tilt Indicator
Figure 3-1 Normal Tilt Indicator Tilt indicator Figure 3-2 Abnormal Tilt Indicator NOTE If the tilt indicator shows that an abnormal shipping condition has occurred, write “possible hidden damage” on the bill of lading and keep the packaging. Chapter 3 Installing the System Unpacking and Inspecting the System Retaining... -
Page 80: Unpacking And Inspecting Hardware Components
HP Sales and Service Office. If damage occurred in transit, notify the carrier as well. HP will arrange for replacement or repair without waiting for settlement of claims against the carrier. In the event of damage in transit, retain the packing container and packaging materials for inspection. -
Page 81: Figure 3-3 Front Of Cabinet Container
WARNING Use three people to unpack the cabinet safely. HP recommends removing the cardboard shipping container before moving the cabinet into the computer room. If unpacking the cabinet in the computer room, be sure to position it so that it can be moved NOTE into its final position easily. -
Page 82: Figure 3-4 Cutting Polystrap Bands
Installing the System Unpacking and Inspecting the System Figure 3-4 Cutting Polystrap Bands Step 3. Lift the cardboard corrugated top cap off of the shipping box. Step 4. Remove the corrugated sleeves surrounding the cabinet. CAUTION Cut the plastic wrapping material off rather than pull it off. Pulling the plastic covering off represents an electrostatic discharge (ESD) hazard to the hardware. -
Page 83: Figure 3-5 Removing The Ramps From The Pallet
Installing the System Unpacking and Inspecting the System Figure 3-5 Removing the Ramps from the Pallet Ramps Chapter 3... -
Page 84: Figure 3-6 Location Of Power Supply Mounting Screws
Some damage can be repaired by replacing the damaged part. If extensive damage is found, it may be necessary to repack and return the entire cabinet to HP. Inspecting the Cabinet Inspect the cabinet exterior for signs of shipping damage. -
Page 85: Figure 3-7 I/O Chassis Mounting Screws
Step 3. Verify that the I/O chassis mounting screws are in place and secure (Figure 3-7). Inspect all components for signs of shifting during shipment or any signs of damage. Figure 3-7 I/O Chassis Mounting Screws Moving the Cabinet Off the Pallet Step 1. -
Page 86: Figure 3-8 Shipping Strap Location
Installing the System Unpacking and Inspecting the System Figure 3-8 Shipping Strap Location Step 2. Remove the pallet mounting brackets and pads on the side of the pallet where the ramp slots are located (Figure 3-9). Figure 3-9 Removing the Mounting Brackets Shipping strap Chapter 3... -
Page 87: Figure 3-10 Positioning The Ramps
WARNING Do not remove the bolts on the mounting brackets that attach to the pallet. These bolts prevent the cabinet from rolling off the back of the pallet. Step 3. On the other side of the pallet, remove only the bolt on each mounting bracket that is attached to the cabinet. -
Page 88: Unpacking The Pdca
Installing the System Unpacking and Inspecting the System Step 5. Carefully roll the cabinet down the ramp (Figure 3-11). Figure 3-11 Rolling the Cabinet Down the Ramp Step 6. Unpack any other cabinets that were shipped. Unpacking the PDCA At least one power distribution control assembly (PDCA) is shipped with the system. In some cases, the customer may have ordered two PDCAs, the second to be used as a backup power source. -
Page 89: Returning Equipment
Returning Equipment If the equipment is found to be damaged, use the original packing material to repackage the cabinet for shipment. If the packing material is not available, contact the local HP Sales and Support Office regarding shipment. Before shipping, place a tag on the container or equipment to identify the owner and the service to be performed. - Page 90 Repackaging To repackage the cabinet, perform the following steps: Step 1. Assemble the HP packing materials that came with the cabinet. Step 2. Carefully roll the cabinet up the ramp. Step 3. Attach the pallet mounting brackets to the pallet and the cabinet.
-
Page 91: Setting Up The System
Setting Up the System After a site has been prepared, the system has been unpacked, and all components have been inspected, the system can be prepared for booting. Moving the System and Related Equipment to the Installation Site Carefully move the cabinets and related equipment to the installation site but not into the final location. If the system is to be placed at the end of a row, you must add side bezels before positioning the cabinet in its final location. -
Page 92: Figure 3-13 Removing Protective Cardboard From The Housing
Installing the System Setting Up the System This cardboard protects the housing baffle during shipping. If it is not removed, the fans will not work properly. Figure 3-13 Removing Protective Cardboard from the Housing NOTE Double-check that the protective cardboard has been removed. Step 3. -
Page 93: Figure 3-15 Installing The Front Blower Housing
Step 4. Using the handles on the housing labeled Blower 0 Blower 1, part number A5201-62030, align the edge of the housing over the edge at the top front of the cabinet, and slide it into place until the connectors at the back of each housing are fully mated (Figure 3-15). Then tighten the thumbscrews at the front of the housing. -
Page 94: Attaching The Side Skins And Blower Side Bezels
Installing the System Setting Up the System Step 7. Tighten the thumbscrews at the front of each blower. Step 8. If required, install housings on any other cabinets that were shipped with the system. Attaching the Side Skins and Blower Side Bezels Two cosmetic side panels affix to the left and right sides of the system. -
Page 95: Figure 3-18 Attaching The Front Side Skins
Step 3. Attach the skin without the lap joint (Front) over the top bracket and under the bottom bracket and gently slide the skin into position. Figure 3-18 Attaching the Front Side Skins Step 4. Push the side skins together, making sure the skins overlap at the lap joint. Attaching the Blower Side Bezels The bezels are held on at the top by the bezel lip, which fits over the top of the blower housing frame, and are secured at the bottom by tabs that fit into slots on the cabinet side panels (Figure 3-19). -
Page 96: Figure 3-19 Attaching The Side Bezels
Installing the System Setting Up the System Step 1. Place the side bezel slightly above the blower housing frame. Figure 3-19 Attaching the Side Bezels Tab (2) Brackets Blower side bessel (See detail) Notches Step 2. Align the lower bezel tabs to the slots in the side panels. Step 3. -
Page 97: Attaching The Leveling Feet And Leveling The Cabinet
Step 6. To secure the side bezels to the side skins, attach the blower bracket locks (HP part number A5201-00268) to the front and back blowers using a T-20 driver. There are two blower bracket locks on the front blowers and two on the rear. -
Page 98: Figure 3-21 Installing The Lower Front Door Assembly
Installing the System Setting Up the System NOTE The procedure in this section requires two people and must be performed with the front metal chassis door open. To install the front door assembly: Step 1. Open the door, unsnap the screen, and remove all the filters held in place with Velcro. Step 2. -
Page 99: Figure 3-22 Installing The Upper Front Door Assembly
Figure 3-22 Installing the Upper Front Door Assembly Step 6. Feed the grounding strap through the door and attach it to the cabinet. Step 7. Insert the shoulder studs on the upper door bezel into the holes on the front door metal chassis. Step 8. -
Page 100: Figure 3-23 Installing The Rear Blower Bezel
Installing the System Setting Up the System Figure 3-23 Installing the Rear Blower Bezel Step 3. Align the bezel over the nuts that are attached to the bracket at the rear of the cabinet. Step 4. Using a T-20 driver, tighten the two captive screws on the lower flange of the bezel. Tighten the screws securely to prevent them from interfering with the door. -
Page 101: Wiring Check
Figure 3-24 Installing the Front Blower Bezel Step 3. Align the bezel over the nuts that are attached to the bracket at the front of the cabinet. Step 4. Using a T-20 driver, tighten the two captive screws on the lower flange of the bezel. Tighten the screws securely to prevent them from interfering with the door. - Page 102 Required method of grounding is to connect the green power cord safety ground to the site ground point. This is accomplished through the power cord receptacle wiring. HP does not recommend cabinet grounding. Cabinet grounding should be treated as auxiliary or additional grounding over and above the ground wire included within the supplied power cord.
-
Page 103: Installing And Verifying The Pdca
Installing and Verifying the PDCA All systems are delivered with the appropriate cable plug for options 6 and 7 (Figure 3-25 on page 104). Check the voltages at the receptacle prior to plugging in the PDCA plug. • To verify the proper wiring for a 4-wire PDCA, use a DVM to measure the voltage at the receptacle. Voltage should read 200 to 240V ac phase-to-phase as measured between the receptacle pins as follows: L1 to L2, L2 to L3, L1 to L3 (Figure 3-26 on page 104). -
Page 104: Figure 3-25. Pdca Assembly For Options 6 And 7
Installing the System Setting Up the System Figure 3-25 PDCA Assembly for Options 6 and 7 Figure 3-26 A 4-Wire Connector Chapter 3... -
Page 105: Figure 3-27 A 5-Wire Connector
Installing the System Setting Up the System Figure 3-27 A 5-Wire Connector Use the following procedure to install the PDCA: Make sure the circuit breaker on the PDCA is OFF. WARNING Step 1. Remove the rear PDCA bezel by removing the four retaining screws. Step 2. -
Page 106: Figure 3-28 Installing The Pdca
Installing the System Setting Up the System Figure 3-28 Installing the PDCA Step 4. Using a T-20 driver, attach the four screws that hold the PDCA in place. Step 5. If required, repeat step 2 through step 4 for the second PDCA. Step 6. -
Page 107: Table 3-3. 4- And 5-Wire Voltage Ranges
Figure 3-29 Checking PDCA Test Points (5-Wire) (See detail) Retaining screw Table 3-3 4- and 5-Wire Voltage Ranges 4-Wire L2 to L3: 200-240 V L2 to L1: 200-240 V L1 to L3: 200-240 V a. Neutral to ground voltage can vary from millivolts to several volts depending on the distance to the ground/neutral bond at the transformer. -
Page 108: Voltage Check
AC input voltage is within limits. NOTE If a UPS is used, refer to applicable UPS documentation for information to connect the server and to check the UPS output voltage. UPS User Manual documentation is shipped with the UPS. -
Page 109: Figure 3-31 Power Supply Indicator Led Detail
Use properly insulated probes. Be sure to replace access cover when finished testing primary power. Step 10. Set the server power to Step 11. Check that the indicator LED on each power supply is lit. See Figure 3-31. Figure 3-31 Power Supply Indicator LED Detail... -
Page 110: Removing The Emi Panels
Installing the System Setting Up the System Removing the EMI Panels Remove the front and back electromagnetic interference (EMI) panels to access ports and to visually check whether components are in place and the LEDs are properly illuminated when power is applied to the system. To remove the front and back EMI panels: Step 1. -
Page 111: Connecting The Cables
Figure 3-33 Removing the Back EMI Panel Back EMI panel screw Step 4. Use the handle provided to gently remove the EMI panel and set it aside. Connecting the Cables The I/O cables are attached and tied inside the cabinet. When the system is installed, these cables must be untied, routed, and connected to the cabinets where the other end of the cables terminate. -
Page 112: Routing The I/O Cables
Installing the System Setting Up the System Figure 3-34 Cable Labeling Routing the I/O Cables Routing the cables is a significant task in the installation process. Efficient cable routing is important not only for the initial installation, but also to aid in future service calls. Neatness counts. -
Page 113: Figure 3-35 Routing I/O Cables
Figure 3-35 Routing I/O Cables Use the following procedure and guidelines to route cables through the cable groomer at the bottom rear of the cabinet. Step 1. Remove the cable access plate at the bottom of the groomer. Step 2. Beginning at the front of the cabinet, route the cables using the following pattern: a. - Page 114 Installing the System Setting Up the System Step 3. Connect the management processor cables last. Step 4. Reattach the cable access plate at the bottom of the cable groomer. Step 5. Reattach the cable groomer kick plate at the back of the cabinet. Step 6.
-
Page 115: Installing The Support Management Station
SMS. The SMS software is pre-loaded at the factory. If you have an existing SMS, install the latest scan firmware using the appropriate bundle for a Windows-based SMS or HP-UX SMS. See WTEC Current Issue 1911 for where to find scan, firmware, and EIT tools. -
Page 116: Configuring The Event Information Tools
Where to Find the EIT Documentation The latest documentation for setting up and configuring these tools is available at: http://docs.hp.com/en/diag.html Once you are at the Web site, select the category, “Event Information Tools (EIT) - formerly SMS”. You will find documentation for each of the following areas: •... -
Page 117: Turning On Housekeeping Power
Turning On Housekeeping Power Use the following procedure to turn on housekeeping power to the system: Step 1. Verify that the ac voltage at the input source is within specifications for each cabinet being installed. Step 2. Ensure that: • The ac breakers are in the OFF position. -
Page 118: Figure 3-36 Front Panel With Housekeeping (Hkp) Power On And Present Leds
Installing the System Turning On Housekeeping Power Figure 3-36 Front Panel with Housekeeping (HKP) Power On and Present LEDs Step 5. Examine the bulk power supply (BPS) LEDs (Figure 3-37). When on, the breakers on the PDCA distribute ac power to the BPSs. Power is present at the BPSs when: •... -
Page 119: Figure 3-37 Bps Leds
Installing the System Turning On Housekeeping Power Figure 3-37 BPS LEDs BPS LEDs Chapter 3... -
Page 120: Connecting The Mp To The Customer Lan
Installing the System Connecting the MP to the Customer LAN Connecting the MP to the Customer LAN This section discusses how to connect, set up, and verify the management processor (MP) to the customer LAN. LAN information includes the MP network name (host name), the MP IP address, the subnet mask, and gateway address. -
Page 121: Setting The Customer Ip Address
Setting the Customer IP Address NOTE The default IP address for the customer LAN port on the MP is 192.168.1.1. To set the customer LAN IP address: Step 1. From the MP Command Menu prompt (MP:CM>), enter lc (for LAN configuration). The screen displays the default values and asks if you want to modify them. -
Page 122: Figure 3-40 The Ls Command Screen
This is the host name for the customer LAN. You can use any name you like. The name can be up to 64 characters long, and can include alphanumerics, dash (-), under score (_), period (.), or space. HP recommends that the name be a derivative of the complex name. For example, Maggie.com_MP. -
Page 123: Booting And Verifying The System
Booting and Verifying the System After installing the system, verify that the proper hardware is installed and booted. This section describes how to power on the cabinet and boot and test each partition. A console window must be open for each partition. Two additional windows must also be open: one window for initiating reset on partitions and the other for monitoring system partition status. -
Page 124: Figure 3-42 Main Mp Menu
Installing the System Booting and Verifying the System The MP Main Menu appears as shown in Figure 3-42. Figure 3-42 Main MP Menu Step 3. Repeat the first two steps for each partition required. Step 4. In one window bring up the command prompt by entering cm at the MP> prompt as shown in Figure 3-43. -
Page 125: Figure 3-44 Mp Virtual Front Panel
Figure 3-44 MP Virtual Front Panel Step 6. From the VFP menu, enter s to select the whole system, or enter the partition number to select a particular partition. An output similar to that shown in Figure 3-45 appears. In this example, no status is listed because the system 48 V has not been switched on. -
Page 126: Powering On The System 48 V Supply
IMPORTANT The MP should be running in each window. As the cabinet boots, observe the partition activity in the window displaying the VFP. Step 2. For HP Integrity Superdome/sx2000 systems, follow the procedure in “Booting the HP Integrity Superdome/sx2000 to a EFI Shell” on page 127. -
Page 127: Booting The Hp Integrity Superdome/Sx2000 To A Efi Shell
Installing the System Booting and Verifying the System Booting the HP Integrity Superdome/sx2000 to a EFI Shell After powering on or using the CM bo command, all partition console windows will show activity while the firmware is initialized and will stop momentarily at an EFI Boot Manager menu (Figure 3-47). -
Page 128: Figure 3-48 Efi Shell Prompt
Installing the System Booting and Verifying the System Figure 3-48 EFI Shell Prompt NOTE If autoboot is enabled for an nPartition, you must interrupt it to stop the boot process at the EFI firmware console. At this point, the Virtual Front Panel indicates that each partition is at system firmware console as indicated in Figure 3-49. -
Page 129: Verifying The System
Figure 3-49 HP Integrity Superdome/sx2000 Partitions at System Firmware Console Verifying the System Use the following procedure to verify the system: Step 1. From the CM> prompt, enter ps to observe the power status. A status screen similar to the one in Figure 3-50 should appear. -
Page 130: Figure 3-51 Power Status Window
Installing the System Booting and Verifying the System Step 2. At the Select Device: prompt, enter b then the cabinet number to check the power status of the cabinet. Observe Power Switch: on and Power: enabled as shown in Figure 3-51. Figure 3-51 Power Status Window Figure 3-51 shows that cells are installed in slots 0 and 4. - Page 131 Installing the System Booting and Verifying the System IMPORTANT An asterisk (*) appears in the MP column only for cabinet 0; that is, the cabinet containing the MP. Only cabinet 0 contains the MP. Verify that there is an asterisk (*) for each of the cells installed in the cabinet by comparing what is in the Cells column with the cells located inside the cabinet.
-
Page 132: Running Jet Software
• in the \opt\scansw\docs\stt directory on the Windows • in the /opt/scansw/docs/stt directory on the HP-UX Support Management Station. IMPORTANT Once scan testing has successfully completed, reset the complex by cycling the AC power. Power Cycling After Using JET After using JET, you must recycle the system power because the offline diagnostic can deallocate the CPUs. -
Page 133: Offline Diagnostic Environment (Ode)
Installing the System Offline Diagnostic Environment (ODE) Offline Diagnostic Environment (ODE) Now that scan has been run, you can run all the appropriate diagnostics for this system. See the appropriate diagnostic documentation for instructions. Chapter 3... -
Page 134: Attaching The Rear Kick Plates
Installing the System Attaching the Rear Kick Plates Attaching the Rear Kick Plates Kick plates protect cables from accidentally being disconnected or damaged and add an attractive cosmetic touch to the cabinet. You need to attach three metal kick plates to the bottom rear of the cabinet. To install the kick plates: Step 1. -
Page 135: Performing A Visual Inspection And Completing The Installation
Performing a Visual Inspection and Completing the Installation After booting the system, carefully inspect it and reinstall the EMI panels. Here are the steps required to perform a final inspection and complete the installation: Step 1. Visually inspect the system to verify that all components are in place and secure. Step 2. -
Page 136: Figure 3-55 Front Emi Panel Flange And Cabinet Holes
Installing the System Performing a Visual Inspection and Completing the Installation Step 4. Reinstall the front EMI panel (Figure 3-55). Figure 3-55 Front EMI Panel Flange and Cabinet Holes a. Hook the flange at the lower corners of the EMI panel into the holes on the cabinet. b. -
Page 137: Figure 3-56 Reinstalling The Back Emi Panel
a. Align the lip inside the cabinet with the lip on the EMI panel. Figure 3-56 Reinstalling the Back EMI Panel panel lip b. Push the EMI panel up and in. The EMI gasket may have to be compressed at the top of the enclosure to get the panel to seat properly. -
Page 138: Conducting A Post Installation Check
Enter information in the Gold Book. When the installation and cleanup are complete, make the appropriate notations in the Gold Book shipped with the system. • Obtain customer acceptance (if required). This includes thanking the customer for choosing HP. Chapter 3... -
Page 139: Booting And Shutting Down The Operating System
Booting and Shutting Down the Operating System This chapter presents procedures for booting an operating system (OS) on an nPartition (hardware partition) and procedures for shutting down the OS. Chapter 4... -
Page 140: Operating Systems Supported On Cell-Based Hp Servers
Refer to “Booting and Shutting Down HP OpenVMS I64” on page 153 for details. • Red Hat Enterprise Linux 4 Update 4— On servers based on the HP sx2000 chipset, is supported only in nPartitions that have dual-core Intel® Itanium® 2 processors. Prior releases of Red Hat Enterprise Linux are not supported on servers based on the HP sx2000 chipset. -
Page 141: System Boot Configuration Options
At the EFI Shell, the bcfg command supports listing and managing the boot options list for all OSs except Microsoft Windows. On HP Integrity systems with Windows installed the \MSUtil\nvrboot.efi utility is provided for managing Windows boot options from the EFI Shell. On HP Integrity systems with OpenVMS installed, the \efi\vms\vms_bcfg.efi and \efi\vms\vms_show utilities are provided for managing OpenVMS boot options. - Page 142 — To set HP-UX boot options refer to “Adding HP-UX to the Boot Options List” on page 145. — To set OpenVMS boot options refer to “Adding HP OpenVMS to the Boot Options List” on page 153. — To set Windows boot options refer to “Adding Microsoft Windows to the Boot Options List” on page 158.
- Page 143 For details, refer to “ACPI Configuration for HP-UX Must Be default” on page 147. — HP OpenVMS I64 ACPI Configuration: default On cell-based HP Integrity servers, to boot or install the HP OpenVMS I64 OS, you must set the ACPI configuration value for the nPartition to default.
- Page 144 To display or set the boot mode for an nPartition on a cell-based HP Integrity server, use any of the following tools as appropriate. Refer to Installing and Managing HP-UX Virtual Partitions (vPars), Sixth Edition, for details, examples, and restrictions.
-
Page 145: Booting And Shutting Down Hp-Ux
To determine whether the cell local memory (CLM) configuration is appropriate for HP-UX, refer to “HP-UX Support for Cell Local Memory” on page 145. • To add an HP-UX entry to the nPartition boot options list on an HP Integrity server, refer to “Adding HP-UX to the Boot Options List” on page 145. •... -
Page 146: Booting Hp-Ux
From the EFI Boot Manager menu, select the EFI Shell menu option to access the EFI Shell environment. Step 2. Access the EFI System Partition for the device from which you want to boot HP-UX (fsX: where X is the file system number) . - Page 147 “HP-UX Booting (EFI Shell)” on page 148 HP-UX Booting (EFI Boot Manager) From the EFI Boot Manager menu, select an item from the boot options list to boot HP-UX using that boot option. The EFI Boot Manager is available only on HP Integrity servers.
- Page 148 The bootable file systems of interest typically are listed as fs0:, fs1:, and so on. Step 4. Access the EFI System Partition for the device from which you want to boot HP-UX (fsX: where X is the file system number).
- Page 149 From the EFI Boot Manager menu, select the EFI Shell menu option to access the EFI Shell environment. Step 2. Access the EFI System Partition for the device from which you want to boot HP-UX (fsX: where X is the file system number).
- Page 150 Booting and Shutting Down HP-UX Step 4. Boot to the HP-UX Boot Loader prompt (HPUX>) by pressing any key within the 10 seconds given for interrupting the HP-UX boot process. You will use the HPUX.EFI loader to boot HP-UX in single-user mode in the next step.
-
Page 151: Shutting Down Hp-Ux
From the EFI Boot Manager menu, select the EFI Shell menu option to access the EFI Shell environment. Step 2. Access the EFI System Partition for the device from which you want to boot HP-UX (fsX: where X is the file system number). - Page 152 To reboot the nPartition, you must do so manually by using the BO command at the management processor Command Menu. If HP-UX is halted on the nPartition, thus not allowing you to use the shutdown command, you can reboot or reset the nPartition by issuing commands from the management processor Command Menu.
-
Page 153: Booting And Shutting Down Hp Openvms I64
To determine whether the cell local memory (CLM) configuration is appropriate for HP OpenVMS, refer to “HP OpenVMS I64 Support for Cell Local Memory” on page 153. • To add an HP OpenVMS entry to the boot options list, refer to “Adding HP OpenVMS to the Boot Options List” on page 153. •... - Page 154 From the EFI Boot Manager menu, select the EFI Shell menu option to access the EFI Shell environment. Step 2. Access the EFI System Partition for the device from which you want to boot HP OpenVMS (fsX:, where X is the file system number).
-
Page 155: Booting Hp Openvms
From the EFI Boot Manager menu, select an item from the boot options list to boot HP OpenVMS using the selected boot option. Step 1. Access the EFI Boot Manager menu for the system on which you want to boot HP OpenVMS. Log in to the management processor, and enter CO to select the system console. -
Page 156: Shutting Down Hp Openvms
The bootable file systems of interest typically are listed as fs0:, fs1:, and so on. Step 3. Access the EFI System Partition for the device from which you want to boot HP OpenVMS (fsX:, where X is the file system number). - Page 157 Log in to the management processor (MP) for the server and use the Console menu to access the system console. Accessing the console through the MP enables you to maintain console access to the system after HP OpenVMS has shut down.
-
Page 158: Booting And Shutting Down Microsoft Windows
CLM amount allocated for the specified cell (-c#, where # is the cell number) or the specified nPartition (-p#, where # is the nPartition number). For details, refer to the HP System Partitions Guide or the Partition Manager Web site (http://docs.hp.com/en/PARMGR2/). - Page 159 Windows boot options utility. fs0:\> msutil\nvrboot NVRBOOT: OS Boot Options Maintenance Tool [Version 5.2.3683] 1. SUSE SLES 9 2. HP-UX Primary Boot: 0/0/1/0/0.2.0 * 3. Windows Server 2003, Datacenter 4. EFI Shell [Built-in] * = Windows OS boot option (D)isplay (M)odify (C)opy E(x)port (I)mport (E)rase (P)ush (H)elp (Q)uit Select>...
-
Page 160: Booting Microsoft Windows
Main Menu. To exit the management processor, enter X at the Main Menu. Booting Microsoft Windows You can boot the Windows Server 2003 OS on an HP Integrity server by using the EFI Boot Manager to choose the appropriate Windows item from the boot options list. -
Page 161: Shutting Down Microsoft Windows
Main menu. To exit the management processor, enter X at the Main menu. Shutting Down Microsoft Windows You can shut down the Windows OS on HP Integrity servers using the Do not shut down Windows using Special Administration Console (SAC) restart or shutdown CAUTION commands under normal circumstances. - Page 162 Refer to the help shutdown Windows command for details. NOTE On HP Integrity Superdome servers, the Windows shutdown /s command shuts down the system and keeps all cells at the boot-is-blocked (BIB) inactive state. Windows Shutdown from the Command Line From the Windows command line, issue the shutdown command to shut down the OS.
-
Page 163: Booting And Shutting Down Linux
CLM amount allocated for the specified cell (-c#, where # is the cell number) or the specified nPartition (-p#, where # is the nPartition number). For details, refer to the HP System Partitions Guide or the Partition Manager Web site (http://docs.hp.com/en/PARMGR2/). - Page 164 See “Boot Options List” on page 141 for additional information about saving, restoring, and creating boot options. NOTE On HP Integrity servers, the OS installer automatically adds an entry to the boot options list. Adding a Linux Boot Option This procedure adds a Linux item to the boot options list.
-
Page 165: Booting Red Hat Enterprise Linux
Booting Red Hat Enterprise Linux You can boot the Red Hat Enterprise Linux OS on HP Integrity servers using either of the methods described in this section. Refer to “Shutting Down Linux” on page 167 for details on shutting down the Red Hat Enterprise Linux OS. -
Page 166: Booting Suse Linux Enterprise Server
ELILO boot prompt. To exit the loader, use the exit command. Booting SuSE Linux Enterprise Server You can boot the SuSE Linux Enterprise Server 9 OS on HP Integrity servers using either of the methods described in this section. Refer to “Shutting Down Linux” on page 167 for details on shutting down the SuSE Linux Enterprise Server... -
Page 167: Shutting Down Linux
The Red Hat Enterprise Linux and SuSE Linux Enterprise Server shutdown command includes the following options: Halt after shutdown. On cell-based HP Integrity servers, this either powers down server hardware or puts the nPartition into a shutdown for reconfiguration state. Chapter 4... - Page 168 Step 1. Log in to Linux running on the system you want to shut down. Log in to the management processor (MP) for the server and use the Console menu to access the system console. Accessing the console through the MP enables you to maintain console access to the system after Linux has shut down.
-
Page 169: Sx2000 Leds
sx2000 LEDs Appendix A... -
Page 170: Table A-1 Front Panel Leds
sx2000 LEDs Table A-1 Front Panel LEDs Driven By 48V Good On (green) HKP Good On (green) On (green) Present Cabinet# Numeric Dash Flashing Attention Flashing Red State Meaning 48V is good Housekeeping is good. MP is installed in this cabinet Cabinet number Invalid cabinet ID Locate feature activated... -
Page 171: Table A-2. Power And Ol* Leds
Table A-2 Power and OL* LEDs Location Cell Power Chassis beside cell, and on cell Cell Chassis beside cell Attention PDHC Post Cell PM Post On the UGUYboard, driven by the PM CLU Post On the UGUY board, driven by the Chassis behind PCI Cardcage cardcage... -
Page 172: Table A-3. Ol* Led States
sx2000 LEDs Table A-2 Power and OL* LEDs (Continued) Location Hot swap System Backplane oscillators (HSO) Figure A-1 Utilities LEDs Table A-3 OL* LED States Description Normal operation (powered) Fault detected, power on Slot selected, power on, not ready for OLA/D Power off or slot available Fault detected, power off Read for OL*... -
Page 173: Table A-4 Pdh Status And Power Good Led States
Figure A-2 PDH Status PDH STATUS SM US A label will be placed on the outside of the SDCPB Frame to indicated PDH Status, DC/DC Converter faults that shutdown the sx2000 cell, and loss of DC/DC Converter Redundancy. Figure A-2 illustrates the label and table A-4 describes each LED. - Page 174 sx2000 LEDs Appendix A...
-
Page 175: Management Processor Commands
Management Processor Commands This Appendix summarizes the Management Processor commands. Notice that in the examples herein, MP is used as the command prompt. The term Guardian Service Processor has been changed to Management Processor, but some code already written uses the old term. Appendix B... -
Page 176: Mp Command: Bo
Management Processor Commands MP Command: BO MP Command: BO BO - Boot partition • Access level—Single PD user • Scope—partition This command boots the specified partition. It ensures that all the cells assigned to the target partition have valid complex profiles and then releases Boot-Is-Blocked (BIB). Example B-1 BO command Appendix B... -
Page 177: Mp Command: Ca
MP Command: CA CA - Configure Asynchronous & Modem Parameters • Access level—Operator • Scope—Complex This command allows the operator to configure the local and remote console ports. The parameters that can be configured are the baud rate, flow control, and modem type. Example B-2 CA Command Appendix B... -
Page 178: Mp Command: Cc
Management Processor Commands MP Command: CC MP Command: CC CC - Complex Configuration • Access level—Administrator • Scope—Complex This command performs an initial out of the box complex configuration. The system can be configured as either a single (user specified) cell in partition 0 (the genesis complex profile) or the last profile can be restored. -
Page 179: Mp Command: Cp
MP Command: CP CP - Cells Assigned by Partition • Access Level - Single Partition User • Scope - Complex The cp command displays a table of cells assigned to partitions and arranged by cabinets. This is for display only, no configuration is possible with this command. Example B-4 CP Command Appendix B... -
Page 180: Mp Command: Date
Management Processor Commands MP Command: DATE MP Command: DATE DATE Command - Set Date and Time. • Access level—Administrator • Scope—Complex This command changes the value of the real time clock chip on the MP. Example B-5 DATE Appendix B... -
Page 181: Mp Command: Dc
MP Command: DC DC - Default Configuration • Access level—Administratrix • Scope—Complex This command resets some or all of the configuration parameters to their default values. The clock setting is not effected by the DC command. The example below shows the various parameters and their defaults. Example B-6 DC Command Appendix B... -
Page 182: Mp Command: Df
Management Processor Commands MP Command: DF MP Command: DF DF - Display FRUID • Access level—Single Partition User • Scope—Complex This command displays the FRUID data of the specified FRU. FRU information for the SBC, BPS, and processors are “constructed,” because they do not have a FRU ID EEPROM. Because of this fact, the list of FRUs is different than the list presented in the WF command. -
Page 183: Mp Command: Di
MP Command: DI DI - Disconnect Remote or LAN Console • Access level—Operator • Scope—Complex This command initiates separate remote console or LAN console disconnect sequences. For the remote console, the modem control lines are de-asserted, forcing the modem to hang up the telephone line. For the LAN console, the telnet connection is closed. -
Page 184: Mp Command: Dl
Management Processor Commands MP Command: DL MP Command: DL DL - Disable LAN Access • Access level—Administrator • Scope—Complex This command disables Telnet LAN access. Disabling Telnet access kills all of the current Telnet connections and causes future telnet connection requests to be given a connection refused message. Example B-9 DL Command Example:... -
Page 185: Mp Command: El
MP Command: EL DL - Enable LAN Access • Access level—Administrator • Scope—Complex This command enables Telnet LAN access. Example B-10 EL Command MP:CM> el Enable telnet access? (Y/[N]) y -> Telnet access enabled. MP:CM> • See also: DI, DL Note that this command is deprecated and does not support SSH. -
Page 186: Mp Command: He
Management Processor Commands MP Command: HE MP Command: HE HE - Help Menu • Scope—N/A • Access level—Single PD user This command displays a list of all MP commands available to the level of the MP access (Administrator, Operator, or Single PD user). The commands that are available in manufacturing mode will be displayed if the MP is in manufacturing mode. - Page 187 Management Processor Commands MP Command: HE Example B-11 HE Command Appendix B...
-
Page 188: Mp Command: Id
Management Processor Commands MP Command: ID MP Command: ID ID - Configure Complex Identification • Access level—Operator • Scope—Complex This command configures the complex identification information. The complex identification information includes the following: • model number • model string • complex serial number •... -
Page 189: Mp Command: Io
MP Command: IO IO - Display Connectivity Between Cells and I/O • Access level—Sinfle Partition User • Scope—Complex This command displays a mapping of the connectivity between cells and I/O. • Example: MP:CM> io --------------------------+ Cabinet | 0 | 1 | --------+--------+--------+ Slot |01234567|01234567| --------+--------+--------+... -
Page 190: Mp Command: It
Management Processor Commands MP Command: IT MP Command: IT IT - View / Configure Inactivity Timeout Parameters • Access level—Operator • Scope—Complex This command sets the two inactivity time-outs. The session inactivity timeout prevents a session to a partition to be inadvertently left opened, preventing other users to log onto a partition using this path. -
Page 191: Mp Command: Lc
MP Command: LC LC - LAN Configuration • Access level—Administrator • Scope—Complex This command displays and modifies the LAN configurations. The IP address, Hostname, Subnet mask, and Gateway address can be modified with this command. Example B-14 LC Command Appendix B Management Processor Commands MP Command: LC... -
Page 192: Mp Command: Ls
Management Processor Commands MP Command: LS MP Command: LS LS - LAN Status • Access level—Single Partition User • Scope—Complex This command displays all parameters and current connection status of the LAN interface. Example B-15 LS Command Appendix B... -
Page 193: Mp Command: Ma
MP Command: MA MA - Main Menu • Access level—Single Partition User • Scope—N/A The command takes the specific user from the Command menu and returns the user to the main menu. Only the user that enters the command is returned to his private main menu. Example B-16 MP Main Menu Appendix B... -
Page 194: Mp Command: Nd
Management Processor Commands MP Command: ND MP Command: ND ND - Network Diagnostics • Access level—Administrator • Scope—Complex This command enables/disables network diagnostics. This will enable or disable the Ethernet access to MP Ethernet ports other than the main telnet port (TCP port 23). Disabling the network diagnostic port prevents the user from accessing the system with diagnostic tools such as JUST, GDB, LDB and firmware update (FWUU). -
Page 195: Mp Command: Pd
MP Command: PD PD - Set Default Partition • Access level—Operator • Scope—Complex This command sets the default partition. If a default partition already exists, then this command overrides the previously defined partition. Setting the default partition prevents the user from being forced to enter a partition in commands that require a partition for their operation. -
Page 196: Mp Command: Pe
Management Processor Commands MP Command: PE MP Command: PE PE - Power Entity • Access level—Operator • Scope—Complex This command turns power on/off to the specified entity. If there is a default partition defined then the targeted entity must be a member of that partition. In the case when the entity being powered is an entire cabinet this command has some interesting interactions with the physical cabinet power switch. - Page 197 Management Processor Commands MP Command: PE I - IO Chassis P - Partition Select Device: p # Name --- ---- 0) Partition 0 1) Partition 1 2) Partition 2 3) Partition 3 Select a partition number: 0 The power state is OFF for partition 0. In what state do you want the power? (ON/OFF) on [spudome] MP:CM>...
-
Page 198: Mp Command: Ps
Management Processor Commands MP Command: PS MP Command: PS PS - Power and Configuration Status • Access level—Single Partition User • Scope—Cabinet This command displays the status of the specified hardware. This command adds new information from previous versions of the PS command in other systems. The user can retrieve a summary or more detailed information on one of the following: a cabinet, a cell, a core IO, and the MP. - Page 199 Management Processor Commands MP Command: PS Example B-20 PS Command Appendix B...
-
Page 200: Mp Command: Re
Management Processor Commands MP Command: RE MP Command: RE RE - Reset Entity • Access level—Operator • Scope—Complex This command resets the specified entity. Care should be exercised when resetting entities because of the side effects. Resetting an entity has the following side effects. –... -
Page 201: Mp Command: Rl
MP Command: RL RL - Re-key Complex Profile Lock • Access level—Operator • Scope—Complex This command re-keys the complex profile lock. It should only be used to recover from the error caused by the holder of the lock terminating before releasing the complex profile lock. It invalidates any outstanding key to the complex profile lock. -
Page 202: Mp Command: Rr
Management Processor Commands MP Command: RR MP Command: RR RR - Reset Partition for Re-configuration • Access level—Single Partition User • Scope—Partition This command resets the specified partition but does not automatically boot it. The utility system resets each cell that is a member of the specified partition.If the user is either Administrator or Operator, a choice of which partition will be offered. -
Page 203: Mp Command: Rs
MP Command: RS RS - Reset Partition • Access level—Single PD user • Scope—Partition This command resets and boots the specified partition. The utility system resets each cell that is a member of the specified partition. Once all cells have completed reset, the partition is booted. If the user is either Administrator or Operator, a choice of which partition is offered. -
Page 204: Mp Command: Sa
Management Processor Commands MP Command: SA MP Command: SA SA - Set Access Parameters • Access level—Administrator • Scope—Complex This command modifies the enablement of interfaces including telnet, SSH, modem, network diagnostics, IPMI LAN, web console, etc. • Example: [spudome] MP:CM> sa This command displays and allows modification of access parameters. -
Page 205: Mp Command: So
MP Command: SO SO - Security Options and Access Control Configuration • Access level—Administrator • Scope—Complex This command modifies the security options and access control to the MP handler. The parameters that can be modified are: • Login timeout • Number of password faults allowed •... -
Page 206: Mp Command: Sysrev
Management Processor Commands MP Command: SYSREV MP Command: SYSREV SYSREV - Display System and Manageability Firmware Revisions • Access level—Single Partition User • Scope—Complex This command will display the firmware revisions of all of the entities in the complex. • Example: MP:CM>... -
Page 207: Mp Command: Tc
MP Command: TC TC - TOC Partition • Access level—Single Partition User • Scope—Partition This command transfers the control (TOC) of the specified partition. The SINC on each cell in the specified partition asserts the sys_init signal to Dillon. Example B-25 TC Command Appendix B Management Processor Commands... -
Page 208: Mp Command: Te
Management Processor Commands MP Command: TE MP Command: TE TE - Tell • Access level—Single Partition User • Scope—Complex This command treats all characters following the TE as a message that is broadcast when the pressed. The message size is limited to 80 characters. Any extra characters are not broadcast. Also, any message that is written is not entered into the console log. -
Page 209: Mp Command: Vm
MP Command: VM VM - Voltage Margin • Access level—Single Partition User • Scope—Cabinet The command adjusts the voltage of all marginable supplies within a range of +/- 5% No reset is required for the command to become effective. Example B-27 VM Command Appendix B Management Processor Commands... -
Page 210: Mp Command: Who
Management Processor Commands MP Command: WHO MP Command: WHO WHO - Display List of Connected Users • Access level—Single Partition User • Scope—Complex This command displays the login name of the connected console client user and the port on which they are connected. -
Page 211: Mp Command: Xd
MP Command: XD XD - Diagnostic and Reset of MP • Access level—Operator • Scope—Complex This command tests certain functions of the SBC and SBCH boards. Some of the tests are destructive and should not be performed on a system running the operating system. Example B-29 XD Command Appendix B... - Page 212 Management Processor Commands MP Command: XD Appendix B...
-
Page 213: Powering The System On And Off
Powering the System On and Off This appendix provides procedures to shut down and bring up a system. Chose the appropriate section for the desired task. Not all steps in a procedure may apply. For example, if you are checking the configuration as outlined in “Checking System Configuration”... -
Page 214: Shutting Down The System
Powering the System On and Off Shutting Down the System Shutting Down the System Use this procedure whenever the system must be shut down. Checking System Configuration To check the current system configuration, in preparation for shutdown, perform the following procedure: Step 1. -
Page 215: Figure C-2 Main Mp Menu
Figure C-2 Main MP Menu Step 3. Invoke the Command Menu by entering cm at the MP prompt. Step 4. Make sure that no one else is using the system by entering who at the CM prompt. Only one user should be seen, as indicated in Figure C-3. -
Page 216: Figure C-4 Checking Current System Configuration
Powering the System On and Off Shutting Down the System Step 5. Read the and save the current system configuration by entering cp and the CM prompt. Cabinet and partition information should be displayed as in Figure C-4. Figure C-4 Checking Current System Configuration Step 6. -
Page 217: Shutting Down The Operating System
For each partition, perform the following steps: Step 1. Enter the partition number at the prompt. Step 2. Log in to the console: • HP-UX: Log in as root • Linux: Log in as root Appendix C Powering the System On and Off... -
Page 218: Preparing The Partitions For Shutdown
Step 5. Repeat step 1 through step 4 for each partition. Preparing the Partitions for Shutdown IMPORTANT Before powering off the cabinets, HP recommends first that all partitions be brought to the boot-is-blocked (BIB) state. Perform the following procedure to ensure that all partitions are ready to be shut down. -
Page 219: Powering Off The System Using The Pe Command
Powering the System On and Off Shutting Down the System Step 6. Read the Cell PDH Controller status to determine if the partition is at BIB. Figure C-9 Using the de -s Command Boot-is-blocked Step 7. Repeat step 1 through step 6 for each partition. Powering Off the System Using the pe Command Perform the following steps to power off the system. -
Page 220: Figure C-10 Power Entity Command
Powering the System On and Off Shutting Down the System Step 1. From the Command Menu, enter pe (Figure C-10). Figure C-10 Power Entity Command Step 2. Enter the number of the cabinet to power off. In Figure C-10, the number is 0. Step 3. -
Page 221: Figure C-12 Power Status Second Window
Step 5. Enter b at the select device prompt to select ensure that the cabinet power is off. The output should be similar to that in Figure C-12. The Power switch should be on, but the Power should be not enabled. -
Page 222: Turning On Housekeeping Power
Powering the System On and Off Turning On Housekeeping Power Turning On Housekeeping Power Use the following procedure to turn on housekeeping power to the system: Step 1. Verify that the ac voltage at the input source is within specifications for each cabinet being installed. -
Page 223: Figure C-13 Front Panel Display With Housekeeping (Hkp) Power On, And Present Leds
Figure C-13 Front Panel Display with Housekeeping (HKP) Power On, and Present LEDs Step 5. Examine the bulk power suppply (BPS) LEDs (Figure C-14). When on, the breakers on the PDCA distribute power to the BPSs. Power is present at the BPSs when: •... -
Page 224: Figure C-14 Bps Leds
Powering the System On and Off Turning On Housekeeping Power Figure C-14 BPS LEDs BPS LEDs Appendix C... -
Page 225: Powering On The System Using The Pe Command
Powering On the System Using the pe Command This section describes how to power on the system. Use the following procedures whenever the system needs to be powered on. Step 1. From the Command Menu, enter the pe command. IMPORTANT If the complex has an IOX cabinet, power on this cabinet first. In a large complex, cabinets should be powered on in one of the two following orders: •... -
Page 226: Figure C-16 Power Status First Window
Powering the System On and Off Powering On the System Using the pe Command Step 4. From the CM> prompt, enter ps to observe the power status. The status screen shown in Figure C-16 appears. Figure C-16 Power Status First Window Step 5. -
Page 227: Templates
Templates This appendix contains blank floor plan grids and equipment templates. Combine the necessary number of floor plan grid sheets to create a scaled version of the computer room floor plan. Appendix D... -
Page 228: Templates
Templates Templates Templates This section contains blank floor plan grids and equipment templates. Combine the necessary number of floor plan grid sheets to create a scaled version of the computer room floor plan. Figure D-1 illustrates the locations required for the cable cutouts. Figure D-2 on page 230 illustrates the overall dimensions required for SD16 and SD32 systems. -
Page 229: Figure D-1 Cable Cutouts And Caster Locations
Templates Templates Figure D-3 on page 231 illustrates the overall dimensions required for an SD64 complex. Figure D-1 Cable Cutouts and Caster Locations Appendix D... -
Page 230: Figure D-2 Sd16 And Sd32 Space Requirements
Templates Templates Figure D-2 SD16 and SD32 Space Requirements Appendix D... -
Page 231: Equipment Footprint Templates
Templates Templates Figure D-3 SD64 Space Requirements Equipment Footprint Templates Equipment footprint templates are drawn to the same scale as the floor plan grid (1/4 inch = 1 foot). These templates are provided to show basic equipment dimensions and space requirements for servicing. The service areas shown on the template drawings are lightly shaded. -
Page 232: Computer Room Layout Plan
Templates Templates NOTE Photocopying typically changes the scale of copied drawings. If any templates are copied, then all templates and floor plan grids must also be copied. Computer Room Layout Plan Use the following procedure to create a computer room layout plan: Step 1. -
Page 233: Figure D-4 Computer Floor Template
Templates Templates Figure D-4 Computer Floor Template Appendix D... -
Page 234: Figure D-5 Computer Floor Template
Templates Templates Figure D-5 Computer Floor Template Appendix D... -
Page 235: Figure D-6 Computer Floor Template
Templates Templates Figure D-6 Computer Floor Template Appendix D... -
Page 236: Figure D-7 Computer Floor Template
Templates Templates Figure D-7 Computer Floor Template Appendix D... -
Page 237: Figure D-8 Computer Floor Template
Templates Templates Figure D-8 Computer Floor Template Appendix D... -
Page 238: Figure D-9 Sd32 And Sd64, And I/O Expansion Cabinet Templates
Templates Templates Figure D-9 SD32 and SD64, and I/O Expansion Cabinet Templates Appendix D... -
Page 239: Figure D-10 Sd32 And Sd64, And I/O Expansion Cabinet Templates
Templates Templates Figure D-10 SD32 and SD64, and I/O Expansion Cabinet Templates Appendix D... -
Page 240: Figure D-11 Sd32 And Sd64, And I/O Expansion Cabinet Templates
Templates Templates Figure D-11 SD32 and SD64, and I/O Expansion Cabinet Templates Appendix D... -
Page 241: Figure D-12 Sd32 And Sd64, And I/O Expansion Cabinet Templates
Templates Templates Figure D-12 SD32 and SD64, and I/O Expansion Cabinet Templates Appendix D... -
Page 242: Figure D-13 Sd32 And Sd64, And I/O Expansion Cabinet Templates
Templates Templates Figure D-13 SD32 and SD64, and I/O Expansion Cabinet Templates Appendix D... -
Page 243: Figure D-14 Sd32 And Sd64, And I/O Expansion Cabinet Templates
Templates Templates Figure D-14 SD32 and SD64, and I/O Expansion Cabinet Templates Appendix D... - Page 244 Templates Templates Appendix D...
-
Page 245: Index
ac power voltage check wiring check ac power verification 4-wire PDCA 5-wire PDCA AC0 Present LED AC1 Present LED acoustic noise specifications sound power level sound pressure level American Society of Heating, Refrigerating and Air-Conditioning Engineers, See ASHRAE ASHRAE Class 1 attention LED bezel attaching front bezel... - Page 246 Index interference communications inventory check IP address default values LAN configuration screen setting private and customer LAN JTAG utility for scan test JUST JUST JTAG utility for scan test kick plates attaching to cabinet shown on cabinet port 0 port 1 status AC0 Present AC1 Present...
- Page 247 Index wiring check wrist strap usage...
Need help?
Do you have a question about the A9834-9001B and is the answer not in the manual?
Questions and answers