
Related Manuals for Tecnoware EXA 1.1 Rack Mount


Summary of Contents for Tecnoware EXA 1.1 Rack Mount
- Page 1 Uninterruptible Power Supply EXA 1.1 Rack Mount EXA 1.5 Rack Mount EXA 2.2 Rack Mount EXA 2.6 Rack Mount EXA 3.2 Rack Mount User’s manual Manuale utente...
-
Page 3: Table Of Contents
Index Safety Warnings ................1 1 Introduction ................. 2 2 General Characteristics ..............3 3 Receipt and site selection ..............3 4 EXTERNAL DESCRIPTION ..............4 Front Panel ................4 4.1.1 LCD Display .................5 Rear Side ................6 5 Electrical Installation and First Start Up ..........7 6 Functioning ................. - Page 4 Indice Avvisi di Sicurezza ................14 1 Introduzione ................15 2 Caratteristiche Generali ..............15 3 Ricevimento e Collocazione ............. 16 4 Descrizione Esterna ............... 17 Pannello Frontale ..............17 4.1.1 Display LCD ................18 Retro................... 19 5 Installazione e Prima Accensione ............20 6 Funzionamento ................
-
Page 5: Safety Warnings
ENGLISH User’s Manual - English Safety Warnings Read this manual carefully and completely before installing and using the TECNOWARE EXA Rack Mount Uninterruptible Power Supply, which, from here after, will also be referred to as UPS. This manual should be kept close to the UPS and read before the UPS is installed and used. The UPS must be used only by properly trained personnel. -
Page 6: Introduction
EXA Rack Mount is constantly being developed and improved: consequently, your unit may differ somewhat from the description contained in this manual. This manual includes the following models: • EXA 1.1 Rack Mount (1.1 KVA) • EXA 1.5 Rack Mount (1.5 KVA) • EXA 2.2 Rack Mount (2.2 KVA) •... -
Page 7: General Characteristics
ENGLISH 2 General Characteristics EXA Rack Mount has all the advanced features, which guarantee maximum reliability and safety: All functions are controlled by a microprocessor, giving full guarantee of high reliability. • Output Voltage regulation through AVR (Automatic Voltage Regulation). •... -
Page 8: External Description
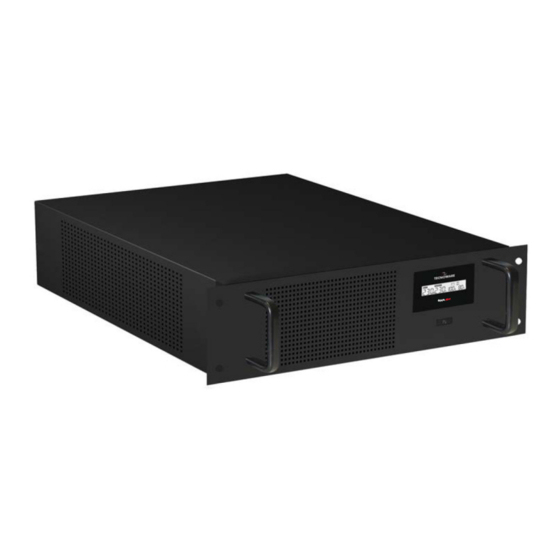
ENGLISH 4 EXTERNAL DESCRIPTION 4.1 Front Panel The front panel informs the user about operating status, alarm conditions and measurements. Front panel shown below consists of two parts: LCD display provides information about input (only in line mode) and output voltage, output frequency (only in battery mode), battery level percentage, load level percentage, functioning modes, alarm and fault conditions. -
Page 9: Lcd Display
ENGLISH 4.1.1 LCD Display Please refer to figure 2. Display visualizzato in modalità rete Display visualizzato in modalità batteria Figure 2 –LCD Display INPUT: the 3 digits indicate the input voltage (only visualized in line mode). OUTPUT: the 3 digits indicate the output voltage. BATTERY LEVEL: 3 digits indicate the battery charging percentage. -
Page 10: Rear Side
ENGLISH 4.2 Rear Side EXA 1.1-1.5-2.2 EXA 2.6-3.2 Figure 3 – Rear Side Grounded AC Input power socket with input fuse: IEC C14 type; to connect the UPS to the AC utility line. Fuse electrical specification: max current 6A (EXA 1.1–1.5 Rack Mount), max current 8A (EXA 2.2 Rack Mount) or max current 10A (EXA 2.6-3.2 Rack Mount), voltage 250 V. -
Page 11: Electrical Installation And First Start Up
ENGLISH Electrical Installation and First Start Up We advise you to follow the steps below explained for greater safety: Switch off all the devices (Personal Computer or other electronic devices) that need to be supplied by the UPS. Connect the UPS Input socket to the AC line outlet through the supplying input cable. It is mandatory to ground the AC line outlet according to the Safety Standards. -
Page 12: Functioning
ENGLISH 6 Functioning 6.1 Normal Mode The UPS typically works in Normal mode: Input mains power is available and its amplitude is within specifications. During Normal mode, the UPS recharges the batteries and keeps them in an optimal charging voltage. 6.2 Battery Mode The UPS automatically runs in Battery mode if the AC Input Line voltage amplitude gets out of security limits (in case of a black-out or over-voltage/low-voltage): in this case, the UPS supplies the required output power by its... -
Page 13: Load Control
ENGLISH 6.4 Load Control The UPS indicates the Output Load level by LCD display (as described in the chapter 4). When the Output load is higher than nominal value the UPS warns of Overload condition by LCD display, by emitting a continuous acoustic alarm. The UPS warns of an Overload less than 110% by acoustic alarm. -
Page 14: Technical Characteristics
ENGLISH Technical Characteristics UPS EXA Rack Mount Model 1100 VA 1500 VA 2200 VA 2600 VA 3200 VA Power (550 W) (750 W) (1100 W) (1300 W) (1600 W) Technology Line Interactive Pure Sinewave with Stabilizer Nominal Input Voltage Single-phase 230 Vac Input Voltage Range +20% / -25% Input/Output Frequency... -
Page 15: Maintenance
ENGLISH Maintenance UPS Cleaning Before starting any cleaning operation, be sure that: 1. The AC Input Voltage for the UPS has been removed. 2. The UPS is OFF. Use only a cloth dampened with water to clean the unit. If UPS works in an environmental unusually dusty or dirty, remove the dirty from the ventilation holes. Before restarting the UPS be sure it is completely dry. -
Page 16: Troubleshooting
ENGLISH 10 Troubleshooting Alarms and problems you may encounter during operating the UPS are given in the table below. Apply the suggestions corresponding to each anomaly as described into the table. If your anomaly is excluded or the suggested actions do not solve your problem, consult the Technical Service. Please give the following information to the Technical Service: Model and serial number of the UPS, which can be found on the nameplate on the rear of the UPS. -
Page 17: Conformity To The European Directives
ENGLISH Conformity to the European Directives TECNOWARE S.r.l. confirms that EXA Rack Mount models comply with the requirements set out in: the Low Voltage Directive (Safety) 2006/95/EC and following amendments, the EMC (Electro-Magnetic Compatibility) Directive 2004/108/EC and following amendments. The following standards were applied: Low Voltage Directive (Safety): CEI EN 62040-1: 2008 EMC Directive (Electro-Magnetic Compatibility): CEI EN 62040-2: 2006 Product Disposal... -
Page 18: Avvisi Di Sicurezza
ITALIANO Manuale Utente – Italiano Avvisi di Sicurezza Leggere attentamente e completamente questo manuale prima di installare ed utilizzare il gruppo di continuità TECNOWARE della serie EXA Rack Mount, che in seguito verrà chiamato anche semplicemente UPS. Conservare con cura questo manuale vicino all’UPS e consultarlo sempre prima di operare sullo stesso. -
Page 19: Introduzione
EXA Rack Mount è soggetto a continui sviluppi e migliorie: di conseguenza può differire lievemente, in alcuni dettagli, da quanto descritto nel presente manuale. Questo manuale è relativo ai seguenti modelli: • EXA 1.1 Rack Mount (1.1 KVA) • EXA 1.5 Rack Mount (1.5 KVA) • EXA 2.2 Rack Mount (2.2 KVA) •... -
Page 20: Ricevimento E Collocazione
ITALIANO Riaccensione automatica dopo lo spegnimento per fine autonomia al ritorno della tensione di rete. • Adattabilità automatica alla frequenza d’ingresso 50 o 60 Hz. • Display LCD per visualizzare il valore della Tensione d’Ingresso e d’Uscita, la percentuale di carica delle •... -
Page 21: Descrizione Esterna
ITALIANO 4 Descrizione Esterna 4.1 Pannello Frontale Il pannello frontale informa l’utente sullo stato di funzionamento, sulle condizioni di allarme e sulle misure. Il pannello frontale, mostrato nella figura 1, è costituito da 2 parti: Un display LCD che fornisce i valori della tensione d’ingresso (solo in modalità rete) e d’uscita, la frequenza d’uscita (solo in modalità... -
Page 22: Display Lcd
ITALIANO 4.1.1 Display LCD Prego riferirsi alla figura 2. Display visualizzato in modalità rete Display visualizzato in modalità batteria Figura 2 – Display LCD Le informazioni indicate dal display LCD sono elencate sotto: 1. INPUT: i 3 digit INPUT indicano il valore della tensione d’ingresso in volt (visualizzato solo in modalità rete). 2. -
Page 23: Retro
ITALIANO 4.2 Retro EXA 1.1-1.5-2.2 EXA 2.6-3.2 Figura 3 – Pannello Posteriore Sul retro di EXA Rack Mount sono presenti (vedi figura 3): Presa d’Ingresso con TERRA con fusibile d’ingresso: di tipo IEC C14. Serve per collegare l’UPS alla linea elettrica d’Ingresso. -
Page 24: Installazione E Prima Accensione
ITALIANO 5 Installazione e Prima Accensione La procedura è molto semplice. Si consiglia di seguire con attenzione i punti successivi per una maggiore sicurezza. Spegnere i dispositivi (Personal Computer o altre apparecchiature elettroniche) che devono essere alimentati tramite l’UPS. Utilizzare il cavo di alimentazione a corredo per collegare l’UPS ad una presa di alimentazione elettrica. La presa di alimentazione scelta deve avere obbligatoriamente una connessione a terra secondo le norme vigenti. -
Page 25: Funzionamento
ITALIANO 6 Funzionamento 6.1 Modo Normale È il modo tipico di funzionamento. In questo caso la Tensione di Rete elettrica è presente in Ingresso ed ha ampiezza all’interno delle specifiche. Durante il funzionamento in modo Normale l’UPS provvede a ricaricare le batterie e a mantenerle ad un livello di carica ottimale. -
Page 26: Segnalazioni Di Guasto
ITALIANO Controllare che l’UPS non indichi mai la condizione di Overload. Non applicare all’UPS un carico maggiore del valore nominale di targa (vedere le specifiche di POTENZA del capitolo “Caratteristiche Tecniche”), in quanto può esserne danneggiato. In tal caso vengono a decadere le condizioni di garanzia. 6.5 Segnalazioni di Guasto L’UPS indica la condizione di Guasto (Fault) tramite segnalazione acustica (segnale acustico continuo). -
Page 27: Caratteristiche Tecniche
ITALIANO 8 Caratteristiche Tecniche Modello UPS EXA Rack Mount 1100 VA 1500 VA 2200 VA 2600 VA 3200 VA Potenza (550 W) (750 W) (1100 W) (1300 W) (1600 W) Tecnologia Line Interactive Onda Sinusoidale con Stabilizzatore Tensione Nominale d’Ingresso Monofase 230 Vac Tolleranza Tensione d’Ingresso +20% / -25%... -
Page 28: Manutenzione
ITALIANO 9 Manutenzione 9.1 Pulizia dell’UPS Prima di avviare qualsiasi operazione di controllo o di pulizia, accertarsi che: 1. La linea elettrica d’Ingresso all’UPS sia scollegata. 2. L’UPS sia spento. Pulire le superfici esterne usando un panno leggermente inumidito solo con acqua. Se l’UPS opera in un ambiente insolitamente polveroso o sporco, rimuovere la polvere dalle feritoie. -
Page 29: Anomalie Ed Interventi
ITALIANO 10 Anomalie ed Interventi Allarmi ed anomalie che possono verificarsi durante il funzionamento dell’UPS sono descritti nella tabella seguente. Per ogni anomalia svolgere le azioni suggerite nella tabella. Se il problema riscontrato non è descritto nella tabella o le azioni consigliate non avessero esito positivo, contattare il Servizio Assistenza. -
Page 30: Conformità Alle Direttive Europee
ITALIANO Conformità alle Direttive Europee TECNOWARE S.r.l. dichiara che il prodotto EXA Rack Mount è conforme ai requisiti stabiliti nella Direttiva Bassa Tensione (Sicurezza) 2006/95/CE e successive modifiche, e nella Direttiva EMC (Compatibilità Elettromagnetica) 2004/108/CE e successive modifiche. Sono state applicate le seguenti Normative: Sono state applicate le seguenti Normative: Direttiva Bassa Tensione (Sicurezza): CEI EN 62040-1: 2008 Direttiva EMC (Compatibilità... - Page 32 TECNOWARE s.r.l. www.tecnoware.com...
Need help?
Do you have a question about the EXA 1.1 Rack Mount and is the answer not in the manual?
Questions and answers