Table of Contents
Advertisement
Quick Links
Download this manual
See also:
User Manual
Advertisement
Table of Contents

Related Manuals for HP 700


Summary of Contents for HP 700
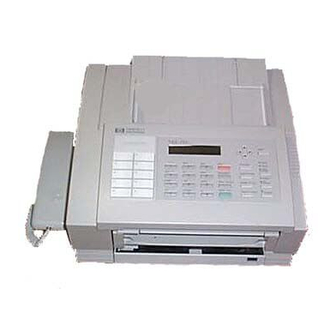
- Page 1 User's Guide HP Fax 700/750...
- Page 2 Contents Contents 1...
- Page 3 Contents 2...
- Page 4 Contents 3...
- Page 5 Contents 4...
-
Page 6: What's In This Guide
Making Copies are described in detail. Check the table of Contents to find them. Hints and tips as well as corrective actions for messages are found in Taking Care of Your HP FAX-700/750. An expanded Index makes it easy for you to find information. - Page 7 Unpacking and Connecting Your HP FAX-700/750 To unpack and connect your HP FAX-700/750, follow the instructions on the following pages to: Unpack and remove packing material Connect the power and cord phone line Load paper Install the print cartridge Open the document trays When you have completed unpacking and connecting, turn to Setting up Your HP FAX-700/750.
- Page 8 Plug the other end of the cord into a grounded electrical connection. Your HP FAX-700/750 has three line connections. Use the connection labeled LINE to connect to the telephone wall jack. Use the...
-
Page 9: Loading Paper
Slide the paper guide to the left for U.S. Letter and U.S. Legal size paper, or to the right for A4 size paper. Be sure to change the Paper Size in the Settings Menu when you change sizes. See "Customizing Your FAX-700/750" in this guide. ek_5 Then close the paper tray. -
Page 10: Installing The Print Cartridge
Installing the print cartridge ek 47 Turn on the fax, then open the top cover. Put the print cartridge into the cradle. If a cartridge is already installed, remove it. Handle the new print cartridge only by the green top. Gently remove both pieces of tape. Be careful not to touch the ink nozzles or the copper contacts. - Page 11 Opening the document trays Reach under the front panel and slide the document out tray forward, until it stops. ek 7 Extend both the document in tray and out tray. Press down on the front edge of the out tray, and the back edge of the in tray to flip them open.
-
Page 12: Using The Front Panel
Using the Front Panel Read messages and Menus One-Touch Dialing Dial stored Dial, number enter names, select from menus Access Navigate stored numbers move cursor Erase mistakes Edit One-Touch and Auto Dial numbers Cancel an activity Stop Auto Dial Backspace Store Number Enter/Monitor Redial/Pause... - Page 13 Using Buttons and Keys The HP LearnFAST User Interface allows you to use more than one button or key to move around in menus. You can also choose options and select settings in more than one way. Use the method you prefer to perform the following functions:...
- Page 14 Using Menus and Navigating Menus are lists of tasks that you can perform, and settings that you can use to control how your HP FAX-700/750 works. Displaying the menus Press Menu to display Menu Options. The number of options or tasks in each menu is displayed next to the title of the menu.
-
Page 15: Selecting Settings
Selecting settings Some settings, like Yes/No, are displayed side by side, with the cursor blinking on one of the choices. Use the arrow keys to move the cursor to the setting you want, then press Enter. You can also use the Yes and No buttons, or Start/Copy. Entering letters and symbols in names Use the keypad to enter letters and symbols when you store names. -
Page 16: When You First Set Up Your Hp Fax, Be Sure To Leave It On For At Least
Connect a telephone answering machine Set the receive mode Warning When you first set up your HP FAX, be sure to leave it on for at least twelve hours to charge the backup battery. The battery saves information you enter during set up. -
Page 17: Setting Up The Date And Time
To do this, you will use menus, buttons and the keypad on the front panel. There are several ways to use buttons and keys with the HP LearnFAST User Interface. The instructions in this guide show you one, easy method. - Page 18 Setting up the Date and Time (Continued) Press the up and down arrows. When the month you want is displayed, press the right arrow to move to day. Browse to the day you want, then press the right arrow to move to year.
- Page 19 To do this, you will use menus, buttons and the keypad on the front panel. There are several ways to use buttons and keys with the HP LearnFAST User Interface. The instructions in this guide show you one, easy method.
- Page 20 Setting up the fax number and name (Continued) Use the keypad to enter your fax number. Press 0 through 9 for numbers, press * to enter a plus (+) sign. The right and left arrow buttons move the cursor. The Report/Space button enters a space.
-
Page 21: Setting The Dialing Method
Setting the dialing method The factory default dialing method is Tone, or touch dialing. If your telephone system uses a Pulse, or rotary dialing method, follow these instructions to select Pulse. Do This Display the Menu Browse to 6: Settings Choose Settings Browse to 06: Dialing Method... -
Page 22: Testing The Setup
You may want to make a copy, or send a fax, to insure that the fax is working as you expect it to. If you would like to test receiving a fax, you can call HP FIRST and retrieve an index of fax machine support information. HP FIRST is at your fingertips 24 hours a day, providing instantaneous access to the most current Hewlett-Packard product support information. -
Page 23: Table Of Contents
Warning When you first set up your HP FAX, be sure to leave it on for at least 12 hours to charge the backup battery. The battery saves information you enter during set up. - Page 24 Connecting the handset to the HP FAX-750 Your HP FAX-700/750 has three line connections. Use the connection labeled LINE to connect to the telephone wall jack. Use the connections labeled TEL to connect a telephone or answering machine. Lift the left side of the fax and snap the telephone base into the slots in the bottom edge of the fax machine.
-
Page 25: Connecting A Telephone
Connecting a telephone Your HP FAX-700/750 has three line connections. Use the connection labeled LINE to connect to the telephone wall jack. Use the connections labeled TEL to connect a telephone or answering machine. Telephone Wall Jack When you have connected the telephone, turn to Managing incoming calls and set the Reception mode. -
Page 26: Connecting A Telephone Answering Machine
Connecting a telephone answering machine Your HP FAX-700/750 has three line connections. Use the connection labeled LINE to connect to the telephone wall jack. Use the connections labeled TEL to connect a telephone or answering machine. Telephone Wall Jack When you have connected the telephone answering machine, turn to Managing incoming calls and set the Reception mode. -
Page 27: Managing Incoming Calls
Fax/Ans Mach. Topics of Interest Customizing Your HP FAX-700/750, 54 Then read this note: To receive a fax in this mode, answer the extension phone and press Start/Copy on the front panel, or dial the remote reception code (123). -
Page 28: Sending A Fax
Sending a Fax Do This Dial the number, like you would a telephone Load the document, face down Press Start/Copy Press Stop to stop sending. Dialing Use the numeric keys to dial numbers like you would dial a telephone. To get a dial tone, press the Enter/Monitor button before you begin dialing. Use this method when you need to wait for dial tones or respond to prompts. - Page 29 Making the image lighter or darker and changing resolution To temporarily change the contrast or resolution for all of the pages in a fax that you are sending, press the Contrast or Resolution button on the front panel. If your document contains a photograph, press the Photograph button.
-
Page 30: Making Copies
Making Copies Do This Press Start/Copy Select up to 99 copies Load the document, face down Press Start/Copy Press Stop to end copying. Loading the document Adjust the guides on the document in tray, above the front panel, to fit the document. Load the document face down in the document in tray. - Page 31 Controlling How Faxes and Copies Look To send a fax, or make a copy of this type document 6 point ....Alphabet 8 point .
- Page 32 Use all of the above settings on the front panel to adjust for unusual documents. Try making a copy before you send a fax that contains unusual material. The copy will indicate how your fax will be received on a comparable fax machine.
- Page 33 Storing Numbers for Faster Dialing You can store frequently used numbers so that they can be dialed quickly. Follow the instructions on the following pages to: Store One-Touch and Auto Dial numbers Store Group Lists of One-Touch and Auto Dial numbers Review, change, or delete stored Auto Dial numbers Review, change, or delete stored Group Lists About Auto Dial numbers...
- Page 34 This graphic represents how you can store and dial numbers. Read About Auto Dial numbers on the previous page for more detail. To store To dial numbers numbers...
-
Page 35: Storing Auto Dial Numbers
Storing Auto Dial numbers Do This Press Store/Number Choose 1: Auto Dial Number The first unused code is shown. Browse to a different code if you wish Enter the number to store, up to 36 digits including spaces and pauses Save the number Enter a name, up to 15 characters... - Page 36 Storing Group Lists of Auto Dial numbers Using These Buttons Do This Press Store/Number Browse to 2: Group List Choose 2: Group List The first unused code is shown. Browse to a different code if you wish Enter a One-Touch or Auto Dial number to store Save the number...
- Page 37 Reviewing, changing, or deleting stored numbers To review, change, or delete a One-Touch or Auto Dial number, use the same procedure that you use to store the number. When the number you want is displayed, you can change it, or space over the number to delete it. When you delete a number, the name stored with it is also deleted.
- Page 38 Dialing with One-Touch and Auto Dial Do This To dial One-Touch numbers: Press the One-Touch key assigned to the number to dial To dial Auto Dial numbers: Press Auto Dial to access stored numbers Enter the Auto Dial code assigned to the number to dial Browse to a different number if you wish,...
- Page 39 Sending to a Distribution List You can send the same fax to more than one number. The instructions that follow show you how to: Send to two or more numbers with the menu. Enter more than one fax number when you send a fax. You can can also store One-Touch and Auto Dial numbers in group lists.
- Page 40 Sending to two or more numbers with the menu Using These Buttons Do This Display the Menu Browse to 4: Send to 2 or More Choose Send to 2 or more Dial a number, manually, One-Touch, or Auto Dial Save the number Enter another number now Repeat the above for each number you want to send to.
- Page 41 Entering more than one number when you send a fax Do This Dial a number, manually, One-Touch, or Auto Dial Save the number Dial another number, manually, One-Touch, or Auto Dial Repeat the above for each number you want to send to. Up to 10 manually dialed and 40 One-Touch and Auto Dial numbers.
- Page 42 Sending a Scanned or Scheduled Fax You can reduce telephone connection time by first scanning, then sending a fax. You can also schedule a fax for a time when telephone rates may be lower, or when you know someone will be there to receive the fax. When you choose Scan and Send from the menu, documents are scanned into memory before the telephone connection is made.
- Page 43 Scanning and sending from memory Do This Press Menu Choose 1:Scan & Send Dial a number, manually, One-Touch, or Auto Dial Load the document, face down Press Start/Copy Press Stop to cancel Using These Buttons To Display Menu Options (1-9) 1:Scan &...
-
Page 44: Sending A Fax At A Later Time
Sending a fax at a later time Do This Using These Buttons Press Menu Browse to 5: Schedule Send Fax Choose Schedule Send Fax Dial a number, manually, One-Touch, or Auto Dial Enter the time you want the fax sent If you entered only one number, store the fax, or leave it in the in tray... - Page 45 Reviewing, changing, or canceling scheduled faxes Do This Press Menu Browse to 5: Schedule Send Fax Choose 5: Schedule Send Fax Choose Review Browse to the fax you want to change or review Select the fax Choose Yes to cancel, or No to review or change Change the time to send, or press Enter to...
- Page 46 Polling allows you to make documents available for others to retrieve by calling your fax machine if their fax has polling capability. It also allows you to call another fax machine that is set up for polling and retrieve documents if the other fax machine doesn't require a password or security code.
- Page 47 Allowing another to poll your fax machine Do This Display the Menu Browse to 8: Polling Choose 8: Polling Choose 1: Being Polled Browse to 2: One Time Only Choose 2: One Time Only if you want the fax sent...
- Page 48 One-Touch, or Auto Dial Press Stop to cancel Note Your HP FAX-700/750 allows you to poll another fax machine, if that machine doesn't require a password or security code. To Display Menu Options (1-9) 1:Scan & Send Menu Options (1-9)
-
Page 49: Viewing And Printing Reports
Viewing and Printing Reports Do This Press Report/Space Choose the report you want: 1: Last Transaction 2: Last 32 Transactions 3: Auto Dial Directory 4: Settings When you choose Last Transaction, read the display. Choose Yes to print a copy. Press Stop to leave the menus Using These Buttons To Display... - Page 50 View and Print a report for the last transaction sent When you choose Print Report Last Tranaction, the following report is generated: LAST TRANSACTION REPORT FOR HP FAX-700 SERIES FAX NAME: FAX NUMBER: DATE TIME REMOTE FAX NAME AND NUMBER DURATION PG RESULT DIAGNOSTIC TO PRINT THIS REPORT AUTOMATICALLY, SELECT AUTOMATIC REPORTS IN THE SETTINGS MENU.
- Page 51 DATE TIME REMOTE FAX NAME AND NUMBER DURATION PG RESULT DIAGNOSTIC Your HP FAX-700/750 transaction report can contain up to 32 records. When the number of transactions exceeds 32 between printing reports, the first entries are deleted as new transactions take place. You may want to print this report frequently if you require records of transactions.
- Page 52 Print a list of Auto Dial and One-Touch numbers When you choose Auto Dial Directory from the reports menu, the following reports are generated: AUTO DIAL DIRECTORY FOR HP FAX 700 SERIES VERSION: 01.00 FAX NAME: FAX NUMBER: AUTO DIAL NO. NAME NUMBER NO.
- Page 53 The One-Touch dialing overlay report is printed so that you can cut it out and place it under the plastic cover on the front panel. One-Touch DIALING OVERLAY FOR HP FAX-700 SERIES VERSION 01.00 FAX NAME: FAX NUMBER: CUT ALONG DASHED LINES...
- Page 54 All of the settings are listed with the options available. The current and standard, or factory settings, are shown to the right of each setting. To change any of the settings that control your HP FAX-700/750, see Customizing Your HP FAX-700/750. Topics of Interest...
- Page 55 PRINT REDUCTION FAX REDUCTION COPY REDUCTION VOLUME ADJUSTMENTS RING VOLUME MONITOR VOLUME KEY VOLUME AUTOMATIC REDIAL NUMBER OF TRIES SETTINGS REPORT FOR HP FAX-700 SERIES SELECTION (SEE HEADING ABOVE) (SEE HEADING ABOVE) (1:STANDARD 2:FINE) (1:LIGHT 2:NORMAL 3:DARK) (1:QUALITY 2:ECONOMY) (1:PULSE...
- Page 56 The Automatic Power Failure Report If a power failure happens while documents are stored in memory, the following report is automatically printed when power is restored: POWER FAILURE REPORT FOR HP FAX-700 SERIES FAX NAME: FAX NUMBER: POWER FAILURE OCCURRED...
- Page 57 Using the Telephone with the HP FAX-750 Placing and Answering Calls To get a dial tone, lift the handset from the base. To answer a call, press START. To hang up, either replace the handset on the base, or press the switchook.
- Page 58 Using One-Touch Dialing You can store three telephone numbers, each up to 16 digits, for One-Touch dialing. To store a number, press PROG, enter the number, then press the One-Touch key M1, M2, or M3, to save the number. To dial a stored number, press the One-Touch key.
-
Page 59: Customizing Your Hp Fax-700/750
Set ringer volume Redial the last number Store One-Touch numbers Set Dialing for Tone or Pulse Dial stored One-Touch numbers Turn off the handset microphone EK 39... - Page 60 Customizing Your HP FAX-700/750 Your HP FAX-700/750 is shipped with settings that conform to the most common forms of usage. You can customize your fax by making changes in the menus to reflect how your phone system and office are set up.
- Page 61 This sample Settings Report shows how your HP FAX-700/750 was set up when shipped from the factory. To print your settings report choose 2: Print Report from the Main Menu, then choose 4: Settings from the Print Report Menu. FAX NAME:...
-
Page 62: Settings For Your Telephone System
If your telephone system is set up with a distinctive ring, select Enable, then place a call to your fax machine from another phone. If a call is received before you call your fax machine, set distinctive ring to Disable, and start over. - Page 63 The factory default for Receive to Memory is If Printer Error. If an error occurs, incoming faxes are received to memory and printed when the error is corrected. You can select Never if you don't want your fax machine to answer when there is an error condition.
- Page 64 Header Location The factory default for Header Location is Outside Fax Area. The name and number you enter for this fax are printed at the top of each fax you send. You can change the location for the header to Inside Fax Area. Paper Size The factory default for Paper Size is Letter (U.S.).
-
Page 65: Taking Care Of Your
HP Customer Support Center at (208) 323-2551. If your HP FAX-700/750 is out of warranty, you have two options: you can call (900) 551-1500 (a charge will be assessed) or you can call... - Page 66 Changing the paper separator If documents continually feed more than one page at a time, you may need to change the paper separator. Follow these instructions to change the paper separator. Notch Open the front panel Paper Separator Assembly Pry the paper separator assembly out at the notch using your fingers, a coin, or a small screwdriver.
- Page 67 Cleaning the scanner window glass When transmitted faxes or copies have lines or spots on them, follow these instructions to clean the scanner window glass and scanner plate. Lift the front panel to open it Use a lint-free cloth moistened with water to clean the scanner window glass.
- Page 68 Clearing document and paper jams To clear a document jam: Lift the front panel and remove the jammed document. Then close the cover. Caution: be sure to press both sides of the cover until it snaps closed Note: If a document jam happens while you are storing to memory, press Stop on the front panel to clear memory, then start over.
- Page 69 Loading multipage documents to prevent jams When "Reload Document" is displayed, you may have to follow this procedure if your document contains many pages. Hold the document by the top and bottom edges. Bend it upwards to fan the bottom edges.
-
Page 70: Understanding Display Messages
The meaning of the message is further defined in the Meaning column. The steps you should follow to correct the problem are in the Remedy column. See Avoiding Problems for hints and tips on how to best use your HP FAX. Message... - Page 71 All other settings are now at factory default. Reset them if you need to make changes. Be sure to leave your HP FAX turned on for at least 12 hours to recharge the backup battery and save your settings.
- Page 72 Message Meaning Replace ink cartridge The print cartridge is out of ink, or ink is not flowing from the cartridge. Reseat or load The print cartridge is missing, or ink cartridge not seated correctly in the cartridge cradle. Send error FAX An error occurred while sending may be incomplete a fax.
-
Page 73: Interpreting Error Codes
Interpreting error codes When errors occur while you are sending or receiving faxes, an error message is included on the Last Transaction and Last 32 Transaction reports. The RESULT column of the report contains the word ERROR and an error code is printed to the right of the message. - Page 74 Avoiding Problems The following hints and tips will help you avoid problems when you use your HP FAX-700/750. Problem Fax and Copy Problems Copies are missing information. Document jam. Faxes or copies have lines or spots. Faxes or copies are not straight, or are misplaced on the page.
- Page 75 HP FAX-700/750. When the telephone answering machine is not connected directly to your HP FAX-700/750, callers must enter your remote reception code and then send the fax. You could record an answering machine message that explains this. Be sure that remote reception is set to Enable in the settings menu.
-
Page 76: Replacement Part Numbers
Replacement part numbers One-Touch overlay C3530-85010 For ordering information, see page 73 In tray extender C3530-43056 Top cover assembly C3530-63051 Print cartridge 51626A ek 8 HP FAX-750 telephone C3781-60001 Paper separator C3530-62913 ek-22 Paper delivery tray C3530-62351... - Page 77 9 seconds per page 256 KB (12 pages) 50 auto dial numbers (10 One-Touch, 40 Auto Dial) Yes (up to 5 groups) 1 year overnight HP Express Exchange Approximately 45 watts Operating Temperature 59 - 95 degrees F Relative Humidity...
- Page 78 3. Gather some basic information before you call. If you suspect that your HP fax machine will have to be returned or exchanged, be sure to have the following information readily available before you contact HP or your dealer:...
- Page 79 #51, CompuServe connect charges apply to caller) Continued on next page Support Provided Hours of Operation Help in locating nearest HP 24 hours per day authorized dealer 7 days per week Pre-recorded help messages 24 hours per day...
- Page 80 Whom to call if you're in the United States (continued): Internet ftp address: 92.6.71.2 or (HP ftp site) ftp-boi-external.hp.com Printer drivers by (303) 339-7009 mail HP Customer (800) 752-0900 Information Center HP Direct (800) 538-8787 HP North American (800) 633-3600...
- Page 81 (800) 999-1148 ($25.00* fee per call U.S., Visa or MasterCard) *prices subject to change without notice HP Customer (208) 323-2551 Support Center Post-warranty assistance on 7:00 am - 6:00 pm MST product questions and the Mon, Tu, Th, Fri...
- Page 82 (CompuServe connect subscriber, ask for charges apply to agent #51) caller) Support Provided Hours of Operation Help in locating nearest HP 24 hours per day authorized dealer 7 days per week Ordering of supplies and accessories Pre-recorded help messages 24 hours per day...
- Page 83 HP Canada Eastern Canada (800) Customer Support 268-1221 Center Western Canada (800) 361-9791 HP Canada HP Canada Customer Customer Information Center Information Center 5150 Spectrum Way Mississauga, Ontario L4W 4V1 Post-Warranty (800) 999-1148 Support ($25.00* fee per...
- Page 84 To Obtain a Material Safety Data Sheet (MSDS) You can obtain the current MSDS for the print cartridge (HP Part No. 51626A) used in the fax machine by mailing a request to this address in the USA: Hewlett-Packard Direct Marketing Organization, Bldg.
- Page 85 Notice to Users of the U. S. Telephone Network - FCC Requirements This equipment complies with FCC rules, Part 68. On this equipment is a label that contains, among other information, the FCC Registration Number and Ringer Equivalence Number (REN) for this equipment. If requested, provide this information to your telephone company. An FCC compliant telephone cord and modular plug is provided with this equipment.
- Page 86 Plug the facsimile into a different outlet so that the facsimile and the receiver are on different branch circuits. If necessary, consult an authorized HP service agency or an experienced radio/television technician for additional suggestions. You may find the following booklet, prepared by the Federal Communications Commission, to be helpful: "How to Identify and Resolve Radio/TV Interference Problems."...
- Page 87 Index 1...
- Page 88 Index 2...
- Page 89 Index 3...
- Page 90 Index 4...
- Page 91 Index 5...
- Page 92 Index 6...
Need help?
Do you have a question about the 700 and is the answer not in the manual?
Questions and answers