Table of Contents
Advertisement
Quick Links
Advertisement
Table of Contents

Related Manuals for John Lewis JLBIOS614


Summary of Contents for John Lewis JLBIOS614
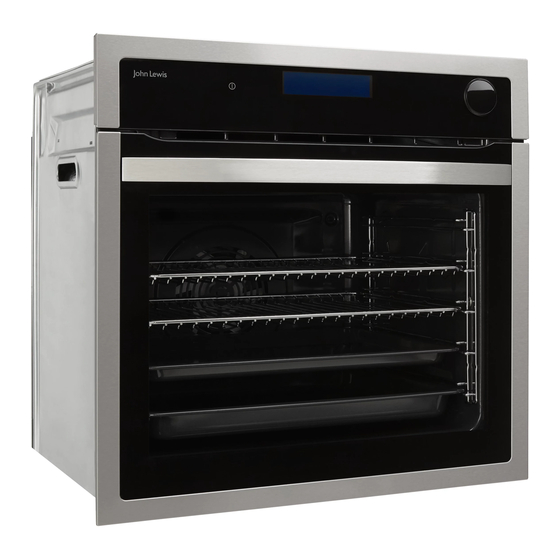
- Page 1 Oven JLBIOS614 User manual...
-
Page 2: Table Of Contents
Contents Safety information RECIPE MENU Automatic programmes Children and vulnerable people safety Automatic recipes General Safety Automatic programmes with weight input Safety instructions Automatic programmes with the core Installation temperature sensor Electrical connection Using the accessories Core temperature sensor Steam Cooking Care and Cleaning Installing the Oven Accessories Internal light... - Page 3 Preserving - Bottom Heat Drying - True Fan Cooking Core temperature sensor table Care and cleaning Shelf supports Removing the shelf supports Installing the shelf supports Lamp Cleaning the oven door Installing the door and the glass panels What to do if… Installation Environment concerns Repairs - after sales service...
-
Page 4: Safety Information
Safety information Before the installation and use of the appliance, carefully read the supplied instructions. The manufacturer is not responsible if an incorrect installation and use causes injuries and damages. Always keep the instructions with the appliance for future reference. Children and vulnerable people safety Warning! Risk of suffocation, injury or permanent disability. - Page 5 • Before maintenance cut the power supply. • Do not use harsh abrasive cleaners or sharp metal scrapers to clean the glass door since they can scratch the surface, which may result in shattering of the glass. • Only use the core temperature sensor recommended for this appliance.
-
Page 6: Safety Instructions
Safety instructions • Make sure not to cause damage to the mains Installation plug and to the mains cable. Contact the Service or an electrician to change a damaged mains cable. Warning! Only a qualified person • Do not let mains cables to come in touch must install this appliance. -
Page 7: Steam Cooking
• Do not let the appliance stay unattended Steam Cooking during operation. Warning! Risk of burns and • Deactivate the appliance after each use. damage to the appliance. • Be careful, when you open the appliance door while the appliance is in operation. Hot air •... -
Page 8: Disposal
• Before replacing the lamp, disconnect the appliance from the power supply. • Only use lamps with the same specifications. Disposal Warning! Risk of injury or suffocation. • Disconnect the appliance from the mains supply. • Cut off the mains cable and discard it. •... -
Page 9: Product Description
Product description Control panel Accessories Electronic programmer • Wire shelf Water drawer Socket for the core temperature sensor Heating element Lamp Rear wall heating element Steam generator with cover 10. Shelf support, removable 11. Shelf positions For cookware, cake tins, roasts. Oven user manual... - Page 10 • Baking tray To measure how far the food is cooked. • Telescopic runners For cakes and biscuits. For shelves and trays. • Grill- / Roasting pan • Steam set To bake and roast or as a pan to collect fat. •...
-
Page 11: Before First Use
Before first use Warning! Refer to the Safety chapters. Initial Cleaning • Remove all parts from the appliance. • Clean the appliance before first use. Important! Refer to chapter "Care and Cleaning". Setting and changing the time After the first connection to the mains, all symbols in the display are on for some seconds. -
Page 12: Control Panel
Control panel Electronic programmer Use the sensor fields to operate the appliance. Sensor Field Function Description DISPLAY Shows the current settings of the appliance. ON / OFF To activate and deactivate the appliance. Oven OPTIONS To set an oven function, an automatic programme or a functions cleaning function. -
Page 13: Display
Display A) Oven function symbol E) Indicators for the clock functions (refer to the table "Clock functions") B) Temperature / Time display F) Heat up indicator C) Clock / Residual heat display (also Minute minder and Time of day) G) Number of oven function / programme D) Residual heat indicator Other indicators in the display Symbols... -
Page 14: Daily Use
Daily use • automatic programmes - to prepare a Warning! Refer to the Safety dish when you do not have knowledge or chapters. experience in cooking. To operate the appliance you can use: • The manual mode - to set a heating function, the temperature and the cooking time manually. -
Page 15: Setting The Oven Function
Oven function Application Fast Grilling To grill flat food in large quantities. To toast bread. Grilling To grill flat food and to toast. Keep Warm To keep food warm. Defrost To defrost frozen food. Bottom Heat To bake cakes with a crispy base, and to preserve food. ECO Roasting ECO functions let you to optimize the energy consumption during cooking. - Page 16 Additional information: • Do not put food into the oven when the Fast heat up function operates. • The Fast heat up is not available with all oven functions. An acoustic signal sounds if the Fast heat up is not available for the set function. Energy saving The appliance contains features which help you save energy...
-
Page 17: Clock Functions
Clock functions SYMBOL FUNCTION DESCRIPTION COUNT UP TIMER To set count up. It shows how long the appliance operates. This function has no effect on the operation of the appliance. TIME OF DAY To examine the time of day. For changing the time of day refer to 'Setting the time of day'. -
Page 18: Setting The Set+Go
When the set time ends, an acoustic signal the MINUTE MINDER at any time and also sounds for two minutes. when the appliance is off. symbol and the time setting flash in the Touch the field Minute timer. display. The appliance deactivates. "00"... -
Page 19: Automatic Programmes
Automatic programmes There are three types of automatic Warning! Refer to the Safety programmes: chapters. • Automatic recipes • Automatic programmes with weight input RECIPE MENU • Automatic programmes with the core temperature sensor The display shows the shelf position and the default cooking times for all automatic recipes. -
Page 20: Automatic Recipes
Programme number Programme name ROAST GAME CHICKEN, WHOLE PIZZA QUICHE LORRAINE LEMON SPONGE CAKE CHEESE CAKE CANNELLONI CONVENIENCE CAKE CONVENIENCE PIZZA CONVENIENCE POTATO TYPES Automatic recipes The display shows: the cooking time, the duration symbol , a default weight, a unit of measurement (kg, g). - Page 21 Touch to see the core temperature sensor programmes. When a core temperature sensor programme is set, the display shows the cooking time, Touch or the settings save automatically after five seconds. When the set time ends, an acoustic signal sounds for two minutes. flashes.
-
Page 22: Using The Accessories
Using the accessories Put the plug of the core temperature sensor Warning! Refer to the Safety into the socket at the front of the appliance. chapters. The display shows and the default set core temperature. The temperature is 60 Core temperature sensor °C for the first operation, and the last set value for each subsequent operation. -
Page 23: Installing The Oven Accessories
Installing the Oven Accessories minutes. Touch a sensor field to deactivate the acoustic signal. Remove the core temperature sensor from the socket and remove the meat from the appliance. Warning! Be careful when you remove the core temperature sensor. It is hot. There is a risk of burns. -
Page 24: Telescopic Runners - Inserting The Oven Accessories
Telescopic runners - inserting the Put the wire shelf on the deep pan. Put the wire shelf and the deep pan on the telescopic oven accessories runners. Trivet and Grill- / Roasting pan Warning! Be careful when you remove the accessories from a hot appliance. - Page 25 You can use the trivet to grill flat dishes in large quantities and to toast: • Put the trivet into the deep pan so that the supports of the wire shelf point down. • Put the deep pan into the oven on the necessary shelf position.
-
Page 26: Additional Functions
Additional functions My Favourite Programme function If the appliance has the Pyrolytic cleaning function and the function Use this function to save your favourite operates, the door is locked. A temperature and time settings for an oven message comes on in the display when function or programme. -
Page 27: Automatic Switch-Off
Settings menu Indicator of the setting menu Description Value to set SET1 SET+GO ON / OFF SET2 RESIDUAL HEAT INDICATOR ON / OFF KEY TONE CLICK / BEEP / OFF SET3 SET4 FAULTY TONE ON / OFF SET5 SERVICE MENU SET6 RESTORE SETTINGS YES / NO... -
Page 28: Cooling Fan
– If you touch a sensor field during the night brightness (apart from ON / OFF), the display goes back to the day brightness mode for the next 10 seconds. – If the appliance is deactivated and you set the Minute Minder. When the Minute Minder function ends, the display goes back to the night brightness. -
Page 29: Helpful Hints And Tips
Helpful hints and tips distance between the shelves to let the steam The temperature and baking times in circulate around each container. the tables are guidelines only. They • After each use, remove the water from the depend on the recipes and the quality water drawer, connecting hoses and steam and quantity of the ingredients used. - Page 30 necessary for one of the dishes in the operation. • Put the clean containers in the middle of the Put the dishes into the correct cookware and shelf on the 1st shelf position. Make sure that then on the oven shelves. Adjust the distance the opening is down at a small angle.
- Page 31 Temperature Water in the Time Food Shelf position (ºC) water drawer (ml) (min.) Savoy cabbage 20 - 25 Courgette, slices 15 - 20 1) The times are for guidance only. Side dishes / accompaniments Water in the Time Food Shelf position Temperature (ºC) water drawer (ml) (min.)
-
Page 32: Turbo Grilling And Full Steam In Succession
Meat Water in the Time Food Shelf position Temperature (ºC) water drawer (ml) (min.) Cooked ham 1000 g 800 + 150 55 - 65 Chicken breast, poached 25 - 35 Chicken, poached, 1000 - 800 + 150 60 - 70 1200 g Veal / pork loin without 800 + 300... -
Page 33: Half Steam + Heat
Food Turbo Grilling Full Steam (first step: cook meat) (second step: add vegetables) Tempe Time Shelf Temper Time Shelf rature (min.) position ature (min.) position (°C) (°C) Roast beef 1 kg 60 – 70 meat: 1 meat: 1 40 – 50 Brussels sprouts, polenta vegetables: 3 Roast pork 1 kg,... -
Page 34: Baking
Quarter Steam + Heat Quarter Steam + Heat Type of Food Shelf position Temperature (°C) Time (min.) Roast pork 1000 g 160 - 180 90 - 100 Roast beef 1000 g 180 - 200 60 - 90 Roast veal 1000 g 80 - 90 Meat loaf, uncooked, 500 g 30 - 40... -
Page 35: Tips On Baking
Tips on baking Baking results Possible cause Remedy The bottom of the cake is not The shelf position is incorrect. Put the cake on a lower shelf. browned sufficiently. The cake sinks and becomes soggy, The next time you bake, set a The oven temperature is too high. - Page 36 Type of baking Oven function Shelf position Temperature Time (min) (°C) Flan base - short True Fan Cooking 10 - 25 170 - 180 pastry Flan base - sponge True Fan Cooking 150 - 170 20 - 25 mixture Apple pie / Apple True Fan Cooking 60 - 90 pie (2 tins Ø20 cm,...
- Page 37 Temperature Type of baking Oven function Shelf position Time (min) (°C) Fruit flans (made with yeast dough / True Fan Cooking 35 - 55 sponge mixture) Fruit flans (made with yeast dough / Conventional 35 - 55 sponge mixture) Cooking Fruit flans made True Fan Cooking 160 - 170...
- Page 38 Temperature Type of baking Oven function Shelf position Time (min) (°C) Small cakes / Small True Fan Cooking 20 - 35 cakes (20 per tray) Small cakes / Small Conventional 20 - 30 cakes (20 per tray) Cooking 1) Preheat the oven. Bakes and gratins Temperature Dish...
-
Page 39: Multileveled Baking
Multileveled Baking Cakes / pastries / breads on baking trays True Fan Cooking Temperature Type of baking Shelf position Time (min) (°C) 2 shelf positions 3 shelf positions Cream puffs / 1 / 4 160 - 180 25 - 45 Eclairs Dry streusel cake 1 / 4... -
Page 40: Pizza Setting
use the automatic slow cook function for Put the meat together with the hot roasting poultry. pan into the oven on the wire shelf. Put the Core Temperature Sensor into the When you use this function, always meat. cook dishes without a cover. Select the Slow cook function and set the correct end core temperature. -
Page 41: Roasting
Roasting • To prevent the meat juices or fat from burning onto the pan, put some liquid into the deep pan. • Use heat-resistant ovenware to roast (refer to the instructions of the manufacturer). • If necessary, turn the roast (after 1 / 2 - 2 / 3 of the cooking time). - Page 42 Veal Type of meat Quantity Oven function Shelf position Temperature Time (min.) °C Roast veal 1 kg Turbo Grilling 160 - 180 90 - 120 Knuckle of veal 1.5 - 2 kg Turbo Grilling 160 - 180 120 - 150 Lamb Type of meat Quantity...
-
Page 43: Grilling
Fish (steamed) Type of meat Quantity Oven function Shelf position Temperature Time (min.) °C Whole fish 1 - 1.5 kg Conventional 210 - 220 40 - 60 Cooking Grilling Grill only flat pieces of meat or fish. Always preheat the empty oven with the grill functions for 5 minutes. -
Page 44: Convenience Food
Convenience food True Fan Cooking Convenience food Shelf position Temperature (°C) Time (min.) Pizza, frozen 200 - 220 15 - 25 Pizza American, frozen 190 - 210 20 - 25 Pizza, chilled 210 - 230 13 - 25 Pizza Snacks, frozen 180 - 200 15 - 30 French Fries, thin... -
Page 45: Preserving - Bottom Heat
Defrosting time Further defrosting Dish Comment (min.) time (min.) Put the chicken on an upturned Chicken, 1000 g 100 - 140 20 - 30 saucer placed on a large plate. Turn halfway through. Meat, 1000 g 100 - 140 20 - 30 Turn halfway through. -
Page 46: Drying - True Fan Cooking
Vegetables Cooking time until Continue to cook at Preserve Temperature in °C simmering (min.) 100°C (min.) Carrots 160 - 170 50 - 60 5 - 10 Cucumbers 160 - 170 50 - 60 Mixed pickles 160 - 170 50 - 60 5 - 10 Kohlrabi / Peas / 160 - 170... - Page 47 Food Food Core Temperature °C Rib / Fillet steak: medium 60 - 65 Rib / Fillet steak: well done 70 - 75 Pork Food Food Core Temperature °C Shoulder / Ham / Neck joint of pork 80 - 82 Chop (saddle) / Smoked pork loin 75 - 80 Meatloaf 75 - 80...
-
Page 48: Care And Cleaning
Care and cleaning Lightly move the supports on the front Warning! Refer to the Safety catch inwards. chapters. Pull the supports out of the rear catch. Installing the shelf supports Notes on cleaning: Install the shelf supports in the opposite •... -
Page 49: Cleaning The Oven Door
Remove and clean the metal frame and the Hold the door trim (B) on the top edge of seal. the door at the two sides and push inwards to release the clip seal. Replace the lamp with a suitable 300 °C heat-resistant lamp. -
Page 50: What To Do If
What to do if… Warning! Refer to the Safety chapters. Problem Possible cause Remedy The appliance does not heat up. The appliance is deactivated. Activate the appliance. The appliance does not heat up. The clock is not set. Set the clock. Refer to “Setting and changing the time”. -
Page 51: Installation
Installation Letter N - Neutral terminal Warning! Refer to the Safety - Earth terminal chapters. Caution! This oven must be Important! The built-in unit must meet earthed! the stability requirements of DIN 68930. The cable used to connect the oven to the The oven is designed to be connected to 230 - electrical supply must comply to the 240V ~ (50Hz) electricity supply. - Page 52 min. 3 mm min. 50 mm Oven user manual...
- Page 53 560 min. 20 min. ! 530 min. 560 min. 530 min. 590 min. Oven user manual...
- Page 54 alternativ 100 max. R1200 mm H05VV-F H05RR-F min. 1600 mm 90° 2x3,5x25 Oven user manual...
-
Page 55: Environment Concerns
Environment concerns The symbol on the product or on its packaging indicates that this product may not be treated as household waste. Instead it should be taken to the appropriate collection point for the recycling of electrical and electronic equipment. By ensuring this product is disposed of correctly, you will help prevent potential negative consequences for the environment and human... -
Page 56: Repairs - After Sales Service
Repairs - after sales service Spare parts Your appliance comes with a three year warranty. If it is not working correctly refer to "Something not working". If a fault occurs which Always insist on genuine spare parts. you can not resolve through following the advice An authorised service engineer should service and information contained within this instruction this product, and only genuine spare parts... - Page 57 John Lewis, Oxford Street 020 7629 7711 John Lewis, Norwich 01603 660021 Peter Jones, Sloane Square 020 7730 3434 John Lewis, Nottingham 0115 941 8282 John Lewis, Brent Cross 020 8202 6535 John Lewis, Peterborough 01733 344644 John Lewis, Kingston 020 8547 3000 John Lewis at home, Poole 01202 756020 John Lewis, Aberdeen 01224 625000 John Lewis, Reading 0118 957 5955...
- Page 58 Oven user manual...
- Page 59 Oven user manual...
- Page 60 892960686-A-052013...
Need help?
Do you have a question about the JLBIOS614 and is the answer not in the manual?
Questions and answers
power is on, press start button, SAFE appears in control panel
"SAFE" appears on the control panel when pressing the start button on the John Lewis JLBIOS614 because the child lock function is activated. This feature prevents accidental operation of the oven. To disable it, follow the instructions in the user manual for deactivating the child lock.
This answer is automatically generated