
Related Manuals for Interlogix TruVision IP Dome


Summary of Contents for Interlogix TruVision IP Dome
- Page 1 TruVision IP Dome Open- Standards User Manual P/N 1076511B-EN • REV 1.0 • ISS 20MAR12...
- Page 2 Copyright © 2012 UTC Fire & Security. All rights reserved. Trademarks and Interlogix, TruVision names and logos are trademarks of patents UTC Fire & Security. Other trade names used in this document may be trademarks or registered trademarks of the manufacturers or vendors of the respective products.
-
Page 3: Table Of Contents
Adding extra on-screen text 38 Configuring the video image 38 Chapter 5 Camera management 41 User management 41 Formatting the SDHC card 43 Restoring default settings 44 Upgrading the firmware 44 Rebooting the camera 45 TruVision IP Dome Open-Standards User Manual... - Page 4 Playing back recorded video 48 Searching event logs 50 Archiving recorded files 52 Using presets 53 Appendix A Specifications 55 TruVision IP Dome Open-Standards cameras 55 IP wedge dome cameras 56 Appendix B Pin definitions 57 Index 59 TruVision IP Dome Open-Standards User Manual...
-
Page 5: Chapter 1 Introduction
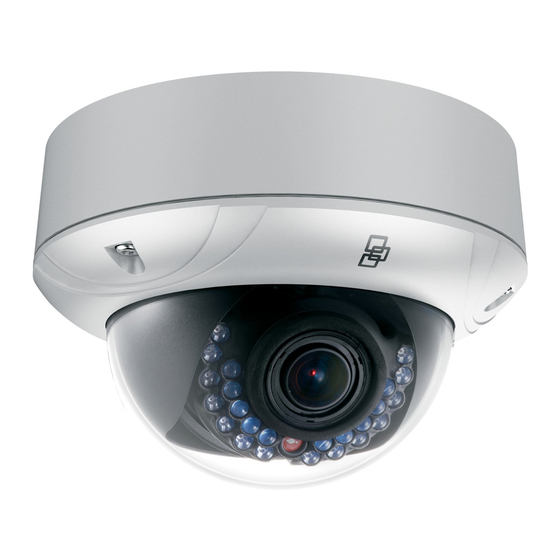
Chapter 1 Introduction Product overview This is the user manual for TruVision IP dome open-standard camera models: TruVision IP dome: TVD-N210V-2-N(-P) (VGA) TVD-M1210V-2-N(-P) (1.3 megapixel) TVD-M2210V-2-N(-P) (2 megapixel) TVD-M3210V-2-N(-P) (3 megapixel) TruVision IP IR dome: TVD-N245V-2-N(-P) (4CIF WDR, D/N) TVD-M1225V-2-N(-P) (1.3 megapixel, D/N) - Page 6 Supports remote upgrades and maintenance H.264 video compression with dual capability Supports full HD, HD, 4CIF, 2CIF, CIF and QCIF SDHC card for local storage (dome cameras only) TruVision IP Dome Open-Standards User Manual...
-
Page 7: Installation
Chapter 2 Installation This chapter provides information on how to install the TruVision IP dome and wedge dome cameras. Installation environment When installing your product, consider these factors: • Electrical: Install electrical wiring carefully. It should be done by qualified service personnel. -
Page 8: Package Contents
Table 1 below lists the requirements for the cables that connect to the camera. Table 1: Recommended cable requirements Cable type Requirements Data For RS-485: 22 gauge (0.64 mm) shielded, two-conductor, twisted-pair (STP) cable. Video 75 ohm RS-59 coaxial cable with BNC ends Power 12 VDC cable TruVision IP Dome Open-Standards User Manual... -
Page 9: Camera Dimensions
See “Dome and IR dome camera connections” on page 7. 3. Mount the camera to the ceiling using the appropriate fasteners. See “Mounting the dome cameras on a ceiling ” on page 11. TruVision IP Dome Open-Standards User Manual... -
Page 10: Connecting The Devices
5. Program the camera to suit its location. See “Chapter 4 Camera configuration” on page 27. Connecting the devices A qualified service person, complying with all applicable codes, should perform all required hardware installation. TruVision IP Dome Open-Standards User Manual... - Page 11 2.0 to 2.4 Vp-p, 1 kΩ. Note: The alarm output can be used to turn on and off an external alarm device. Connect a 12 VDC/30 mA external power supply to the alarm output. See Figure 4 below. TruVision IP Dome Open-Standards User Manual...
-
Page 12: Accessing The Sdhc Card
Video and log files stored on the SDHC card can only be accessed via the Web browser. You cannot access the card using TruVision Navigator or a recording device. Note: There is no SDHC card slot in the wedge dome cameras. TruVision IP Dome Open-Standards User Manual... -
Page 13: Mounting The Dome Cameras On A Ceiling
1. Place the mounting plate (supplied) on the ceiling. 2. Securely fasten the mounting plate to the ceiling surface with the supplied screws. 3. In the middle of the mounting plate make a hole in the ceiling to access the cabling. TruVision IP Dome Open-Standards User Manual... - Page 14 While viewing the video on the monitor, adjust horizontally and vertically the camera pan and tilt. Adjust the lens focus to get optimal video effect. TruVision IP Dome Open-Standards User Manual...
-
Page 15: Mounting The Wedge Dome Cameras On A Ceiling
1. Using the supplied hex key, loosen the four hex screws on the camera and remove the camera housing. 2. Make a hole in the ceiling for the cabling. Fix the camera base to the ceiling using the supplied screws. TruVision IP Dome Open-Standards User Manual... - Page 16 Note: The lens focus has been adjusted in the factory so should not require further adjusting. 5. Reattach the camera housing and tighten the fixed screws and. Ensure that the camera is firmly attached to the ceiling. TruVision IP Dome Open-Standards User Manual...
-
Page 17: Using The Camera With Tvr 60/ Tvn 20/ Tvn 40/ Lnvr And Other Systems
A camera must be connected to a TVR 60/ TVN 20/ TVN 40 in order to be operated by TruVision Navigator. Please refer to the TruVision Navigator user manual for instructions on operating the camera with the TruVision Navigator. TruVision IP Dome Open-Standards User Manual... -
Page 19: Network And Streaming Configuration
Tools menu. 2. On the Security tab, click the zone to which you want to assign a Web site under “Select a Web content zone to specify its security settings”. 3. Click Custom Level. TruVision IP Dome Open-Standards User Manual... - Page 20 Settings, click the security level for the whole zone in the Reset To box, and select Low. Click Reset. Then click to the Internet Options Security tab screen. 5. Click Apply in the Internet Options Security tab screen. TruVision IP Dome Open-Standards User Manual...
-
Page 21: Accessing The Camera Over The Internet
The Login dialog box appears. Note: Ensure that the Active X controls are enabled. 2. Enter your user name and password. User name: admin Password: 1234 3. Click OK. The Web browser screen appears in live mode. TruVision IP Dome Open-Standards User Manual... -
Page 22: Overview Of The Camera Web Browser
Note: Any changes made to the camera’s configuration only apply to this camera. The configuration of other devices that may be connected to the camera, such as cameras or DVRs, is not changed. TruVision IP Dome Open-Standards User Manual... - Page 23 Click to take a snapshot of the video. The snapshot will be saved to the default folder in JPEG format. See “Local configuration” on page 21 for more information. Start/stop recording Click to record live video. TruVision IP Dome Open-Standards User Manual...
-
Page 24: Configuring The Camera's Network Settings
Configuration button on the toolbar to display the configuration screen. The Local configuration screen appears. See Figure 9 on page 21. The camera is shipped with on-screen display (OSD) menus in English only. TruVision IP Dome Open-Standards User Manual... -
Page 25: Remote Configuration
Specifies the transmission speed. Options include: Shortest delay mode, good real time, normal real time and fluency, and good fluency. Save record file as Specifies the directory for recorded files. The default directory is C:\Program Data\Web\RecordFiles. TruVision IP Dome Open-Standards User Manual... - Page 26 Network parameters Defines the network parameters required to access the camera over the internet. See “Network parameters” on page Serial settings Defines the RS-485 and RS-232 communication settings. See “Serial port settings” on page 25. TruVision IP Dome Open-Standards User Manual...
-
Page 27: Information About The Camera
Use the “Network Parameters” folder to define the network settings. See Figure 11 on page 24 for further information. Note: When a network parameter is modified, the camera will prompt you to save and reboot. TruVision IP Dome Open-Standards User Manual... - Page 28 Specifies either DynDNS or IP server. For future use. E-mail Specifies the e-mail address to which messages are sent when an alarm occurs. It is not possible to send an attachment with the e-mail. TruVision IP Dome Open-Standards User Manual...
-
Page 29: Serial Port Settings
Use the “Serial setting” folder to define the RS-232 and RS-485 communication settings. If a PTZ camera is connected to this camera, the RS-485 settings must be the same as the PTZ protocol used. TruVision IP Dome Open-Standards User Manual... - Page 30 Default baud rate value for the RS-232 port is 9600. Default baud rate value for the RS-485 port is 9600. Data bits Default value is 8. Stop bits Default value is 1. Parity Default value is “None”. TruVision IP Dome Open-Standards User Manual...
-
Page 31: Camera Configuration
IR mode, image flip, power mode and white balance. • Time & date: Defines the synchronization of the time and date with the NTP server. TruVision IP Dome Open-Standards User Manual... -
Page 32: Defining How Information Is Displayed On Screen
3. Check the Week box to include the day of the week in the on-screen display. 4. Select the date format from the Date format list box. Formats include: • YYYY-MM-DD • MM-DD-YYYY (Default) • DD-MM-YYYY TruVision IP Dome Open-Standards User Manual... -
Page 33: Defining The System Time
Synchronize with an NTP server: Check the enable box and enter the server NTP address. - Or - Set manually: Enter the current date and time values. 3. Select your time zone. 4. Click Save to save changes. TruVision IP Dome Open-Standards User Manual... -
Page 34: Alarm Parameters
Triggers the recording to start in the camera. Note: Only available for cameras with an SDHC card. 5. Click Save to save changes. Note: The camera will prompt you to reboot in order for the schedule changes to take effect. TruVision IP Dome Open-Standards User Manual... -
Page 35: Events Scheduling
For the event schedule to be operational, you must also define the motion detection parameters (see page 35) as well as the alarm input and output parameters (see page 30.) The recording schedule for motion detection must fall within the time period of the event schedule. TruVision IP Dome Open-Standards User Manual... -
Page 36: Defining Recording Parameters
You can adjust the video recording parameters to obtain the picture quality and file size best suited to your needs. Figure 16 on page 33 lists the recording options you can configure for the camera. TruVision IP Dome Open-Standards User Manual... - Page 37 Default is 2048. Frame rate Specifies the frame rate for the selected resolution. The frame rate is the number of video frames that are shown or sent per second. Default value is 25 (PAL)/ 30 (NTSC). TruVision IP Dome Open-Standards User Manual...
- Page 38 If you have selected “All day recording”, select one of the record types to record from the drop-down list box: • Schedule recording. This is continuous recording. • Motion detection • Alarm record • Motion or alarm TruVision IP Dome Open-Standards User Manual...
-
Page 39: Motion Detection Alarms
Use the “Motion detection” screen in the “Channel parameters” folder to change the motion detection settings. TruVision IP Dome Open-Standards User Manual... - Page 40 Motion detection subfolder to open its screen. 2. Check the Enable Motion Detection box. Note: Deselect the “Enable Motion Detection” option to disable the motion detection alarm. 3. Define the motion detection area or areas. TruVision IP Dome Open-Standards User Manual...
- Page 41 23 for further information. Trigger alarm output Triggers the camera’s alarm output. Up to two alarm outputs can be selected. Trigger recording Triggers the recording to start in the camera (A1). 7. Click Save to save changes. TruVision IP Dome Open-Standards User Manual...
-
Page 42: Adding Extra On-Screen Text
See item 13 in Figure 18 on page 39 for more information. Use this menu to also adjust camera behavior parameters such as shutter speed, iris mode, day/night mode, IR mode, image flip, power mode and white balance. TruVision IP Dome Open-Standards User Manual... - Page 43 Adjusts the sensitivity of the camera to color or black and white. Options: Low, Normal or High. Default is Normal. IR cut delay Adjusts the delay time to change between day and night mode. TruVision IP Dome Open-Standards User Manual...
- Page 44 Select one of the options: Auto: White balance is determined automatically. White balance 1: White balance for indoor environments. White balance 2: White balance for outdoor environments. This option is only available on 4CIF camera models. TruVision IP Dome Open-Standards User Manual...
-
Page 45: Camera Management
However, only the administrator can create a password for a user. Admin passwords can have up to four digits, ranging from 1 to 4. Note: Keep the admin password in a safe place. If you should forget it, contact technical support. TruVision IP Dome Open-Standards User Manual... - Page 46 5. Enter the IP address and physical address (MAC address) of the user’s computer. 6. Select the type of user from the drop-down list. The options are Viewer and Operator. 7. Click to save the changes and return to the main “User management” screen. TruVision IP Dome Open-Standards User Manual...
-
Page 47: Formatting The Sdhc Card
Before formatting the HDD (the SDHC card) stop all recording. Once formatting is completed, reboot the camera as otherwise the device will not function properly. When the card becomes full, it overwrites the oldest recordings. TruVision IP Dome Open-Standards User Manual... -
Page 48: Restoring Default Settings
(digicap.DAV) into the flash memory. You need to upgrade firmware when it has become outdated. When you upgrade the firmware, all existing settings are unchanged. Only the new features are added with their default settings. TruVision IP Dome Open-Standards User Manual... -
Page 49: Rebooting The Camera
4. Click Update. You will receive a prompt asking you to reboot the camera. Rebooting the camera The camera can be easily rebooted remotely. Click the folder Reboot device to open its screen. Click to the question “Restart the device?” The camera reboots. TruVision IP Dome Open-Standards User Manual... -
Page 51: Chapter 6 Camera Operation
See “Figure 8: Web browser interface” on page 19 for the description of the interface. You can stop and start live view by clicking the Start/stop live view button the bottom of the screen. TruVision IP Dome Open-Standards User Manual... -
Page 52: Playing Back Recorded Video
SDHC card. To search recorded video stored on the camera’s SDHC card for playback, click Playback on the menu toolbar. The Playback screen displays. See Figure 21 on page 49. TruVision IP Dome Open-Standards User Manual... - Page 53 The timeline can also be scrolled to earlier or later periods for play back. Time moment Vertical bar shows where you are in the playback recording. The current time and date are also displayed. TruVision IP Dome Open-Standards User Manual...
-
Page 54: Searching Event Logs
The Log screen appears. See Figure 22 on page 51. Note: You must have view log access rights to search and view logs. See “User management” on page 41 for more information. TruVision IP Dome Open-Standards User Manual... - Page 55 Transparent Channel, Net Stop Transparent Channel, Net Get Parameter, Net Config, Net get Status, Net Alert On, Net Alert Off, Net Reboot, BiComStart (Start Voice Talk), BiComStop (Stop Voice Talk), Net Upgrade, Net File Play, Net Time Play, Net PTZ TruVision IP Dome Open-Standards User Manual...
-
Page 56: Archiving Recorded Files
To archive a recorded video segment during playback: 1. While playing back a recorded file click the snapshot button to start recording and click it again to stop recording. A video segment is created. TruVision IP Dome Open-Standards User Manual... -
Page 57: Using Presets
5BChapter 6: Camera operation 2. Repeat step 1 to create additional segments. You can generate up to 30 additional segments. The video segments are saved onto your computer desktop. Using presets This function is for future use. TruVision IP Dome Open-Standards User Manual... -
Page 59: Appendix A Specifications
Indoor vandal-resistant PC requirements Intel-based PC 1 GHz or faster Memory I GB RAM Operating system Windows® XP, Vista or Windows 7 Direct X 9.0 or later Browser Microsoft Internet Explorer 6.0 or later TruVision IP Dome Open-Standards User Manual... -
Page 60: Ip Wedge Dome Cameras
IP66 vandal-resistant PC requirements Intel-based PC 1 GHz or faster Memory I GB RAM Operating system Windows® XP, Vista or Windows 7 Direct X 9.0 or later Browser Microsoft Internet Explorer 6.0 or later TruVision IP Dome Open-Standards User Manual... -
Page 61: Appendix B Pin Definitions
Orange Orange White-Green White-Green Blue Blue White/Blue White/Blue Green Green White/Brown White/Brown Brown Brown Figure 24: Cross-over cable White/Orange White/Orange Orange Orange White-Green White-Green Blue Blue White/Blue White/Blue Green Green White/Brown White/Brown Brown Brown TruVision IP Dome Open-Standards User Manual... - Page 62 7BAppendix B: Pin definitions Please make sure your connected cables have the same pin assignment and color as above before deploying the cables in your network. TruVision IP Dome Open-Standards User Manual...
-
Page 63: Index
50 Date format set up, 28 viewing logs, 50 Day/night setup, 39 Default settings restore, 44 Device information Motion detection display, 23 configuring, 35 Display information on-screen marking the detection areas, 36 TruVision IP Dome Open-Standards User Manual... - Page 64 ActiveX controls, 15 SDHC card White balance setup, 40 accessing in camera, 8 Wiring the dome camera, 7 capacity, 43 Wiring the mini-wedge camera, 8 card full, 43 formatting, 43 free space available, 43 TruVision IP Dome Open-Standards User Manual...
Need help?
Do you have a question about the TruVision IP Dome and is the answer not in the manual?
Questions and answers